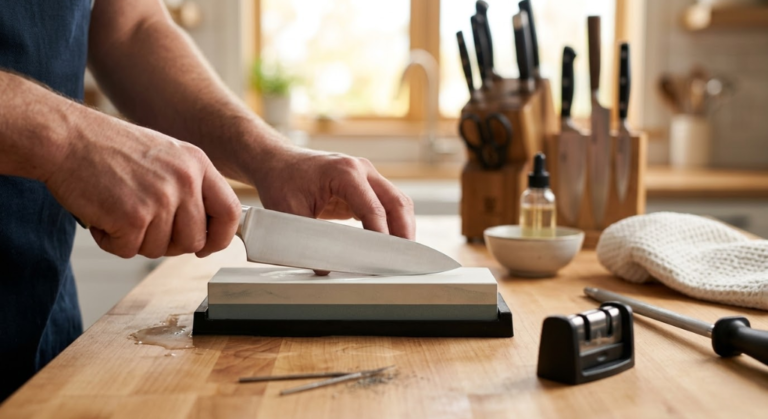
Sharpen vs Hone — Know the Difference First
Sharpening removes metal to create a new edge — done every 2–3 months. Honing realigns the existing edge — done before every use with a honing rod. Most home cooks who think their knives need sharpening actually just need honing. 5 passes per side on a honing rod before each use and you’ll sharpen far less often. For a genuinely new edge: 10–15 minutes on a whetstone.
Don’t want to learn freehand technique at all? A guided sharpening system removes most of the skill requirement, and a professional sharpening service is a reasonable option for expensive knives — both are covered in detail further down this guide.
- 1.Sharpening vs Honing — The Crucial Difference
- 2.How to Test If Your Knife Needs Sharpening
- 3.All Sharpening Methods Compared
- 4.The Right Angle & Bevel Type for Every Knife
- 5.How to Sharpen with a Whetstone (6 Steps)
- 6.How to Use a Pull-Through Sharpener
- 7.How to Use an Electric Sharpener
- 8.How to Use a Honing Rod (Daily Maintenance)
- 9.Guided Sharpening Systems & Jigs
- 10.Choosing Your Stone: Water, Diamond, Oil & Ceramic
- 11.Sharpening by Knife Type
- 12.Fixing Chips, Rust & Uneven Edges
- 13.Emergency Sharpening With No Tools
- 14.Professional Sharpening Services — Cost & Value
- 15.Knife Storage — Why It Matters
- 16.Do’s and Don’ts
- 17.Common Myths About Knife Sharpening
- 18.Knife Sharpening Glossary
- 19.Frequently Asked Questions
Sharpening vs Honing — The Crucial Difference
Sharpening physically removes metal from the blade to create a new cutting edge. Because metal is removed, sharpening should be done sparingly — only when the knife genuinely won’t cut properly anymore. For most home cooks, proper sharpening is needed every 2–4 months.
Honing removes no metal. It realigns the microscopic teeth on the cutting edge that fold over during normal use. A honing rod straightens them back. This is why professional chefs run their knives over a honing rod before every service — they’re not sharpening, they’re maintaining alignment. Done correctly before every use, honing keeps a knife cutting like it was just sharpened, for months.
Five passes per side on a honing rod before every cook. Takes 20 seconds. Extends the time between sharpenings from weeks to months.
How to Test If Your Knife Needs Sharpening
Try honing first — if the knife cuts well after honing, you don’t need to sharpen. If still dull, use these tests:
All Sharpening Methods Compared
Each method produces different results, requires different skill, and suits different knives. There’s also a fifth path worth knowing about — guided sharpening systems, covered later in this guide, which sit between freehand whetstone work and a pull-through sharpener in both skill required and edge quality.
The Right Angle & Bevel Type for Every Knife
Sharpening angle is the single most important variable. Using the wrong angle on a Japanese knife can permanently damage the blade geometry:
Understanding Bevel Types
Beyond the angle number, the shape of the bevel itself changes how a blade behaves, and most buying guides skip this entirely.
A V-bevel is the standard grind on the overwhelming majority of Western and Japanese double-bevel knives. Two flat facets meet at a single apex, forming a V in cross-section. At lower angles, roughly 12–15° per side, a V-bevel produces an extremely keen, slicing edge, but there’s less steel supporting the apex, so the edge can roll or chip more easily on hard contact. At higher angles, 18–25° per side, the same V-bevel becomes noticeably tougher and better suited to harder use, at some cost to how effortlessly it slices.
A convex bevel curves gently outward from spine to edge instead of meeting at a flat facet. You’ll see this most often on cleavers, axes, and outdoor knives rather than delicate slicers, because the extra steel behind the edge makes the blade stronger and more chip-resistant. Convex edges are trickier to maintain on a flat whetstone and are usually touched up with a leather strop or a slack, flexible abrasive belt instead.
A chisel grind, sometimes called a single bevel, has one completely flat side and one beveled side, rather than two matching bevels. This is the traditional grind on Japanese yanagiba, deba, and usuba knives, and it’s what allows those blades to achieve an unusually thin, precise edge for fish butchery and vegetable work. Because only one side is ground, a chisel-ground knife has handedness: a knife made for a right-handed cook will not cut straight for a left-handed one, and vice versa. Always confirm which hand a single-bevel knife is ground for before buying — it cannot be changed afterward without essentially re-grinding the entire blade.
A V-bevel accepts a whetstone, pull-through, or electric sharpener. A convex bevel wants a strop or belt, not a flat stone pressed hard against the edge. A chisel-ground single bevel must only touch a whetstone, and only on its beveled face — running the flat side across any abrasive will ruin the geometry.
How to Sharpen with a Whetstone (Best Results)
The whetstone method produces the finest edge of any home sharpening method. You’ll need a 1000 grit stone for sharpening + 3000–6000 grit for finishing. Most quality whetstones are water stones — soak for 5–10 minutes before use and keep wet throughout.
How to Use a Pull-Through Sharpener
Pull-through sharpeners have preset angles built into V-shaped slots — angle management is automatic. The trade-off is they remove more metal per sharpening than a whetstone.
Step-by-Step for Pull-Through Sharpeners
- Start in the coarse slot — only if the knife is genuinely dull. For a touch-up, skip straight to the fine slot.
- Pull the blade through with light pressure — heel to tip in one smooth motion. Let the knife’s weight provide the pressure. Repeat 3–5 times.
- Move to the fine slot — 3–5 pulls to refine and polish the edge.
- Use the honing slot if present — 2–3 pulls to align the final edge.
- Wash the blade — metal particles will be on the knife. Rinse before using.
The coarse slot removes a significant amount of metal each use. For regular maintenance after initial sharpening, use only the fine or honing slot. Weekly coarse-slot use will shorten blade life significantly over years.
How to Use an Electric Sharpener
Electric sharpeners use motorised abrasive wheels at preset angles. Quality models produce an excellent edge with minimal skill — the machine does the angle work for you.
Using an Electric Sharpener Correctly
- Check compatibility — do not use on single-bevel Japanese knives (yanagiba, deba) — they will ruin the asymmetric grind.
- Start in the coarsest stage — only for genuinely dull knives.
- Draw blade through with light pressure — let the machine work. Pull heel to tip in one smooth stroke.
- Repeat 3–5 times per stage, then move to the finer stage.
- Wash the knife before use — electric sharpeners produce metal filings on the blade.
How to Use a Honing Rod (Daily Maintenance)
The honing rod is the most important tool for day-to-day knife maintenance. Thirty seconds before you start cooking, every time, keeps knives at their sharpest and dramatically extends time between full sharpenings.
Two Techniques
Stationary rod method (recommended for beginners): Hold rod tip-down on a cutting board. Place heel of blade near top of rod at 15–20° angle. Draw blade downward toward you — heel to tip. Repeat 5–6 times per side, alternating.
Moving rod method (the chef technique): Sweep the knife downward across a horizontally-held rod, edge-leading, heel to tip. Harder to maintain consistent angle — the stationary method produces better results for most home cooks.
Choosing the Right Honing Rod
- Steel honing rod: The standard. For most Western kitchen knives. Removes no metal, purely realigns.
- Ceramic honing rod: Slightly abrasive — removes a tiny amount of metal while honing. Good for knives that dull quickly.
- Diamond rod: An abrasive tool, not just a honer. For very dull knives between sharpening sessions.
- Japanese knives: Use only ceramic or leather strop. Steel rods are too aggressive and can chip the edge.
Guided Sharpening Systems & Jigs
Freehand whetstone work gives the best results but takes months to get consistent. Pull-through and electric sharpeners are fast but remove more metal than necessary. Between those two extremes sits a category of tools built for people who want whetstone-quality results without freehand practice: guided sharpening systems.
These systems hold either the knife or the stone at a fixed, repeatable angle so your hand only has to move the abrasive back and forth, not manage the angle at the same time. A few names come up constantly in this category.
A metal clamp locks onto the spine of the blade, and stones or rods slide along a guide rod set to a specific angle — commonly 17°, 20°, 25°, or 30° per side on entry-level clamps, with fully adjustable angles on higher-end models. These give the most precise, repeatable angle of any home method and are excellent for reprofiling a knife to a new angle. The trade-off is setup time: clamping the knife correctly and re-clamping to flip sides takes longer than freehand sharpening once you’re skilled, and very thin or bolstered blades can be awkward to seat in the clamp.
Ceramic rods sit vertically in a base at fixed angles, and you draw the knife down past the rods instead of moving an abrasive across the blade. Faster to set up than a clamp system and excellent for routine touch-ups on an edge that’s already correctly profiled, but it relies on your eye and hand to keep the blade vertical and consistent — more “guided” than fully fixed. It also struggles to fix a badly damaged or overly obtuse edge unless you add optional coarse or diamond rods.
These combine a clamp with an angle-adjustable arm, letting you dial in any angle rather than choosing from a few presets. This makes it easier to match a factory edge exactly, which minimizes how much metal you need to remove on future sharpenings. Entry kits typically ship with three or four stone grits, which covers most kitchen knives without extra purchases.
For a home cook who wants consistent, professional-looking results without dedicating months to freehand practice, a mid-range clamp or adjustable system is generally the most reliable investment — expect to spend somewhere between $50 and $150 for a capable kit, with high-end precision systems running considerably higher. None of these systems replace daily honing; they simply make the occasional full sharpening faster and more foolproof.
↑ Back to topChoosing Your Stone: Water, Diamond, Oil & Ceramic
Not every whetstone is the same material, and the differences matter more than the grit number printed on the box. Here’s how the four common types actually compare:
← Scroll to see all columns →| Stone Type | Cutting Speed | Needs Soaking | Finish Quality | Best For |
|---|---|---|---|---|
| Water stone | Fast, self-refreshing | Usually, 5–10 min | Excellent | Everyday kitchen knives |
| Diamond stone | Fastest | No — light spray only | Good, coarser at same grit | Reprofiling, repair, guided systems |
| Oil / Arkansas stone | Slow | No — needs honing oil | Extremely fine, mirror-like | Fine finishing, straight razors |
| Ceramic stone/rod | Slow | No | Very fine polish | Touch-ups, final honing |
Water stones, also called Japanese water stones, are the most common choice for kitchen knives and the type assumed throughout the whetstone steps above. They’re made from compressed abrasive particles in a soft binder, which means they cut fast and refresh themselves as you sharpen — the surface constantly sheds tiny worn particles to expose fresh abrasive underneath. Most need soaking for 5–10 minutes before use, though some newer “splash-and-go” water stones only need a quick surface wetting. Because the binder is relatively soft, water stones wear down and dish faster than harder stone types, which is why they eventually need flattening.
Diamond stones use a layer of actual diamond particles bonded to a rigid metal or resin plate. They cut extremely fast, stay flat almost indefinitely since there’s no soft binder to wear away, and never need soaking — a light spray of water is enough. They’re the fastest option for reprofiling a very obtuse or damaged edge and are the standard abrasive in most clamp-style guided systems. The trade-off is a coarser, less refined finish at the same nominal grit compared with a water stone, so many people follow a diamond stone with a fine water stone or strop for the final polish.
Oil stones, such as Arkansas stones and similar novaculite or silicon-carbide stones, use honing oil instead of water as a lubricant and cut noticeably slower than water or diamond stones. What they trade in speed they make up for in an extremely fine, polished finish and a stone that essentially never wears out of flat. They’re a traditional choice for straight razors and fine pocket knives, and while they work on kitchen knives, the slow cutting speed makes them a poor first choice for someone starting from a genuinely dull edge.
Ceramic stones and rods are very hard, cut slowly, and are mainly used for the final polishing stage or for touch-up honing — this is the material used in most Sharpmaker-style rod systems. They rarely need flattening because they’re so hard, but that same hardness means they’re a poor choice for removing serious damage or reprofiling.
For a first stone, a combination water stone (1000 grit on one face, 6000 grit on the other) remains the most practical, affordable choice for kitchen knives. Add a coarse diamond stone later only if you regularly need to fix chips or reprofile.
Flattening a Whetstone
Every time you sharpen, you wear the stone’s surface unevenly — more pressure typically comes from the center of the stroke, which digs a shallow dish into the stone over months of use. A dished stone can’t hold a consistent angle across the full blade length, a common, invisible cause of inconsistent results. Flatten a water stone every few months, sooner if you sharpen often, using a dedicated flattening stone or a sheet of wet-and-dry sandpaper on a flat surface: rub the whetstone in circular motions until the entire face shows uniform wear marks, rinse, and check with a straightedge held across the surface. Diamond and ceramic stones rarely need this step.
Sharpening by Knife Type
Different knives require different approaches. Using the wrong method damages blades that took significant skill and expense to manufacture.
← Scroll to see all columns →| Knife Type | Angle | Best Method | Avoid | Frequency |
|---|---|---|---|---|
| Western chef’s knife | 15–20° | Whetstone, electric, pull-through | Nothing specific | Every 2–3 months |
| Japanese gyuto / santoku | 10–15° | Whetstone only | Pull-through, electric | Every 3–4 months |
| Single-bevel (yanagiba) | Single bevel | Whetstone, flat side only | All pull-through & electric | Every 2–3 months |
| Serrated knife | Varies | Tapered ceramic rod | Standard stones | Yearly or less |
| Paring knife | 15–20° | Whetstone, pull-through | Nothing specific | Every 2–3 months |
| Boning / filleting knife | 15–20° | Whetstone, guided system | Pull-through on flexible blades | Every 2–3 months |
| Utility knife | 15–20° | Whetstone, pull-through, electric | Nothing specific | Every 2–3 months |
| Cleaver | 20–25° | Whetstone, electric | Fine grit finish | Every 3–6 months |
Considering a new knife set? Our best knife sets for beginners covers what to buy at every price point. For the full kitchen setup, see the complete appliance buying guide.
Fixing Chips, Rust & Uneven Edges
Not every knife problem is solved by a normal sharpening pass. These are the issues home cooks run into most often, and the extra steps each one actually needs.
A small chip — a tiny missing notch along the edge — usually comes from contact with something harder than the blade: bone, a frozen ingredient, or the edge striking a ceramic plate or ceramic-coated cutting board. You have to grind the entire edge down below the depth of the chip, not just spot-treat the damaged area, or the surrounding edge will end up inconsistent with the repaired section. Start on a coarse stone (400 grit or coarser, or a coarse diamond stone) and work the full length evenly until the chip disappears into the new bevel, then move through your normal progression of grits. This removes noticeably more metal than a routine sharpening, which is why avoiding hard contact in the first place matters more than most people assume.
Rust forms when iron in the steel reacts with moisture and oxygen, and it develops fastest on carbon-steel blades left wet or in contact with acidic ingredients like tomato or citrus. Light surface rust usually comes off with a paste of baking soda and a little water, worked in with a soft cloth or toothbrush, or with a soak in white vinegar for a few minutes followed by a gentle scrub. Commercial rust erasers work well on stubborn spots without removing much surrounding steel. Whichever method you use, always sharpen the knife afterward — rust removal is mildly abrasive and can leave the edge slightly duller than before you started. Dry the blade fully and apply a light coat of food-safe mineral oil afterward if it’s carbon steel, since a freshly cleaned blade with no oil layer will often rust again within days.
If a knife cuts fine in some spots along the blade but drags or catches in others, one section usually has more metal removed than the rest — a common result of pressing harder near the handle than near the tip during freehand sharpening, or from years of honing at a slightly inconsistent angle. The fix is patience rather than a special technique: work the full length of the edge in even, deliberate strokes at your chosen grit, checking the bevel with a marker between passes to confirm you’re removing metal evenly heel to tip, rather than repeatedly re-attacking just the dull-feeling spot.
Repeated sharpening at too shallow an angle, or too many passes on a fine stone without ever resetting the bevel, gradually thins the edge until it becomes fragile and prone to rolling over during normal cutting, even though it still feels sharp right after sharpening. If a knife dulls unusually fast every time despite correct storage and regular honing, this is often the underlying cause. The remedy is to slightly increase the sharpening angle by a degree or two and reset the bevel on a medium stone, rebuilding a bit more supporting steel behind the edge before returning to your normal finishing grits.
Emergency Sharpening With No Tools
Every so often a knife goes dull mid-recipe with nothing else in the kitchen to fix it. A few household surfaces can restore a usable edge in a pinch, though none of them replace a proper sharpening later.
- The unglazed base of a ceramic mug or bowl — the rough ring on the bottom that has no glossy glaze — is mildly abrasive and works surprisingly well on a small or medium knife. Hold the blade at roughly a 15° angle against the rough ring and draw the edge across it in one direction, alternating sides every few strokes, the same way you would on a stone.
- The unglazed foot of a ceramic plate works on the same principle and is often easier to hold steady on a countertop than a mug. Some cooks also use the rough edge of a concrete step or a stone garden paver in the same way, though the coarser, less consistent surface makes it a rougher option best saved for genuine emergencies rather than routine use.
- A leather belt, drawn edge-trailing (never edge-leading) across the smooth side several times per side, can realign a slightly rolled edge in the same way a honing rod does — though it does nothing for a genuinely dull blade, only for one that’s folded rather than worn away.
None of these methods belong in a regular routine. They remove metal unevenly, can’t be controlled the way a real stone or rod can, and are meant purely as a stopgap until you can do a proper sharpening or honing pass with the right tool.
Professional Sharpening Services — Cost & Value
Not everyone wants to learn freehand sharpening, and for some knives — very high-end Japanese blades, badly damaged edges, or a large set all at once — sending knives out can be the more sensible choice.
Most local knife shops, some hardware stores, and mobile sharpening services charge either a flat rate per knife or a rate based on blade length, commonly working out to somewhere around $1–$2 per inch of blade, or roughly $5–$15 per standard kitchen knife depending on size and condition. Mail-in services follow a similar structure plus shipping, and are a reasonable option if there isn’t a good local sharpener nearby. Expect extra charges — typically an additional $5–$20 — for repairing chips, straightening a bent blade, or reprofiling serrations, since these take meaningfully more time than a routine touch-up.
A professional pass is generally worth it in three situations: the knife is expensive enough that a mistake would be costly, the edge is damaged badly enough that fixing it at home would mean removing a lot of extra metal while you learn, or you simply have more knives than time. For an everyday knife block used a few times a week, a DIY kit usually pays for itself within a year or two compared to paying for sharpening two or three times annually, and it also lets you hone in between visits, which a professional service can’t do for you.
If you do go the professional route, ask what stones or method the sharpener uses before handing over an expensive Japanese knife — a shop that only runs a belt sander or a machine grinder can permanently change the geometry of a thin single-bevel blade, where a shop that finishes by hand on water stones will preserve it properly.
Knife Storage — Why It Matters
How a knife is stored between uses affects its edge almost as much as how it’s sharpened, and it’s the single most overlooked reason a knife goes dull faster than it should.
Whatever the storage method, the underlying goal is the same: keep the edge from touching anything harder than the food it’s meant to cut. A knife stored well and honed regularly can go months longer between full sharpenings than the same knife left loose in a drawer.
Do’s and Don’ts of Knife Sharpening
Common Myths About Knife Sharpening
A few pieces of sharpening folklore persist even though they don’t hold up, and believing them tends to either waste money or damage a good knife.
Knife Sharpening Glossary
Quick definitions for the terms used throughout this guide and elsewhere on sharpening product pages and forums.
Frequently Asked Questions
For home cooks using knives daily, a full sharpening every 2–4 months is sufficient — provided you hone regularly. With daily honing, a properly sharpened knife maintains excellent performance for 3–4 months.
A combination 1000/6000 grit water stone is ideal. Good beginner options include stones from King, Shapton, or Naniwa — widely available on Amazon for $25–$50. Avoid stones under $15 as they dish quickly and wear unevenly.
Yes, but it requires a tapered ceramic sharpening rod — work each individual serration separately. Serrated knives dull much more slowly than plain-edge knives — most home cooks only need to sharpen a bread knife once every 1–2 years.
Not bad — but aggressive. Pull-through sharpeners remove significantly more metal per session than whetstones. For everyday kitchen knives ($30–$80), this is an acceptable trade-off. For quality knives ($100–$300+), use a whetstone or electric sharpener. Never use on single-bevel Japanese knives.
Common causes: 1) Glass or ceramic cutting surfaces — use only wood or plastic. 2) Dishwasher use — handwash quality knives only. 3) Storing loose in a drawer — edges constantly knock against utensils. 4) No regular honing — the edge folds over quickly without daily honing.
Buy the honing rod first. A $20 honing rod used correctly before every session will outperform a $200 sharpener used occasionally. Once you have a honing habit established, then invest in a sharpening solution.
Check the manufacturer’s website. German/Western knives (Wüsthof, Henckels, Victorinox) are typically 15–20° per side. Japanese knives (Global, Shun, MAC) are typically 10–15° per side. If unknown, 15° is a safe choice for most kitchen knives.
They’re the same thing. “Whetstone” and “sharpening stone” both describe a flat abrasive block used to grind a new edge onto a blade. “Whet” is an old word meaning to sharpen — it isn’t related to “wet,” though most whetstones do happen to be used wet.
Yes. The stone doesn’t know or care what kind of knife is on it — what matters is matching the grit and angle to the blade in front of you. Many people use one combination stone for their entire knife collection.
Not immediately. New knives ship with a factory edge that’s usually sharp enough for a while, though it’s rarely as refined as a properly finished home sharpening job. Regular honing from day one will keep that factory edge performing well for months before a full sharpening is needed.
This almost always points to an edge that’s been over-thinned from repeated sharpening at too shallow an angle, or a storage problem where the edge is contacting something hard between uses. A slightly steeper angle and better storage usually solve it — see Section 12 and Section 15.
Not with the same technique. Scissors have two blades that shear past each other rather than a single edge slicing straight through food, so they need a different sharpening approach — most people are better served sending scissors to a professional or using a dedicated scissor sharpener rather than a knife whetstone.


