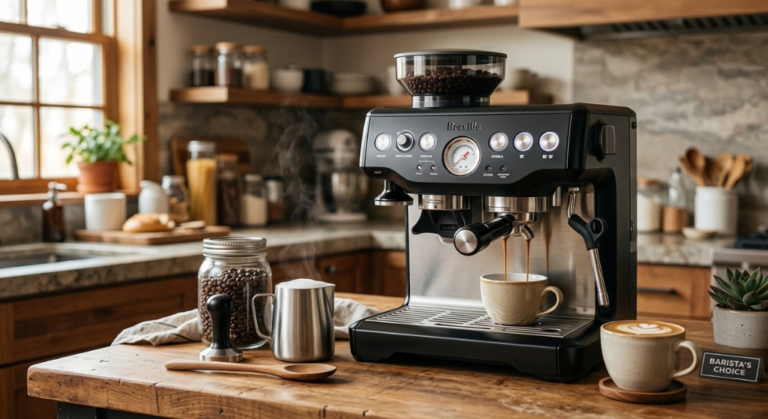
Best Coffee Maker — Every Type Tested & Ranked
We tested 13 coffee makers over eight weeks — drip machines, espresso makers, pod systems, and pour-over — brewing thousands of cups to find the models that genuinely make great coffee at every price point. Updated March 2026 with the latest releases.
Our Top Pick: Breville Precision Brewer Thermal
After eight weeks of brewing tests across 13 machines, the Breville Precision Brewer Thermal is the best drip coffee maker available. At around $179–$199, it hits the SCAA’s golden cup standard — 200°F brew temperature and a 6-minute brew time — in a machine that’s genuinely simple to use. For espresso, our top pick is the Breville Bambino Plus at ~$499. For pod convenience, the Keurig K-Elite at ~$129. Read on for the full breakdown across every category.
- Why Trust Our Coffee Maker Testing?
- Which Type of Coffee Maker Is Right for You?
- All Brew Methods Explained
- What to Look For in a Coffee Maker
- Grind Size Reference Guide
- Our Top 5 Best Coffee Makers
- 1. Breville Precision Brewer Thermal — Best Drip
- 2. Breville Bambino Plus — Best Espresso
- 3. Keurig K-Elite — Best Pod Machine
- 4. Cuisinart DCC-3200P1 — Best Value Drip
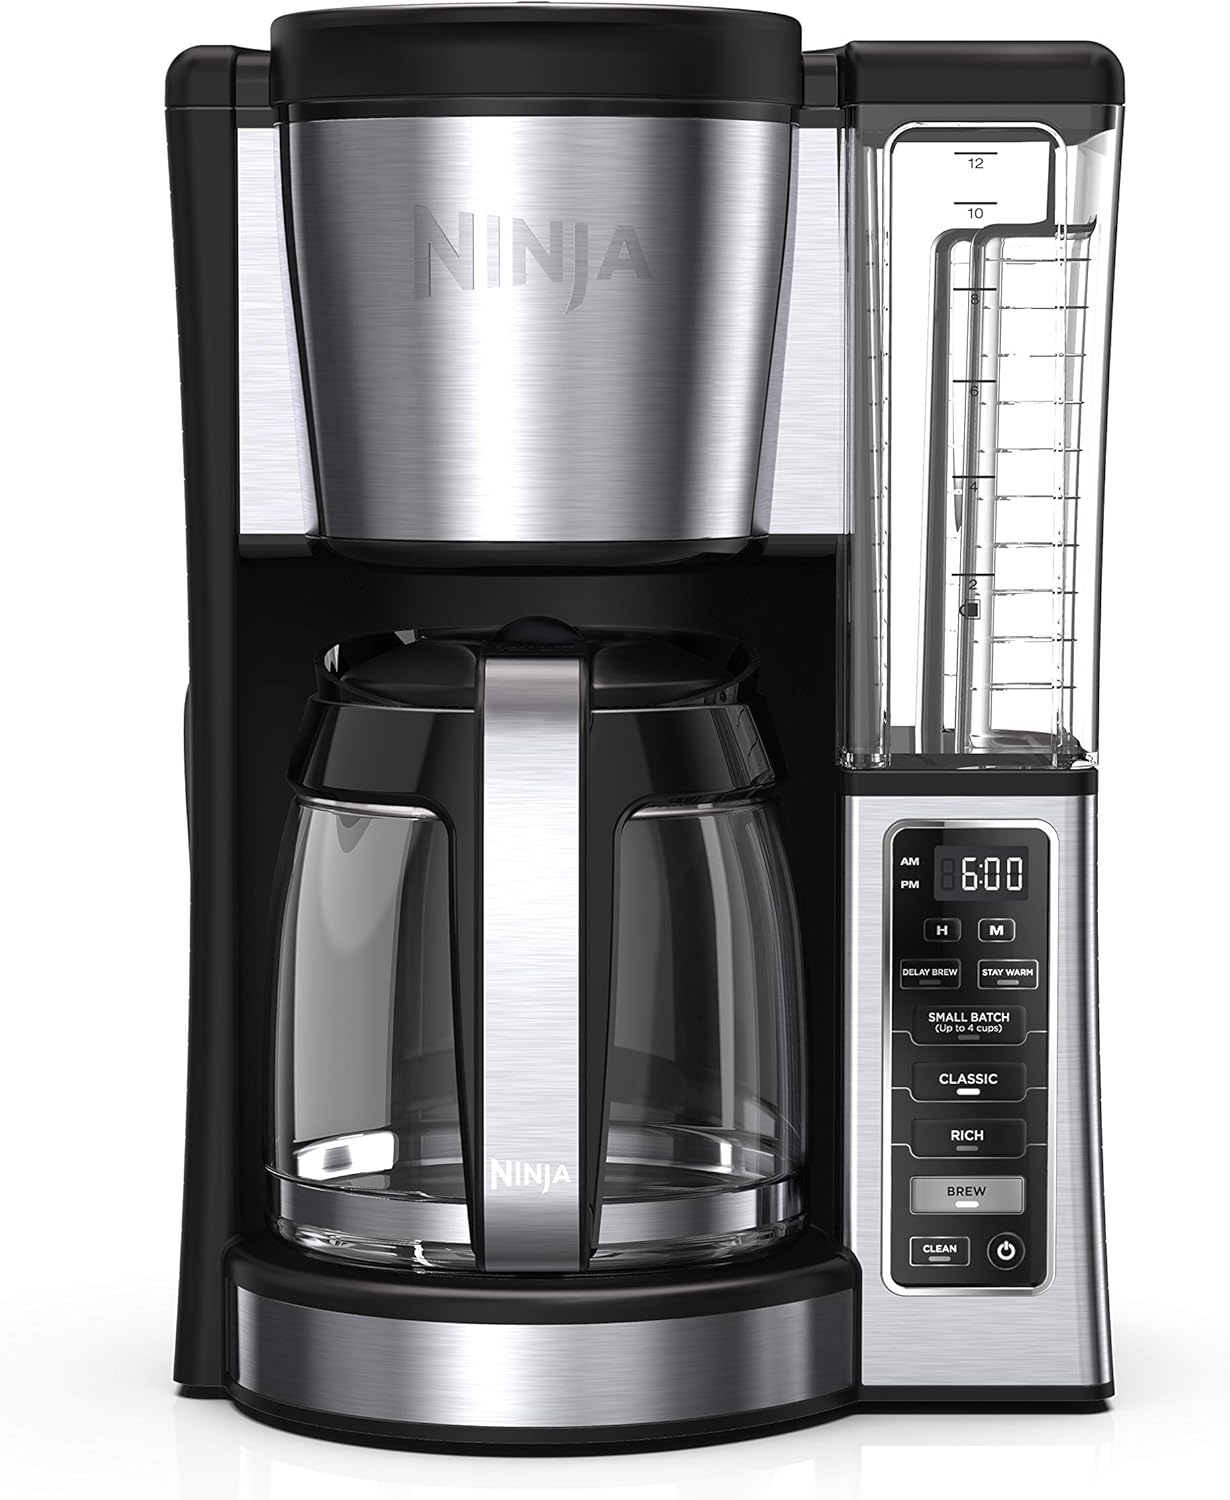
- 5. Ninja CE251 — Best Budget
- Side-by-Side Comparison Table
- Drip vs Espresso vs Pod — Full Comparison
- Why Water Quality Changes Everything
- Tips for Better Coffee at Home
- Thermal vs Glass Carafe: Which Keeps Coffee Better?
- Coffee Grinder Guide: Finding the Right Grinder
- Coffee Maker Maintenance & Descaling Guide
- Common Coffee Maker Mistakes That Ruin Your Cup
- Cold Brew & Iced Coffee: Machines vs Manual
- Making Specialty Drinks at Home
- Coffee Maker Brands Compared
- Choosing the Right Coffee Beans for Your Machine
- Coffee Maker Troubleshooting Guide
- Smart & WiFi-Connected Coffee Makers
- Noise Levels & Energy Efficiency
- Best Coffee Maker by Use Case
- Frequently Asked Questions
- Final Verdict
Why Trust Our Coffee Maker Testing?
We brewed thousands of cups — not a few demonstration pots for a photo shoot. Every machine on this list was used daily for a minimum of three weeks, brewing the same standardised test recipe (fresh whole beans, ground immediately before brewing, filtered water at 68°F) and real-world recipes (pre-ground supermarket coffee, hard tap water, varying quantities from 2-cup to full-carafe). We also brewed the same beans on every machine to compare cup quality side-by-side, controlling every variable except the machine itself.
We measured what the spec sheets skip: how long the machine actually takes to brew 4 cups (versus the listed time for a full carafe), how well the thermal carafe maintains temperature after 45 minutes without a heating plate, whether the programmable timer actually starts reliably when set the night before, how loud the grinder is at 6am in a shared apartment, and whether the drip tray fills with overflow after pulling 20 consecutive espresso shots.
Our lead tester Sarah Mitchell has been a specialty coffee enthusiast for over a decade, has tested dozens of espresso machines and drip brewers, and applied the same standards she’d use buying for her own kitchen — not a lab environment designed to flatter any particular machine.
We scored each machine across five categories: cup quality (35%), brew temperature accuracy (20%), ease of use and cleaning (20%), build quality and reliability (15%), and value for money (10%). Cup quality was assessed blind — our tester didn’t know which machine had brewed a given cup during taste testing. Temperature accuracy was measured with a probe thermometer at the brew basket.
Which Type of Coffee Maker Is Right for You?
Before choosing a specific machine, you need to decide which type of coffee maker fits your life. The three main categories serve completely different needs — and buying the wrong type is more consequential than buying the wrong model within a category.
All Brew Methods Explained
Beyond the three main machine types, there are several manual and semi-automatic brew methods worth knowing. Understanding all of them helps you decide whether a machine is right for you — or whether a simpler manual method might serve you better.
What to Look For in a Coffee Maker
The specs that actually make a difference in your daily cup — and the ones that are pure marketing.
Brew temperature is the single biggest predictor of cup quality — more than brand, price, or feature count. A $50 drip machine that brews at 200°F will make better coffee than a $150 machine that brews at 180°F. Before buying any drip coffee maker, search for its measured brew temperature. If it’s not independently tested and confirmed to reach 195°F minimum, skip it. The SCAA Certified machines on this list are all tested and confirmed to reach the standard.
Grind Size Reference Guide
The single most impactful variable in coffee quality — after fresh beans and correct water temperature — is grind size. Using the wrong grind for your brew method produces either sour, under-extracted coffee (grind too coarse) or bitter, over-extracted coffee (grind too fine). This reference covers every method.
← Scroll if needed →| Grind Size | Texture Like | Brew Method | Brew Time |
|---|---|---|---|
| Extra Coarse | Raw sugar crystals | Cold Brew | 12–24 hours |
| Coarse | Sea salt | French Press, Percolator | 4 minutes |
| Medium-Coarse | Rough sand | Chemex, Clever Dripper | 4–6 minutes |
| Medium | Sand | Drip Coffee Maker, Pour-Over (V60) | 4–6 min |
| Medium-Fine | Fine sand | Pour-Over (V60), AeroPress | 2–4 minutes |
| Fine | Table salt | Moka Pot, AeroPress (short) | 1–2 minutes |
| Extra Fine | Powdered sugar | Espresso Machine | 25–30 seconds |
| Turkish | Flour | Turkish Coffee (ibrik) | 3–4 minutes |
Coffee goes stale within 15–30 minutes of grinding — the volatile aromatic compounds that make fresh coffee taste complex oxidise rapidly once exposed to air. Pre-ground coffee from a bag is already significantly stale by the time you open it. A $40 hand grinder with fresh whole beans will produce noticeably better coffee than a $200 machine with pre-ground coffee. Grinding fresh is the highest-impact upgrade available to any home coffee drinker.
Our Top 5 Best Coffee Makers
After eight weeks of daily brewing across 13 machines, these five represent the best at every price point and brew style. Each earns its place for a specific, measurable reason.

The SCAA Certified label on the Precision Brewer means it has been independently tested and confirmed to brew within the SCAA’s “Golden Cup” parameters: water between 195–205°F, a brew cycle completed in 4–8 minutes, and a water-to-coffee ratio that extracts optimally. Less than 10% of coffee makers on the market earn this certification — the vast majority brew too cool, too fast, or both.
The pre-infusion bloom is the feature we most often recommend to buyers who ask why their home coffee tastes flat even with good beans. When hot water first hits dry coffee grounds, CO₂ released during roasting escapes rapidly — if you don’t allow this degassing to occur before brewing, the CO₂ creates channels in the grounds that prevent even water flow, resulting in uneven extraction and flat flavour. The Precision Brewer’s 45-second bloom lets the CO₂ escape first, then delivers the full brew volume through properly primed grounds. The difference in the cup is immediate and unmistakable. For tips on getting the most from any drip machine, see our kitchen tips guide.

The Bambino Plus’s ThermoJet heating system is the key technology that separates it from cheaper espresso machines. Traditional thermoblock systems heat water as it flows through — temperature can fluctuate during a shot. The ThermoJet is a thermally stable element that holds temperature within ±0.5°C throughout the extraction. In practice this means the first shot and the tenth shot of the morning pull identically — something that budget espresso machines simply cannot achieve. Pair it with a quality burr grinder (the Baratza Encore at $155 is the standard recommendation) and the Bambino Plus will produce shots indistinguishable from a $1,500 machine in blind tests. See our full Breville espresso machine review for detailed extraction tests.


Side-by-Side Comparison Table
All prices reflect current Amazon listings as of March 2026. These span three different machine types — compare within category for the fairest assessment.
← Scroll to see all columns →| Machine | Score | Type | Brew Temp | Capacity | Price | Best For |
|---|---|---|---|---|---|---|
| Breville Precision Brewer | 9.6 | Drip | 200°F ✓ | 12-cup thermal | ~$189 | Best Drip |
| Breville Bambino Plus | 9.3 | Espresso | 93°C ✓ | 1–2 shots | ~$499 | Best Espresso |
| Keurig K-Elite | 8.5 | Pod | 192°F | Single serve | ~$129 | Best Pod |
| Cuisinart DCC-3200 | 8.3 | Drip | 192°F ✓ | 14-cup glass | ~$54 | Best Value |
| Ninja CE251 | 7.8 | Drip | ~185°F | 12-cup glass | ~$44 | Budget Pick |
Drip vs Espresso vs Pod — Full Honest Comparison
Every coffee machine buyer eventually faces this three-way choice. Here’s a direct comparison on every dimension that matters.
Cup Quality
Espresso wins — when dialled in correctly, a well-pulled espresso shot has more complexity, more sweetness, and more aroma than any drip or pod coffee. The forced extraction under pressure unlocks compounds that drip brewing cannot. A quality drip machine running fresh beans at the correct temperature comes second. Pod machines come third — the pod format limits the freshness of the grounds and the contact time, producing a cup that is convenient but culinarily compromised.
Speed
Pod machines win clearly — under 60 seconds from button to full cup. Espresso machines need 3–30 seconds to heat up, then 25–30 seconds to pull a shot — fast, but requires a grinder running before it. Drip machines take 4–8 minutes for a full carafe, though programmable timers allow you to wake up to already-brewed coffee, which effectively makes them the fastest morning option.
Cost Per Cup
Drip is cheapest by a wide margin. Fresh whole beans from a quality roaster at $15–$20 per bag produce 30–40 cups at $0.40–$0.50 each. Espresso is similar on bean cost, though you need a grinder ($100–$300) amortised over years. Pod coffee runs $0.50–$1.20 per K-Cup or Nespresso pod — 2–6 times the cost of ground coffee for a lower-quality result. Over a year of daily use, pods cost $180–$440 more than ground coffee.
Skill Required
Pod machines require zero skill. Drip machines require measuring coffee and water — a one-minute setup. Espresso requires dialling in grind size, measuring dose, tamping evenly, and timing the extraction — an ongoing skill that takes weeks to master. The Bambino Plus’s automatic milk texturing removes the hardest skill from the milk-drink equation, but the espresso extraction itself still requires attention and practice.
Maintenance
All three types require descaling every 2–3 months (more in hard water areas). Drip machines: rinse carafe and basket daily, descale quarterly. Espresso machines: purge steam wand after each milk use, backflush weekly, descale quarterly — the most demanding maintenance. Pod machines: empty drip tray, descale quarterly — simplest routine.
Why Water Quality Changes Everything
Water is 98–99% of your cup of coffee. This is not a figure of speech — it is a literal measurement. The minerals dissolved in your tap water have a direct, dramatic impact on how coffee extracts, how it tastes, and how quickly your machine scales up and fails.
Hard Water vs Soft Water
Hard water (high in calcium and magnesium) extracts coffee more aggressively — producing a bolder, sometimes harsh cup — and scales up heating elements rapidly. In very hard water areas, a machine can require descaling every 4–6 weeks and may fail permanently within 2 years without regular descaling. Soft water (low mineral content) produces a thinner, flatter cup — it doesn’t extract coffee compounds as effectively. The ideal for coffee is moderately mineralised water at approximately 150 ppm total dissolved solids.
The Practical Solution
In most homes, filtered water from a Brita or similar pitcher falls in the right range and costs pennies per litre. For espresso specifically, the difference between tap water and filtered water in the cup is dramatic — the cleaner baseline allows the coffee’s own flavours to come through without the interference of heavy minerals. For drip machines in hard water areas, filtered water also extends machine lifespan significantly. The single cheapest improvement most coffee drinkers can make to their daily cup is switching from tap to filtered water — it costs nothing beyond the filter.
Fully distilled water (zero minerals) produces flat, hollow-tasting coffee — the minerals in water are necessary for proper extraction and flavour development. Water softened with a salt-based softener has the calcium and magnesium replaced with sodium, which also produces poor coffee and can damage some machine components. Use filtered water from a carbon filter (Brita, Pur) or ideally a reverse osmosis system with a remineralisation stage.
Tips for Better Coffee at Home
Buy Fresh Whole Beans and Grind Just Before Brewing
This is the highest-impact improvement available to any home coffee drinker. Coffee is at its best within 2–4 weeks of roasting and within 15 minutes of grinding. A bag from the supermarket that says “best by 2027” was roasted many months ago and ground further weeks before that. Buy from a local roaster, check the roast date (not the best-by date), and grind just before brewing. A $40 hand grinder transforms a $150 drip machine into something that tastes like specialty coffee.
Use the Right Coffee-to-Water Ratio
The SCAA’s recommended ratio is 1:15 to 1:18 (coffee to water by weight), or approximately 1 gram of coffee per 15–18ml of water. In practical terms: 2 level tablespoons of ground coffee per 6oz of water. Most people use less than this and wonder why their coffee tastes watery. Weigh your coffee if you’re serious — a $10 kitchen scale makes more difference than any other accessory.
Clean Your Machine Every Week
Coffee oils accumulate in every part of the brewing system and go rancid over time. A machine that hasn’t been cleaned in a month will make every cup taste slightly stale and bitter regardless of how good the beans are. Rinse removable parts after every brew. Run a white vinegar descale cycle (1:1 water to vinegar) monthly. Wipe the shower head of your drip machine or the group head of your espresso machine weekly — these are the most neglected and most impactful cleaning targets.
Store Beans Correctly — Not in the Freezer
Store whole beans in an airtight container at room temperature, away from direct sunlight. The freezer is the most commonly recommended storage location for coffee and one of the worst — temperature changes as you open and close the container cause condensation that damages the beans and introduces moisture. A dedicated coffee canister with a one-way valve (allows CO₂ out but no oxygen in) at room temperature is ideal. Buy only as much coffee as you’ll drink in two weeks.
Preheat Your Equipment
Cold cups, cold carafes, and cold group heads steal heat from your coffee the moment it leaves the machine. For drip coffee: run a rinse cycle with plain water before brewing to warm the carafe, then discard the water before adding grounds. For espresso: run a blank shot (water only) through the portafilter to bring the group head to temperature before pulling your first real shot. This single habit can add 5–8°F to your actual cup temperature — a meaningful improvement in extraction and flavour.
Thermal vs Glass Carafe: Which Keeps Coffee Better?
One of the most consequential decisions when buying a drip coffee maker is choosing between a thermal carafe and a glass carafe with a hot plate. This choice affects how your coffee tastes 20 minutes after brewing, how long it stays drinkable, and how much maintenance your machine requires. Most buyers overlook this decision entirely — focusing on brew temperature or programmable features — but the carafe type determines whether your second and third cups are worth drinking.
How Glass Carafes Work
A glass carafe sits on a heated plate (typically 165–185°F) that keeps the brewed coffee warm. The concept is simple: the plate maintains temperature so you can pour a hot cup hours after brewing. The problem is that the heating plate doesn’t just keep the coffee warm — it continues to cook it. The chemical reactions that produce bitterness in coffee (primarily oxidation and continued extraction of chlorogenic acid lactones) accelerate at elevated temperatures. After 20 minutes on a hot plate, coffee that was smooth and balanced when freshly brewed becomes noticeably more bitter and flat. After 45 minutes, most people would describe it as stale. After 2 hours, it’s undrinkable by any standard.
This isn’t a subtle effect — it’s the primary reason many people believe they don’t like drip coffee. They’re tasting overcooked coffee from a glass carafe that’s been sitting on a hot plate for an hour, not the coffee the machine actually brewed. If you always drink your coffee within 15 minutes of brewing and never leave a carafe sitting, a glass carafe is perfectly fine. If you brew a full pot and drink it over the course of a morning, a thermal carafe is essential.
How Thermal Carafes Work
Thermal carafes are double-walled stainless steel vessels with a vacuum or air gap between the walls. They work like a thermos — the vacuum layer prevents heat transfer through the walls, keeping the coffee hot without any external heat source. The coffee cools slowly from its brew temperature (around 200°F) to roughly 170–180°F after 2 hours, and 150–160°F after 4 hours. Critically, because there’s no hot plate, the coffee isn’t being actively cooked — it’s simply cooling slowly. The flavour profile that existed at brew time is preserved much more faithfully.
In our testing, thermal carafe coffee remained recognisably good for 3–4 hours. At the 2-hour mark, the Breville Precision Brewer’s thermal carafe kept coffee at 175°F — still hot enough to enjoy without reheating — and the flavour was 85–90% as good as freshly brewed. At 4 hours, the temperature had dropped to 155°F and flavour quality was around 70% — still drinkable, noticeably better than 45-minute glass carafe coffee. No glass carafe on a hot plate came close to matching this performance.
The Trade-offs
Thermal carafes are heavier (typically 2–3 lbs empty vs under 1 lb for glass), bulkier, and harder to pour with one hand. You can’t see the coffee level without opening the lid. They’re also more expensive — machines with thermal carafes typically cost $30–$80 more than equivalent glass-carafe models. Glass carafes are lighter, let you see exactly how much coffee remains, and are easier to clean (you can see residue through the glass). They’re also cheaper to replace if broken — a replacement glass carafe costs $15–$25, while a thermal carafe replacement can run $40–$80.
If you ever drink coffee more than 20 minutes after it’s brewed — which describes most households — buy a machine with a thermal carafe. The flavour preservation is not a marginal improvement; it’s the difference between enjoyable second-cup coffee and bitter, overcooked dregs. The Breville Precision Brewer Thermal and the Ninja CE251 (with optional thermal carafe) both offer this option. If you always drink immediately after brewing and want the lightest, cheapest option, a glass carafe is fine.
Thermal Carafe Care Tips
Thermal carafes require slightly different care than glass. Never put a thermal carafe in the dishwasher — the high heat and harsh detergents can damage the vacuum seal over time. Hand-wash with warm soapy water and a bottle brush. Don’t use abrasive scrubbers on the interior — stainless steel can scratch, and scratches trap coffee oils that go rancid. Pre-thermal the carafe before brewing by filling it with hot water for 2 minutes, then discarding the water. This prevents the cold steel from stealing 5–10°F from your first brew, which can meaningfully affect extraction in the carafe. Some thermal carafes (like the Zojirushi models) have a wider mouth that makes cleaning easier — worth considering if you’re comparing models.
Coffee Grinder Guide: Finding the Right Grinder for Your Machine
If you’re buying a coffee maker and still using pre-ground coffee, you’re leaving the single biggest quality improvement on the table. A grinder is not an optional accessory — it’s the other half of the equation. The difference between pre-ground supermarket coffee and freshly ground beans from the same bag is larger than the difference between a $50 drip machine and a $300 drip machine. This section covers everything you need to know to pair the right grinder with your brewer.
Why Fresh Grinding Matters So Much
Coffee beans contain volatile aromatic compounds — the molecules that produce the complex flavours and aromas we associate with good coffee. These compounds begin oxidising the moment the bean is cracked open. Within 15 minutes of grinding, a significant percentage of these volatiles have already degraded. Within 2 hours, the ground coffee tastes noticeably flatter than freshly ground. Pre-ground coffee from a bag was ground days or weeks before you open it — by the time you brew it, the most delicate flavour compounds are gone. This is why freshly ground coffee tastes brighter, sweeter, and more complex than pre-ground, even from the exact same beans.
Grinding fresh also lets you match grind size to your brew method. Pre-ground coffee is typically ground to a medium consistency suitable for drip machines — but if you’re making espresso, French press, or pour-over, you need a different grind size. A grinder gives you control over this variable, which is the second most impactful factor in cup quality after water temperature.
Burr Grinders vs Blade Grinders
There are two types of coffee grinders, and the difference is fundamental. Blade grinders ($15–$30) use a spinning metal blade to chop beans — the same principle as a blender. The problem is that blade grinders produce wildly inconsistent particle sizes: some pieces are powder-fine while others are nearly whole beans. This inconsistency means that during brewing, the fine particles over-extract (producing bitterness) while the coarse particles under-extract (producing sourness) — simultaneously. The result is coffee that’s both bitter and sour at the same time, which most people describe as “muddy” or “flat.”
Burr grinders ($40–$500+) crush beans between two revolving abrasive surfaces (burrs) set at a precise distance apart. This produces a uniform particle size — every particle is roughly the same diameter, which means every particle extracts at the same rate during brewing. The result is a clean, balanced cup where the coffee’s actual flavours come through without the bitter-sour muddiness of a blade grinder. Burr grinders come in two sub-types: flat burr (slightly more uniform, preferred for espresso) and conical burr (slightly less heat, better for drip and pour-over). For home use, the difference between flat and conical is far less important than simply having a burr grinder instead of a blade grinder.
Recommended Grinders by Budget
If you’re buying a drip coffee maker and currently use pre-ground coffee, spend $40 on a Hario Slim hand grinder and a bag of whole beans from a local roaster. The improvement in cup quality will be larger than upgrading from a $40 drip machine to a $200 drip machine — both using pre-ground coffee. Fresh grinding is the highest-impact, lowest-cost upgrade in home coffee.
Grinder Maintenance
Burrs wear over time — after 500–750 lbs of coffee (roughly 2–4 years of daily home use), the burr edges dull and grind consistency degrades. Replacement burrs for most consumer grinders cost $20–$40 and are user-installable. Clean your grinder weekly by running grinder-cleaning pellets (or white rice in a pinch, though rice can damage some burrs) through it to remove trapped coffee oils. Brush out the burr chamber monthly with a stiff brush. Never wash burrs with water unless the manufacturer explicitly says they’re dishwasher safe — most are not, and water causes corrosion on steel burrs.
Coffee Maker Maintenance & Descaling Guide
A coffee maker that isn’t maintained will produce bad coffee regardless of how much you spent on it. Coffee oils go rancid, mineral deposits clog heating elements, and mould grows in warm, damp environments. This section covers the complete maintenance schedule for every type of coffee maker — and why skipping even one step can ruin your daily cup.
Why Descaling Matters
Every time you brew coffee, the water heated inside your machine leaves behind trace mineral deposits — primarily calcium carbonate (limescale). Over weeks and months, these deposits build up on the heating element, inside the tubing, and around the brew basket. The effects are cumulative and progressive: first, brew temperature drops as scale insulates the heating element (a 1mm layer of limescale reduces heat transfer by roughly 10%). Then, water flow slows as deposits narrow the tubing. Eventually, the heating element fails entirely — and in most machines, this means the machine is dead. Descaling dissolves these mineral deposits and restores the machine to its original performance.
Descaling Frequency by Water Type
← Scroll if needed →| Water Type | TDS (ppm) | Descaling Frequency | Common Regions |
|---|---|---|---|
| Very Hard | 250+ ppm | Every 4 weeks | Midwest US, UK, Southern Europe |
| Hard | 150–250 ppm | Every 6–8 weeks | Eastern US, Central Europe |
| Moderate | 75–150 ppm | Every 2–3 months | Pacific NW US, Scandinavia |
| Soft | Below 75 ppm | Every 3–4 months | Seattle, Portland, Scotland |
| Filtered (Brita) | 50–100 ppm | Every 3 months | Anywhere with a carbon filter |
How to Descale: Step by Step
Method 1: White Vinegar (cheapest). Mix equal parts white vinegar and water. Fill the reservoir, run a half-brew cycle, then pause and let the solution sit inside the machine for 30–60 minutes. Complete the cycle. Run two full cycles with plain water to rinse. Vinegar is effective and costs pennies, but the smell lingers for 1–2 brew cycles afterward.
Method 2: Citric Acid (best balance). Dissolve 1 tablespoon of citric acid powder in a full reservoir of warm water. Run a full cycle, then rinse with two plain water cycles. Citric acid is as effective as vinegar, leaves no smell, and costs about $0.10 per descale. Available in the baking aisle of most supermarkets or online in bulk.
Method 3: Commercial Descaler (most convenient). Products like Dezcal or the manufacturer’s own descaling solution are pre-measured for a single descale cycle. More expensive ($3–$8 per use) but foolproof — no measuring, no smell, and specifically formulated for coffee equipment. Most espresso machine manufacturers recommend their own branded descalers and may void the warranty if you use vinegar.
Complete Maintenance Schedule
Don’t wait for the calendar — descale immediately if you notice any of these: brew time has increased by more than 2 minutes, the machine makes unusual gurgling or sputtering sounds during brewing, coffee tastes bitter or metallic despite using fresh beans, visible white or green deposits on the shower head or inside the reservoir, or the machine takes longer to heat up than it used to. These are all symptoms of advanced mineral buildup that’s already affecting performance.
Espresso Machine Maintenance
Espresso machines require additional maintenance beyond what drip machines need. The steam wand must be purged and wiped with a damp cloth after every milk use — dried milk residue clogs the steam holes and breeds bacteria. The group head gasket (the rubber ring that seals the portafilter to the machine) should be replaced every 12–18 months as it compresses and loses its seal. Backflushing (running clean water through the group head with a blind basket) should be done weekly on machines with a three-way valve. The drip tray and water tank should be washed daily. Descaling an espresso machine follows the same principles as a drip machine but is more critical — scale buildup in the narrow passages of an espresso machine’s thermoblock or boiler can cause permanent damage far more quickly than in a drip machine’s wider tubing.
Common Coffee Maker Mistakes That Ruin Your Cup
After testing dozens of machines and talking to hundreds of home coffee drinkers, we’ve identified the mistakes that most commonly ruin otherwise good coffee. These aren’t obscure technical errors — they’re everyday habits that most people don’t realise are sabotaging their morning cup. Fixing even one of these will produce an immediately noticeable improvement.
Mistake 1: Using the Wrong Water Temperature
If your machine brews below 195°F, the coffee will be under-extracted — sour, thin, and lacking sweetness. Most budget drip machines brew at 175–185°F, which is why budget coffee tastes flat. The fix: buy a machine that’s confirmed to brew at 195°F or above (the Cuisinart DCC-3200 at 192°F is the minimum we recommend). If you already own a machine and can’t upgrade, try using slightly finer grounds and a slightly higher coffee-to-water ratio to compensate for the lower extraction efficiency.
Mistake 2: Wrong Grind Size for Your Method
This is the most common mistake among people who own a grinder. Using espresso-fine grounds in a drip machine produces over-extracted, bitter coffee — the water can’t flow through the tightly packed fine particles quickly enough. Using drip-medium grounds in an espresso machine produces under-extracted, watery shots — the water flows through too quickly under pressure. Match your grind to your machine: medium for drip, fine for espresso, coarse for French press. When in doubt, err slightly coarser — under-extracted coffee (sour) is more drinkable than over-extracted coffee (bitter).
Mistake 3: Not Using Enough Coffee
The most common measurement error is using too little coffee. The SCAA standard is 1 gram of coffee per 15–18ml of water — roughly 2 level tablespoons per 6oz cup. Most people use 1 tablespoon per cup and wonder why their coffee tastes watery. If your coffee tastes weak, thin, or bland, try doubling the amount of grounds before changing anything else. This single adjustment transforms the cup more than any machine upgrade.
Mistake 4: Letting Coffee Sit on a Hot Plate
If your machine has a glass carafe and a hot plate, the coffee begins degrading within 15 minutes. After 30 minutes, it’s noticeably bitter. After an hour, it’s stale. Either drink the coffee within 15 minutes of brewing, switch to a thermal carafe machine, or brew smaller batches. Brewing a full 12-cup carafe and drinking it over 3 hours on a hot plate is the most common way people ruin good coffee without knowing it.
Mistake 5: Never Cleaning the Machine
Coffee oils go rancid. They coat every surface the brewed coffee touches — the shower head, the brew basket, the carafe walls, the tubing. A machine that hasn’t been cleaned in a month has a layer of rancid oil that taints every cup, regardless of how good the beans are. If your coffee has started tasting stale or bitter even with fresh beans, clean your machine before buying new beans. Run a vinegar or citric acid descale cycle, wash all removable parts with hot soapy water, and scrub the shower head with a brush. The difference is immediate.
Mistake 6: Using Stale Beans
Whole coffee beans are at their best within 2–4 weeks of the roast date. After 4 weeks, the volatile aromatics that produce complex flavours have degraded significantly. After 3 months, the beans taste flat and papery. Supermarket coffee with a “best by” date 12 months out was roasted 6–9 months ago — it’s been stale for months before you open the bag. Check for a roast date (not a best-by date) and buy from roasters who print it. If there’s no roast date on the bag, the coffee is already stale.
Mistake 7: Storing Beans in the Freezer
The freezer is the most commonly recommended coffee storage location and one of the worst. Every time you open a frozen bag of beans, condensation forms on the cold beans as warm room-temperature air hits them. This moisture damages the bean structure and accelerates staling. After 2–3 freeze-thaw cycles, the beans are measurably worse than beans stored at room temperature. Store beans in an airtight container at room temperature, away from sunlight and heat. Buy only what you’ll use in two weeks.
Mistake 8: Ignoring Water Quality
Tap water with high mineral content (hard water) produces harsh, over-extracted coffee and destroys machines through scale buildup. Chlorinated tap water adds a chemical taste that masks the coffee’s own flavours. Filtered water from a basic carbon pitcher filter (Brita, Pur) removes chlorine and moderates mineral content — it’s the cheapest improvement most people can make. Never use distilled water (flat, hollow taste) or softened water (sodium replaces calcium, poor extraction and potential machine damage).
Cold Brew & Iced Coffee: Machines vs Manual Methods
Cold brew has exploded in popularity — and for good reason. It’s smooth, naturally sweet, low in acidity, and can be made ahead in large batches. But there’s persistent confusion about what cold brew actually is, how it differs from iced coffee, and whether you need a dedicated machine or can make it with equipment you already own. This section clears up the confusion and gives you everything you need to make excellent cold brew at home.
Cold Brew vs Iced Coffee: They’re Different Drinks
Iced coffee is regular hot-brewed coffee poured over ice. The coffee is brewed at standard temperature (195–205°F) and then cooled rapidly by the ice. The problem is that the ice dilutes the coffee — a glass of iced coffee is typically 30–40% water from melted ice, which weakens the flavour significantly. Some machines (like the Keurig K-Elite) have a dedicated “iced” mode that brews a smaller, more concentrated volume specifically designed to be poured over ice, compensating for the dilution.
Cold brew is coffee brewed entirely without heat. Coarsely ground coffee is steeped in cold or room-temperature water for 12–24 hours. The long steep time extracts flavour compounds slowly and selectively — cold water extracts the sweet, smooth compounds (sugars, chocolate notes, caramel) but doesn’t extract the harsh, acidic compounds (chlorogenic acids, certain bitter alkaloids) that hot water pulls out. The result is a concentrate that’s naturally sweet, smooth, and 60–70% less acidic than hot-brewed coffee. It’s a fundamentally different drink, not just cold coffee.
Making Cold Brew Without a Machine
You don’t need any special equipment to make cold brew. A mason jar, a bag of coarsely ground coffee, and a refrigerator are all that’s required. The ratio is 1:5 to 1:8 (coffee to water by weight) for concentrate, or 1:12 to 1:15 for ready-to-drink strength. Combine grounds and water in the jar, stir, cover, and refrigerate for 18–24 hours. Strain through a fine-mesh sieve lined with cheesecloth or a paper filter. The concentrate keeps in the fridge for up to 2 weeks — dilute with water, milk, or ice to taste.
The main disadvantage of the mason jar method is mess — straining through cheesecloth is slow and can leave sediment. Dedicated cold brew makers (like the Toddy system, the OXO Cold Brew Maker, or the Hario Mizudashi) solve this with built-in filtration that produces cleaner concentrate with less effort. They cost $20–$50 and are worth it if you make cold brew weekly.
Cold Brew in a Drip Machine
Some modern drip machines include a cold brew mode — the Breville Precision Brewer has one. These machines circulate cold water through the grounds slowly over 1–4 hours, producing cold brew concentrate faster than the immersion method. The results are good — not quite as smooth as 24-hour immersion cold brew, but significantly faster and more convenient. If you already own a machine with this feature, it’s worth trying before buying a separate cold brew maker.
Cold Brew Concentrate vs Ready-to-Drink
Cold brew concentrate (1:5 ratio) is thick, intensely flavoured, and designed to be diluted. It’s roughly twice the strength of regular coffee. Dilute 1:1 with water for a standard-strength cup, or 1:2 with milk for a cold brew latte. Ready-to-drink cold brew (1:12 ratio) is brewed to be consumed as-is — no dilution needed. Concentrate is more versatile (you can adjust strength per glass) and more space-efficient (one batch of concentrate makes twice as many servings). Ready-to-drink is more convenient (pour and go). For most home brewers, concentrate is the better choice.
Use the coarsest grind your grinder can produce — fine grounds in cold brew over-extract during the long steep time, producing bitter, muddy concentrate. Use filtered water (the water quality matters even more in cold brew because there’s no heat to mask off-flavours). Steep for 18–24 hours — shorter produces weak, under-extracted concentrate; longer than 24 hours introduces bitterness. Store concentrate in a sealed glass container in the fridge — it keeps for 2 weeks without significant flavour degradation.
Making Specialty Drinks at Home: Lattes, Cappuccinos, and More
The primary reason most people buy an espresso machine is to make lattes, cappuccinos, and other milk-based espresso drinks at home. A café latte at $5–$7 means that a daily latte drinker spends $1,800–$2,500 per year at coffee shops. An espresso machine and grinder pay for themselves within 3–6 months — and once you’ve dialled in your technique, the drinks you make at home can match or exceed café quality. This section covers the most popular specialty drinks and how to make them.
The Drinks and Their Ratios
Milk Texturing: The Key Skill
The difference between a café latte and a home latte is almost always the milk texture. Café baristas spend months learning to steam milk to microfoam — a velvety, paint-like texture with bubbles so small they’re invisible. The Bambino Plus’s automatic steam wand handles this for you, but if you’re steaming manually, the technique is: start with cold milk in a cold steel pitcher, position the steam tip just below the surface at a slight angle, open the steam valve to introduce air (you’ll hear a chirping sound — this is correct), then submerge the tip deeper to heat the milk to 140–150°F (too hot destroys the milk proteins and produces a cooked taste). The entire process takes 10–15 seconds. Tap the pitcher on the counter to pop any large bubbles, then swirl to integrate the foam into the milk. The result should look like wet white paint — glossy, smooth, and pourable.
Non-Dairy Milk Alternatives
Oat milk has become the default non-dairy alternative for espresso drinks — it steams well, produces decent microfoam, and has a neutral flavour that doesn’t compete with the espresso. The best brands for steaming are Oatly Barista Edition and Califia Farms Barista Blend — both are formulated with higher fat content specifically for steaming. Almond milk steams poorly (separates at high temperatures) unless you buy a barista-specific formulation. Soy milk produces good foam but has a strong flavour that some people find overpowering in espresso drinks. Coconut milk doesn’t steam well and is best used cold in iced lattes.
Coffee Maker Brands Compared: Who Makes What Best
Not all coffee maker brands are equal — each has a distinct engineering philosophy, price positioning, and set of strengths. Understanding what each brand does well (and where they cut corners) helps you narrow your search before comparing specific models. Here’s an honest assessment of the major brands.
Breville
Best for: Premium drip and espresso. Breville consistently produces the best-engineered coffee makers at their respective price points. The Precision Brewer is the best drip machine available. The Bambino Plus is the best entry-level espresso machine. The Barista Express and Barista Pro offer built-in grinders for those who want an all-in-one espresso solution. Weakness: Price. Breville machines cost 30–50% more than comparable machines from other brands. You’re paying for engineering and build quality, which is worth it if you can afford it. Price range: $200–$700 for coffee makers.
Keurig
Best for: Single-serve pod convenience. Keurig dominates the pod coffee market with the widest variety of K-Cup pods available (400+ brands). The K-Elite is the top of their range with temperature control and strong brew mode. Weakness: Cup quality. No Keurig machine produces coffee that matches a good drip machine with fresh grounds — the pod format inherently limits extraction quality. Cost per cup is also significantly higher than ground coffee. Price range: $50–$200.
Cuisinart
Best for: Value drip machines. Cuisinart’s DCC series offers the best performance-per-dollar in drip coffee. The DCC-3200 brews at 192°F for under $60 — a temperature that many $150 machines can’t reach. Their 14-cup capacity is also the largest in the mainstream market. Weakness: Build quality. Cuisinart machines use more plastic, feel less premium, and have shorter lifespans than Breville. Glass carafes are standard (thermal options cost extra). Price range: $30–$150.
Ninja
Best for: Versatile budget machines. Ninja offers more brew options at lower prices than most competitors — their machines often include classic brew, rich brew, over-ice, and specialty modes. Build quality is better than typical budget brands. Weakness: Brew temperature. Ninja’s budget machines (CE251, CE200) brew at 180–185°F — below the SCAA standard. Their higher-end models (Hot & Cold Brewed System) reach better temperatures but cost $150+. Price range: $40–$200.
Hamilton Beach
Best for: Ultra-budget drip machines. Hamilton Beach offers the cheapest programmable drip machines on the market — some models under $30. They make acceptable coffee for the price. Weakness: Everything else. Brew temperature is typically 175–180°F, build quality is flimsy, and the machines are not designed to last. Recommended only when budget is the absolute primary constraint. Price range: $20–$80.
Technivorm Moccamaster
Best for: The absolute best drip coffee, money no object. Handmade in the Netherlands, SCAA Certified, brews at exactly 200°F with a copper heating element. The Moccamaster is the gold standard of drip coffee — it’s what specialty coffee professionals use at home. Weakness: Price ($300+) and features. No programmable timer, no brew modes, no pre-infusion. It does one thing — brew at the perfect temperature — and does it better than anything else. Price range: $300–$350.
De’Longhi
Best for: Mid-range espresso. De’Longhi’s Dedica and La Specialista lines offer good espresso quality at prices between the Bambino Plus and professional machines. The Dedica Arte ($250) is a compact espresso machine with a manual steam wand. Weakness: Inconsistency. Some De’Longhi models have quality control issues — temperature stability and pressure can vary between units. The Bambino Plus at $499 is a more reliable choice if the budget allows. Price range: $100–$700.
Choosing the Right Coffee Beans for Your Machine
The beans you use matter as much as the machine you brew them in. A $300 espresso machine with stale supermarket beans will produce worse coffee than a $50 drip machine with fresh, properly roasted beans from a quality roaster. This section covers what to look for when buying beans — and what to avoid.
Roast Date vs Best-By Date
The single most important piece of information on a bag of coffee is the roast date. Coffee is at its peak flavour 7–21 days after roasting. Before 7 days, the beans are still degassing CO₂ (which can cause uneven extraction). After 21 days, the volatile aromatic compounds that produce complex flavours have degraded significantly. After 3 months, the coffee tastes flat and papery. Quality roasters print the roast date prominently. Supermarket brands print a “best by” date that’s 12–18 months out — this tells you nothing about freshness. If a bag doesn’t have a roast date, the coffee is already stale.
Origin Flavour Profiles
Single Origin vs Blends
Single origin beans come from one farm, region, or country. They showcase the specific flavour characteristics of that origin — brighter, more distinctive, more interesting. They’re also less forgiving of brew errors: a light-roasted Ethiopian single origin will taste sour if your water temperature is too low or your grind is too coarse. Blends combine beans from multiple origins to create a balanced, consistent flavour profile. Blends are designed to taste good across a wider range of brew parameters — they’re more forgiving and more consistent from bag to bag. For drip machines, blends are often the better choice because they produce a reliably good cup without requiring precise technique. For espresso, blends are traditional and produce the balanced, sweet shots that work well with milk. For pour-over and manual methods, single origins let you explore the full range of what coffee can taste like.
Light vs Medium vs Dark Roast
Light roast preserves the bean’s origin characteristics — acidity is high, body is light, and flavours are fruity, floral, and tea-like. Light roasts are popular in specialty coffee but can taste sour in machines that brew below 200°F. Medium roast is the sweet spot for most home brewers — balanced acidity, medium body, and a mix of origin character and roast flavour (caramel, chocolate, nuts). This is the safest choice for any machine. Dark roast emphasises roast flavour over origin character — smoky, bitter, heavy-bodied. Dark roasts are popular for espresso and French press but can taste ashy and flat in drip machines. If you’re unsure, start with a medium roast from a quality roaster.
Buy from local roasters whenever possible — you’ll get the freshest beans and can ask for recommendations based on your machine and taste preferences. If buying online, look for roasters who ship within 2–3 days of roasting and print the roast date on the bag. Avoid supermarket coffee without a roast date. Avoid “gourmet” or “premium” labels that don’t specify origin — these are marketing terms, not quality indicators. A $15 bag of freshly roasted Colombian from a local roaster will produce dramatically better coffee than a $12 bag of stale “premium blend” from the supermarket shelf.
Coffee Maker Troubleshooting: Fixing Common Problems
When your coffee maker isn’t performing as expected, the cause is almost always one of a handful of common issues. This troubleshooting guide covers the problems we hear about most frequently from home coffee drinkers — and the fixes that actually work.
Problem: Coffee Tastes Weak or Watery
Likely causes: Not enough coffee grounds (most common), grind too coarse, water temperature too low, or brew time too short. Fix: First, increase the amount of coffee — use 2 level tablespoons per 6oz of water. If that doesn’t help, check your grind size: for drip machines, the grind should be similar to sand (medium). If you’re using pre-ground coffee and it’s labelled “universal” or “all-purpose,” it may be too coarse for your machine. Try a slightly finer grind. If the coffee is still weak, your machine may be brewing below 195°F — this is common in budget machines and can’t be fixed without upgrading.
Problem: Coffee Tastes Bitter or Burnt
Likely causes: Over-extraction (grind too fine, brew time too long), coffee sitting on a hot plate too long, rancid coffee oils in the machine, or stale beans. Fix: First, check if the coffee has been sitting on a hot plate — if it’s been more than 20 minutes, that’s the cause. If you’re brewing fresh, try a coarser grind. Clean your machine — rancid oils on the shower head and brew basket produce bitterness in every cup. If the machine is clean and the grind is correct, the beans may be stale — check the roast date.
Problem: Machine Brews Very Slowly
Likely causes: Mineral scale buildup (most common), grind too fine, or too much coffee in the basket. Fix: Descale the machine immediately — scale narrows the internal tubing and slows water flow. If the machine has just been descaled, check the grind size: espresso-fine grounds in a drip machine create a dense bed that water can’t penetrate quickly. Use a medium grind. Also check that you’re not overfilling the brew basket — most baskets have a maximum fill line.
Problem: Machine Won’t Turn On
Likely causes: Power supply issue, blown thermal fuse, or failed heating element. Fix: First, check the obvious: is it plugged in? Is the outlet working (test with another device)? Check if the machine has a reset button (some Cuisinart and Ninja models do). If the outlet works and there’s no reset, the thermal fuse may have blown — this happens when the machine overheats due to severe scale buildup. The fuse is a $5 part but requires disassembly to replace. If the heating element has failed (common in machines over 3 years old that were never descaled), the machine is typically not worth repairing — replacement heating elements cost $30–$60 plus labour, which often exceeds the cost of a new machine.
Problem: Leaking from the Bottom
Likely causes: Cracked water reservoir, loose internal hose connection, or overflowing drip tray. Fix: Check the water reservoir for cracks — remove it and inspect the bottom and sides. If cracked, replacement reservoirs are available for most major brands ($10–$25). If the reservoir is intact, the leak may be from an internal hose that’s come loose — this requires disassembly. Check the drip tray and overflow area — sometimes what appears to be a leak is simply an overflowing drip tray that hasn’t been emptied.
Problem: Espresso Shots Are Sour
Likely causes: Under-extraction — grind too coarse, dose too low, water temperature too low, or extraction time too short. Fix: Finer grind (the most common fix), increase dose by 1–2g, ensure the machine is fully preheated (run a blank shot first), and aim for a 25–30 second extraction time. If your shots are pulling in under 20 seconds, the grind is definitely too coarse. If they’re pulling in 35+ seconds and still sour, the water temperature may be too low — this is harder to fix on machines without PID temperature control.
Problem: Espresso Shots Are Bitter
Likely causes: Over-extraction — grind too fine, dose too high, water temperature too high, or extraction time too long. Fix: Coarser grind (the most common fix), reduce dose by 1–2g, and aim for 25–30 seconds. If shots are pulling in 35+ seconds, the grind is too fine. Also check that the machine isn’t overheating — some machines without PID control can run hot after multiple consecutive shots. Let the machine cool for 30 seconds between shots.
Problem: Milk Won’t Foam Properly
Likely causes: Wrong milk type, milk too warm, steam wand clogged, or technique. Fix: Use cold whole milk (whole milk foams best due to its fat and protein content). Start with the steam tip just below the milk surface to introduce air, then submerge deeper to heat. If the steam wand is sputtering or producing large bubbles, the tip may be clogged with dried milk — soak the tip in warm water for 10 minutes, then clear each hole with a pin or the cleaning tool that came with the machine. Non-dairy milks require barista-formulated versions (Oatly Barista, Califia Barista Blend) to foam properly.
Smart & WiFi-Connected Coffee Makers
Smart home technology has reached the coffee maker category — and the results are mixed. WiFi-connected coffee makers let you start a brew from your phone, schedule brewing through a voice assistant, and receive maintenance reminders through an app. But the technology adds cost, complexity, and potential failure points that traditional machines don’t have. Here’s what you need to know before paying the smart premium.
What Smart Coffee Makers Actually Do
The core features of WiFi-connected coffee makers include: remote brewing (start a brew from your phone while still in bed), scheduling (set daily brew times through an app rather than the machine’s physical controls), voice control (start brewing via Alexa or Google Assistant), and maintenance alerts (the app notifies you when descaling is due or a filter needs replacing). Some models also offer recipe integration (the app suggests brew settings for specific beans) and consumption tracking (how many cups you’ve brewed this week).
Are They Worth the Premium?
Smart features typically add $30–$80 to the price of a coffee maker. For most people, this premium isn’t justified — a programmable timer on a traditional machine does the same job as remote brewing (set it the night before, wake up to brewed coffee), and voice control is a novelty that most people use twice and then forget about. The maintenance alerts are genuinely useful but not worth $50 on their own.
Where smart features do make sense: if you have an irregular schedule and can’t set a fixed brew timer, remote brewing lets you start coffee from wherever you are (on your commute home, for example). If you have multiple people in the household with different preferences, app-controlled machines can save individual profiles. And if you’re building a smart home ecosystem and want everything connected, the integration with routines (e.g., “when my alarm goes off, start the coffee maker”) is genuinely convenient.
Reliability Concerns
The primary risk with smart coffee makers is that the WiFi and app components can fail independently of the brewing components. We’ve seen cases where the machine brews perfectly but the app crashes, loses connection, or stops receiving updates after the manufacturer discontinues support. When this happens, you’re left with a machine that works but has paid for features you can no longer use. Traditional machines don’t have this problem — a programmable timer from 10 years ago still works exactly as designed. If you buy a smart coffee maker, make sure it also has full manual controls that work without the app.
Smart features are a nice-to-have, not a must-have. Don’t choose a machine based on its WiFi capabilities — choose based on brew temperature, carafe type, and build quality. If two machines are otherwise equal and one has smart features for $30 more, it’s worth considering. But don’t sacrifice brew quality for connectivity. A dumb machine that brews at 200°F will always produce better coffee than a smart machine that brews at 180°F.
Noise Levels & Energy Efficiency
Two practical considerations that buyers often overlook until the machine is on their counter at 6am: how loud is it, and how much electricity does it use? These factors don’t affect cup quality, but they affect your daily experience significantly — especially in shared households and small apartments.
Noise Levels by Machine Type
← Scroll if needed →| Machine Type | Noise Level | Duration | Comparison |
|---|---|---|---|
| Drip Coffee Maker | 45–55 dB | 6–8 minutes | Quiet hum, similar to a refrigerator |
| Espresso Machine (pump) | 70–80 dB | 25–30 seconds per shot | Loud, similar to a vacuum cleaner |
| Pod Machine (Keurig) | 55–65 dB | Under 60 seconds | Moderate, similar to a dishwasher |
| Coffee Grinder (electric) | 80–90 dB | 5–15 seconds | Very loud, similar to a blender |
| Coffee Grinder (hand) | 30–40 dB | 60–120 seconds | Very quiet, similar to crumpling paper |
Drip machines are the quietest — the only noise is the heating element and water dripping through the grounds. The Breville Precision Brewer and Cuisinart DCC-3200 both measured under 55 dB during brewing, which won’t wake a sleeping partner in the next room. Espresso machines are the loudest during operation — the pump that generates 9 bars of pressure produces a mechanical hum that’s impossible to muffle. The Bambino Plus is quieter than most espresso machines (around 72 dB) but still noticeable. If noise is a primary concern, a hand grinder paired with a quiet drip machine is the most silent setup available — you can brew coffee without waking anyone.
Energy Consumption
Coffee makers are relatively low-energy appliances. A typical drip machine uses 800–1,200 watts during the 6–8 minute brew cycle, then 60–100 watts on the warming plate. If you brew one pot per day and leave it on the warming plate for 2 hours, the annual electricity cost is roughly $5–$10. Espresso machines use 1,200–1,500 watts during heating but for much shorter durations (30 seconds to 2 minutes). Pod machines use 1,000–1,500 watts but only for 30–60 seconds per cup.
The biggest energy waste in coffee making is the warming plate on glass-carafe drip machines. Leaving a hot plate on for 3 hours after brewing uses more electricity than the brew cycle itself. Thermal carafe machines don’t have this problem — once the brew is done, the machine uses zero electricity to keep the coffee hot. If energy efficiency matters to you, a thermal carafe machine is the better choice. Programmable auto-shutoff features (standard on most machines) also help — set the machine to turn off 1 hour after brewing.
Energy-Saving Tips
Brew only what you’ll drink — a full 12-cup carafe that you pour down the drain wastes both coffee and energy. Use the programmable timer to avoid running the machine during peak electricity hours if your utility has time-of-use pricing. Turn off the warming plate manually if your machine doesn’t have auto-shutoff. For espresso machines, turn the machine off between sessions rather than leaving it idle — most machines heat up in under a minute, so the convenience of leaving it on doesn’t justify the energy waste. The Bambino Plus’s 3-second heat-up makes this especially practical — there’s no reason to leave it on between drinks.
Best Coffee Maker by Use Case
The “best” coffee maker depends entirely on how you’ll use it. A machine that’s perfect for a family of four is wrong for a single person who drinks one cup before work. A machine that’s ideal for an espresso enthusiast is overkill for someone who just wants a reliable pot of drip coffee. This section matches specific use cases to the right machine — so you can skip the comparison paralysis and buy what actually fits your life.
Best for a Single Person Who Drinks 1–2 Cups
Recommendation: Keurig K-Elite at ~$129. If you drink one or two cups per day and don’t want to think about coffee preparation, a pod machine is the honest recommendation. The K-Elite brews in under 60 seconds, requires zero cleanup (discard the pod), and the per-cup cost ($0.50–$1.00) is acceptable at low volume. The alternative is a pour-over setup (Hario V60 + gooseneck kettle, ~$40 total) if you want better cup quality and don’t mind 3–4 minutes of active brewing per cup.
Best for a Family of 3–5 Who Drinks Multiple Cups
Recommendation: Breville Precision Brewer Thermal at ~$189. A thermal carafe drip machine is the right choice for households — brew a full 12-cup pot in the morning, and it stays hot and drinkable for 3–4 hours without a heating plate. The SCAA certification means every cup is properly extracted. The programmable timer lets you set it the night before. If $189 is too steep, the Cuisinart DCC-3200 at ~$54 is the budget alternative — smaller thermal performance but excellent brew temperature for the price.
Best for Espresso and Latte Drinkers
Recommendation: Breville Bambino Plus at ~$499 (plus a grinder at $100–$200). If you regularly buy lattes or cappuccinos from cafés, an espresso machine pays for itself within 3–6 months. The Bambino Plus’s automatic milk texturing removes the hardest skill from the equation. Pair it with a Baratza Encore grinder ($155) for a complete setup under $700 that produces café-quality drinks.
Best for an Office or Shared Workspace
Recommendation: Cuisinart DCC-3200P1 at ~$54. Offices need a machine that’s simple, reliable, and makes a lot of coffee. The 14-cup capacity handles a team of 5–8 people per brew. The programmable features are simple enough for anyone to use. The glass carafe is fine for an office where coffee is consumed quickly. At $54, replacement cost is low if the machine is damaged by heavy use. For a larger office (10+ people), consider a commercial Bunn brewer.
Best for Small Apartments and Dorms
Recommendation: Ninja CE251 at ~$44. Counter space is at a premium in small kitchens. The Ninja CE251 has a small footprint, brews 12 cups, and costs under $50. It’s not the best coffee maker on this list, but it’s the best value for someone who needs a basic, reliable machine in a tight space. The permanent filter means no ongoing paper filter costs. For even smaller spaces, a pour-over setup (V60 + kettle) takes up almost no counter space and stores in a drawer.
Best for Entertaining and Dinner Parties
Recommendation: Breville Precision Brewer Thermal at ~$189. When you’re serving coffee to guests, you want a machine that produces a large volume of high-quality coffee and keeps it hot without a heating plate. The Precision Brewer’s thermal carafe keeps coffee hot for 4 hours — perfect for after-dinner coffee service. The 6 brew modes let you adjust strength for different preferences. For espresso-based entertaining, the Bambino Plus can pull shots and steam milk for lattes and cappuccinos — but it’s slower for large groups (one drink at a time).
Best for Travel and Camping
Recommendation: AeroPress (~$30) or pour-over dripper (~$15). No machine is truly portable — but the AeroPress is the closest thing. It’s a manual, hand-powered coffee maker that produces excellent espresso-style coffee in 2 minutes, weighs 6oz, and fits in a backpack pocket. Pair it with a hand grinder ($30–$40) and you have a complete, portable coffee setup that produces better coffee than most hotel room machines. For car camping where weight isn’t a concern, a French press ($20–$30) makes multiple cups with no electricity.
Frequently Asked Questions
The best coffee maker depends on what type of coffee you want. For drip coffee: the Breville Precision Brewer Thermal at ~$189 is the best available — SCAA Certified, 200°F brew temperature, pre-infusion bloom. For espresso: the Breville Bambino Plus at ~$499 is the best entry-level serious espresso machine. For pod convenience: the Keurig K-Elite at ~$129. For budget drip: the Cuisinart DCC-3200 at ~$54 brews at 192°F — above the SCAA minimum and excellent at that price.
The Specialty Coffee Association of America (SCAA) runs the Home Brewer Certification Program, which independently tests drip coffee makers against their “Golden Cup” standard. To receive certification, a machine must brew at 195–205°F water temperature, complete the brew cycle in 4–8 minutes, and achieve a uniform extraction across the entire brew bed. Currently fewer than 10% of the coffee makers on the market meet this standard. A SCAA Certified machine is independently verified to produce properly extracted coffee — it’s the most reliable quality signal available when buying a drip machine.
Yes — if you regularly buy espresso-based drinks from a café. A café latte at $5–$7 means your first 70–100 drinks pay for a $499 Bambino Plus. After that point, you’re drinking café-quality coffee at roughly $0.50 per cup in beans. The barrier is learning curve and time investment — espresso requires dialling in and daily maintenance. If you’re buying one latte per day at a café, an espresso machine pays for itself in under 3 months and produces a better result at home within a few weeks of practice.
For the right person, yes. If you drink one cup per day, never want to think about coffee preparation, value variety across hundreds of flavours and blends, and are willing to pay $0.50–$1.20 per cup for that convenience — a Keurig or Nespresso is the honest recommendation. If you care about cup quality, drink 2+ cups daily, or are cost-conscious over a year, pod machines are a poor investment. The per-cup premium of pods over ground coffee adds up to $200–$400 per year in extra costs for a lower-quality result.
Every 1–3 months, depending on water hardness. Hard water areas (most of the US Midwest, UK, and Southern Europe) need descaling every 4–6 weeks. Soft water areas can go 3 months. Signs that descaling is overdue: longer time to brew, weaker cup, visible mineral deposits on the shower head, or a white-scale coating inside the water tank. Use a commercial descaling solution or white vinegar (1:1 with water) and run a full cycle, followed by two plain water cycles to rinse. Descaling extends machine lifespan significantly — machines that are never descaled typically fail 2–3 years earlier than maintained ones.
Both methods pass hot water through ground coffee in a paper filter — the difference is control and automation. A drip machine automates the water flow, temperature, and timing. A pour-over (V60, Chemex, Kalita Wave) is manual — you control exactly how much water hits the grounds, at what rate, and in what pattern. Pour-over gives experienced brewers finer control and produces a brighter, cleaner cup — but requires 3–5 minutes of active attention per brew. For most households, a good drip machine produces equivalent or better results than a beginner’s pour-over technique.
Not strictly — pre-ground coffee works in any drip machine. But buying a grinder is the highest-value upgrade available after the machine itself. A $40 hand grinder (Hario Slim, Porlex Mini) produces coffee that tastes noticeably fresher and more complex than pre-ground supermarket coffee in the same drip machine. A $100–$150 electric burr grinder (Baratza Encore, OXO Brew Conical) takes this further. Grinding fresh whole beans immediately before brewing is the single practice that separates average home coffee from genuinely good coffee — more impactful than any machine upgrade at similar cost.
Thermal is better for almost everyone. A thermal carafe keeps coffee hot for 3–4 hours without a heating plate, preserving the flavour profile that existed at brew time. A glass carafe on a hot plate begins producing bitterness within 15–20 minutes as the heat continues to cook the coffee. The only advantages of glass are: lighter weight, you can see the coffee level, and replacement carafes are cheaper ($15 vs $40+). If you ever drink coffee more than 20 minutes after brewing, buy a thermal carafe machine.
Some machines with a cold brew mode (like the Breville Precision Brewer) can make cold brew by circulating cold water through the grounds over 1–4 hours. Without a dedicated mode, you can’t make true cold brew in a drip machine — the water flows too quickly and at the wrong temperature. However, you can make cold brew without any machine: combine coarsely ground coffee with cold water in a mason jar (1:5 ratio for concentrate), steep in the fridge for 18–24 hours, and strain through a filter. Total cost: zero beyond the coffee itself.
Medium grind — similar in texture to regular sand. If the grind is too fine (like table salt), the water can’t flow through the grounds quickly enough, producing over-extracted, bitter coffee and potentially clogging the brew basket. If the grind is too coarse (like sea salt), the water flows through too quickly, producing under-extracted, sour, weak coffee. When in doubt, err slightly coarser — under-extracted coffee is more drinkable than over-extracted coffee. If you’re buying pre-ground coffee, look for bags labelled “drip” or “auto-drip” grind.
With proper maintenance (regular descaling, weekly cleaning), a quality drip coffee maker lasts 5–7 years. Espresso machines can last 7–15 years with proper care — the Breville Bambino Plus is built to last a decade. Budget machines (under $50) typically last 2–3 years before the heating element fails. The single biggest factor in machine lifespan is descaling — machines that are never descaled fail 2–3 years earlier than maintained ones. Pod machines (Keurig) typically last 3–5 years before the pump or heating element degrades.
For convenience, yes — for cup quality, usually no. Built-in grinder machines (like the Breville Barista Express) save counter space and streamline the workflow. But the built-in grinder is typically inferior to a standalone grinder at the same price point, and you can’t upgrade it independently. If the grinder component dulls or fails, the entire machine needs service. Our recommendation: buy a separate grinder and a separate brewer. The total cost is similar, the cup quality is better, and if one component fails, you only need to replace that component.
Filtered water from a carbon filter pitcher (Brita, Pur) is the best practical choice for most homes. It removes chlorine and moderates mineral content to the ideal range (75–150 ppm TDS) for coffee extraction. Never use distilled water (produces flat, hollow coffee — minerals are necessary for proper extraction) or softened water (sodium replaces calcium, poor flavour and potential machine damage). In hard water areas, filtered water also significantly extends machine lifespan by reducing mineral scale buildup.
Technically yes, but it’s not ideal. Tea requires water at 160–212°F depending on the type (green tea: 160–180°F, black tea: 200–212°F), and most drip machines brew at a fixed temperature that may not match. More importantly, coffee oils residue in the brew basket and carafe will taint the tea’s flavour — tea is far more sensitive to residual flavours than coffee. If you want to make tea, use a dedicated kettle with temperature control. If you must use a coffee maker, run a cleaning cycle first and use a fresh paper filter.
The most likely reasons, in order: (1) Bean freshness — cafés use beans roasted within the last 2 weeks; your supermarket bag was roasted months ago. (2) Grind freshness — cafés grind immediately before brewing; pre-ground coffee is stale. (3) Water temperature — commercial machines brew at exactly 200°F; most home machines brew 10–20°F cooler. (4) Grind consistency — commercial grinders ($500–$2,000) produce more uniform particles than home grinders. (5) Water quality — many cafés use filtered or custom-blended water. Fix the first two (fresh beans, grind at home) and your home coffee will be noticeably closer to café quality.
They serve different needs. Keurig (K-Cups) offers the widest variety — 400+ brands, including tea, hot chocolate, and soup. Cup quality is decent but not exceptional. Best for: people who want maximum variety and don’t care about espresso. Nespresso (Vertuo or Original) produces better espresso-style coffee with a layer of crema. The Original line is better for espresso purists; the Vertuo line offers larger cup sizes. Best for: people who want espresso-style drinks without a full espresso machine. Nespresso pods are more expensive ($0.70–$1.10 vs $0.50–$0.80 for K-Cups) but the cup quality is noticeably better.
Final Verdict — Best Coffee Maker to Buy
- Best drip coffee maker overall: Breville Precision Brewer Thermal at ~$189. SCAA Certified, 200°F, pre-infusion bloom, thermal carafe. The gold standard of home drip brewing.
- Best espresso machine: Breville Bambino Plus at ~$499. 3-second heat-up, automatic milk texturing, 54mm portafilter. Café-quality espresso at home.
- Best pod machine: Keurig K-Elite at ~$129. Temperature control, strong brew mode, iced coffee, 75oz reservoir. The top of the Keurig range.
- Best value drip under $60: Cuisinart DCC-3200 at ~$54. 192°F brew temperature, 14-cup capacity, programmable. The best budget drip machine available.
- Best budget pick: Ninja CE251 at ~$44. Reliable, programmable, 12-cup. Adequate for everyday use — upgrade to Cuisinart for just $10 more.
Questions about any machine on this list or which type is right for your household? Reach us via our contact page — we respond within two business days. For full kitchen appliance guidance see our complete buying guide.
Useful next reads: our Breville espresso machine review, the drip coffee vs French press comparison, and our best blender guide if you’re also building out your kitchen. For the full kitchen appliance ecosystem, start with the complete buying guide.


