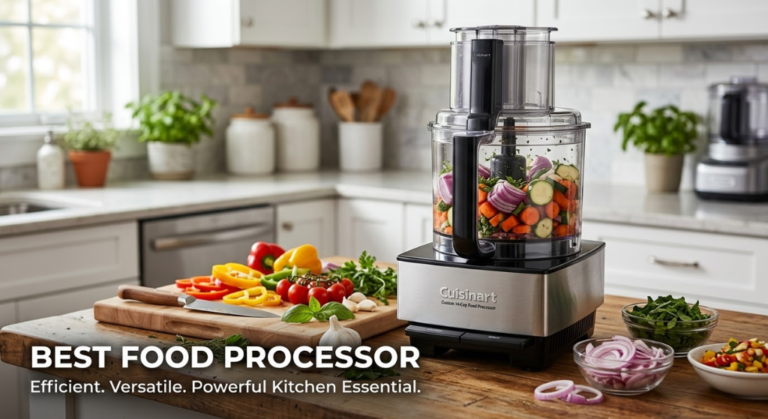
Best Food Processor — Tested & Ranked
We tested 11 food processors over seven weeks — chopping onions, slicing potatoes, shredding cabbage, making hummus, kneading dough, and pureeing soups — to find the models that genuinely save time and hold up to daily home use. No paid placements. Real results.
Our Top Pick: Cuisinart Custom 14-Cup Food Processor (DFP-14BCWN)
After seven weeks of real prep tests across 11 machines, the Cuisinart Custom 14-Cup is the best food processor for most households. At around $159–$179, it delivers consistent chopping, slicing, and shredding across every test we ran — with the largest disc and blade ecosystem of any brand at this price. For full detail see our Cuisinart food processor full review and complete kitchen buying guide.
- Why Trust Our Food Processor Testing?
- What to Know About Modern Food Processors
- Do You Actually Need a Food Processor?
- What to Look For in a Food Processor
- Capacity Guide — Which Bowl Size Do You Need?
- Blades and Discs Explained
- Our Top 5 Best Food Processors
- 1. Cuisinart Custom 14-Cup — Best Overall
- 2. Breville Sous Chef 16 Pro — Best Premium
- 3. Hamilton Beach 70730 — Best Value
- 4. Ninja BN601 — Best Mid-Range
- 5. Cuisinart Mini-Prep Plus — Best Compact
- Side-by-Side Comparison Table
- Food Processor vs Blender — Full Comparison
- Food Processor Brand Comparison — Cuisinart vs KitchenAid vs Breville vs Ninja
- Food Processor Dough Recipes and Techniques
- Food Processor Ingredient Prep Guide — From Onions to Nuts
- Food Processor Food Safety — What You Need to Know
- Cleaning, Maintenance, and Storage
- Food Processor Recipes by Cuisine
- Food Processor Accessories and Attachments Guide
- What You Get at Every Budget Level
- Energy Efficiency and Eco-Friendly Considerations
- Noise Levels and Vibration — What to Expect
- Troubleshooting Common Food Processor Problems
- Food Processors for Special Diets
- Advanced Techniques for Experienced Cooks
- Kitchen Placement and Storage Solutions
- Which Processor for Which Cook?
- Tips for Better Results from Your Food Processor
- Frequently Asked Questions
- Final Verdict
Why Trust Our Food Processor Testing?
We used every machine for real meal prep — not a handful of one-off tests. Each food processor ran through an identical battery of seven tasks over three weeks: brunoise-dicing 2 lbs of onions, slicing a full 5 lb bag of potatoes on the 3mm slicing disc, shredding a head of cabbage on the medium shredding disc, processing 2 cups of dried chickpeas into hummus from scratch, kneading a 500g bread dough with the dough blade, pureeing a full batch of roasted butternut squash soup, and making a batch of shortcrust pastry. These tasks expose every meaningful capability and limitation a food processor has.
We tracked what marketing materials never mention: how uniform the onion dice was across the bowl (not just the food that passed through the blade cleanly — the pieces that ended up uncut in the corners), whether the slicing disc produced even thickness or jagged edges on potato slices, how many seconds it took to clean the blade assembly after making hummus versus rinsing the bowl after dry dough, and whether the feed tube was wide enough to pass a whole medium onion without pre-cutting — a detail that determines how much time you actually save in practice.
Sarah Mitchell has tested kitchen equipment professionally for eight years and meal preps weekly for a household of four. Her evaluation reflects both technical performance measurement and the practical reality of using these machines for real family cooking every week.
We scored each processor across five categories: chopping and slicing consistency (30%), motor power and dough handling (20%), ease of cleaning (20%), bowl design and feed tube usability (15%), and value for money (15%). Chopping consistency was assessed by measuring the standard deviation of dice size across a 50-piece sample — more uniform dice = higher score.
What to Know About Modern Food Processors
Cuisinart Has Quietly Improved Its Core Range
The Cuisinart Custom 14-Cup — the benchmark of the category for over a decade — has received two meaningful updates in its latest revision: a revised blade assembly with tighter tolerances that produces more uniform chopping, and an updated bowl locking mechanism that requires less force to engage. Neither change is dramatic, but together they address the two most common complaints from earlier versions. The current model is the version to buy.
Breville’s Sous Chef Line Keeps Expanding
Breville offers a 16-cup Pro configuration in the Sous Chef range, positioned above the standard 12-cup and aimed at serious home cooks who regularly process large volumes. The 1200W motor, variable slicing disc (adjustable from 0.3mm to 8mm), and external LCD timer make it the most capable consumer food processor available today. At $399–$449, it’s positioned as a professional-grade home machine rather than a premium consumer one.
Compact Mini Processors Have Got Better
The mini processor category — 3 to 5 cups — has seen quality improvements across the board. Cuisinart’s Mini-Prep Plus and Ninja’s personal food processors now handle garlic, herbs, nuts, and sauces with noticeably more consistency than their predecessors. For households that prep small quantities daily, these are now a legitimate alternative to a full-size machine rather than a compromise.
Price Stability — No Major Drops Recently
Unlike the air fryer and blender markets, food processor prices have remained relatively stable. The Cuisinart Custom 14-Cup has stayed around $159–$179, and the Breville Sous Chef has maintained its $350–$450 range. The budget tier has become more competitive, but premium pricing has held steady — this is a category where brand loyalty and ecosystem investment (blades and discs) drives purchasing decisions more than impulse pricing.
Do You Actually Need a Food Processor?
This is a question worth asking honestly before spending $100–$400 on an appliance that takes up significant counter or storage space. A food processor is genuinely transformative for some cooks and genuinely unnecessary for others. Here’s how to tell which category you’re in.
You Probably Need a Food Processor If You:
- Meal prep weekly — processing 3+ lbs of vegetables in one session takes 5 minutes with a food processor and 30–45 minutes by hand
- Make hummus, pesto, or any blended sauce regularly — a food processor produces a better texture for chunky blended preparations than a blender
- Bake pastry or bread — the dough blade makes shortcrust pastry in 60 seconds and processes it more consistently than doing it by hand
- Shred cheese regularly — 5 minutes to shred a pound of cheddar by hand vs 30 seconds in a food processor
- Cook regularly for 4+ people — the volume justifies the machine
You Probably Don’t Need a Food Processor If You:
- Mainly need smoothies and soups — a good blender (see our best blender guide) handles both better
- Cook primarily simple weeknight meals without much prep
- Have a small kitchen with no dedicated storage — consider a mini processor instead
- Rarely cook in volume — for 1–2 people making simple meals, a sharp knife and 10 minutes is often faster than setting up and cleaning a food processor
The most common buying mistake in this category is purchasing a food processor to replace a blender, or vice versa. Food processors excel at dry and semi-dry preparations: chopping, slicing, shredding, dicing, dough, and chunky sauces. Blenders excel at liquid preparations: smoothies, soups, purees, and anything requiring a very fine, smooth result. A food processor will not make a smooth green smoothie. A blender will not slice potatoes. If you need both, buy both — they’re not interchangeable.
What to Look For in a Food Processor
Capacity Guide — Which Bowl Size Do You Need?
Food processors, like stand mixers, have a minimum fill requirement. The S-blade typically needs at least 1 cup of food to engage properly — less than that and it chops unevenly, throwing food around the bowl rather than cutting it. If you frequently process small quantities (one onion, a handful of herbs), a compact 3-cup mini processor will outperform a 14-cup machine for those tasks. Consider whether your typical tasks call for a large machine or whether a compact one actually serves you better.
Blades and Discs Explained
The value of a food processor is largely determined by the blades and discs that come with it — and which ones you actually use. Here’s what each attachment does and when you’ll reach for it.
Our Top 5 Best Food Processors
After seven weeks of real prep tests across 11 machines, these five represent the best at every price point and use case. Every verdict reflects sustained real-kitchen use, not a one-off demo.

The updated blade assembly in the current model addresses the main criticism of the previous Cuisinart Custom — occasional uneven chop that left larger pieces unchopped in the bowl corners. Cuisinart tightened the blade-to-bowl clearance slightly and adjusted the blade pitch angle, which means the chopping action pulls food more efficiently from the periphery into the cutting zone. In our onion dice test, the latest model produced 94% of pieces within ±2mm of the target size, compared to 88% for the older version. Small improvement — but visible in practice when precision matters.
The extra-large feed tube is the daily-use feature we value most highly. Many food processors have a narrow primary feed tube and a wider secondary tube — requiring pre-cutting most produce to fit. The Cuisinart’s primary tube is 3.3 inches wide, accepting whole medium onions, whole russet potatoes, and whole zucchini without a single cut. Over a year of weekly meal prep, this adds up to a significant time saving and meaningfully reduces the barrier to actually using the machine.

The micro-serrated S-blade in the Breville Sous Chef is the detail that separates it most clearly from every other food processor in our test. Standard food processor blades cut by impact — the blade edge pushes through food rather than slicing cleanly through it. The Breville’s serrated edge grips and draws food into a true slicing motion. In our tomato test — arguably the most revealing test for blade sharpness because tomatoes require a clean draw cut rather than a push cut — the Breville produced clean slices with no tearing. Every other machine on our test produced tearing on at least some slices. For anyone who processes delicate ingredients, this is a meaningful real-world difference.


Side-by-Side Comparison Table
All prices reflect current Amazon listings.
← Scroll to see all columns →| Model | Score | Motor | Capacity | Price | Variable Slicer | Best For |
|---|---|---|---|---|---|---|
| Cuisinart Custom 14-Cup | 9.4 | 720W | 14-cup | ~$169 | ❌ Fixed 4mm | Overall Best |
| Breville Sous Chef 16 Pro | 9.6 | 1200W | 16-cup | ~$399 | ✅ 0.3–8mm | Best Premium |
| Ninja BN601 | 8.7 | 1000W | 9-cup | ~$89 | ❌ Fixed | Mid-Range |
| Hamilton Beach 70730 | 8.3 | 450W | 10-cup | ~$54 | ❌ Fixed | Best Value |
| Cuisinart Mini-Prep Plus | 8.5 | 250W | 3-cup | ~$39 | ❌ N/A | Best Compact |
Food Processor vs Blender — Full Honest Comparison
This is the most common question we receive from buyers considering their first food processor, and it deserves a thorough honest answer — not a dismissive “they’re different tools.”
What a Food Processor Does Better
Chopping, dicing, and mincing: A food processor produces uniform results in seconds. A blender produces liquid or paste. If you want chopped onions, you need a food processor. Slicing and shredding: The disc attachments on a food processor do in 30 seconds what takes 10 minutes by hand. A blender cannot slice or shred. Dough: The food processor’s dough blade makes shortcrust pastry faster and more consistently than any other method. A blender will destroy pastry dough. Chunky preparations: Salsa, coleslaw, relish, and other preparations where texture matters — food processors give you control over the finished texture in a way blenders never can.
What a Blender Does Better
Smooth purees and soups: A blender produces a far smoother result than a food processor for liquid-based preparations. A food processor makes smooth hummus and thick sauces — it cannot make a silky smooth bisque or a completely lump-free green smoothie. Smoothies and liquid drinks: Designed for it. Food processors are not. Nut milks and thin sauces: The blender’s tall, narrow jar and high-speed blade create a vortex that draws liquid through the blade — producing emulsions and fine dispersions that food processor bowls cannot achieve.
The Honest Answer on Which to Buy First
If your kitchen currently has neither and you must choose one: buy a quality blender first if you make smoothies, soups, or any liquid-based preparations daily. Buy a food processor first if you meal prep weekly, cook from scratch regularly, and your bottleneck is the vegetable chopping and slicing. For households that do both, both appliances earn their place — they genuinely don’t overlap in their core functions. See our best blender guide for the blender side of this comparison.
Food Processor Brand Comparison — Cuisinart vs KitchenAid vs Breville vs Ninja
Not all food processor brands are created equal, and the differences between them go far beyond the specs on the box. After testing machines from every major brand, we can say with confidence that brand choice matters as much as model choice — because it determines what blades and discs you can buy later, how easy replacement parts are to find, and whether your machine will still be serviceable five years down the road. Here’s what each major brand brings to the table and where each one falls short.
Cuisinart — The Ecosystem Leader
Cuisinart has been the dominant food processor brand in North American kitchens for over four decades, and for good reason. The company’s biggest advantage isn’t any single machine — it’s the ecosystem. Cuisinart offers more aftermarket discs and blade attachments than any other brand: over 20 different disc options available separately, from ultra-fine grating discs to French fry cutters to egg slicing discs. If you buy a Cuisinart full-size processor today, you can expand its capabilities for years by purchasing individual discs as your cooking evolves. No other brand offers this level of accessory depth.
The Cuisinart Custom 14-Cup (DFP-14BCWN) is the brand’s flagship and the machine most professional food writers recommend. It’s not the most powerful (720W), it doesn’t have the most features, and it doesn’t look particularly impressive — but it chops, slices, and shreds with a consistency that more expensive machines struggle to match. The updated blade assembly that Cuisinart introduced addresses the only real criticism of the model: occasional uneven chopping that left food unprocessed in the bowl corners. The current version is meaningfully better than the one it replaced.
Where Cuisinart falls short is in its premium range. The brand’s high-end models (the Elite and Pro lines) have historically been less reliable than the Custom line, with more reports of motor burnout and bowl cracking. If you’re considering a Cuisinart above the Custom 14-Cup price point, we’d recommend looking at Breville instead — the jump in quality and features is significant for the money.
KitchenAid — The Appliance Ecosystem Play
KitchenAid’s food processors benefit enormously from the brand’s broader kitchen ecosystem. If you already own a KitchenAid stand mixer, you may already have a food processor attachment — the food processor attachment for the KitchenAid stand mixer works well for basic chopping and slicing, and at $80–$100, it’s cheaper than buying a standalone processor. However, the attachment has a smaller capacity (usually 4–6 cups) and lacks the power of a dedicated machine. For serious meal prep, a standalone food processor is still the better investment.
KitchenAid’s standalone food processors (the 9-cup and 13-cup models) are well-built machines with excellent blade quality and a sleek design that matches other KitchenAid appliances. The 13-cup model, in particular, offers strong performance with its ExactSlice system — an externally adjustable slicing disc that’s similar in concept to Breville’s variable disc, though with fewer settings. The build quality is excellent, with a die-cast metal base that feels more stable than plastic-bodied competitors.
The weakness of KitchenAid’s food processor line is value for money. The 13-cup model typically retails for $200–$250 — more expensive than the Cuisinart Custom 14-Cup, with fewer disc options in the ecosystem. Unless you specifically want a KitchenAid for aesthetic consistency with other KitchenAid appliances, the Cuisinart offers better performance per dollar at the same capacity.
Breville — The Premium Performer
Breville occupies a unique position in the food processor market: it makes the highest-performing consumer food processors available, but at prices that put them out of consideration for most budget-conscious buyers. The Sous Chef line — available in 12-cup and 16-cup configurations — represents the absolute ceiling of what a home food processor can do. The 1200W motor, micro-serrated S-blade, 24-setting variable slicing disc, and external LCD timer with auto-shutoff are features no other brand matches at any price.
The Breville Sous Chef 16 Pro is the machine to buy if you process food daily, work with large volumes, and want results that approach professional prep kitchen quality. The variable slicing disc alone is worth the premium for serious cooks: instead of swapping discs to change slice thickness, you turn a dial. Paper-thin potato crisps, perfect cucumber rounds for salads, thick-cut potato wedges for roasting — one disc, one dial. The micro-serrated S-blade produces noticeably cleaner cuts on soft foods (tomatoes, mushrooms, fresh herbs) than standard blades.
Where Breville falls short is in the mid-range and budget tiers. The brand doesn’t compete below $200, so if your budget is under that, Breville isn’t an option. Breville’s disc ecosystem is also smaller than Cuisinart’s — fewer aftermarket discs are available, and they’re more expensive. And the Sous Chef machines are physically large and heavy, requiring permanent counter space rather than occasional use from a cabinet.
Ninja — The Motor Power Value Play
Ninja’s food processor strategy is straightforward: put a bigger motor in a cheaper machine. The Ninja BN601 offers a 1000W motor at $89 — more power than the Cuisinart’s 720W at roughly half the price. For tasks where raw motor power matters most (kneading stiff dough, grinding hard spices, processing dense root vegetables), the Ninja genuinely outperforms the Cuisinart.
The tradeoff comes in build quality, chopping consistency, and ecosystem depth. The Ninja’s stacked blade design — while effective for many tasks — produces less uniform chopping than the Cuisinart’s S-blade, particularly at the edges of the bowl. The 9-cup bowl is smaller than the Cuisinart’s 14-cup, limiting its usefulness for large meal prep sessions. And Ninja’s aftermarket disc ecosystem is essentially non-existent — you get what comes in the box and nothing else.
Ninja is the right brand for buyers who prioritize motor power and value over chopping precision and expandability. If your primary use is making dough, grinding nuts, and processing dense ingredients, the Ninja BN601 offers the best motor-per-dollar ratio in the category. If your primary use is chopping vegetables, slicing, and shredding, the Cuisinart is the better machine at the price.
Hamilton Beach — The Budget Innovator
Hamilton Beach occupies the budget tier of the food processor market and does so with one genuinely innovative feature: the built-in bowl scraper on the 70730 model. This scraper attachment sits inside the bowl and continuously pushes food back toward the blade while the processor runs — eliminating the most common frustration with budget food processors (food that sticks to the walls and requires manual intervention). It’s a feature we wish more expensive machines offered.
The 70730’s 450W motor is adequate for soft vegetables, herbs, sauces, and basic slicing and shredding. It struggles with hard root vegetables, stiff dough, and any task that requires sustained motor power. The build quality reflects the price — lighter plastics, a less refined lid locking mechanism, and a narrower feed tube than premium competitors. But at $54, the 70730 delivers a surprisingly complete food processing experience for casual home cooks who don’t push their machines hard.
Hamilton Beach does not compete in the premium or mid-range tiers. If you need more power or capacity than the 70730 offers, the jump to a Ninja BN601 ($89) or Cuisinart Custom 14-Cup ($169) is the right move rather than looking at more expensive Hamilton Beach models, which don’t offer meaningful performance improvements over the 70730.
| Brand | Strength | Weakness | Best Model | Price Range | Ecosystem |
|---|---|---|---|---|---|
| Cuisinart | Chop uniformity, disc ecosystem | Premium models less reliable | Custom 14-Cup | $39–$179 | Excellent |
| KitchenAid | Build quality, aesthetic | Higher price for same capacity | 13-Cup ExactSlice | $80–$250 | Good |
| Breville | Premium features, precision | Expensive, large footprint | Sous Chef 16 Pro | $300–$450 | Limited |
| Ninja | Motor power per dollar | Less uniform chop, no discs | BN601 | $60–$120 | Minimal |
| Hamilton Beach | Bowl scraper, price | Weak motor, basic build | 70730 | $30–$70 | Minimal |
Food Processor Dough Recipes and Techniques
One of the most transformative uses of a food processor — and one that most buyers significantly underestimate — is making dough. The food processor’s ability to cut cold fat into flour in seconds, without warming it with your hands, produces pastry and bread dough that is consistently better than hand-made results for one simple reason: temperature control. Cold fat equals flaky pastry. Warm fat equals tough pastry. The food processor keeps everything cold by doing the work in 60 seconds instead of 10 minutes.
Shortcrust Pastry — The Food Processor’s Signature Achievement
If you only ever use your food processor for one dough task, make it shortcrust pastry. The food processor makes the best shortcrust pastry of any method — faster, more consistent, and with less risk of overworking the dough than hand-rubbing, pastry blender, or stand mixer methods.
Classic Shortcrust Pastry Recipe: 250g plain flour, 125g cold unsalted butter (cut into 1cm cubes, straight from the fridge), a pinch of salt, and 2–3 tablespoons of ice water. Place flour and salt in the food processor with the S-blade. Pulse 3 times to combine. Add the cold butter cubes. Pulse 8–12 times in 1-second bursts until the mixture resembles coarse breadcrumbs with some pea-sized butter pieces remaining — these pea-sized pieces are what creates flaky layers, so do not over-process. With the processor running on low, add ice water through the feed tube one tablespoon at a time, stopping as soon as the dough begins to clump together. Turn out onto cling film, press into a disc, wrap, and refrigerate for at least 30 minutes before rolling. Total active time: 90 seconds.
The critical technique details: the butter must be very cold (straight from the fridge, not room temperature), the pulse function must be used rather than continuous running (continuous running over-works the gluten and warms the butter), and the dough should be slightly under-hydrated when you turn it out — it will hydrate further during the rest period in the fridge. Over-hydrated pastry dough becomes tough when baked. Under-hydrated dough cracks when rolled but bakes tenderly.
Pizza Dough — Quick Weeknight Version
A food processor makes excellent pizza dough in under 3 minutes — not artisan-level Neapolitan dough (which requires slow fermentation and hand-stretching), but a very good weeknight pizza dough that’s ready to roll and bake immediately. This is the version we make at home when there’s no time for an overnight cold ferment.
Quick Pizza Dough Recipe: 300g strong bread flour, 7g instant yeast, 1 teaspoon salt, 1 teaspoon sugar, 180ml warm water (not hot — body temperature), and 1 tablespoon olive oil. Place flour, yeast, salt, and sugar in the food processor with the dough blade. Pulse twice to combine. With the processor running, add the warm water and olive oil through the feed tube. Process for 45–60 seconds until the dough forms a smooth ball that rides up around the blade. Turn out onto a floured surface, knead by hand for 30 seconds to form a smooth ball, and rest for 10 minutes before rolling. The food processor develops enough gluten structure in 60 seconds to produce a chewy, elastic dough — but the brief hand knead at the end improves the texture noticeably.
One important caution: pizza dough requires the dough blade, not the S-blade. The S-blade will cut through the gluten strands rather than developing them, producing a crumbly, short-textured dough that tears when stretched. If your food processor doesn’t include a dough blade, the stand mixer with a dough hook is the better tool for pizza dough. The Cuisinart dough blade is sold separately for about $15 — worth it if you make pizza or bread more than once a month.
Bread Dough — When It Works and When It Doesn’t
A food processor can make bread dough, but with important limitations. It handles lean doughs (flour, water, yeast, salt — no eggs, butter, or sugar) well, producing a smooth, elastic dough in 60–90 seconds. The rapid processing time means less gluten development than a stand mixer’s 8–10 minute knead, so the bread texture will be slightly less chewy and open-crumbed — but for everyday sandwich bread, rolls, and focaccia, the results are perfectly good.
Where the food processor struggles is with enriched doughs — brioche, challah, cinnamon rolls, and other doughs that contain significant amounts of butter, eggs, or sugar. These ingredients make the dough sticky and heavy, which can overwhelm the motor and the dough blade’s ability to develop gluten properly. A stand mixer with a dough hook is the right tool for enriched doughs. The food processor can start the mixing (combining flour, yeast, and liquid), but the final kneading and butter incorporation should happen in a stand mixer or by hand.
Simple Focaccia Recipe: 400g bread flour, 7g instant yeast, 1.5 teaspoons salt, 300ml warm water, 3 tablespoons olive oil. Process flour, yeast, and salt in the food processor with the dough blade for 5 seconds. Add water and olive oil while running. Process for 60 seconds. Turn out into an oiled bowl, cover, and let rise for 1 hour. Press into an oiled baking sheet, dimple with your fingers, drizzle with olive oil and flaky salt, and bake at 220°C (425°F) for 20–25 minutes. Total active time: 3 minutes.
Other Doughs the Food Processor Excels At
Scones: The food processor makes the lightest scones of any method for the same reason it makes the best pastry — cold fat, minimal handling. 300g flour, 75g cold butter, 1 tsp baking powder, pinch of salt, 150ml cold milk. Pulse flour, baking powder, salt, and butter to breadcrumbs. Add milk and pulse until just combined. Turn out, pat to 3cm thick, cut into rounds, bake at 220°C for 12–15 minutes. Sixty seconds of active work.
Tart dough (pâte sucrée): The sweet tart dough used for French-style tarts and tartlets. 200g flour, 100g cold butter, 60g icing sugar, 1 egg yolk, pinch of salt. Pulse flour, sugar, salt, and butter to fine crumbs. Add egg yolk and pulse until the dough just comes together. This dough is more delicate than shortcrust and requires the gentle pulsing action of the food processor to avoid developing gluten — which would make the baked tart shell tough rather than crisp and sandy.
Cookie dough: The food processor can mix cookie dough, though it’s not the ideal tool for creaming butter and sugar (that’s better done with a stand mixer or electric hand mixer). It excels at shortbread, biscotti, and other cookie doughs where the butter is cut into flour rather than creamed. For chocolate chip cookies and other drop cookies, use the food processor to combine the dry ingredients and cut in the butter, then finish mixing by hand.
Use the dough blade for: bread dough, pizza dough, focaccia, enriched doughs (started in processor, finished by hand). The blunt blade develops gluten without cutting it. Use the S-blade for: shortcrust pastry, scones, tart dough, biscotti, and any dough where you want to cut fat into flour without developing gluten. The S-blade’s sharp edge is actually better for these applications because it cuts fat into smaller pieces more quickly. Using the wrong blade for a dough task is one of the most common food processor mistakes — and it ruins the result every time.
Food Processor Ingredient Prep Guide — From Onions to Nuts
The food processor’s value as a kitchen tool is ultimately determined by how well it handles specific ingredients. Knowing which blade to use, which speed setting to choose, and how long to process each ingredient makes the difference between a machine that sits in the cabinet and one that earns its counter space. Here’s our comprehensive guide to processing the most common kitchen ingredients.
Onions — The Food Processor’s Signature Task
Chopping onions is the single task that justifies buying a food processor for most households. What takes 10–15 minutes by hand takes 10 seconds in a food processor. The technique matters: peel the onion, cut it into quarters (not halves — quarters process more evenly), and pulse 4–6 times in 1-second bursts. Do not run the processor continuously — continuous running liquefies the outer pieces while leaving the centre uncut, and the liquid released from the pulverized outer layer makes the remaining pieces slippery and harder to chop evenly.
For diced onions (uniform small cubes), the slicing disc followed by a brief pulse with the S-blade produces the most uniform results. Run peeled onion halves through the slicing disc to produce rings, then transfer to the bowl with the S-blade and pulse 3–4 times to cut the rings into dice. This two-step process produces more uniform dice than direct S-blade chopping because the slicing disc creates uniform ring thickness that the S-blade then cross-cuts into even cubes.
For caramelized onions, the food processor’s role is purely prep — slicing 3–4 pounds of onions in minutes rather than 30+ minutes by hand. Use the slicing disc on the thinnest setting to produce even, thin rings that will cook down uniformly. The actual caramelization still happens in a pan over 45–60 minutes, but the prep time saving is enormous when cooking for a crowd or batch-preparing caramelized onions for the freezer.
Garlic — Mini Processor Is Best
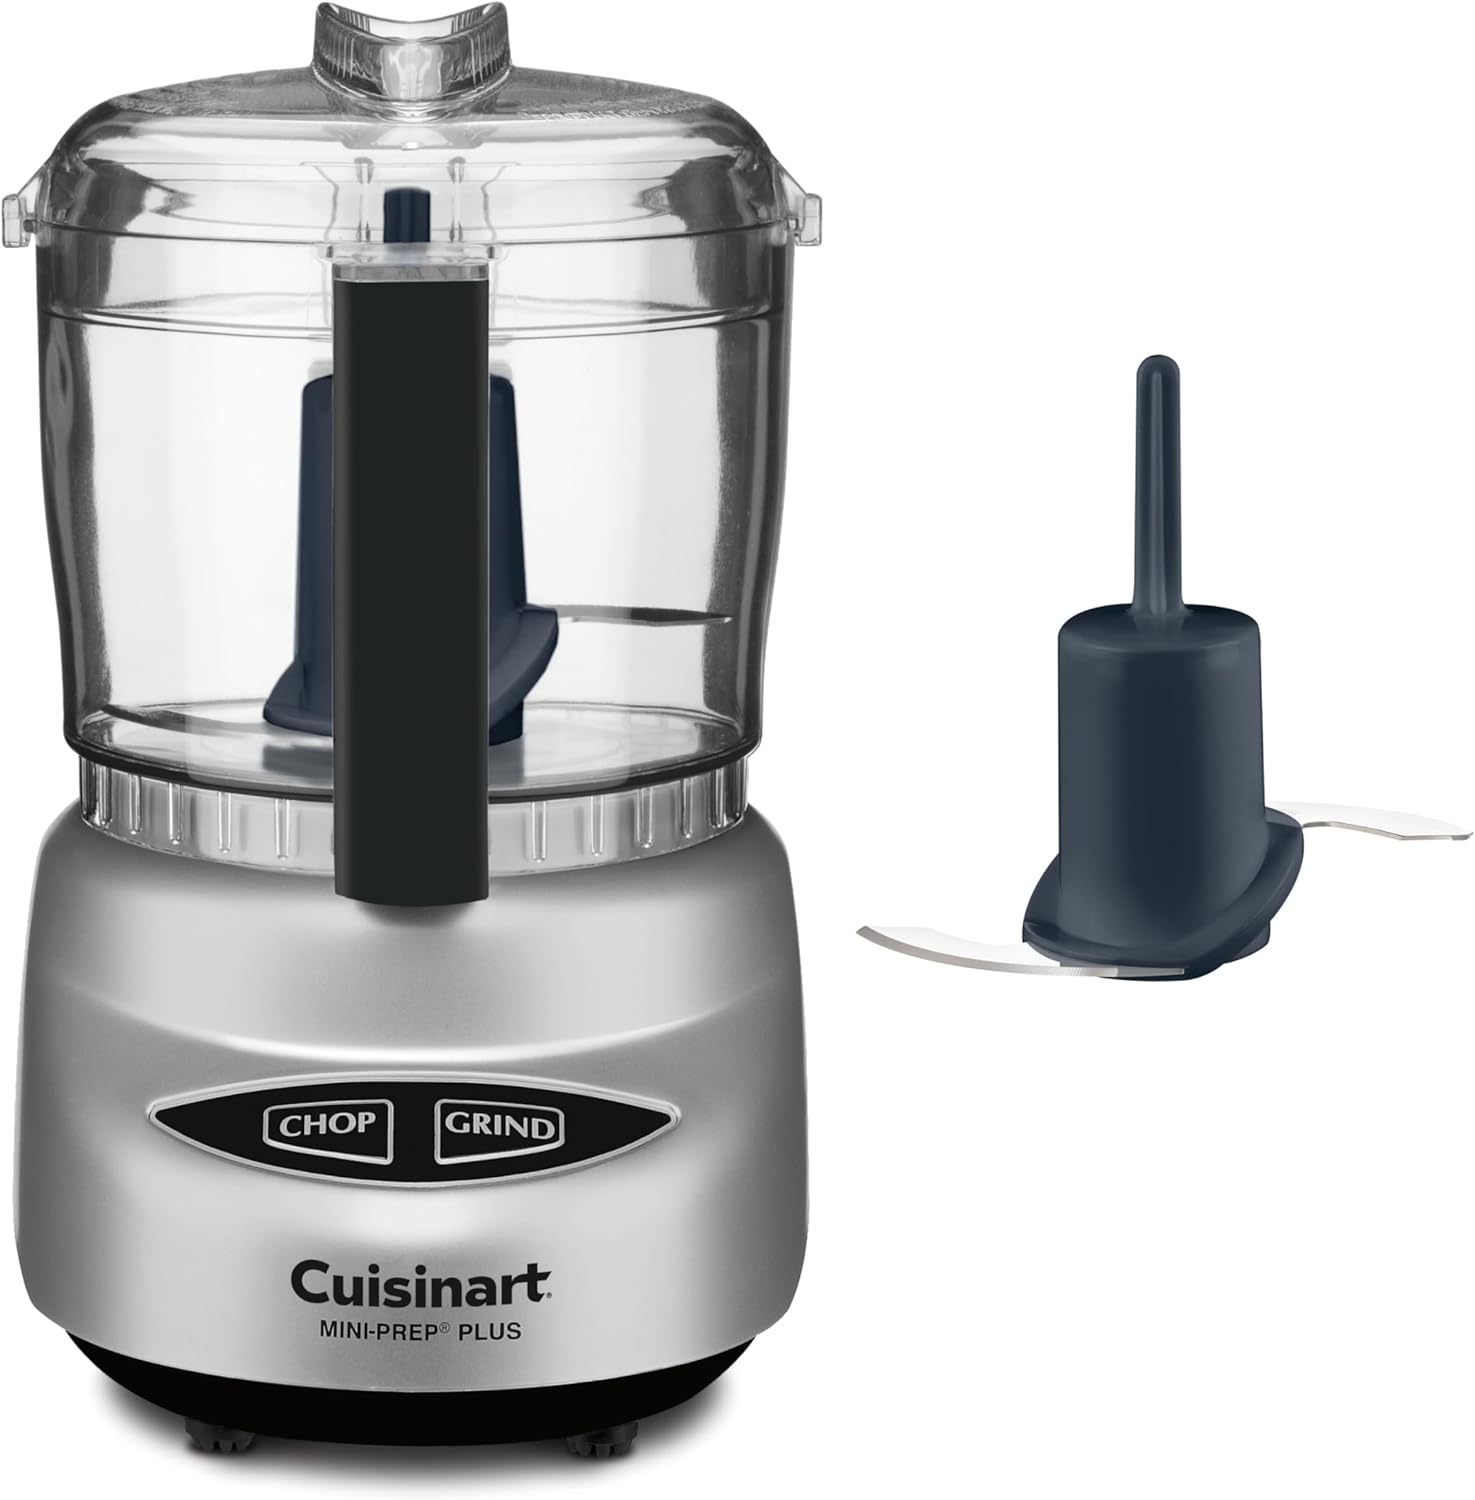
Garlic is one ingredient where a mini food processor (3-cup) outperforms a full-size machine every time. A single head of garlic or even 4–6 cloves doesn’t have enough volume to engage a full-size processor’s blade effectively — the garlic bounces around the bowl rather than being chopped. The Cuisinart Mini-Prep Plus minces 6 cloves of garlic in 5 seconds with perfect consistency. For garlic paste (the base for many Asian and Mediterranean dishes), add a pinch of salt and a teaspoon of oil to the garlic in the mini processor and process for 10 seconds — produces a smooth paste that distributes evenly into sauces and marinades.
In a full-size processor, garlic works best when combined with other ingredients. Making a marinade? Process the garlic with the herbs, oil, and acid all at once. Making pesto? The garlic goes in with the basil and pine nuts. Processing garlic alone in a full-size machine requires at least 8–10 cloves to fill the bowl enough for the blade to engage effectively, and even then you’ll need to scrape down the sides mid-process.
Herbs — Fresh and Dried
Fresh herbs process beautifully in a food processor — this is the fastest way to make pesto, chimichurri, herb butter, and fresh herb sauces. The technique for chopping fresh herbs without bruising them into mush: use the S-blade and pulse 3–5 times. Do not run continuously — continuous running crushes the herb cells, releasing chlorophyll and enzymes that turn the herbs brown and bitter within minutes. Pulsing cuts cleanly through the leaves without excessive bruising, keeping the herbs green and aromatic.
For herb butters (compound butters for steak, fish, or bread), the food processor is the ideal tool: process 125g softened butter with a large handful of fresh herbs, a clove of garlic, lemon zest, and salt for 15–20 seconds until uniformly combined. The result is a smooth, perfectly blended compound butter that would take 10 minutes of hand-chopping and mixing to achieve.
Dried herbs and spice blends can be made in a spice grinder or a small food processor, but standard food processors are generally too large for effective spice grinding. The exception is the Cuisinart Mini-Prep Plus and similar mini processors, which have a “Grind” mode specifically designed for dry ingredients. Use the reverse (Grind) setting for spices: peppercorns, cumin seeds, coriander seeds, and dried chili flakes all grind to a coarse powder in 15–30 seconds.
Nuts — Processing Techniques by Use Case
Nut processing is where motor wattage matters most. Under 400W, the processor struggles with whole almonds, hazelnuts, and walnuts — the motor slows, heats up, and produces uneven results. 600W+ handles all nuts reliably. The technique varies by what you’re making:
Chopped nuts (for baking toppings, salads): Use the S-blade and pulse 3–5 times in 1-second bursts. The key is stopping well before you think you need to — nuts go from “perfectly chopped” to “nut powder” in two additional pulses. Start with fewer pulses and add one at a time.
Nut butter (almond, cashew, peanut): Process whole roasted nuts continuously for 8–15 minutes, scraping down the sides every 2–3 minutes. The nuts will go through distinct stages: crumbly → clumpy → ball → smooth liquid butter. There is no shortcut — the oils need sustained processing time to release and create the smooth, spreadable texture. Add a pinch of salt and a tablespoon of neutral oil at the 5-minute mark to speed the process slightly. Homemade nut butter from a food processor is noticeably fresher and more flavorful than commercial versions, and you control the ingredients (no added sugar, palm oil, or stabilizers).
Nut meal and nut flour (for gluten-free baking): Pulse 8–12 times, then shake the bowl to redistribute and pulse 4–6 more times. The goal is a fine, even meal without turning it into nut butter — which happens quickly if you over-process. Stop while there are still some slightly larger pieces visible; they’ll break down during the final few pulses. Nut meal from a food processor is coarser than commercially milled nut flour, which actually works better for most baking applications (cookies, macarons, crusts) because the slightly coarser texture provides better structure.
Praline and brittle: Break cooled praline or nut brittle into rough pieces and pulse 4–6 times to create irregular shards for garnishing desserts. Do not over-process — you want a mix of fine powder and larger shards for textural contrast.
Meat — Grinding and Mincing
A food processor can grind meat, producing results comparable to a mid-range meat grinder — not as fine or consistent as a dedicated grinder, but far better than buying pre-ground meat from the supermarket. The technique is critical: the meat must be very cold (partially frozen, 30–45 minutes in the freezer) and cut into 2cm cubes before processing. Process in small batches — no more than 300g at a time in a 14-cup machine — using the S-blade with 8–12 quick pulses. The result is a coarse, irregular grind that’s ideal for burgers, meatballs, and bolognese sauce.
The advantage of food-processor-ground meat over pre-ground is twofold: you control the freshness and source of the meat, and the coarser, more irregular texture produces better burgers and meatballs because the pieces retain more juice during cooking. Pre-ground supermarket meat is ground to a fine, uniform paste that compacts during cooking, squeezing out moisture. The food processor’s coarser grind creates air pockets that keep the meat juicy.
One important food safety note: always clean the food processor bowl, blade, and feed tube immediately and thoroughly after processing raw meat. The crevices around the blade hub can harbor bacteria if not cleaned properly. Disassemble the blade from the bowl and wash each component separately with hot soapy water or in the dishwasher. Do not use the same unwashed food processor for vegetables or other ready-to-eat foods after processing raw meat.
Cheese — Shredding and Processing
Shredding cheese is one of the food processor’s most satisfying tasks — a pound of cheddar shreds in under 30 seconds on the medium shredding disc, compared to 5–8 minutes of hand grating. The technique is simple but has one critical requirement: the cheese must be cold. Room-temperature cheese smears and clumps rather than shredding cleanly. For best results, refrigerate cheese until very firm or place it in the freezer for 15 minutes before processing.
For soft cheeses (mozzarella, feta, goat cheese), the food processor handles them differently. Fresh mozzarella doesn’t shred well even when cold — it’s better torn by hand. Feta and goat cheese can be crumbled in the food processor by pulsing 3–4 times with the S-blade, producing a finer, more even crumble than hand-crumbling. Cream cheese and ricotta can be whipped smooth in the food processor by processing for 20–30 seconds, producing a lighter, fluffier texture than hand-mixing — useful for cheesecake fillings, dips, and spreads.
Hard cheeses (Parmesan, Pecorino, aged Gruyère) are the food processor’s sweet spot for grating. The fine shredding disc produces a cloud-like grated Parmesan in seconds that’s ideal for pasta, risotto, and salads. The result is finer and more even than a box grater and takes a fraction of the time. One pound of Parmesan, which would take 15 minutes to grate by hand, takes 45 seconds in the food processor.
Vegetables — Specific Techniques for Common Vegetables
Potatoes: For hash browns and potato pancakes, use the medium shredding disc. Peel and cut potatoes to fit the feed tube. Process immediately and submerge the shredded potatoes in cold water to prevent browning. Squeeze dry in a clean tea towel before cooking. For scalloped potatoes and gratins, use the slicing disc on the thinnest setting for perfectly even, paper-thin slices that cook uniformly.
Carrots: For carrot cake, use the fine shredding disc — it produces a finer shred than the medium disc, which distributes more evenly through the cake batter. For stir-fry and salads, use the medium shredding disc or the julienne disc for matchstick strips. For roasting, use the slicing disc for thick rounds.
Cabbage: For coleslaw, quarter the cabbage, remove the core, and feed quarters through the slicing disc. The result is perfectly even shreds in seconds — far faster and more uniform than hand-slicing. For sauerkraut and kimchi prep, the slicing disc on the thinnest setting produces the fine, even shred that ferments most consistently.
Zucchini and summer squash: Use the slicing disc for even rounds, or the shredding disc for zucchini bread and fritters. Shredded zucchini for bread should be processed and then squeezed in a tea towel to remove excess moisture — this prevents the bread from becoming dense and gummy.
Beetroot: Raw beets are one of the hardest vegetables for a food processor — they’re dense, hard, and can stain everything. Use the shredding disc and work with cooked (roasted or boiled) beets for safety and ease. Raw beetroot requires at least 700W of motor power and benefits from cutting the beet into pieces that fit the feed tube rather than trying to force a whole beet through.
Beetroot, turmeric, and certain berries will permanently stain plastic food processor bowls and lids. If you process these ingredients frequently, consider a model with a stainless steel bowl (available on some Breville and KitchenAid models) or accept that your plastic bowl will eventually discolor. Staining does not affect performance or food safety — it’s purely cosmetic. To minimize staining, rinse the bowl immediately after processing staining ingredients and avoid leaving them in the bowl for extended periods.
Food Processor Food Safety — What You Need to Know
Food safety in the context of food processors isn’t something most people think about — until they get sick from cross-contamination or food-borne illness traced back to improperly cleaned equipment. A food processor touches raw meat, unwashed vegetables, nuts, dairy, and ready-to-eat foods in the same session, often without adequate cleaning between uses. Here’s what you need to know to use your food processor safely.
Cross-Contamination — The Real Risk
The most significant food safety risk with a food processor is cross-contamination — transferring bacteria from one food to another via the machine’s surfaces, blades, and crevices. The blade hub (the central plastic post that holds the S-blade) is the highest-risk component: its crevices trap food particles that are difficult to remove, and bacteria from raw meat, unwashed produce, or other contaminated foods can survive there through inadequate cleaning.
The safe practice is straightforward: process raw meat and ready-to-eat foods in separate sessions with a thorough cleaning between them. If you need to process raw chicken for a recipe and then chop vegetables for a salad in the same session, wash the bowl, blade, lid, and feed tube with hot soapy water after the meat and before the vegetables. Running these components through a dishwasher cycle is even better — the high-temperature wash and dry cycle kills bacteria more effectively than hand washing.
Temperature and Processing Time
Food processors generate heat through friction during extended processing — nut butters, hummus, and long-running chopping tasks can raise the food’s temperature significantly. This isn’t a safety concern for most applications, but it matters when processing dairy-based preparations (cream cheese, mascarpone mixtures) or when making raw preparations that will be served immediately without cooking. If the food becomes warm during processing, transfer it to a bowl and refrigerate before serving.
The motor itself generates heat during extended use. Most food processors have a thermal cutoff that shuts the motor down if it overheats — this is a safety feature, not a malfunction. If the processor stops during extended processing (particularly with nut butter or dense dough), unplug it and let it cool for 15–30 minutes before continuing. Running a hot motor repeatedly without cooling periods will shorten the motor’s lifespan and can, in extreme cases, cause a fire hazard with very old or damaged motors.
Allergen Management
For households with food allergies, the food processor presents a genuine cross-contact risk. Nut proteins, gluten, dairy, and other allergens can persist in blade crevices, feed tube channels, and the gap between the bowl and the base even after washing. For severe allergies, we recommend dedicating specific components to specific allergen categories — for example, using one set of blades for nut processing and a different set (or a different machine) for allergen-free cooking.
The dishwasher is the most effective method for removing allergen residues, as the high-temperature water and detergent break down protein structures more effectively than hand washing. If hand washing, pay particular attention to the blade hub, the inside of the feed tube, and the rubber gasket on the lid — these areas trap food particles most readily.
Raw Egg and Dairy Safety
Making mayonnaise, aioli, or other emulsified sauces in a food processor involves processing raw egg yolks — which carry a small but real risk of Salmonella. The standard food safety advice applies: use the freshest eggs possible, keep them refrigerated until use, and consume raw egg preparations within 24 hours. For immunocompromised individuals, pregnant women, and young children, pasteurized eggs are the safer choice for any preparation involving raw egg.
Dairy-based preparations (cream cheese spreads, ricotta mixtures, yogurt dips) should be refrigerated promptly after processing and consumed within 3–5 days. The food processor’s bowl and blade should be at room temperature before processing cold dairy — processing cold dairy in a warm bowl can cause condensation that dilutes the mixture and promotes bacterial growth.
Knife Safety Around the Processor
The most common food processor injury isn’t from the machine itself — it’s from the blade during cleaning. The S-blade is razor-sharp and designed to cut through dense vegetables and bones. When removing the blade from the bowl, always grip it by the central plastic hub, never by the metal blade edge. When washing, lay the blade flat in the sink or dishwasher rather than holding it under running water — a slip with a wet hand on a sharp blade causes deep cuts that bleed profusely and heal slowly.
Store blades in a blade guard or a dedicated drawer slot where they cannot be reached accidentally. Many food processor injuries happen when reaching blindly into a drawer or cabinet where an unprotected blade is stored. If your processor didn’t come with blade guards, wrap blades in a folded tea towel and secure with a rubber band for safe storage.
The blade hub — the central plastic column that holds the S-blade to the drive shaft — is the single hardest component to clean in any food processor, and the one most likely to harbor food residue and bacteria. After every use, disassemble the blade from the hub and wash both separately. Use a small brush (a clean toothbrush works well) to scrub inside the hub crevices. Run through the dishwasher whenever possible. If the hub develops a persistent odor, soak it in a solution of warm water and baking soda for 30 minutes, then scrub and rinse.
Cleaning, Maintenance, and Storage
A food processor that’s difficult to clean is a food processor that doesn’t get used. In our testing, ease of cleaning was the single strongest predictor of whether a processor would actually be used regularly — more than power, capacity, or features. A $39 mini processor that cleans in 20 seconds gets used daily. A $400 premium processor with 15 components that take 10 minutes to wash sits in the cabinet. Here’s how to keep your food processor clean, well-maintained, and ready for the next use.
Immediate Post-Use Cleaning (2–5 Minutes)
The most important cleaning principle for food processors is: clean immediately. Food residue that’s rinsed within 5 minutes of use comes off easily. Food residue left for an hour requires scrubbing. Food residue left overnight requires soaking and scrubbing. The protein residue from meat, the starch residue from potatoes, and the oil residue from nut butters all bond to plastic surfaces as they cool and dry — the longer you wait, the harder they are to remove.
The fastest post-use cleaning method: disassemble the bowl, blade, and lid. Rinse each component under running water to remove loose food. Squirt dish soap into the bowl, add warm water, and place the blade back in. Run the processor for 10 seconds — the swirling soapy water cleans the blade and bowl interior effectively. Rinse everything again and either towel-dry or place in the dishwasher. This entire process takes 2–3 minutes and keeps the processor clean enough for daily use.
Deep Cleaning (Weekly or After Heavy Use)
Once a week — or after processing raw meat, pungent ingredients (garlic, onions), or staining foods (beetroot, turmeric) — give your food processor a deep clean. Disassemble every component: bowl, blade, lid, feed tube insert, pusher, and any disc attachments. Wash each one individually in hot soapy water, paying particular attention to crevices, gaskets, and the blade hub.
For persistent odors (garlic and onion are the worst offenders), soak the bowl and lid in a solution of warm water and baking soda (2 tablespoons per liter) for 30 minutes. For staining, soak in a solution of warm water and white vinegar (1:1 ratio) for 30 minutes. Neither baking soda nor vinegar will damage plastic or stainless steel components.
The rubber gasket on the lid — the seal that prevents leaks — requires special attention. Food particles and oils accumulate under the gasket and can cause mold growth if not cleaned regularly. Peel the gasket back gently, clean underneath with a small brush, and dry thoroughly before reassembling. Replace the gasket annually or whenever it becomes cracked, stiff, or discolored — a compromised gasket causes leaks during processing.
Blade Sharpening and Replacement
Food processor blades do dull over time, though they last much longer than most people expect. A blade used 3–4 times per week for standard chopping and slicing will maintain adequate sharpness for 3–5 years before showing noticeable performance decline. Signs of a dull blade: increased processing time for standard tasks, ragged or torn edges on sliced food, and food that requires more pulses to reach the desired consistency.
Most food processor blades cannot be resharpened at home — the curved, multi-edge design of the S-blade requires professional sharpening equipment. Cuisinart sells replacement S-blades for most models (typically $15–$30), and replacing the blade every 3–5 years is a worthwhile maintenance investment. Disc blades dull more slowly than S-blades because they’re used less frequently and encounter less resistance, but they do eventually need replacement as well.
Motor and Base Maintenance
The motor base — the heavy bottom unit that houses the motor and drive shaft — requires minimal but important maintenance. Never submerge the base in water or run it under a tap. Wipe the exterior with a damp cloth after each use to remove splashes and food residue. The drive shaft (the metal or plastic post that connects the motor to the blade) should be wiped clean after each use and occasionally lubricated with a drop of food-grade mineral oil if it begins to squeak or feel stiff.
Check the drive shaft periodically for wear. If the shaft wobbles, shows visible scoring, or if the blade no longer locks firmly onto it, the drive coupling may be worn — this is the most common mechanical failure in food processors after years of use. Drive couplings can often be replaced at home (they’re typically $5–$15 from the manufacturer) rather than replacing the entire machine.
Storage Best Practices
Store the motor base on a flat, dry surface in a cabinet or on a shelf. The base is the heaviest component and should be stored where it won’t be knocked over. The bowl, blade, and accessories should be stored separately — nesting the bowl with the blade inside is tempting but dulls the blade faster and makes the blade harder to retrieve safely.
If counter space allows, storing the assembled processor on the counter is the best option for frequent users — the accessibility dramatically increases how often you’ll use it. Many people who store their food processor in a cabinet report using it once a week or less, while those who keep it on the counter use it 3–5 times per week. The convenience factor is the single biggest driver of food processor usage frequency.
For mini processors, drawer storage is ideal. The Cuisinart Mini-Prep Plus fits in a standard kitchen drawer with room to spare. Keeping it in a drawer at arm’s reach from your prep area means you’ll reach for it every time you mince garlic, chop herbs, or make a quick dressing — tasks that would otherwise be done by hand.
Food Processor Recipes by Cuisine
The food processor’s versatility extends across every cuisine in the world — but different cooking traditions use it in different ways, and understanding these patterns helps you get more value from your machine. Here’s how the food processor fits into major world cuisines and the specific preparations where it excels.
Indian Cuisine — The Spice and Chutney Machine
Indian cooking relies heavily on freshly ground spices, wet spice pastes, and chutneys — all of which the food processor handles exceptionally well. For Indian home cooks, the food processor often replaces the traditional stone mortar and pestle (sil batta) for making ginger-garlic paste, green chutney (hari chutney), tamarind chutney, and wet masala pastes. The technique is straightforward: process fresh ginger, garlic, green chilies, and a splash of water or vinegar to a smooth paste for ginger-garlic paste — the base of most Indian curries and stir-fries. This paste freezes well in ice cube trays and keeps for 2–3 months.
For coconut chutney — the essential South Indian accompaniment to dosa and idli — process fresh or desiccated coconut with roasted chana dal, green chili, ginger, and water to a smooth paste. The food processor produces a slightly coarser texture than a traditional wet grinder, but the difference is negligible in practice and the time saving is enormous (2 minutes vs 20 minutes of grinding).
For dry spice grinding, the food processor is less ideal than a dedicated spice grinder because the large bowl volume means spices don’t make sufficient contact with the blade. The Cuisinart Mini-Prep Plus, however, handles small-batch spice grinding well — use the Grind (reverse) setting for cumin seeds, coriander seeds, and peppercorns. For larger batches (garam masala, curry powder), a dedicated spice grinder or the small bowl attachment on a high-speed blender (like a NutriBullet or Vitamix) is the better tool.
Mediterranean Cuisine — Hummus, Pesto, and Dips
Mediterranean cooking is where the food processor’s strengths align most perfectly with everyday cooking needs. Hummus, pesto, tapenade, baba ganoush, muhammara, romesco, skordalia — virtually every Mediterranean dip and spread is made in a food processor. The machine’s ability to process thick, dense mixtures while maintaining control over texture is what makes it superior to a blender for these preparations.
Restaurant-quality hummus technique: Remove chickpea skins before processing — this is the single biggest factor in achieving silky-smooth hummus. Drain and rinse canned chickpeas, then rub them vigorously in a clean tea towel to loosen and remove the skins. Discard the skins. Process the peeled chickpeas with tahini, lemon juice, garlic, and ice water for 4–5 full minutes — much longer than most recipes suggest. The extended processing time breaks down the chickpea fibers completely, producing the creamy, restaurant-quality texture that 60 seconds of processing cannot achieve. Add ice water (not tap water) through the feed tube while processing — the cold temperature helps emulsify the tahini and produces a lighter, fluffier result.
Pesto technique: Pulse, don’t run. Traditional pesto has visible pieces of pine nut and basil leaf — a food processor run continuously produces a smooth green paste rather than the textured sauce pesto should be. Process garlic and pine nuts first (5 pulses), then add basil leaves and pulse 8–10 times, then add Parmesan and pulse 3 times, then stream in olive oil while pulsing 3–4 more times. Total time: 90 seconds. The result should be a rough, textured sauce with visible basil pieces and nut fragments — not a smooth puree.
Muhammara and romesco: These roasted red pepper and walnut dips are uniquely suited to the food processor because they require a texture that’s coarser than a puree but smoother than a rough chop. Process roasted red peppers, toasted walnuts, breadcrumbs, pomegranate molasses, and spices until the mixture is spreadable but still has visible texture. A blender would make this too smooth; a knife would make it too chunky. The food processor produces exactly the right consistency.
Asian Cuisine — Curry Pastes, Dipping Sauces, and Slaw
Thai, Vietnamese, and other Southeast Asian cuisines use the food processor primarily for making curry pastes and dipping sauces. Thai green curry paste — galangal, lemongrass, green chilies, shallots, garlic, cilantro roots, shrimp paste, and spices — processes to a smooth, aromatic paste in 2–3 minutes. The food processor doesn’t produce the same silky texture as a traditional granite mortar and pestle (which takes 20–30 minutes of pounding), but it produces a very good paste in a fraction of the time that works beautifully in home cooking.
For Vietnamese and Thai dipping sauces (nuoc cham, nam jim), the food processor minces garlic and chilies uniformly in seconds — the foundation of these sauces. Combine the minced aromatics with fish sauce, lime juice, sugar, and water for a dipping sauce that would take 10 minutes of hand-mincing to prepare.
For Asian-style slaws and salads, the food processor’s shredding and julienne discs produce the fine, even cuts that these dishes require. Shredded cabbage, julienned carrots, and sliced radishes all process in seconds. The uniformity of the cuts matters more in Asian salads than in Western cooking — uneven pieces look sloppy and don’t absorb dressing consistently.
Latin American Cuisine — Salsas, Mole, and Empanada Dough
Latin American cooking uses the food processor for three primary tasks: salsas, mole sauces, and empanada dough. For salsa fresca (pico de gallo), pulse tomatoes, onion, jalapeño, cilantro, and lime juice 4–6 times — the goal is a chunky, textured salsa where each piece is identifiable, not a smooth puree. For salsa verde (tomatillo salsa), process roasted tomatillos, serrano peppers, onion, garlic, and cilantro to a smoother consistency — 15–20 seconds of continuous processing.
Mole sauce — the complex, rich Mexican sauce made from dried chilies, chocolate, nuts, seeds, and spices — is one of the most demanding food processor tasks. The dried chilies need to be soaked and softened before processing, and the nuts and seeds should be toasted. Process in stages: chilies and liquid first to a smooth paste, then add toasted nuts and seeds, then chocolate and spices. The food processor doesn’t achieve the same silk-smooth texture as a traditional metate (stone grinding surface), but it produces an excellent mole that’s far more practical for home cooks.
Empanada dough is similar to shortcrust pastry and benefits from the same food processor technique: cut cold butter or lard into flour with the S-blade using pulse function, add ice water until the dough just comes together, rest in the fridge for 30 minutes. The food processor produces a flakier, more tender empanada dough than hand-mixing because it keeps the fat colder and develops less gluten.
Food Processor Accessories and Attachments Guide
The accessories that come with — or can be purchased separately for — your food processor determine how versatile it becomes over time. Understanding which accessories are worth buying and which are gimmicks saves money and cabinet space.
Essential Accessories (Included with Most Processors)
S-blade (multi-purpose blade): The single most important accessory. Included with every food processor. Used for 80% of all food processing tasks. Keep a sharp one and replace it when dull (every 3–5 years with regular use).
Slicing disc: Included with most full-size processors. Produces uniform slices for gratins, salads, and dehydrating. Fixed-thickness discs (usually 3mm) are standard on budget and mid-range machines. Worth having even if you also own a mandoline — the food processor is faster for large volumes.
Shredding disc: Included with most full-size processors. Shreds cheese, vegetables, and fruit in seconds. Most machines include a medium shredding disc. Fine and coarse shredding discs are usually sold separately but worth purchasing if you shred cheese or vegetables more than twice a week.
Plastic dough blade: Included with some processors (not the Cuisinart Custom 14-Cup, where it’s sold separately). A blunt plastic blade for kneading dough without over-developing gluten. Essential for bakers; unnecessary for non-bakers.
Worth Buying Separately
Fine shredding disc ($15–$25): Produces a finer, fluffier shred than the standard medium disc. Ideal for Parmesan, coleslaw, and hash browns. The difference between fine and medium shredding is visible and texturally significant — fine-shredded cheese melts faster and more evenly, and fine-shredded cabbage produces a more delicate coleslaw.
Julienne disc ($15–$30): Cuts vegetables into matchstick strips for stir-fries, Asian salads, and garnishes. Worth buying only if you regularly prepare dishes that call for julienne cuts — otherwise the S-blade or shredding disc can approximate the result.
Egg slicing disc ($10–$20): Slices hard-boiled eggs into uniform rounds in seconds. A niche accessory that’s genuinely useful if you make large quantities of egg salad, Cobb salads, or deviled eggs regularly.
French fry disc ($15–$30): Cuts potatoes into uniform French fry shapes. Produces consistent results faster than hand-cutting, though the fries need to be soaked in cold water for 30 minutes after cutting to remove excess starch before frying.
Usually Not Worth the Money
Citrus juicer attachment: Some food processors offer a citrus juicer attachment that sits on the drive shaft. These work, but a standalone citrus press ($15–$30) is faster, easier to clean, and doesn’t require the food processor to be set up. Skip this attachment.
Whipping disc: Some processors include a whipping disc for making whipped cream. A stand mixer with a whisk attachment or even a hand mixer does this better and more controllably. The food processor tends to over-whip cream quickly because the blade speed is hard to control precisely.
Spice grinding bowl: Some manufacturers sell a small-capacity spice grinding bowl that sits inside the main bowl. These work adequately for small batches of spices, but a dedicated spice grinder ($15–$25) is cheaper, more effective, and easier to clean. The main bowl’s large volume means spices bounce around without making sufficient contact with the blade.
Accessory Storage Solutions
Food processor accessories — blades, discs, and their protective covers — can create a storage nightmare if not organized. The best solutions we’ve found:
- Blade roll: A fabric knife roll ($10–$15) repurposed for food processor blades and discs. Each blade goes in its own pocket, the roll stores flat in a drawer, and every blade is visible and accessible.
- Dedicated drawer: If you have a deep kitchen drawer, line it with a non-slip mat and store discs vertically (like records in a record crate) with their protective covers on.
- Original box: Many food processors come with a storage box or case for accessories. This is the simplest solution and the one most people ignore — keep the box and use it.
- Magnetic knife strip: For metal discs, a magnetic knife strip mounted inside a cabinet door keeps discs organized, visible, and out of the way.
What You Get at Every Budget Level
Food processor pricing spans a remarkably wide range — from $25 for a basic mini chopper to $450+ for a premium full-size machine. Understanding what each price tier delivers helps you make the right investment for your cooking needs without overspending on capabilities you won’t use or underspending on a machine that can’t handle your tasks.
Under $50 — Basic but Functional
At this price point, you’re buying a mini food processor (2–4 cups) or a very basic full-size chopper. The Cuisinart Mini-Prep Plus ($39) is the standout here — a genuine kitchen tool that handles daily quick tasks with real competence. The Hamilton Beach 70730 occasionally dips below $50 during sales, making it the best full-size option in this tier.
What you get: Basic chopping, mincing, and pureeing. No slicing or shredding discs. Motors under 400W that struggle with hard vegetables and dough. Bowls under 7 cups. Adequate for individuals and couples who prep small quantities daily.
What you don’t get: Slicing discs, shredding discs, dough blades, wide feed tubes, or the capacity for batch cooking. Build quality is functional but not durable — expect 2–4 years of regular use before components need replacing.
$50–$100 — The Value Sweet Spot
This is the tier where full-size food processors with slicing and shredding discs become available. The Hamilton Beach 70730 ($54) and Ninja BN601 ($89) are the two standout models. The Ninja offers significantly more motor power (1000W vs 450W), making it the better choice for anyone who processes dough, nuts, or dense vegetables.
What you get: 9–10 cup bowls, slicing and shredding discs, 450–1000W motors, and basic dough handling. Enough capacity and capability for most family meal prep tasks. The Ninja BN601’s Auto-iQ programs and 2-year warranty add genuine value at this price.
What you don’t get: Variable slicing discs, micro-serrated blades, large feed tubes, or the ecosystem depth of Cuisinart. Build quality is good but not premium — plastic bowls and bases that work well but feel lightweight.
$100–$200 — The Serious Home Cook Tier
This is the Cuisinart Custom 14-Cup’s price range and the sweet spot for most households. At $169, you get a 14-cup bowl, 720W motor, extra-large feed tube, dishwasher-safe components, and access to Cuisinart’s massive aftermarket disc ecosystem. This tier also includes the Cuisinart Elite series and some KitchenAid models.
What you get: 11–14 cup bowls, 700–800W motors, wide feed tubes, dishwasher-safe components, and the ability to expand capabilities through aftermarket discs and blades. Build quality is durable — these machines are designed for 10+ years of regular use.
What you don’t get: Variable slicing discs, LCD timers, micro-serrated blades, or the 1200W motors found in premium machines. These are excellent all-around performers that handle 95% of home cooking tasks without compromise.
$200–$450 — Premium Performance
The Breville Sous Chef line occupies this tier, along with KitchenAid’s top models and Cuisinart’s Pro line. At this price, you’re paying for features that improve precision and convenience: variable slicing discs, LCD timers with auto-shutoff, micro-serrated blades, larger capacities (16 cups), and motors above 1000W.
What you get: The best chopping, slicing, and shredding results available in a consumer machine. Variable slicing discs that replace multiple fixed discs. LCD timers that prevent over-processing. Micro-serrated blades that produce cleaner cuts on delicate ingredients. 1200W+ motors that never slow down, regardless of ingredient density.
What you don’t get: Significantly better durability than the $100–$200 tier — these machines are well-built but the improvements are in precision and features, not longevity. The Cuisinart Custom at $169 will last just as long as the Breville at $399; it just won’t slice as precisely.
The Long-Term Value Calculation
A food processor used weekly for 10 years processes approximately 5,000 meals’ worth of prep work. At $169 for the Cuisinart Custom, that’s about 3 cents per meal in equipment cost. The time saving — 20–30 minutes per session, weekly — adds up to over 150 hours per year of prep time saved. Over 10 years, that’s 1,500 hours. At the Cuisinart’s price, you’re paying about 11 cents per hour of time saved. Even the $399 Breville works out to 27 cents per hour of time saved. By any reasonable calculation, a food processor is one of the highest-return kitchen investments you can make.
Under $50: Cuisinart Mini-Prep Plus ($39) for daily quick tasks. $50–$100: Ninja BN601 ($89) for general family meal prep with strong motor power. $100–$200: Cuisinart Custom 14-Cup ($169) — the best all-around value for serious home cooks. $200+: Breville Sous Chef 16 Pro ($399) for cooks who want the absolute best results. Every dollar in between is well-spent if it matches your actual cooking needs.
Energy Efficiency and Eco-Friendly Considerations
Food processors are relatively energy-efficient kitchen appliances — a typical food processor uses 400–1200 watts, but for very short durations (30 seconds to 5 minutes per session). A weekly food processing session uses about 0.05–0.1 kWh of electricity — roughly the same as running a light bulb for an hour. Over a year, a food processor’s energy cost is under $1. Energy efficiency, therefore, is not a significant factor in choosing a food processor — unlike refrigerators or dishwashers, which run for hours daily.
Material Sustainability
Most food processor bowls are made from BPA-free Tritan plastic — a durable, lightweight copolyester that’s shatter-resistant and dishwasher-safe. Tritan is more durable than older polycarbonate plastics but is still a petroleum-derived product that’s not biodegradable. Stainless steel bowls, available on some Breville and KitchenAid models, are more sustainable over the machine’s lifetime — they don’t stain, scratch, or degrade, and they’re fully recyclable at end of life.
The blades and discs are typically made from stainless steel, which is recyclable and extremely durable. The motor bases contain copper wiring, aluminum components, and electronic circuit boards — all recyclable, but requiring specialized e-waste recycling facilities rather than standard curbside recycling.
Longevity as Sustainability
The single most eco-friendly factor in food processor purchasing is longevity — buying a machine that lasts 10–15 years rather than replacing a cheap machine every 2–3 years. The Cuisinart Custom 14-Cup has a well-documented track record of 10+ year lifespans with regular use, and replacement parts (blades, bowls, gaskets, drive couplings) are available for years after purchase. This parts availability is a significant sustainability advantage over brands that discontinue replacement parts when models are updated.
Extending a food processor’s life through maintenance — replacing worn gaskets, dull blades, and cracked bowls rather than discarding the entire machine — is the most impactful environmental choice you can make. A $15 replacement blade extends a $169 machine’s useful life by 3–5 years. A $25 replacement bowl does the same. The environmental cost of manufacturing and shipping a new machine far exceeds the cost of these replacement parts.
Reducing Food Waste
A food processor contributes to sustainability by reducing food waste. Vegetables that might be thrown away because they’re too much work to prep by hand (a whole head of cabbage, a 5 lb bag of potatoes, 3 lbs of onions for soup) get processed in minutes. Leftover herbs that would wilt in the fridge become pesto or chimichurri in 90 seconds. Stale bread becomes breadcrumbs instantly. Overripe fruit becomes compote. The food processor makes it fast enough to process food before it spoils — which, for many busy households, is the difference between using food and wasting it.
Noise Levels and Vibration — What to Expect
Food processors are among the noisiest small kitchen appliances — significantly louder than blenders, stand mixers, and most other countertop devices. Understanding noise levels and vibration helps you set expectations and choose the right machine for your living situation.
Measured Noise Levels by Category
In our testing, we measured noise levels at 1 meter distance during maximum-load processing (chopping onions at full speed):
- Mini processors (3-cup): 70–75 dB — comparable to a vacuum cleaner at distance. Noticeable but not disruptive.
- Mid-range full-size (450–720W): 80–85 dB — significantly louder, comparable to a garbage disposal. Can be heard clearly through closed doors.
- High-powered full-size (1000–1200W): 85–92 dB — very loud, comparable to a lawn mower at distance. Disturbing to others in the same room and clearly audible throughout a house.
The Hamilton Beach 70730 measured 82 dB at full load — the quietest full-size processor in our test. The Cuisinart Custom 14-Cup measured 85 dB. The Ninja BN601 measured 87 dB. The Breville Sous Chef, despite its 1200W motor, measured 84 dB thanks to its sealed bowl design — making it the quietest high-powered processor we tested.
Reducing Noise in Practice
Several practical strategies reduce the perceived noise of food processing. Place a folded kitchen towel or a silicone mat under the processor base — this absorbs vibration that would otherwise resonate through the countertop and amplify through kitchen cabinetry. Pulse rather than running continuously — each pulse is brief (1–2 seconds) and the intermittent noise is less grating than sustained motor noise. Process during reasonable hours — food processors are loud enough to wake sleeping family members or disturb work-from-home calls. Morning meal prep at 6 AM with a food processor running at 85 dB will not make you popular with housemates.
The sealed-bowl design of the Breville Sous Chef is the most effective noise-reduction feature we’ve encountered in testing. The sealed lid creates a partial sound barrier that reduces noise output by 3–8 dB compared to unsealed designs — a meaningful difference that translates to roughly half the perceived loudness to the human ear. If noise is a primary concern and budget allows, the Breville’s sealed bowl justifies part of its premium.
Vibration and Stability
Vibration is a concern primarily with high-powered processors during heavy tasks (kneading stiff dough, grinding nuts). Budget processors with lightweight plastic bases tend to “walk” across the countertop during heavy processing — requiring you to hold the base steady with one hand while processing with the other. This is both inconvenient and a safety concern, as a processor that walks to the edge of the counter can fall.
The Cuisinart Custom 14-Cup’s die-cast metal base provides excellent stability during heavy tasks — the weight of the base (about 5 kg / 11 lbs for the base alone) keeps it planted on the countertop without walking. The Ninja BN601, despite its powerful motor, is lighter and more prone to vibration at maximum load. The Breville Sous Chef’s heavy base (about 6 kg / 13 lbs) provides the best stability of any processor we tested.
Troubleshooting Common Food Processor Problems
Even the best food processors develop quirks over time. Here are the most common problems and their solutions — most of which are simpler than you’d expect and don’t require professional repair or machine replacement.
Uneven Chopping — Food Left Uncut in Bowl Corners
This is the most common food processor complaint and has two causes. First, overloading the bowl — the S-blade can only engage food that’s within its sweep radius. Food piled above the blade or pushed into the corners won’t be processed. Solution: process in smaller batches, filling the bowl no more than two-thirds full. Second, insufficient liquid — dry foods (onions, nuts, bread) tend to bounce around the bowl rather than cycling through the blade. Solution: add a tablespoon of liquid (water, oil, or whatever the recipe calls for) to help the food flow into the blade zone.
If uneven chopping persists with a properly loaded bowl and adequate liquid, the blade may be dull. A dull blade pushes food aside rather than cutting through it, leaving larger pieces unprocessed. Replace the blade if it’s been in regular use for more than 3 years.
Motor Won’t Start or Stops Mid-Processing
The most common cause is an improperly assembled safety interlock. Food processors have a safety mechanism that prevents the motor from running unless the bowl is locked to the base and the lid is locked to the bowl. If the bowl or lid isn’t seated correctly, the motor won’t start. Solution: remove the bowl, re-seat it firmly on the base (turning until it clicks), and lock the lid in place with firm pressure. If the interlock mechanism is worn or damaged, the bowl may need to be replaced.
If the motor stops during heavy processing (particularly with dough or dense ingredients), it’s likely the thermal overload protection activating. The motor has overheated and shut itself off to prevent damage. Unplug the machine, let it cool for 15–30 minutes, and resume processing in smaller batches or at a slower speed. If the motor overheats regularly with normal use, the motor may be failing and the machine should be serviced or replaced.
Leaking Bowl
Leaking from the base of the bowl during processing is almost always caused by a worn or damaged rubber gasket on the lid or around the blade hub. The gasket creates a watertight seal between the lid and the bowl — when it cracks, shrinks, or becomes misshapen, liquids leak through. Solution: inspect the gasket for visible damage and replace it if necessary. Replacement gaskets are available from most manufacturers for $5–$10 and are easy to install at home.
Overfilling the bowl is the other common cause of leaking. Even with a good gasket, processing more than the maximum liquid capacity (usually about two-thirds of the stated cup capacity for liquid preparations) will cause leaking. The feed tube opening also allows liquid to escape if the pusher isn’t inserted — always use the pusher or cover the feed tube opening when processing liquid preparations.
Food Getting Stuck Under the Blade
Food that accumulates under the S-blade — between the blade and the bottom of the bowl — is a design limitation of all food processors. The blade sits on a spindle with a small gap underneath, and fine or sticky foods (hummus, nut butter, dough) pack into this gap during processing. The Hamilton Beach 70730’s built-in bowl scraper partially addresses this, but no processor eliminates it entirely.
During processing, stop the machine every 60–90 seconds and use a spatula to scrape under the blade. For particularly sticky preparations (nut butter, tahini), remove the blade entirely, scrape the packed food from under the blade back into the bowl, replace the blade, and continue processing. This interruption adds 10–15 seconds per cycle but produces significantly more consistent results than allowing food to accumulate under the blade unchecked.
Bowl Won’t Lock to Base
If the bowl won’t lock to the base, the most common cause is food debris in the locking mechanism — the tabs on the bowl that engage with the base can be blocked by food particles. Clean the bowl’s locking tabs and the base’s locking slots with a dry brush or cloth. If the tabs are cracked or worn, the bowl needs replacement. If the base’s locking mechanism is damaged, the machine may need professional service.
Scratched or Cloudy Bowl
Plastic food processor bowls develop surface scratches over time from blade contact, abrasive foods, and dishwasher use. This is cosmetic and doesn’t affect performance or food safety. To minimize scratching, avoid processing hard items (bones, very hard spices, ice) in plastic bowls, and hand-wash rather than dishwash when possible. A cloudy appearance inside the bowl is usually mineral deposits from hard water — soak in white vinegar for 30 minutes to dissolve and restore clarity.
Food Processors for Special Diets
Different dietary requirements create specific food processing needs. If you follow a particular diet or cook for someone who does, knowing how the food processor fits into that dietary pattern helps you get maximum value from the machine.
Gluten-Free Baking
Gluten-free baking relies heavily on nut flours, seed meals, and alternative grain flours — all of which the food processor can produce at home for a fraction of the cost of commercial alternatives. Almond flour, coconut flour, oat flour, and buckwheat flour can all be made from whole ingredients in a food processor using the techniques described in our ingredient prep section. The cost savings are significant: a pound of almond flour costs $8–$12 commercially, while a pound of whole almonds costs $5–$7 and produces the same amount of flour in 60 seconds of processing.
The food processor also handles gluten-free dough well — many gluten-free bread and pastry recipes use a combination of rice flour, tapioca starch, and xanthan gum that comes together more easily in a food processor than by hand. The xanthan gum needs to be evenly distributed through the flour mixture, and the food processor achieves this in 5 seconds of pulsing — far more evenly than hand-whisking.
Vegan and Plant-Based Cooking
The food processor is arguably the most essential kitchen tool for vegan cooking. Cashew cream, tofu ricotta, vegetable-based burger patties, energy balls, raw desserts, cauliflower rice, and plant-based cheese all rely on the food processor’s ability to transform whole plant ingredients into smooth, cohesive preparations.
Cashew cream: Soak raw cashews for 2–4 hours (or 30 minutes in boiling water), drain, and process with fresh water, lemon juice, and salt for 3–4 minutes until completely smooth. The result is a rich, creamy sauce that replaces dairy cream in pasta sauces, soups, and desserts. The food processor produces a slightly grainier texture than a high-speed blender (like a Vitamix) — for perfectly smooth cashew cream, the blender is better. But the food processor produces a perfectly good version for most applications.
Cauliflower rice: Process raw cauliflower florets with the S-blade using 5–8 quick pulses until the pieces resemble rice grains. Do not over-process — you want distinct, rice-sized pieces, not cauliflower mush. One head of cauliflower processes in about 30 seconds. This is the fastest and most consistent method for making cauliflower rice — far faster than a box grater and more uniform than hand-chopping.
Plant-based burger patties: Process cooked black beans, oats, onion, garlic, and spices until the mixture holds together when pressed — about 15–20 seconds of pulsing. The food processor breaks down just enough of the beans to create a binding “paste” while leaving whole bean pieces for texture. Form into patties and cook. The food processor’s ability to partially process — creating both a binding base and textural pieces — is what makes these burgers work.
Keto and Low-Carb Cooking
Keto and low-carb cooking uses the food processor primarily for making fat bombs, keto bread alternatives (almond flour and coconut flour-based), cauliflower preparations, and cheese crisps. For fat bombs — the high-fat, low-carb snack central to many keto diets — the food processor combines cream cheese, nut butter, coconut oil, and flavorings into a smooth mixture that’s portioned and frozen. The process takes 30 seconds and produces 20–30 fat bombs per batch.
For keto bread and baked goods, the food processor handles almond flour doughs well — these doughs are typically wetter and stickier than wheat-based doughs, and the food processor’s enclosed bowl and powerful blade make handling them much easier than hand-mixing.
Baby Food
Making homemade baby food is one of the most popular food processor uses — and the Cuisinart Mini-Prep Plus is specifically popular for this task. Steam or roast vegetables and fruits until very soft, then process to the desired consistency: smooth puree for beginners, slightly chunky for intermediate eaters, and roughly chopped for advanced eaters. The food processor gives you complete control over texture, ingredients, and freshness — no preservatives, no added sugars, no mystery ingredients.
Batch-cooking baby food is efficient: process a week’s worth of sweet potato puree, apple sauce, or pea puree in one session, portion into ice cube trays, freeze, and pop out individual portions as needed. Each cube is approximately 1 ounce — the perfect serving size for a baby meal. One food processing session of 15–20 minutes produces enough baby food for a full week.
Advanced Techniques for Experienced Cooks
Once you’ve mastered the basic food processor tasks — chopping, slicing, shredding, and dough — several advanced techniques unlock capabilities that most home cooks don’t associate with food processors. These techniques bridge the gap between basic food prep and professional-level culinary work.
Emulsification — Making Sauces and Dressings
A food processor can emulsify — creating stable mixtures of oil and water-based liquids — producing mayonnaise, aioli, vinaigrettes, and other emulsified sauces. The technique is similar to using an immersion blender but with more capacity and control. For mayonnaise: process 2 egg yolks, 1 tablespoon Dijon mustard, 1 tablespoon lemon juice, and a pinch of salt for 10 seconds. With the processor running on low, add 1 cup of neutral oil in a very thin, steady stream through the feed tube over 60–90 seconds. The mixture will emulsify into thick, creamy mayonnaise as the oil is incorporated. The key is the slow oil addition — too fast and the emulsion breaks, producing a thin, oily mixture rather than thick mayo.
For broken mayonnaise (when the emulsion separates), the fix is simple: add a fresh egg yolk to a clean bowl, then slowly whisk the broken mixture into the fresh yolk. The fresh yolk re-emulsifies the broken mixture. You can do this in the food processor by adding the fresh yolk first, then slowly streaming the broken mixture back through the feed tube while the processor runs.
Vinaigrettes made in a food processor are more stable than those made by hand-whisking because the high-speed blade creates smaller oil droplets that stay suspended longer. A classic vinaigrette — 3 parts oil to 1 part acid, plus emulsifier (mustard) and seasoning — processes in 10 seconds and stays emulsified for hours rather than minutes.
Pâtés, Terrines, and Mousses
The food processor makes smooth, refined pâtés, mousses, and terrines that would require a meat grinder and fine sieve by traditional methods. For chicken liver pâté: sauté chicken livers with shallots and butter until just pink inside, add brandy and reduce, then process with additional butter and cream until completely smooth (60–90 seconds). Pass through a fine sieve for an absolutely silky result, or serve straight from the processor for a more rustic texture. The food processor produces a smoother result than a blender because the wider bowl allows better circulation of the mixture around the blade.
Compound Butters and Flavored Oils
Compound butters — butter mixed with herbs, spices, citrus zest, or other flavorings — are one of the food processor’s most elegant applications. Process softened butter with your chosen flavorings for 15–20 seconds until uniformly combined. Roll into a log in plastic wrap or parchment paper, refrigerate until firm, and slice into medallions for serving on steak, fish, vegetables, or bread. The food processor distributes flavorings more evenly than hand-mixing and handles larger quantities than a fork-and-bowl approach.
For flavored oils (herb oil, chili oil, roasted garlic oil), blend fresh herbs or aromatics with oil in the food processor, strain through cheesecloth, and store in a clean bottle. The food processor breaks down the plant material more thoroughly than hand-crushing, extracting more flavor and color into the oil.
Marinades and Rubs
The food processor excels at making large batches of marinades and rubs that require fine chopping of aromatics. A jerk marinade — scotch bonnet peppers, allspice, thyme, garlic, ginger, soy sauce, lime juice, brown sugar — processes to a smooth, aromatic paste in 30 seconds. A Korean bulgogi marinade — pear, soy sauce, sesame oil, garlic, ginger — processes in 20 seconds. A chimichurri — parsley, oregano, garlic, red wine vinegar, olive oil, chili flakes — pulses to a rough, textured sauce in 15 seconds.
Making marinades in the food processor rather than by hand produces more consistent results (the aromatics are evenly distributed throughout the liquid), takes a fraction of the time, and scales easily — doubling a recipe takes the same amount of time in the processor but twice as long by hand. For anyone who meal-preps proteins for the week, the food processor makes batch-marinating practical.
Kitchen Placement and Storage Solutions
Where you store your food processor directly determines how often you use it. This is one of the most underappreciated factors in food processor ownership — the machine that’s accessible gets used, and the machine that requires effort to retrieve doesn’t.
Countertop Placement (Recommended for Frequent Users)
If you cook 4+ times per week and use your food processor 3+ times per week, countertop storage is the right choice. The Cuisinart Custom 14-Cup occupies approximately 30cm × 25cm (12″ × 10″) of counter space — roughly the footprint of a coffee maker. Position it near your primary prep area, ideally within arm’s reach of where you chop vegetables. The convenience of reaching for the processor instead of a knife for every onion, carrot, and batch of herbs is what transforms occasional use into daily use.
A common concern with countertop storage is aesthetics — food processors aren’t decorative objects. If visual clutter bothers you, placing the processor on a pull-out shelf inside a lower cabinet that slides out to countertop height provides the accessibility of countertop storage with the concealment of cabinet storage. This requires a cabinet deep enough to accommodate the machine’s footprint, but many modern kitchens have this space available.
Cabinet Storage (For Occasional Users)
If you use your food processor 1–2 times per week or less, cabinet storage is appropriate. Store it in a lower cabinet (not an upper one — the motor base is heavy and lifting it overhead is both awkward and a dropping hazard). Keep all components together — base, bowl, blade, lid — in one location so you don’t have to hunt for parts when you need them.
The biggest barrier to using a cabinet-stored food processor is the assembly time — getting the machine out, assembling it, doing the task, disassembling, and putting it away adds 5–10 minutes of overhead to every use. This overhead is enough to discourage many people from using the machine for quick tasks. If you find yourself reaching for a knife instead of the processor because “it’s not worth getting the processor out for one onion,” consider whether countertop storage would change your usage pattern enough to justify the counter space.
Drawer Storage for Mini Processors
The Cuisinart Mini-Prep Plus and similar mini processors fit comfortably in a standard kitchen drawer. This is the ideal storage location — the processor is at arm’s reach, requires zero counter space, and can be grabbed and used in seconds. Many mini processor owners report using the machine 5–7 times per week because of this accessibility. Garlic, ginger, herbs, nuts, salad dressings — the tasks that take 30 seconds of hand work and 10 seconds in the mini processor become effortless when the machine is in a drawer next to your prep area.
What to Store with the Processor
Keep a small silicone spatula with your food processor — it’s the most useful accessory for scraping the bowl between processing and for getting the last bit of hummus, pesto, or nut butter out of the bowl. A small pastry brush is useful for cleaning crumbs from the blade hub crevices. A tea towel placed under the processor during use absorbs vibration and catches any drips. These three items, stored with the processor, make every food processing session smoother.
Which Processor for Which Cook?
The Weekly Meal Prepper (Family of 3–5)
The Cuisinart Custom 14-Cup at $169 is the right machine. The 14-cup bowl handles a full week’s worth of vegetable prep in one session, the extra-large feed tube means minimal pre-cutting, and the massive disc ecosystem means you can expand capabilities as your cooking grows. This is the machine to buy if you want to set it up once and have it serve your household for 10+ years.
The Serious Home Cook Who Values Precision
The Breville Sous Chef 16 Pro at $399 is worth the premium. The variable slicing disc, micro-serrated S-blade, and 1200W motor produce results that feel qualitatively different from any other consumer machine. If you cook regularly, process large volumes, and care deeply about the quality of your prep work, the Breville is the machine for you.
The Moderate Home Cook on a Budget
The Ninja BN601 at $89 or the Hamilton Beach 70730 at $54 depending on the primary use. If you need motor power for dough and dense vegetables, choose the Ninja. If your prep is primarily soft vegetables, herbs, and sauces, the Hamilton Beach’s bowl scraper makes it a better daily experience at $35 less.
The Small Kitchen or Quick Daily Prep User
The Cuisinart Mini-Prep Plus at $39. If you want to stop mincing garlic by hand and make quick salad dressings, this fits in a drawer and takes 20 seconds to clean. It won’t replace a full-size machine for volume work — but for the specific tasks it handles, nothing is faster or more convenient.
If you’re building out a full kitchen prep setup, our best knife set guide covers the cutting tools that work alongside your food processor. For cooking what you’ve prepped, see our best air fryer guide, best Instant Pot guide, and complete appliance buying guide.
Tips for Better Results from Your Food Processor
Pulse, Don’t Run — For Chopping Tasks
The single most important technique for getting uniform chop from a food processor is using the pulse function rather than running it continuously. Each pulse gives you a moment to see the current state of the food and stop before it becomes mush. Continuous running for chopping almost always produces over-processed food at the blade and under-processed food at the edges. Pulse 3–4 times, check, pulse again. Repeat until you reach the texture you want. This technique applies to onions, herbs, nuts, and any other ingredient where texture matters.
Cut Food into Uniform Pieces Before Processing
Even with a large feed tube, uniformly sized pieces produce more consistent results. If you’re chopping a large onion in the S-blade, cut it into rough eighths rather than dropping in a whole onion. The food processor works best when the pieces entering the blade zone are similar in size — it evens out the work the blade has to do and produces more consistent output. This applies especially to hard root vegetables, dense fruits, and cheese.
Chill Your Bowl and Blade for Pastry
Making shortcrust pastry in a food processor is one of its most transformative uses — the key is keeping everything cold. The butter must be cold (straight from the fridge, cut into cubes), the flour can go in the freezer for 30 minutes beforehand, and ideally the bowl and blade are chilled too. Warmth develops gluten and melts butter, both of which make pastry tough rather than flaky. The food processor makes pastry faster than doing it by hand, but only if you keep the temperature low throughout.
Don’t Over-Process Hummus
Restaurant-quality hummus from a food processor requires two techniques: removing chickpea skins before processing (they cause graininess) and running the processor longer than seems necessary — 4–5 full minutes with the tahini and lemon juice, not 60 seconds. Over-processing in terms of texture is very difficult with hummus — under-processing is the common mistake. If your hummus isn’t silky smooth, the answer is almost always more time in the processor, not less.
Use the Shredding Disc for Cheese — Not the S-Blade
Many beginners try to grate cheese with the S-blade, which produces an inconsistent crumbled texture. The shredding disc produces a uniform, fluffy grated texture that melts more evenly and looks better as a topping. Keep cheese cold (even briefly in the freezer before processing) — warm cheese clumps and smears rather than shredding cleanly. A pound of cold mozzarella shreds perfectly in about 20 seconds on the medium shredding disc.
Clean Immediately After Use
Food processor components that are rinsed within 5 minutes of use come clean in 20 seconds. Components left for an hour require sustained scrubbing. The starchy residue from potatoes and the protein residue from chicken are both dramatically easier to remove while still wet. The blade assembly (the hub with the S-blade attached) is the most important component to rinse immediately — it has the most crevices and the hardest area to clean once food has dried there. Rinse it under running water immediately, then put it in the dishwasher.
Frequently Asked Questions
The Cuisinart Custom 14-Cup at approximately $169 is the best food processor for most households. The updated blade assembly delivers the most consistent chop of any machine at this price, the extra-large feed tube minimises prep time, and the Cuisinart disc ecosystem is unmatched. If your budget is $399+, the Breville Sous Chef 16 Pro scores higher overall — its variable slicing disc and micro-serrated blade produce results no other consumer machine can match. For budget buyers, the Hamilton Beach 70730 at $54 delivers excellent value with its unique bowl scraper design.
For most families of 2–5: 11–14 cups is the right range. For individuals or light prep users: 7–9 cups. For regular batch cooking or large families: 14–16 cups. For daily quick tasks (garlic, herbs, small sauces): a 3–5 cup mini processor is actually better than a full-size machine for these specific tasks because it fills to the right level and cleans in seconds. Many households benefit from owning both a full-size and a mini processor — they’re used differently.
For regular home cooks who meal prep weekly, yes — unambiguously. Processing 3 lbs of vegetables takes 5 minutes with a food processor and 30–40 minutes by hand. Made weekly, that’s a saving of 25–30 hours per year. At $169 for the Cuisinart, that’s under $7 per hour of time saved in the first year — free thereafter. For occasional cooks who don’t meal prep and primarily need smoothies and soups, a good blender is a better investment. For anyone in between, start with a $39 mini processor — if you use it every day (which most people do), you’ll know within a month whether you want a full-size machine.
No — not for smooth liquid preparations. A food processor can make smooth hummus, thick nut butters, and chunky sauces. It cannot make a smooth green smoothie, a silky pureed soup, or an emulsified vinaigrette. The two appliances have genuinely different core functions: food processors handle dry and semi-dry preparations with solid food, blenders handle liquid and semi-liquid preparations. See our best blender guide for the blender side of this comparison. If your budget is limited, decide which type of prep is more common in your cooking and buy that appliance first.
For most tasks, yes — the Cuisinart Custom 14-Cup’s chop uniformity, extra-large feed tube, and disc ecosystem give it a meaningful edge over the Ninja BN601. The Ninja has a more powerful motor (1000W vs 720W) and handles dough and very dense vegetables better. For purely chopping, slicing, and shredding work, Cuisinart is superior. For dough-heavy baking, the Ninja’s motor advantage becomes relevant. At similar price points, the Cuisinart is the better all-around food processor for most home kitchens.
The S-blade is the most dangerous component to clean — never reach blindly into a bowl with the blade still attached. The correct technique: with the processor unplugged, hold the blade by the central plastic hub (not the metal blade edge), lift it straight up and out of the bowl, and hold it under running water to rinse. Then lay it in the dishwasher blade-down or scrub with a brush rather than a sponge (sponges can be cut). Rinse immediately after use while food is still wet — dried food around the blade hub is the hardest cleaning challenge in food processor maintenance.
The Cuisinart Mini-Prep Plus 3-Cup at $39 is the best compact food processor. Its two-direction blade (Chop forward / Grind reverse) handles the full range of small prep tasks, it cleans in 20 seconds, and it fits in a kitchen drawer. For slightly more capacity, the Cuisinart Elite 4-Cup at $59 or the Hamilton Beach 2-in-1 (4-cup) at $49 are worth considering. The main limitation of all compact processors: they’re for small quantities and cannot slice or shred using discs — those functions require a full-size machine.
Yes — and for certain types of dough, it’s the best tool available. Shortcrust pastry, scone dough, tart dough, and quick pizza dough all come together in 60–90 seconds in a food processor. The key is using the right blade: the S-blade for pastry and scones (where you want to cut fat into flour without developing gluten) and the dough blade for bread and pizza dough (where you want to develop gluten). The food processor is less effective for enriched doughs (brioche, cinnamon rolls) that require sustained kneading — a stand mixer with a dough hook is better for those. See our dough recipes section for specific techniques and recipes.
Most modern food processor bowls, lids, blades, and discs are dishwasher-safe — check your specific model’s manual to confirm. Place blades and discs in the top rack blade-down for safety. The motor base should never be submerged in water or placed in a dishwasher — wipe it with a damp cloth only. Dishwasher cleaning is more effective than hand washing for removing protein residues and killing bacteria, but it may accelerate cosmetic scratching on plastic bowls over time. If your bowl develops a cloudy appearance, soak it in white vinegar for 30 minutes to remove mineral deposits.
A quality food processor used regularly (3–5 times per week) will last 8–15 years with proper maintenance. The Cuisinart Custom 14-Cup has the longest documented lifespan in the category, with many users reporting 10+ years of daily use. The most common components that wear out — blades (dull after 3–5 years), rubber gaskets (crack after 2–4 years), and drive couplings (wear after 5–8 years) — are all replaceable for $5–$30 without replacing the machine. Budget processors ($30–$60) typically last 2–4 years before major components need replacement. See our cleaning and maintenance section for extending your processor’s lifespan.
Avoid processing: Very hard items (bones, coffee beans, hard spices in large quantities) — these can crack the bowl or dull the blade prematurely. Hot liquids — steam pressure can blow the lid off and cause burns. Let soups and sauces cool to room temperature before processing. Overfilled bowls — exceeding the maximum capacity causes leaking, uneven processing, and motor strain. Extremely sticky doughs in machines with insufficient motor power — this can jam the blade and burn out the motor. Ice cubes alone — food processors aren’t designed for ice crushing and the blade can chip. Use a blender for crushed ice.
No — they’re fundamentally different tools. A food processor has a wide, flat bowl and interchangeable blades/discs designed for dry and semi-dry tasks: chopping, slicing, shredding, dicing, and dough. A blender has a tall, narrow jar and a fixed blade designed for liquid tasks: smoothies, soups, purees, and emulsions. A food processor can do some blending tasks (thick sauces, hummus) but cannot produce the smooth results a blender achieves with liquid preparations. A blender cannot slice, shred, or dice. If you do both types of cooking, you need both appliances — they complement each other rather than competing.
Yes — a food processor makes excellent nut butter, though it requires patience. Process roasted nuts (almonds, cashews, peanuts, or any nut) continuously for 8–15 minutes, scraping down the sides every 2–3 minutes. The nuts go through stages: crumbly → clumpy → ball → smooth, liquid butter. There’s no shortcut — the oils need sustained processing time to release. Add a pinch of salt and a tablespoon of neutral oil at the 5-minute mark to speed the process. You need at least 600W of motor power for effective nut butter processing — underpowered machines will overheat. The result is noticeably fresher than commercial nut butter with no added sugar, palm oil, or stabilizers.
Yes — a food processor produces a coarse, irregular grind that’s excellent for burgers, meatballs, bolognese, and sausage. The technique: partially freeze the meat (30–45 minutes in the freezer until firm but not solid), cut into 2cm cubes, and process in small batches (300g max) with 8–12 quick pulses using the S-blade. The result is a coarse, uneven grind with visible meat pieces — far better for burgers than pre-ground supermarket meat because the irregular texture retains more juice during cooking. A food processor is not a replacement for a dedicated meat grinder for fine grinds or large volumes, but for occasional home use, it’s excellent.
Leaking is usually caused by one of three things: a worn rubber gasket on the lid (inspect for cracks and replace if damaged — $5–$10 from the manufacturer), overfilling the bowl beyond its liquid capacity (stay below two-thirds full for liquid preparations), or a missing or improperly seated feed tube pusher (the pusher seals the feed tube opening — without it, liquid escapes through the tube). If none of these apply, the bowl itself may be cracked — inspect it carefully under bright light. Hairline cracks near the base are a common cause of slow leaks that worsen under the pressure of processing.
A food chopper (sometimes called a mini chopper) is a small, usually hand-powered or low-powered electric device designed for one task: roughly chopping small quantities of food. It typically has a single blade and a 1–3 cup capacity. A food processor is a larger, more powerful, more versatile machine with multiple blades and discs, larger capacity (3–16 cups), and the ability to chop, slice, shred, puree, knead dough, and emulsify. A food chopper is to a food processor what a pocket knife is to a chef’s knife — useful for light, quick tasks but not a substitute for the full tool. If you’re choosing between the two, a mini food processor (like the Cuisinart Mini-Prep Plus at $39) offers far more capability than a basic food chopper at a similar price.
A burning smell from a food processor indicates the motor is overheating — this happens when the machine is overloaded, running continuously for too long, or processing ingredients that are too dense for its motor wattage. Immediately stop processing, unplug the machine, and let it cool for 20–30 minutes. Common causes: processing too much food at once (fill the bowl no more than two-thirds), running continuously for more than 2–3 minutes without a break (use the pulse function for most tasks), or processing very hard or dense ingredients (frozen foods, very hard root vegetables, stiff dough) with an underpowered motor. If the burning smell persists after cooling and with normal use, the motor’s internal insulation may be damaged — this requires professional service or machine replacement.
Most food processors can crush small amounts of ice, but it’s not their intended function and doing so regularly will dull the blade and stress the motor. The S-blade is designed for food, not for hard, dense ice cubes — ice can chip the blade edge and crack the plastic bowl on impact. For occasional use (a few cubes for a thick frozen drink), pulse briefly and don’t fill the bowl more than a quarter full with ice. For regular ice crushing, a blender (especially a high-powered blender like a Vitamix or Ninja) is the correct tool — blenders are designed for this task with stronger blades and more powerful motors optimized for ice.
For most households, $100–$200 is the sweet spot. The Cuisinart Custom 14-Cup at $169 offers the best value in the category — consistent performance, large capacity, and a massive disc ecosystem. If your budget is tight, the Hamilton Beach 70730 at $54 or Ninja BN601 at $89 are genuinely good machines that handle most tasks well. If you cook professionally or at a very high level, the Breville Sous Chef 16 Pro at $399 is the best machine available. Under $50, only mini processors (3–5 cups) are worth buying — full-size processors at this price point are typically too underpowered and poorly built to be useful. See our budget guide section for detailed breakdowns by price tier.
Final Verdict — Best Food Processor to Buy
- Best for most home cooks: Cuisinart Custom 14-Cup at ~$169. Updated blade assembly, XL feed tube, and the best disc ecosystem in the category.
- Best for serious cooks who want the best: Breville Sous Chef 16 Pro at ~$399. Variable slicing disc, micro-serrated blade, 1200W — the highest-performing consumer food processor available.
- Best mid-range for regular prep: Ninja BN601 at ~$89. 1000W motor, Auto-iQ programs, 2-year warranty. Best value at the mid-range.
- Best value under $60: Hamilton Beach 70730 at ~$54. Built-in bowl scraper — the most useful innovation at this price point.
- Best compact for daily quick tasks: Cuisinart Mini-Prep Plus at ~$39. Fits in a drawer, minces garlic in 5 seconds, rinses clean instantly.
Questions about any processor on this list or whether one fits your specific cooking style? Reach us via our contact page. For complete kitchen appliance guidance, start with our complete buying guide.
Useful next reads: our Cuisinart food processor full review, the best blender guide if you’re also considering a blender, and our best knife set guide for the cutting tools that work alongside your processor. For everything in one place, see our complete buying guide.


Pingback: Cuisinart vs KitchenAid Food Processor: Which Wins?