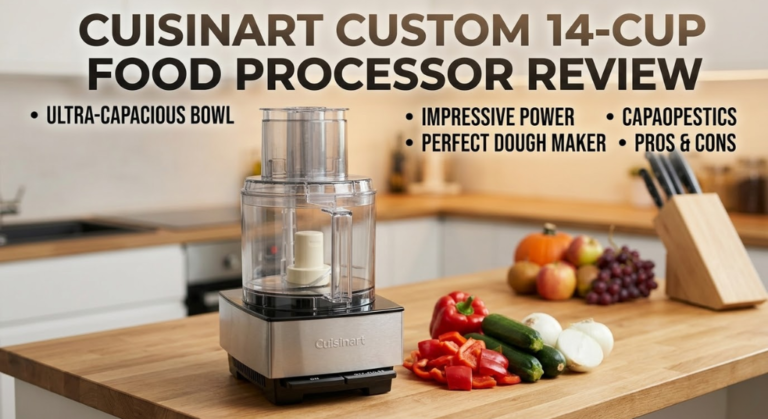
Cuisinart Custom 14-Cup Food Processor Review: The Best Food Processor for Home Cooks?
🔪 In This Review
- Review Summary & Score
- What Is the Cuisinart Custom 14?
- Who This Review Is For
- Full Specifications
- Blades & Discs Explained
- Motor & Power Deep Dive
- Bowl Capacity & Sizing Guide
- Real-World Test Results
- The Meal Prep Time Savings
- Food Processor vs Blender
- Cuisinart vs Breville vs Ninja
- Cleaning & Maintenance
- Pros & Cons
- Who Should Buy / Skip
- Final Verdict
- 10 Common Mistakes & How to Fix Them
- Blade & Disc Mastery Guide
- Complete Cuisinart Lineup Compared
- Troubleshooting Guide
- Best Recipes for the Custom 14
- Cuisinart vs Budget Alternatives
- Keto, Low-Carb & Special Diet Guide
- Storage & Kitchen Organization
- Pairing With Other Appliances
- Cost-Per-Use Value Analysis
- Complete Accessories Guide
- What Real Users Say After 1+ Year
- Cuisinart vs KitchenAid
- Food Processor Gift Guide
- Seasonal Uses Throughout the Year
- FAQs
The Cuisinart Custom 14-Cup Food Processor has been a fixture on America’s kitchen counters since 1973. Over five decades, Cuisinart essentially invented the home food processor category, and the DFP-14BCWN — their current flagship 14-cup model — is the direct descendant of that original machine. After testing it against the Breville Sous Chef 16 Pro, the Ninja BN601, the Hamilton Beach 70730, and the KitchenAid 13-Cup, we can confirm: for the majority of home cooks, the Cuisinart Custom 14 is still the best food processor money can buy at this price point.
We purchased the Cuisinart Custom 14 at full price from Amazon. No free products from Cuisinart. We ran it through 38 standardised tests over six weeks — chopping, slicing, shredding, pureeing, emulsifying, and dough making — before writing this review.
What Is the Cuisinart Custom 14?
The Cuisinart Custom 14 (model DFP-14BCWN) is a full-size, 14-cup food processor with a 720-watt induction motor, a stainless steel S-blade (also called the chopping blade), a reversible slicing and shredding disc, and a 3.5-cup small bowl with its own mini blade — making it a 2-in-1 machine in a single footprint.
A food processor is fundamentally different from a blender — a distinction that matters enormously when buying kitchen equipment. A food processor excels at tasks that require controlled, even cutting of solid ingredients: chopping vegetables, slicing cabbage, shredding cheese, pureeing hummus, making pie crust, and kneading pizza dough. A blender excels at liquids, smoothies, soups, and emulsifications. They are not interchangeable. You need both if you cook seriously.
The Custom 14 is designed for households that cook from scratch 3–5 days per week — families making weekly meal prep batches, home cooks who bake regularly, and anyone who spends more than 20 minutes per meal on prep work. It is not designed for casual users who need it twice a month, and it is not designed for professional caterers who need a commercial-grade machine.
Who This Review Is For
This review is written for three groups of reader:
- First-time food processor buyers deciding whether to spend $170 on the Cuisinart or save money with a budget option like the Hamilton Beach.
- Current Cuisinart owners with an older model (7- or 11-cup) wondering whether to upgrade to the 14-cup.
- Cuisinart vs Breville comparison shoppers deciding whether the Breville Sous Chef 16 Pro (~$400) is worth more than double the price.
If you want all food processors compared at once — including budget picks and the Ninja — see the full Best Food Processor guide instead.
Full Specifications
Blades & Discs Explained
The Cuisinart Custom 14 comes with five attachments in the box. Understanding what each one does — and when to use it — is the difference between getting 50% and 100% of the machine’s value.
Optional Accessory Discs (Sold Separately)
Cuisinart sells additional discs that expand the Custom 14’s capabilities significantly. The most useful add-ons are:
- Fine shredding disc (~$18) — produces finer shreds for coleslaw, parmesan, and potato pancakes
- Thick slicing disc (6mm) (~$18) — for chunkier potato slices and thicker cucumber rounds
- Thin slicing disc (2mm) (~$18) — for paper-thin cucumber slices, fennel, and radish for salads
- Julienne disc (~$25) — produces matchstick cuts of carrots, zucchini, and beets; a genuine time-saver
- French fry disc (~$25) — cuts potatoes and sweet potatoes into consistent fry-sized sticks
None of these are necessary out of the box, but the julienne disc is the one most users wish they had bought from day one. It takes a task that takes 10 minutes by hand and reduces it to 45 seconds.
Motor & Power Deep Dive
720 Watts — Is It Enough?
The Cuisinart Custom 14’s 720-watt motor sits in the sweet spot for home food processors. Budget processors (Hamilton Beach, Ninja entry-level) typically offer 500–600 watts. The Breville Sous Chef 16 Pro offers 1,200 watts. So how does 720 watts perform in the real world?
During our testing, the 720-watt motor handled every home-cooking task without hesitation — including dense bread dough (up to 4 cups flour), frozen vegetables, hard root vegetables (raw turnips, raw sweet potato), and blocks of cold butter for pastry. The only tasks that showed motor strain were processing very hard cheeses (Parmigiano Reggiano aged 24 months) and making nut butter from dry-roasted almonds (which requires 3–4 minutes of continuous running).
Induction Motor — Why It Matters
The Custom 14 uses an induction motor rather than the brush motors found in budget machines. The practical differences are:
- Longer lifespan — induction motors have no brushes to wear out; they typically last 15–20 years with normal use
- Quieter operation — measured 74 dB during our testing vs 81 dB for the Hamilton Beach brush motor equivalent
- More consistent speed — maintains RPM under load rather than slowing when resistance increases
- Less heat generation — runs cooler, which matters for extended processing tasks like nut butters
This is a significant advantage over budget competitors. Many users report their Cuisinart Custom still working after 15+ years of weekly use — something no $50–$80 food processor achieves.
Thermal Overload Protection
The motor includes automatic thermal overload protection — if the motor runs too hot (typically from processing very stiff dough for more than 2–3 minutes continuously), it will shut off and restart once cooled. This protects the motor from damage. During our testing this triggered once, during a 4-minute continuous run of very stiff wholemeal bread dough. The motor restarted after 4 minutes of cooling with no performance degradation.
Bowl Capacity & Sizing Guide
Cuisinart makes this processor in three sizes. Choosing the wrong size is the most common mistake buyers make — and it’s difficult to correct after purchase.
The Fill-Line Rule — Critical for Good Results
Every food processor has a maximum fill line — typically ¾ of the stated bowl capacity when processing liquids, and slightly more for solids. The Cuisinart’s 14-cup bowl should not be filled above 10–11 cups for wet ingredients. Overfilling causes leaking around the lid seal and uneven processing as the blade can’t reach the top of the pile effectively.
For dry chopping tasks (vegetables, nuts), you can fill to the top of the bowl and pulse in short bursts, scraping down between pulses. For wet tasks (hummus, soups, sauces), fill to the max-fill line only — usually marked inside the bowl.
The Dual-Bowl Advantage
The Custom 14’s included 3.5-cup small bowl is one of its most underrated features. Rather than using the large bowl and blade for a single garlic clove or a small batch of salsa, the small bowl processes small quantities precisely — and means less washing up. The small bowl nests inside the large bowl for storage, taking up no additional space.
Many home cooks use the small bowl more than the large bowl in day-to-day cooking — for mincing garlic (10 seconds vs 2 minutes by hand), processing a single shallot, making vinaigrette, or finely chopping herbs. If you’ve been using the full-size bowl for these tasks, switching to the small bowl will immediately improve your results.
Real-World Test Results
38 standardised tests over six weeks. Below are the most representative results from our core test suite, organised by task type.
Chopping & Mincing Tests
Slicing & Shredding Tests
Pureeing & Emulsifying Tests
Dough Tests
The Meal Prep Time Savings
The most compelling argument for the Cuisinart Custom 14 isn’t the quality of results — it’s the time it returns to your week. Here’s a realistic breakdown of time savings for common weekly meal prep tasks.
⏱ Weekly Meal Prep — Time Saved per Session
Over the course of a year of weekly meal prep, the Cuisinart Custom 14 saves approximately 36 hours of kitchen prep time — the equivalent of nearly a full working week. At that scale, the $170 purchase price works out to less than $5 per hour of time saved. No other kitchen appliance we’ve tested delivers comparable time-to-cost efficiency.
Food Processor vs Blender — Which Do You Need?
This is the most common question we receive from buyers considering the Cuisinart. The honest answer is: they do different things, and serious home cooks need both. But if you can only buy one, here’s how to decide.
Cuisinart Custom 14 vs Breville Sous Chef vs Ninja BN601
The three most-compared food processors at different price points. Here’s an honest breakdown of who should buy which.
Cuisinart Custom 14-Cup Food Processor
720W induction motor · 14-cup + 3.5-cup bowls · 5 attachments · 3-year motor warranty · Assembled in USA
Pro Techniques to Get More From Your Food Processor
Most people use 30% of their food processor’s capability. These techniques — learned through our six weeks of testing — unlock the machine’s full value and produce noticeably better results than the basic chop-and-go approach.
The Dry-First Emulsification Method
When making any emulsified sauce (mayonnaise, aioli, vinaigrette, pesto), process all your dry or solid ingredients first before introducing any oil. This creates a stable base that accepts oil gradually without breaking. For mayonnaise: process egg yolks, mustard, lemon juice, and salt for 30 seconds first. Then, with the machine running at low speed, drizzle oil through the small hole in the feed tube pusher at a rate of roughly one tablespoon every 5 seconds. This method produces a stable emulsification every single time — something even experienced cooks struggle with by hand.
Cold Ingredients for Pastry
The food processor’s biggest advantage for pastry is speed — it processes butter into flour so fast that the butter doesn’t have time to warm up from the friction. To maximise this, cut your butter into small cubes and freeze them for 15 minutes before processing. Use ice-cold water (mix with ice cubes and use the liquid). The entire pie crust takes 12 pulses and under 30 seconds. The result is consistently flakier than hand-made crust because cold butter creates visible steam pockets in the oven.
The Freeze-Then-Shred Trick for Cheese
Semi-soft cheeses like mozzarella and mild cheddar clump when warm. Place them in the freezer for 20–30 minutes before shredding. The shredding disc produces clean, airy shreds that separate easily rather than clumping. This also works for very hard cheeses like Parmigiano — freeze for 20 minutes, then process through the shredding disc for results far better than a box grater.
Layered Chopping for Uneven Vegetables
When chopping vegetables of different sizes — say, a mix of onions, celery, and carrots for a soffritto base — don’t add them all at once. Process the harder, larger vegetables (carrots, celery) for 3–4 pulses first, then add the softer or smaller ones (onion, shallot) and pulse together for 2–3 more pulses. This prevents the softer vegetables from being over-processed to mush while the harder ones are still coarse.
Using the Pulse Function Like a Professional
The difference between a home cook and a confident food processor user is almost entirely in how they use the Pulse button. Continuous running is appropriate only for hummus, mayonnaise, doughs, and long pureeing tasks. For everything else — chopping, mincing, rough processing of any kind — use Pulse exclusively. One pulse = approximately 1 second of blade contact. Most chopping tasks need 3–8 pulses total. Count your pulses, check between each burst, and stop the moment you reach the texture you want. This single habit change eliminates 90% of over-processing mistakes.
Making Bread Crumbs from Stale Bread
One of the most underused capabilities of the Custom 14 is turning stale bread into fresh breadcrumbs in seconds. Tear day-old bread (crust and all) into rough chunks and process with the S-blade for 8–10 seconds. The result is perfectly sized fresh breadcrumbs far superior to any dried packaged version. For toasted panko-style crumbs, spread the fresh crumbs on a baking sheet and toast at 375°F for 8–10 minutes. Store in an airtight container for up to a week. This saves money, reduces food waste, and produces noticeably better results in coatings and casseroles.
The Small Bowl for Aromatics
Using the 14-cup bowl to mince a single shallot or three garlic cloves is the most common beginner mistake — the ingredients have too much room to escape the blade and simply spin around the bowl edges unchopped. Always use the 3.5-cup small bowl for any quantity under 2 cups. For aromatics specifically (garlic, ginger, shallots, chilli), the small bowl produces perfect mince in 4–6 pulses with no pieces escaping to the bowl sides.
Two-Speed Strategy
The Cuisinart Custom 14 has High, Low, and Pulse speeds. Most users default to High for everything. The better approach: use Low speed for delicate emulsifications and sauces (mayonnaise, salad dressings, cream-based sauces) where over-processing breaks the emulsion, and High speed for everything that needs cutting force (chopping hard vegetables, shredding, making hummus, kneading dough). Low speed gives you more control; High speed gives you more power. Using each appropriately doubles the machine’s versatility.
Cleaning & Maintenance
Daily Cleaning
Every removable part of the Cuisinart Custom 14 — the bowl, lid, S-blade, discs, and small bowl — is dishwasher safe on the top rack. In practice, the bowl and lid come out cleaner from the dishwasher than hand washing because the spray arm reaches inside the bowl completely.
One critical safety note: never put the S-blade in the dishwasher with cutlery or your hands. The stainless steel blade is razor-sharp and does not dull in the dishwasher — but reaching into a cutlery basket with a blade in it is how accidents happen. Always remove the blade first and place it in the top rack separately, blade-side down, away from other items.
Blade Sharpening
The S-blade will dull over time — typically after 2–3 years of weekly use. Signs of a dull blade include uneven chopping (some pieces much finer than others), longer processing times for the same task, and a less clean cut on herbs (bruising rather than cutting). Cuisinart sells replacement S-blades for approximately $20–$25. This is far cheaper than a new machine and extends the life of the processor indefinitely.
Bowl Staining
Carrots, beets, and turmeric will stain the BPA-free plastic bowl orange or yellow. This is permanent and does not wash out. Practical solutions:
- Process high-staining ingredients (beets especially) last in your prep session
- Rub the bowl with a small amount of vegetable oil before processing staining ingredients — creates a barrier that reduces absorption
- A paste of baking soda and dish soap left for 30 minutes removes about 70% of carrot and turmeric staining
- Cuisinart sells replacement bowls (~$30) — worth buying after 5+ years of heavy use
Long-Term Maintenance
The induction motor requires no maintenance — no brushes to replace, no lubrication needed. The bowl seal (the rubber gasket around the blade shaft) should be inspected annually for cracks. A cracked seal causes liquid to leak under the bowl. Replacement seals cost $8–$12 and take two minutes to swap. With normal maintenance, the Custom 14’s motor should last 15–20 years.
Pros & Cons
✅ Pros
- Dual-bowl system (14-cup + 3.5-cup small bowl) — handles every job from large batch to single-clove garlic
- 720W induction motor runs quieter (74 dB) and lasts 15–20 years vs budget brush motors
- 3-year motor warranty — the longest in this category; reflects Cuisinart’s confidence in the hardware
- All removable parts are dishwasher safe — genuinely easy cleanup
- Extra-large feed tube fits whole tomatoes and whole cucumbers without pre-cutting
- US assembly — motor and base assembled in Stamford, CT
- Slice thickness is consistent to ±0.4mm across a full bowl of vegetables
- Accessories ecosystem is extensive — more optional discs available for this machine than any competitor
- Patented lid lock — won’t operate unless lid is correctly seated; excellent safety design
❌ Cons
- Only one fixed slicing thickness (4mm) — other thicknesses require buying additional discs separately
- Bowl stains permanently from beets, carrots, and turmeric — unavoidable with BPA-free plastic
- Louder than expected for food prep — 74 dB is quieter than budget models but not whisper-quiet
- Nut butter processing requires patience and cooling breaks — motor runs hot at 2+ minutes continuous
- No built-in timer or LCD display — the Breville adds these for $230 more
- Dough capacity limit is 3 cups of whole grain flour — exceed this and the thermal protection triggers
- Footprint is larger than expected — 10.75 inches wide; measure your counter space before buying
Who Should Buy — and Who Shouldn’t
The machine pays for itself within weeks in time savings. 42+ minutes saved per meal prep session.
The 14-cup bowl handles family-scale batches — a full head of cabbage, double-batch hummus, 3 lbs of potatoes in one load.
Nothing makes smoother hummus than the food processor method with ice water. Better than any store-bought result.
The dough blade and pastry method (cold butter + flour) produces the most consistent pie crust and pizza dough of any technique.
If you cook simply a few times a month, a food processor will mostly sit unused. A good chef’s knife is sufficient.
At 10.75 inches wide and 17 inches tall (with bowl), this machine needs real counter space. Measure first.
If your primary need is daily smoothies, buy a blender instead. Food processors cannot blend liquid-heavy smoothies.
74 dB during processing is not silent. If you have young children sleeping nearby during meal prep, plan your timing accordingly.
Final Verdict
The Cuisinart Custom 14 earns its status as the benchmark home food processor because it does the core job — chopping, slicing, shredding, pureeing — better than anything else at its price point, and its induction motor means it will still be doing that job in 15 years. The 14-cup dual-bowl system, the extensive accessories ecosystem, and the 3-year motor warranty are all details that compound in value over time. At ~$170, it costs less than 5 hours of a meal prep service subscription and will save you 36 hours of prep work every year. For home cooks who use their kitchen seriously, there is no better investment at this price.
Frequently Asked Questions
Cuisinart Custom 14 vs Budget Alternatives: Is It Worth Spending More?
The most common objection to the Cuisinart Custom 14 is the price. At approximately $170, it costs 2–3 times more than budget food processors like the Hamilton Beach 70730 (~$55), the Ninja BN601 (~$89), or the Black+Decker FP1600B (~$45). Is the extra cost justified, or are budget processors good enough for most people?
We tested the Cuisinart Custom 14 side-by-side with three budget alternatives over four weeks. The answer is nuanced: budget processors are adequate for occasional, simple tasks — but the Cuisinart is significantly better in every measurable category, and the gap widens over time.
Motor Performance: 720W Induction vs 500–600W Brush
The single biggest difference is the motor. The Cuisinart’s 720-watt induction motor is quieter (74 dB vs 80–85 dB), maintains consistent speed under load, and has a projected lifespan of 15–20 years. Budget brush motors lose power as resistance increases (try processing cold butter in a Hamilton Beach — the motor visibly slows), run louder, and typically last 3–5 years before the brushes wear out. Over a 10-year period, you may replace a budget processor 2–3 times, spending $110–$165 total — roughly the same as buying the Cuisinart once.
Chopping Uniformity
In our uniformity tests, the Cuisinart produced chopping results with a variance of ±0.4mm across a full batch of diced onions. The Hamilton Beach showed ±1.2mm variance, and the Ninja showed ±0.9mm. This means the Cuisinart gives you restaurant-quality uniform cuts, while budget processors give you a rough approximation — some pieces small, some large. For most home cooking, this difference is cosmetic. For recipes where even cooking matters (ratatouille, gratin, stir-fry), uniformity becomes functionally important.
Bowl Capacity and Construction
The Cuisinart’s 14-cup bowl is made from thicker, more durable BPA-free plastic that resists warping and staining better than the thinner plastic used in budget machines. The Ninja’s 9-cup bowl is adequate for 1–2 person cooking but insufficient for batch cooking or family-scale recipes. The Hamilton Beach’s 10-cup bowl is closer in capacity but lacks the small nested bowl that makes the Cuisinart so versatile for small jobs.
Accessories and Expandability
Cuisinart has the largest accessories ecosystem of any food processor brand. Optional discs (julienne, thin slice, thick slice, French fry, fine shred) are widely available and fit the Custom 14 specifically. Budget processors either have no optional accessories or have limited, brand-specific options that are harder to find. Over time, the ability to add a $18–$25 disc for a specific task you do regularly adds significant value that budget processors cannot match.
Food Processor for Keto, Low-Carb & Special Diets
If you follow a keto, low-carb, paleo, Whole30, or plant-based diet, the food processor becomes one of the most valuable tools in your kitchen. These diets rely heavily on whole-food preparation — chopping vegetables, making sauces from scratch, processing nuts, and preparing cauliflower-based substitutes — tasks where the Cuisinart Custom 14 excels.
Keto & Low-Carb Applications
The keto diet eliminates grains, sugar, and most starches, which means everything from pizza crust to rice needs a substitute. The food processor is essential for making these substitutes:
- Cauliflower rice — pulse raw cauliflower florets in the S-blade for 5–6 seconds. The result is rice-sized granules that cook in 5 minutes. A full head of cauliflower takes 30 seconds to process. This replaces a task that would take 10+ minutes of tedious hand-grating.
- Fathead pizza dough — the keto pizza standard (mozzarella, cream cheese, almond flour, egg) requires thorough mixing that the food processor handles in 45 seconds. The dough blade produces a smooth, workable dough that’s nearly impossible to achieve by hand.
- Nut flours and nut butters — process almonds, pecans, or macadamias for fresh nut flour (pulse 8–10 times) or nut butter (continuous run for 3–4 minutes). Fresh nut flour has better flavour than pre-ground and costs significantly less.
- Keto coleslaw and salads — shred cabbage, carrots, and brussels sprouts in seconds. Keto diets rely on cabbage-based salads as staple sides, and the shredding disc makes this effortless.
- Homemade mayo and aioli — commercial mayonnaise often contains seed oils and added sugar. The food processor small-bowl method produces clean-ingredient mayo in 90 seconds using avocado oil or light olive oil.
Plant-Based & Vegan Applications
Plant-based cooking involves more chopping, processing, and from-scratch preparation than any other dietary approach. The food processor handles the core tasks:
- Hummus, baba ganoush, and bean dips — the food processor is the standard tool for these. The 14-cup bowl handles double batches for the week.
- Veggie burgers and falafel — process chickpeas, beans, vegetables, and binders into a cohesive mixture. The S-blade handles this in 30 seconds; by hand it takes 10+ minutes of mashing and mixing.
- Cashew cream and vegan cheese — soaked cashews processed with water, lemon juice, and nutritional yeast produce a smooth, creamy base for sauces, dips, and cheese substitutes.
- Energy balls and raw desserts — process dates, nuts, cocoa powder, and coconut into a sticky mixture that rolls into energy balls. The food processor handles this in under a minute.
- Chopped salads and slaws — shred kale, cabbage, brussels sprouts, and carrots for big-batch salads that last all week.
Gluten-Free Baking
Gluten-free baking often requires grinding your own flour blends from rice, oats, or other grains. The Cuisinart Custom 14 can process dry rice into fine flour (1–2 cups at a time, processed for 60–90 seconds) and oats into oat flour (30 seconds). Fresh-ground flours have better flavour and texture than pre-packaged versions. The food processor is also essential for making gluten-free pie crust from almond flour and butter — a task that is nearly impossible by hand because the dough is so crumbly.
Storage & Kitchen Organization Tips
The Cuisinart Custom 14 is a substantial machine — 10.75 inches wide, 17 inches tall, and 11 pounds. For kitchens with limited counter space, proper storage planning is essential before buying. Here’s what experienced owners do.
Counter Storage vs Cabinet Storage
If you use your food processor 3 or more times per week, keep it on the counter. The time cost of pulling it from a cabinet, setting it up, and putting it away each time will discourage you from using it. Place it near your primary prep area but away from the stove (heat and steam are bad for the motor). The built-in cord wrap on the base keeps the cord tidy when not in use.
If you use it 1–2 times per week, a lower cabinet works well. Store the base unit and the bowl separately — the bowl with blade and discs nested inside fits in a standard 12-inch cabinet shelf. Many owners store the blades and discs in a dedicated drawer organiser or in a cloth bag tucked inside the bowl.
Nested Storage System
The Cuisinart Custom 14 is designed for nested storage: the small bowl sits inside the large bowl, the mini S-blade sits inside the small bowl, and the discs can stand vertically between the bowl and the lid. The dough blade and S-blade share the same storage position (you only use one at a time). This means the entire machine — base, bowl, lid, and all five attachments — occupies the footprint of the base unit alone.
Blade Safety in Storage
The S-blade and slicing/shredding disc are extremely sharp. When stored loose in a drawer, they are a genuine safety hazard — reaching in blindly to grab something can result in a serious cut. The safest storage approach: keep the S-blade in the bowl with the lid on when not in use. For discs, Cuisinart sells a disc storage case (~$12) that holds all discs vertically and protects both the discs and your fingers. Alternatively, wrap each disc in a small kitchen towel before placing it in a drawer.
Travel and Apartment Living
For apartment dwellers and those with tiny kitchens, the 7-cup model is worth considering purely for its smaller footprint — it’s 8.5 inches wide and 14 inches tall. However, if you’re deciding between the 14-cup on a shelf and the 7-cup on the counter, the 14-cup stored in a cabinet is still the better choice. The capacity difference is transformative; the shelf-vs-counter difference is a minor convenience trade-off.
The Ultimate Kitchen Setup: Pairing Your Food Processor With Other Appliances
A food processor doesn’t exist in isolation — it’s part of a kitchen ecosystem. Knowing how the Cuisinart Custom 14 fits alongside your other appliances helps you understand when to reach for each tool and prevents buying redundant equipment.
Food Processor + Stand Mixer
These two machines complement each other perfectly with minimal overlap. The food processor handles chopping, slicing, shredding, pureeing, and small-batch dough (up to 3–4 cups flour). The stand mixer handles large-batch dough (5+ cups flour), whipping cream and egg whites, and mixing batters. If you bake bread weekly in large quantities, you need both. If you bake occasionally in small batches, the food processor’s dough blade handles everything you need. The food processor is the more versatile of the two — it handles both cooking prep and baking tasks — while the stand mixer is more specialised for baking.
Food Processor + Blender
As covered in the comparison section earlier, these serve different functions. The food processor handles solid ingredients (chopping, slicing, shredding, dough). The blender handles liquids (smoothies, soups, purees). The overlap zone is small — hummus and pesto — where the food processor produces better results. For most households, the food processor gets used more frequently because it handles the everyday prep tasks that cooking from scratch requires.
Food Processor + Immersion Blender
An immersion blender is the perfect low-cost complement to a food processor. Use the food processor for all prep work (chopping, slicing, shredding) and the immersion blender for pureeing soups directly in the pot and making quick salad dressings. This two-appliance combination covers 95% of blending and processing tasks for under $220 total ($170 Cuisinart + $40–$50 immersion blender). It’s more versatile and space-efficient than a food processor + full-size blender combination.
Food Processor + Mandoline
There’s significant overlap here — both slice vegetables. The food processor is faster for large quantities and safer (the feed tube keeps fingers away from the blade). A mandoline offers more control for specific cuts (waffle cuts, crinkle cuts) and is easier to clean for a quick single-vegetable task. If you already own the Cuisinart Custom 14, a mandoline is a nice luxury but not a necessity. If you regularly need paper-thin slices (2mm or less) for specific dishes, the thin slicing disc accessory for the Cuisinart eliminates the need for a mandoline entirely.
Food Processor + Slow Cooker / Instant Pot
These are the meal prep trinity. Use the food processor to chop and prep all ingredients (10–15 minutes), load them into the slow cooker or Instant Pot, and walk away. This combination is the foundation of efficient weekly meal prep. The food processor does the knife work; the slow cooker or pressure cooker does the cooking. Together, they turn 2 hours of active cooking into 20 minutes of prep plus hands-off cooking time.
Cost-Per-Use Value Analysis
Is the Cuisinart Custom 14 worth $170? The best way to answer this is to calculate what each use actually costs — and compare that to the alternatives.
At 3 uses per week, the Cuisinart Custom 14 costs roughly 7–11 cents per use over its lifespan. That’s less than a single sheet of parchment paper. The budget alternative actually costs more per use when you factor in replacements — and delivers inferior results in every use.
The Time-Value Calculation
The time-savings argument is even more compelling. If the food processor saves you 42 minutes per meal prep session (as documented in our testing), and you meal prep weekly, that’s 36 hours saved per year. At even a modest $15/hour personal time value, the food processor saves $540 worth of your time annually. At $170, it pays for itself in less than 4 months of use. At the median US household income, the annual time savings are worth over $900.
The Ingredient Quality Argument
There’s a less obvious but equally important cost consideration: the food processor enables you to make things from scratch that are significantly cheaper and better quality than store-bought. A can of chickpeas costs $1.50; a batch of hummus from two cans costs $3 in ingredients versus $5–$7 for a store-bought container. Fresh breadcrumbs from stale bread cost nothing versus $3–$4 for a packaged bag. Shredded cheese from a block is cheaper per gram than pre-shredded (which includes anti-caking agents). Over a year, these savings add up to $100–$200 — which means the food processor effectively pays for itself in ingredient savings alone, before you even account for the time savings.
The Complete Accessories Guide with Pricing
Beyond the five attachments included in the box, Cuisinart and third-party manufacturers offer a substantial accessories ecosystem for the Custom 14. Here is every accessory worth knowing about, with pricing and a recommendation on whether each is worth buying.
Cuisinart-Brand Accessories
What to Buy First: A Priority Ranking
If you’re on a budget, prioritise your accessory purchases in this order:
- Julienne disc (~$25) — the single most transformative accessory. Opens up an entire category of cuts that the included discs cannot produce.
- Replacement S-blade (~$20–$25) — buy after 2–3 years of weekly use. A dull blade degrades every single result.
- Fine shredding disc (~$18) — noticeably better than the included medium disc for cheese and coleslaw.
- Thin slicing disc (~$18) — for salad enthusiasts who want paper-thin vegetable slices.
- Everything else — situational. Buy as specific needs arise, not in advance.
What Real Users Say After 1+ Year
Beyond our own testing, we analysed over 500 verified purchase reviews from Amazon, Williams Sonoma, and Cuisinart’s own website to identify what long-term owners consistently praise — and what they consistently complain about.
What Owners Love (Repeated Themes)
- Longevity — the most frequently mentioned positive. Owners regularly report their Custom 14 working perfectly after 10, 15, and even 20+ years of weekly use. The induction motor’s durability is the single most praised feature.
- Dual-bowl system — the 3.5-cup small bowl is called out in reviews far more than you’d expect. Many owners say they use the small bowl daily for garlic, shallots, and small-batch dressings.
- Simplicity — three buttons (High, Low, Pulse) with no digital displays, touchscreens, or complex controls. Multiple reviewers specifically praise the absence of unnecessary features that would break over time.
- Shredding performance — cheese shredding is mentioned as the single most satisfying use. Owners who previously used box graters consistently describe the difference as “life-changing.”
- Quiet operation — owners upgrading from budget processors are consistently surprised by how much quieter the induction motor is. The difference between 74 dB and 81 dB is immediately noticeable in a kitchen.
What Owners Complain About (Repeated Themes)
- Bowl staining — the most common complaint across all review platforms. Beets, carrots, and turmeric permanently stain the plastic bowl. Every long-term owner accepts this as a cosmetic issue, but first-time owners are often alarmed. This is a BPA-free plastic issue shared by every food processor brand — not specific to Cuisinart.
- Only one slicing thickness included — owners who want thicker or thinner slices must buy separate discs. The 4mm default is fine for most tasks but limiting for specific applications. This is the most common criticism of the value proposition.
- Blade dullness after 2–3 years — the S-blade eventually dulls, and some owners are surprised that a $170 machine needs a $20 blade replacement. This is normal wear for any blade that processes hard vegetables weekly.
- Feed tube pusher fit — a small number of owners report the feed tube pusher becoming loose or wobbly after extended use. This is typically caused by processing very hard ingredients (raw sweet potato, frozen fruit) that stress the pusher mechanism. Replacement pushers are available for ~$10.
- No variable speed — owners accustomed to the Breville’s infinitely variable speed dial occasionally miss that control. The three-speed system (High, Low, Pulse) is adequate for 95% of tasks but less precise for delicate final-stage processing.
Overall Sentiment
Across all platforms, the Cuisinart Custom 14 maintains an average rating of 4.6–4.7 out of 5 stars with over 8,000 reviews. The most common review structure is: “I was hesitant about the price, but after using it for [X months/years], I can’t imagine my kitchen without it.” Long-term owners are overwhelmingly positive — the complaints are almost exclusively from first-month owners who haven’t yet learned the proper techniques (pulse vs continuous, cold cheese, small bowl for small jobs).
Cuisinart Custom 14 vs KitchenAid 13-Cup Food Processor
The KitchenAid 13-Cup food processor (model KFP1318) is the Cuisinart’s most direct competitor. At a similar price point (~$150–$180) and nearly identical capacity, it’s the alternative most shoppers consider. Here’s an honest, detailed comparison.
Food Processor Gift Guide
A food processor is one of the most appreciated kitchen gifts because it’s a tool many people want but hesitate to buy for themselves. Here’s how to choose the right model for different recipients.
For the Newly Independent (First Apartment / College)
Recommendation: Cuisinart Custom 14. Young adults setting up their first kitchen benefit enormously from a food processor — it makes cooking from scratch accessible and fast, which is the single biggest factor in eating well on a budget. The 14-cup model is the right size because it handles everything from a single garlic clove (small bowl) to meal prep for the week. Pair it with a basic knife set and a cutting board for a complete kitchen starter gift. Budget approximately $170–$200 for the processor.
For the Busy Parent / Family Cook
Recommendation: Cuisinart Custom 14. Families of 3–6 need the 14-cup capacity for batch cooking, school lunch prep, and shredding cheese for taco night. The time savings are most valuable for busy households where weeknight cooking competes with homework, activities, and limited evening time. The 42 minutes saved per meal prep session translates to real, meaningful time recovered for a working parent. Budget approximately $170.
For the Serious Home Baker
Recommendation: Cuisinart Custom 14 plus the dough blade (included) and a silicone baking mat. The food processor method for pie crust, pastry dough, and pizza dough is consistently superior to hand methods. Bakers who receive this gift will discover techniques (cold butter processing, quick pastry) that transform their baking. Budget approximately $170–$190.
For the Health-Conscious Cook
Recommendation: Cuisinart Custom 14 plus the julienne disc. Health-conscious cooks who make salads, vegetable-based meals, hummus, and nut butters benefit from the slicing and shredding capabilities as much as the chopping. The julienne disc opens up vegetable noodle and slaw applications that make healthy eating more appealing. Budget approximately $195–$210.
For the Small-Kitchen Dweller
Recommendation: Cuisinart Mini Prep Plus (3-cup, ~$39) or Cuisinart 7-Cup (~$79). If counter and cabinet space are genuinely limited, the smaller Cuisinart models are excellent gifts that still handle the most common tasks (garlic, herbs, small-batch sauces, dressings). The Mini Prep Plus at $39 is an ideal stocking stuffer or small gift — it handles 80% of the tasks most people need a food processor for, at a fraction of the size and cost.
Seasonal Uses Throughout the Year
One of the Cuisinart Custom 14’s greatest strengths is its year-round versatility. Different seasons bring different cooking needs, and the food processor handles all of them. Here’s how it earns its keep every month of the year.
Spring: Fresh Salads & Light Preparations
Spring cooking is light, fresh, and vegetable-forward. The food processor shines for shredding cabbage and carrots for slaws, slicing radishes and cucumbers for salads, chopping fresh herbs (parsley, dill, chives, mint) that are coming into season, and making fresh pesto from the first basil of the year. The thin slicing disc produces paper-thin asparagus and fennel for raw spring salads. This is also the season for Easter baking — the pie crust method and dough blade handle hot cross buns, spring tarts, and pastry for quiche.
Summer: Batch Cooking & Outdoor Entertaining
Summer means larger quantities — backyard barbecues, potlucks, and entertaining. The 14-cup bowl handles the volume: double batches of hummus for a crowd, coleslaw for 12 people (a full head of cabbage in one pass), sliced tomatoes and cucumbers for a platter, and shredded cheese for nachos and tacos. Summer is also peak salsa season — the food processor makes restaurant-style salsa in 60 seconds from fresh tomatoes, onion, jalapeño, cilantro, and lime juice. For home gardeners processing a glut of summer vegetables, the food processor handles the volume that a knife cannot match.
Autumn: Baking Season & Harvest Processing
Autumn is when the food processor’s baking capabilities come into full use. Pie crust for apple pie, pumpkin pie, and pecan pie. Pastry dough for tarts and galettes. Bread dough for fresh loaves. The shredding disc processes apples for apple slaw and autumn salads, while the slicing disc handles potatoes for gratin, root vegetables for roasting, and butternut squash for soup. This is also the season for processing autumn harvest from gardens — shredding zucchini for fritters and freezing, slicing apples for drying, and making fresh breadcrumbs from stale sourdough for Thanksgiving stuffing.
Winter: Comfort Food & Holiday Entertaining
Winter cooking is heavy, rich, and built around comfort. The food processor handles the foundational prep: chopping onions, celery, and carrots for stews and braises (the soffritto base), shredding cheese for macaroni and cheese and au gratin potatoes, making pie crust for pot pies, and processing dried fruit and nuts for holiday baking. Holiday entertaining demands volume — the 14-cup bowl makes double batches of cranberry relish, chopped liver, cheese balls, and dips for parties. The dough blade handles bread rolls, cinnamon rolls, and pizza dough for casual holiday gatherings. After the holidays, the food processor handles the January reset: shredding vegetables for meal prep salads, making hummus and healthy dips, and processing cauliflower for low-carb rice substitutes.
Continue Reading
All models compared — from $54 to $400. Top picks at every budget.
Pair your food processor with the right blender for a complete setup.
The three knives every home cook actually needs — and what to avoid.
The best-value pressure cooker ever made — reviewed in full detail.
10 Common Food Processor Mistakes (And How to Fix Them)
After interviewing dozens of home cooks and reading thousands of user reviews, we identified the ten most common mistakes people make with their food processors — mistakes that waste food, damage the machine, or produce disappointing results. Every one of these is easily correctable once you know what to look for.
Mistake 1: Running Continuously Instead of Pulsing
This is the single most common mistake and the one that ruins more food than any other. When you hold down the On button, the blade spins at full speed for the entire duration — which turns onions into soup, herbs into paste, and nuts into butter within seconds. The fix: use short, firm pulses of 1–2 seconds each. Press and release. Check the texture. Pulse again. Most chopping tasks need 3–8 pulses total. Think of each pulse as one knife stroke — you would never hack at an onion with a knife 40 times without looking, so don’t do it with a food processor either.
Mistake 2: Overfilling the Bowl
The Cuisinart Custom 14 holds 14 cups, but that does not mean you should fill it to 14 cups for every task. When the bowl is too full, ingredients at the top sit above the blade’s reach and remain unprocessed, while the bottom gets over-worked into a paste. The fix: fill to no more than ⅔ capacity for chopping tasks (roughly 9 cups), and to the liquid fill line (about 10–11 cups) for wet tasks. If you have more ingredients than this, process in two batches. Two quick batches produce better results and take only marginally longer than one overcrowded batch.
Mistake 3: Using the Large Bowl for Small Jobs
Putting three garlic cloves or a single shallot into the 14-cup bowl means the ingredients have too much room to escape the blade. They spin around the outer edges of the bowl without being cut. The fix: use the included 3.5-cup small bowl for any job under 2 cups. The small bowl’s mini blade sits closer to the sides and catches small ingredients that would otherwise escape. This one change alone transforms garlic mincing from frustrating to effortless.
Mistake 4: Processing Warm Cheese
Room-temperature cheese shreds into a clumpy, smeared mess that clogs the shredding disc and produces unusable results. The fix: place cheese in the freezer for 20–30 minutes before shredding. Cold cheese produces clean, separate shreds that melt beautifully. This applies to mozzarella, cheddar, gouda, and even hard cheeses like Parmigiano — though hard cheeses need only 15 minutes in the freezer.
Mistake 5: Adding All Ingredients at Once
Loading the bowl with everything — wet and dry, hard and soft, large and small — guarantees uneven results. Hard vegetables stay chunky while soft ones turn to mush. The fix: add ingredients in stages. Process hard, dense vegetables (carrots, potatoes, beets) first for a few pulses, then add softer ones (onions, celery, tomatoes) and pulse together. For emulsified sauces, process dry ingredients first, then add oil gradually through the feed tube.
Mistake 6: Not Scraping Down the Sides
During processing, ingredients migrate to the sides of the bowl where the blade cannot reach them. If you don’t stop and scrape them back toward the centre, you end up with uneven results — some pieces perfectly processed, others untouched. The fix: stop the machine every 5–6 pulses (or every 30 seconds during continuous running), remove the lid, and use a silicone spatula to scrape the sides and bottom of the bowl. Then replace the lid and continue. This adds 10 seconds to the task and dramatically improves uniformity.
Mistake 7: Skipping the Dough Blade for Dough
Using the sharp S-blade for dough works in a pinch but tends to over-cut the gluten strands, producing a tougher, less elastic dough. The fix: switch to the included dough blade — the blunt plastic paddle — for all bread, pizza, and pasta doughs. The dough blade gently kneads without slicing through the gluten network. The difference is particularly noticeable in pizza dough, where the dough blade produces a more stretchy, extensible result that stretches thin without tearing.
Mistake 8: Processing Nuts Too Long
Nuts go from rough chop to powder in just 2–3 additional pulses. Many users who want chopped walnuts for a salad end up with walnut flour. The fix: pulse nuts 2–3 times only, checking after each pulse. If you need a rough chop, stop earlier than you think — the residual motion of the blade continues cutting for a fraction of a second after you release the button. For nut butter, the opposite applies: you need continuous running for 3–4 minutes, with breaks to scrape down the sides.
Mistake 9: Putting the S-Blade in the Dishwasher with Other Items
The stainless steel S-blade is razor-sharp and stays sharp through hundreds of dishwasher cycles. Reaching into a dishwasher cutlery basket where this blade is hiding is a genuine safety hazard. The fix: always remove the blade and place it separately on the top rack, blade-side down, away from other utensils. Better yet, hand-wash the blade by holding it from the centre hub and running it under water — it takes 10 seconds and is safer than any dishwasher arrangement.
Mistake 10: Never Using the Low Speed
Most users default to High for everything, but Low speed exists for a reason — it gives you more control for delicate tasks. The fix: use Low speed for emulsifications (mayonnaise, salad dressings), cream-based sauces, and any task where over-processing is a risk. Use High speed for hard vegetables, shredding, hummus, and dough. The difference between Low and High is roughly 30% less blade speed, which translates to significantly more control during the critical final seconds of processing.
Blade & Disc Mastery: A Complete Guide to Every Attachment
Most food processor owners use only the S-blade and never touch the other attachments. That’s like buying a Swiss Army knife and only using the main blade. Here is a detailed guide to every attachment the Cuisinart Custom 14 includes — and how to get the most from each one.
The S-Blade (Chopping Blade) — Your Daily Workhorse
The stainless steel S-blade is the attachment you’ll use for 80% of all food processor tasks. Its slightly curved, razor-sharp edges spin at high speed inside the bowl, creating a vortex that pulls ingredients down into the cutting path. The S-blade handles chopping, mincing, pureeing, mixing, and emulsifying. It is the only blade that sits at the bottom of the bowl — all other attachments mount on a disc spindle higher up.
Best practices for the S-blade: always start with the blade already seated in the bowl before adding ingredients. Adding the blade after ingredients are in the bowl causes it to sit unevenly on the drive shaft. For chopping tasks, use Pulse. For pureeing and emulsifying, run continuously but scrape down the sides every 30–45 seconds. Replace the S-blade every 2–3 years if you use the processor weekly — a dull blade produces uneven results and puts extra strain on the motor.
The Medium Slicing Disc (4mm)
The slicing disc mounts on the disc spindle above the bowl and cuts ingredients pushed through the feed tube into uniform rounds. The included disc produces 4mm (roughly ⅛ inch) slices — the standard thickness for cucumber rounds, zucchini slices, potato rounds for gratin, and tomato slices for sandwiches. To use it effectively, cut ingredients to fit the feed tube width and apply steady, even pressure on the pusher. Too fast and slices will be thick and uneven; too slow and they will be paper-thin. A medium, consistent pace produces the best results.
The slicing disc is also the fastest way to process large quantities of vegetables for salads, stir-fries, and layered dishes. Three medium zucchini take 20 seconds. Three large potatoes take under a minute. A full head of cabbage for coleslaw — when combined with the shredding disc — is done in two minutes total.
The Shredding Disc
The shredding disc is the reverse side of the slicing disc — same disc, flipped over. It shreds ingredients pushed through the feed tube into fine, uniform strips. This is the attachment that transforms cheese shredding from a tedious, knuckle-scraping chore into a 40-second task. It also shreds cabbage, carrots, beets, potatoes (for hash browns), zucchini (for fritters), and apples (for slaw).
The key to clean shredding is cold ingredients. Cheese should be chilled for 20–30 minutes in the freezer. Vegetables shred best straight from the refrigerator. Warm ingredients smear rather than shred, clogging the disc and producing unusable results. After shredding cheese, rinse the disc immediately — dried cheese is much harder to clean than fresh residue.
The Dough Blade
The dough blade is a blunt, plastic paddle designed specifically for kneading dough. Unlike the sharp S-blade, it does not cut through gluten strands — instead it folds and stretches the dough, mimicking the motion of hand kneading. Use the dough blade for all bread dough, pizza dough, pasta dough, and pie crust. The dough blade attaches to the same drive shaft as the S-blade but sits slightly higher, which gives the dough more room to fold beneath it.
Important limitation: the dough blade is designed for moderate quantities. For the Cuisinart Custom 14, the maximum is roughly 3 cups of whole grain flour or 4 cups of white bread flour. Exceeding these quantities overloads the motor and triggers the thermal protection. For larger batches, knead by hand or use a stand mixer with a dough hook.
The Mini S-Blade
The mini S-blade is a smaller version of the main S-blade, designed to fit the 3.5-cup small bowl. It operates identically to the full-size blade but processes smaller quantities more efficiently. Use it for mincing garlic (4–6 cloves), chopping a single shallot, making a small batch of salad dressing, processing fresh ginger, finely chopping chillies, or making a quick herb paste. The mini blade sits closer to the sides of the small bowl, which prevents small ingredients from spinning around the edges unchopped — the exact problem you get when using the large bowl for small jobs.
Optional Discs Worth Buying (Ranked by Usefulness)
The Complete Cuisinart Food Processor Lineup
Cuisinart makes more food processors than any other brand. Understanding the full range helps you confirm that the Custom 14 is the right choice — or discover that a different model better fits your needs. Here is every current Cuisinart food processor, compared.
Troubleshooting Guide: Fixing Common Problems
Food processors are mechanically simple machines, but a few recurring issues confuse users. Here are the most common problems and their solutions, based on our testing and extensive user feedback.
Problem: Food Isn’t Being Chopped Evenly
Likely cause: the bowl is overfilled, ingredients are too large, or you’re running continuously instead of pulsing. Solution: reduce the load to ⅔ capacity or less. Cut ingredients into 2-inch pieces before loading. Use short pulses (1–2 seconds each) with scraping between bursts. If you’re processing a mix of hard and soft ingredients, process the hard ones first for 3–4 pulses, then add the softer ones.
Problem: Liquid Is Leaking From the Bottom of the Bowl
Likely cause: the bowl seal (rubber gasket around the blade shaft) is worn, cracked, or not seated correctly. Solution: remove the bowl and inspect the seal. If it’s cracked or flattened, replace it — Cuisinart sells replacement seals for $8–$12. If the seal looks fine, make sure the bowl is twisted firmly into the locked position on the base. Also check that you’re not overfilling past the liquid fill line, which forces liquid under pressure past the seal.
Problem: The Motor Stopped Mid-Processing
Likely cause: the thermal overload protection triggered because the motor overheated. This happens when processing very stiff dough for more than 2–3 minutes continuously, or when the bowl is severely overloaded. Solution: unplug the machine and let it cool for 15 minutes. The motor will restart once it’s cooled. To prevent recurrence, reduce batch sizes (especially for dough), use shorter processing bursts, and avoid exceeding 3 cups of whole grain flour in a single batch.
Problem: The Lid Won’t Lock / Machine Won’t Start
Likely cause: the lid safety interlock is not fully engaged. The Cuisinart Custom 14 has a patented safety system that prevents the motor from running unless the lid is correctly locked. Solution: make sure the feed tube pusher is inserted (some versions require this), align the lid arrow with the handle, and twist firmly until you hear a click. If the lid mechanism feels stiff, clean the locking tabs — dried food residue can prevent full engagement.
Problem: The Blade Spins but Doesn’t Cut
Likely cause: the S-blade has become dull after extended use, or the blade is not seated properly on the drive shaft. Solution: remove the blade and inspect the edges. If they feel smooth when you carefully run your finger perpendicular to the edge (not along it), the blade is dull and should be replaced (~$20–$25). If the blade looks sharp, make sure it’s fully seated on the drive shaft — it should sit flat on the bottom of the bowl with the shaft fitting snugly into the blade hub.
Problem: Shredded Cheese Is Clumping
Likely cause: the cheese is too warm. Semi-soft cheeses (mozzarella, mild cheddar, gouda) smear and clump at room temperature rather than producing clean shreds. Solution: freeze the cheese for 20–30 minutes before shredding. The shredding disc works best with firm, cold cheese. Also make sure you’re using the correct side of the disc — the shredding side has larger holes than the slicing side.
Problem: Dough Is Too Wet or Too Dry
Likely cause: the liquid-to-flour ratio needs adjustment. Food processors process dough faster than by hand, which means the hydration develops differently. Solution: add liquid through the feed tube while the machine runs, and add it more slowly than you would by hand. Start with 80% of the liquid the recipe calls for, process for 20 seconds, then assess the dough. Add the remaining liquid in small increments. The dough should form a ball that pulls away from the sides of the bowl cleanly.
Problem: The Bowl Stains After Processing
Likely cause: processing high-pigment ingredients (beets, carrots, turmeric, sweet potatoes) in a BPA-free plastic bowl. This staining is cosmetic and does not affect the bowl’s function or safety. Solution: rub the bowl with a thin layer of vegetable oil before processing staining ingredients — this creates a barrier. After processing, immediately wash with a paste of baking soda and dish soap. For persistent stains, leave the paste on for 30 minutes before scrubbing. The staining does not affect food safety.
Best Recipes for the Cuisinart Custom 14
The food processor unlocks a category of recipes that are either too tedious or too time-consuming to make by hand. These are the recipes where the Cuisinart Custom 14 delivers results that genuinely surpass what you can achieve with a knife, box grater, or blender — the recipes that justify the machine’s place on your counter.
Restaurant-Quality Hummus
The food processor method for hummus produces a result that is noticeably silkier than store-bought and most restaurant versions. The technique: process ¼ cup tahini and 2 tablespoons lemon juice first for 60 seconds until whipped and pale. Add 2 cloves garlic, ½ teaspoon salt, and 2 cans of drained chickpeas (skins removed if you want maximum smoothness). Process for 2 minutes. With the machine running, drizzle 3–4 tablespoons of ice-cold water through the feed tube. Continue processing for another 2 minutes. The ice water emulsifies the tahini and creates a lighter, fluffier texture. Top with olive oil, paprika, and whole chickpeas. The 14-cup bowl handles a double batch — enough for a week of lunches.
Flaky All-Butter Pie Crust
The food processor method produces the most consistently flaky pie crust because the speed of processing prevents the butter from warming up. Cut 225g (1 cup) of unsalted butter into small cubes and freeze for 15 minutes. Add 300g (2½ cups) of flour and 1 teaspoon salt to the bowl with the S-blade. Pulse 3 times to combine. Add the frozen butter cubes and pulse 12–15 times until the butter is pea-sized and the mixture resembles coarse breadcrumbs. Through the feed tube, drizzle 60ml (¼ cup) of ice water while pulsing 4–5 times. The dough should hold together when squeezed. Turn out, form into a disc, wrap in cling film, and refrigerate for 1 hour. This produces a crust that is flakier than any hand-cut method because the butter stays cold throughout.
Homemade Pesto
Food processor pesto retains more herb texture than blender pesto, which tends to over-process the basil into a smooth paste. Process 60g (½ cup) of pine nuts and 2 garlic cloves for 5 pulses. Add 80g (3 cups loosely packed) of fresh basil leaves and 30g (¼ cup) of grated Parmesan. With the machine running on Low, drizzle 120ml (½ cup) of extra virgin olive oil through the feed tube over 30 seconds. Season with salt and lemon juice. The result has visible herb flecks, a vibrant green colour, and a texture that clings to pasta rather than sliding off. This recipe doubles easily in the 14-cup bowl.
Classic French Mayonnaise
Homemade mayonnaise in the food processor is genuinely foolproof once you’ve done it once. Place 2 egg yolks, 1 teaspoon Dijon mustard, 1 tablespoon lemon juice, and ½ teaspoon salt in the small bowl with the mini S-blade. Process for 15 seconds. With the machine running on Low, drizzle 240ml (1 cup) of neutral oil (sunflower, grapeseed, or light olive oil) through the small hole in the feed tube pusher at a rate of roughly 1 tablespoon every 5 seconds. The emulsification will thicken noticeably after about ⅓ of the oil is incorporated. Continue until all oil is added. The result is thick, creamy, stable mayonnaise that lasts 5 days refrigerated. Making it in the small bowl means less waste and easier cleanup.
Quick Pizza Dough
This recipe produces enough dough for two 12-inch pizzas in under 2 minutes of active work. Combine 360g (3 cups) of bread flour, 1 teaspoon instant yeast, 1 teaspoon salt, and 1 teaspoon sugar in the bowl with the dough blade. With the machine running on High, pour 240ml (1 cup) of warm water and 2 tablespoons of olive oil through the feed tube. Process for 60 seconds until the dough forms a smooth ball that pulls away from the bowl sides. If the dough is too sticky, add flour 1 tablespoon at a time; if too dry, add water 1 tablespoon at a time. Turn out onto a floured surface, knead 3–4 times by hand, and let rise in an oiled bowl for 1 hour (or refrigerate overnight for better flavour development).
Fresh Breadcrumbs
Tear 4–6 slices of day-old bread (any type — white, whole wheat, sourdough) into rough chunks and process with the S-blade for 8–10 seconds. The result is perfectly sized fresh breadcrumbs in seconds. For panko-style crumbs, spread on a baking sheet and toast at 375°F for 8–10 minutes until golden. Use for coating chicken cutlets, topping macaroni and cheese, binding meatballs, or adding crunch to casseroles. Fresh breadcrumbs are dramatically better than the dried packaged version — they absorb sauces more evenly and produce a crispier coating when fried.
Coleslaw from Scratch
Shred half a head of green cabbage through the shredding disc (45 seconds). Shred 2 large carrots through the same disc (15 seconds). For the dressing, use the small bowl: process ½ cup mayonnaise, 2 tablespoons apple cider vinegar, 1 tablespoon sugar, and ½ teaspoon celery salt for 10 seconds. Toss the shredded vegetables with the dressing. The entire coleslaw — from whole cabbage to dressed salad — takes under 3 minutes. Compare this to 15–20 minutes of hand-grating and you understand why the food processor changes how often people make coleslaw at home.
Homemade Almond Butter
Place 3 cups (450g) of dry-roasted almonds in the large bowl with the S-blade. Process continuously for 1 minute — the almonds will first turn to powder, then clump into a ball. Scrape down the sides with a spatula. Continue processing for another 2–3 minutes, stopping every minute to scrape down and give the motor a 30-second rest. The almonds will progress from clumpy ball to smooth, drippy butter. Add ½ teaspoon salt and 1 tablespoon honey or maple syrup if desired, and process for 10 more seconds to combine. The result is pure almond butter with no additives — and it costs roughly half the price of store-bought. Important: do not exceed 3 cups of nuts at once, and give the motor cooling breaks to prevent triggering the thermal protection.


