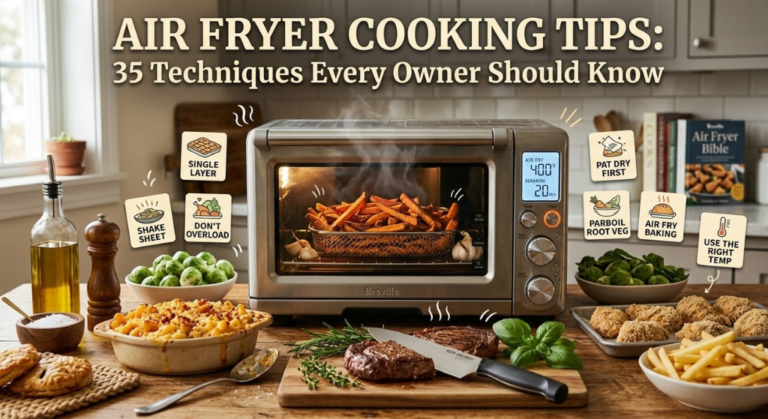
Air Fryer Cooking Tips: 35 Techniques Every Owner Should Know
What’s Covered
- The 5 Fundamental Rules
- Preheating — Why It Matters
- Oil Guide — How Much & What Type
- The Overcrowding Problem
- Tips for Proteins
- Tips for Vegetables
- Tips for Frozen Foods
- Reheating Tips
- Baking in the Air Fryer
- Temperature & Time Cheat Sheet
- Converting Oven Recipes
- 10 Mistakes to Avoid
- Cleaning & Maintenance
- Useful Accessories
- FAQs
- Air Fryer Types & Sizes
- Breakfast Recipes
- Diet-Specific Cooking
- Meal Prep Strategies
- Global Cuisine in the Air Fryer
- Seafood Mastery
- Troubleshooting Guide
- The Science Behind Air Frying
- Seasonal & Holiday Cooking
- Kid-Friendly Air Fryer Meals
- Energy Efficiency & Cost Savings
- Perfect Side Dishes & Pairings
- Sauces, Glazes & Finishing Touches
- Batch Cooking Mastery
- Spice Blends & Seasoning Recipes
- Transforming Leftovers
- Air Fryer Desserts
- Expanded FAQ
- Air Fryer Myths Debunked
- Air Fryer vs Other Appliances
- Hosting & Entertaining
- Seasonal Produce Guide
Most air fryer owners use 30% of what their machine can do — cooking chips and frozen nuggets while missing the techniques that turn an air fryer from a convenient gadget into the most-used appliance in the kitchen. This guide covers every technique, tip, and troubleshooting solution we’ve developed across eight weeks of daily air fryer testing and hundreds of cooked meals.
Whether you bought your air fryer last week or have owned one for years and gotten stuck in a routine, these 35 tips will change how you cook with it.
The 5 Fundamental Rules
Before any specific tips, these five rules govern everything. Break any of them and results suffer regardless of what else you do correctly.
Preheating — Everything You Need to Know
How Long to Preheat
The standard preheat time for most air fryers is 2–3 minutes. Larger-capacity machines (10 Qt dual-zone models) may need 3–4 minutes. Smaller compact models (2–3 Qt) are ready in 1.5–2 minutes. Many air fryers now have a dedicated preheat button that handles this automatically — use it if your machine has it. If not, simply set temperature, start the machine, and wait 2–3 minutes before adding food.
Do You Always Need to Preheat?
For most cooking tasks: yes. Exceptions are genuinely rare:
- Thick, room-temperature proteins (chicken breasts, thick chops) that need a gentle initial cooking phase may occasionally benefit from starting in a cold basket
- Very thin items that cook in under 5 minutes anyway (asparagus, thin fish fillets) where the preheat and cooking time are roughly equivalent
- Items you want to gently warm rather than crisp — leftover rice, bread, etc.
For everything else — chips, wings, vegetables, frozen food, anything you want crispy — preheat without exception.
Preheat With Accessories Inside
If you’re using a rack, skewer holder, or baking pan insert, place it inside the basket during preheating. A cold accessory inserted after preheating drops the basket temperature and extends cooking time unnecessarily.
Oil Guide — How Much, What Type, and When to Skip It
When You Need Oil
When You Don’t Need Oil
Best Oils for Air Frying
The Overcrowding Problem — Solved
Overcrowding is the #1 cause of disappointing air fryer results — and it’s also the most misunderstood. Here’s exactly what happens and how to work around it.
What Happens When You Overcrowd
When pieces of food touch each other in the basket, two things happen: (1) the surfaces touching other food are insulated from hot air — they steam against each other instead of crisping; (2) the excess moisture from all that food has nowhere to go, creating a humid cooking environment that further inhibits the Maillard reaction. The result is soft, pale, steamed food — exactly the opposite of what an air fryer is supposed to produce.
The Batch Strategy
The solution to overcrowding is batch cooking — and with the right approach it doesn’t significantly slow down your meal preparation:
- Cook the longest-cooking item first, then keep it in a warm oven (200°F) while cooking the second batch
- For chips specifically: cook in two batches, then combine both batches in the basket for a final 2-minute blast at maximum heat to re-crisp everything simultaneously
- For proteins: cook in single-layer batches; they stay hot longer than vegetables and can rest on a wire rack while the second batch catches up
- Dual-zone air fryers (Ninja DZ401) eliminate the batch problem for two different foods — use both baskets simultaneously with Smart Finish
Tips for Proteins
Tips for Vegetables
Tips for Frozen Foods
Reheating Tips — The Air Fryer’s Secret Superpower
Baking in the Air Fryer
Temperature & Time Cheat Sheet
Tested times are from a preheated 5.8 Qt basket air fryer at sea level. Add 1–2 minutes for larger machines, subtract 1 minute for compact 2–3 Qt models. All times assume a single layer with appropriate gaps.
Converting Oven Recipes to Air Fryer
10 Mistakes to Avoid
Advanced Techniques for Confident Air Fryer Cooks
Once the fundamentals are second nature, these techniques unlock the full range of what the air fryer can do — well beyond chips and chicken wings.
The Two-Stage Cook — Crispy Outside, Juicy Inside
For thick proteins that need both a thoroughly cooked interior and a crispy exterior — thick pork chops, large chicken breasts, whole chicken thighs — a two-stage approach produces the best of both worlds. Stage 1: cook at a moderate temperature (325–350°F) for 70% of the total cook time. The lower temperature allows the interior to cook through gently without the exterior overcooking. Stage 2: increase to maximum temperature (400–425°F) for the final 30% of cook time to aggressively crisp the exterior. The result is a protein that is evenly cooked throughout and crackle-crisp on the surface — something that is difficult to achieve at a single temperature.
The Moisture Trick for Smoking Prevention
When cooking high-fat foods — duck legs, pork belly, lamb chops — the rendered fat drips into the tray below and can smoke at high temperatures. The professional workaround: add 2 tablespoons of water to the drip tray before cooking. The water absorbs heat and prevents the dripping fat from reaching its smoke point. Replace the water halfway through cooking on long sessions. This technique eliminates smoke from fatty cooking without affecting the food quality above.
Air Fryer Dehydrating — An Underused Feature
Most air fryers have a dehydrate setting (90–135°F / 30–57°C) that turns the machine into a capable food dehydrator at a fraction of the cost of a dedicated unit. The most useful dehydrating applications:
- Beef jerky: slice beef (flank or sirloin) to 3–4mm thickness against the grain, marinate 4–12 hours, air fry at 150°F (66°C) for 4–5 hours. Produces jerky comparable to commercial products at a fraction of the cost per gram.
- Apple and mango chips: slice 2–3mm thin with a mandoline, arrange in single layer, 135°F (57°C) for 6–8 hours. Crispy, naturally sweet, no added sugar required.
- Kale chips: the fastest dehydrating task — kale chips at 150°F for 2 hours produce perfectly crispy, seasoned chips with none of the bitterness of oven-roasted kale.
- Herb drying: fresh thyme, rosemary, and sage at 100°F for 1–2 hours produce dried herbs with brighter colour and more intense flavour than commercially dried alternatives.
Making Crispy Tofu — The Technique That Converts Sceptics
Tofu’s high water content makes it notoriously difficult to crisp in a pan. The air fryer solves this problem completely. The technique: press extra-firm tofu between paper towels under a heavy pan for 30 minutes to extract as much water as possible. Cut into 2cm cubes. Toss with just 1 teaspoon of cornstarch per 200g of tofu — the cornstarch absorbs any remaining surface moisture and forms a thin crust. Season with salt, garlic powder, and a light coat of oil. Air fry at 400°F for 15–18 minutes, shaking at 8 minutes. The result is golden, crispy tofu that holds its shape, absorbs sauces well, and genuinely satisfies the textural expectation of something fried.
Achieving Restaurant-Style Chips at Home
Fresh-cut chips are the most technically demanding common air fryer task — but mastered, they produce results better than most restaurants. The full technique:
- Cut uniformly: 1cm × 1cm sticks, all the same length. Variation in thickness produces uneven cooking.
- Soak in cold water for 30 minutes: this removes surface starch that causes chips to stick together and results in a softer, less crispy exterior. After soaking, drain and dry completely — every drop of water must be removed.
- Parboil optional but recommended for chunky chips: 5 minutes in salted boiling water until just-tender on the exterior. Drain and let steam-dry on a wire rack for 5–10 minutes. Parboiling produces chips with a fluffy interior and an extremely crispy exterior after air frying.
- Toss with oil and salt — 1.5 teaspoons of oil per 400g of potato is the right amount.
- Cook in two stages: 360°F for 15 minutes (shaking at 8 min) to cook through, then 400°F for 8–10 minutes until deeply golden and crispy.
The Air Fryer Baked Potato — Better Than Oven
The air fryer produces a superior baked potato to the oven — crackle-crispy skin with a fluffy interior in 38 minutes vs 60 minutes. The technique that makes the difference: rub the potato generously with oil and coarse salt before cooking. The oil creates a frying-adjacent effect on the skin surface at 400°F, producing a dramatically crispier result than dry-baked potatoes. Pierce with a fork multiple times before cooking to prevent pressure build-up. No foil — foil steams rather than crisps the skin.
Crispy Chickpeas — The Perfect Snack
Drain and thoroughly dry one can of chickpeas — spreading on a tea towel and rolling for 2–3 minutes removes more moisture than patting alone. Toss with oil, smoked paprika, cumin, and salt. Air fry at 400°F for 15–18 minutes, shaking every 5 minutes. They continue crisping as they cool — don’t judge doneness while hot. Properly dried and cooked chickpeas stay crispy for 3–4 days in an airtight container and make an excellent high-protein snack or salad topping.
Air Fryer Placement & Safety
Clearance Requirements
Air fryers exhaust hot air from a vent at the back or sides of the unit. Always maintain a minimum of 5 inches (12cm) of clearance above and behind the air fryer during operation. Never operate an air fryer inside a cupboard, under a closed shelf, or directly against a wall — the exhaust cannot dissipate and the machine will overheat. Most kitchen fires attributed to air fryers result from inadequate clearance, not defective machines.
Countertop Surface
Place the air fryer on a heat-resistant surface. The base of the unit gets warm during extended cooking, and over time direct contact with laminate countertops can cause discolouration or warping. A silicone mat or a wooden chopping board under the machine provides adequate protection and takes up no additional space.
Do Not Leave Unattended for Extended Cooking
For short cook times (under 15 minutes), leaving the air fryer unattended is safe and normal. For extended cooking sessions (over 30 minutes, particularly with high-fat foods), check periodically and ensure the drip tray is not overfull with rendered fat. An overfull drip tray at high heat is the most common cause of air fryer fires.
Cleaning & Maintenance
After Every Use
- Empty and rinse the drip tray — the most important daily maintenance step
- Remove and wash the basket and crisper plate in warm soapy water or dishwasher (if manufacturer states dishwasher-safe)
- Wipe the interior of the air fryer unit with a damp cloth once cooled — grease splatter on the interior walls eventually smokes at high temperatures
Weekly
- Clean the heating element: turn the air fryer upside down, wipe the heating coil with a damp cloth (when fully cooled) to remove any splattered grease
- Inspect the basket coating: any flaking, peeling, or chipping of non-stick coating means the basket needs replacement — cooking with a damaged coating risks ingesting coating particles
The Salt and Seasoning Order — A Detail That Matters
Salt draws moisture from food surfaces through osmosis. Applied too early, it creates a wet surface that steams rather than crisps. Applied too late, it sits on top without penetrating. The optimal approach for air fryer cooking: season with salt and dry spices 15–20 minutes before cooking so the salt has time to draw moisture out and then be reabsorbed by the food — a process called dry brining. The moisture that initially forms on the surface is reabsorbed along with the dissolved salt, seasoning the food at the surface level rather than just on the exterior. Pat dry one final time immediately before the basket to remove any residual surface moisture before cooking begins.
Keeping Food Warm Between Batches
When cooking in batches — which is often necessary to avoid overcrowding — keeping the first batch warm without continuing to cook it is a practical challenge. The two best solutions: (1) a conventional oven set to its lowest temperature (170–200°F / 75–95°C) with the first batch on a wire rack over a tray — this keeps food hot and maintains crispiness without further cooking; (2) the air fryer’s Keep Warm function (if available, typically 170°F / 75°C) holds food for up to 30 minutes without overcooking. Never stack food in a container to keep warm — the steam trapped between pieces destroys the crispiness you worked to achieve. The combination of these two techniques — strategic seasoning timing and proper warm-holding between batches — separates cooks who consistently produce excellent air fryer results from those who get good results sometimes and disappointing results other times.
The Scrubbing Mistake
Never use steel wool, abrasive sponges, or metal utensils on a non-stick basket. These scratch and destroy the coating faster than anything else. For stuck food: soak the basket in warm soapy water for 10–15 minutes — the food releases without scrubbing. A silicone brush or non-abrasive sponge is the correct cleaning tool.
Useful Accessories
Frequently Asked Questions
Air Fryer Types & Sizes — Choosing the Right Machine
The air fryer market has expanded well beyond the original basket-style design. Understanding the different types — and matching them to your cooking habits, household size, and counter space — prevents the most common buyer’s remorse: a machine that’s too small, too large, or the wrong style for how you actually cook.
Basket-Style Air Fryers
The original and still most popular design. A pull-out basket with a perforated crisper plate sits inside a compact unit with a heating element and fan above. Basket air fryers range from 2-Qt compact models (ideal for single servings and snacks) to 8-Qt family-sized units. The basket design excels at foods that benefit from shaking — chips, roasted vegetables, small proteins. The pull-out basket is also the easiest to clean: most are dishwasher-safe and the non-stick surface releases food readily. The limitation is shape — the basket is typically round or square, which makes long items like whole fish fillets or rack of ribs awkward to fit without trimming.
Oven-Style Air Fryers
These look like compact countertop convection ovens with air fry functionality. They use wire racks instead of baskets and typically offer more vertical space, making them suitable for whole chickens, larger roasts, and multiple rack cooking. The trade-off: the larger chamber means air circulation is less concentrated than a basket model, so crisping takes slightly longer and may be less even. Oven-style units also take up significantly more counter space — they’re closer to a microwave in footprint than a basket air fryer. Where they shine is versatility: most include toast, bake, broil, dehydrate, and rotisserie functions alongside air frying, potentially replacing two or three other appliances.
Dual-Zone / Dual-Basket Air Fryers
Two independent baskets in one unit, each with its own heating element and temperature control. The primary advantage is cooking two different foods at two different temperatures simultaneously — chicken wings at 400°F in one basket and chips at 380°F in the other, both finishing at the same time. Models like the Ninja DZ401 include a Smart Finish feature that synchronises cook times by automatically adjusting the temperature of the shorter-cooking item. The downside: each basket is smaller than a single-basket model of equivalent total capacity, so you still can’t fit a large quantity of one food in a single layer. For families cooking the same food for four or more people, a single large basket may be more practical than two small ones.
Toaster-Oven Air Fryer Combos
A hybrid that replaces both a toaster oven and an air fryer. These typically include toast, bake, broil, pizza, and reheat functions alongside air frying. The interior is larger than a basket model but smaller than a full oven, making them suitable for 12-inch pizzas, 6 slices of toast, or a 4-pound chicken. The air frying performance is generally adequate but not as aggressive as a dedicated basket model — the wider chamber and less concentrated airflow produce slightly softer results. The real value is counter space consolidation: one appliance doing the work of three.
Size Guide by Household
Features Worth Paying For
Breakfast in the Air Fryer — Beyond Toast
Most air fryer owners never think to use it for breakfast, which means they’re missing one of the appliance’s strongest meal categories. The air fryer excels at the two things breakfast demands most: crispy textures and hands-off cooking that lets you prepare other components simultaneously.
Bacon — The Air Fryer’s Best Breakfast Performance
Air fryer bacon is objectively superior to pan-fried bacon in three ways: it’s more evenly cooked (no curled, half-raw strips), it’s less messy (rendered fat drips into the tray instead of splattering across the stovetop), and it requires zero attention once the basket closes. Lay 4–6 strips in a single layer — they can touch slightly since bacon is thin enough that contact surfaces still crisp. 375°F for 8–10 minutes for regular bacon, 6–8 minutes for streaky. No flipping needed. The rendered fat collects in the drip tray below — empty it immediately after cooking while still liquid; it solidifies into a stubborn mess once cooled. For extra-crispy bacon, extend by 2 minutes. For chewy bacon, pull at 7 minutes. The consistency is remarkable — every strip comes out the same doneness, which is nearly impossible in a frying pan where strips closest to the pan’s centre cook faster than those at the edges.
Eggs — Multiple Styles, One Appliance
The air fryer handles several egg preparations, though the technique varies by style:
- Hard-boiled eggs: place cold eggs directly in the basket (no water needed). 250°F for 15 minutes for fully set yolks, 13 minutes for slightly jammy centres. Transfer immediately to an ice bath for 5 minutes. The shells peel more easily than traditionally boiled eggs because the dry heat creates a small air pocket between the shell and the white. This is the most foolproof hard-boiled egg method available — no boiling water, no timing the rolling boil, no green ring around the yolk.
- Fried eggs: preheat a small, oven-safe, non-stick dish or silicone egg mould inside the basket. Crack the egg into the hot dish, season, and cook at 300°F for 3–5 minutes depending on desired doneness. The white sets while the yolk stays runny. No oil needed if using a non-stick dish.
- Egg bites / muffins: whisk 4 eggs with 2 tablespoons of cream, salt, pepper, and fillings (diced ham, cheese, spinach, peppers). Pour into silicone muffin cups. 300°F for 10–12 minutes. These are meal-prep gold — make a batch of 6 on Sunday, refrigerate, and reheat in 90 seconds in the air fryer each morning.
- Scrambled eggs: whisk eggs with a splash of milk, pour into a small oven-safe dish. 300°F for 8–10 minutes, stirring at 4 minutes and 7 minutes. The result is creamier than stovetop scrambled eggs because the gentler, surrounding heat doesn’t dry out the curds the way direct-contact pan heat does.
Toast and Pastries
The air fryer makes exceptional toast — better than a toaster for thick-cut bread, bagels, and crumpets because the circulating air crisps both sides simultaneously without the need to flip. Place bread slices directly on the basket floor. 350°F for 2–3 minutes for standard toast, 4 minutes for thick-cut sourdough. For croissants and pastries, 300°F for 3–4 minutes warms and re-crisps without burning the delicate layers. Day-old bakery croissants reheated in the air fryer are genuinely indistinguishable from fresh — the laminated layers puff back up and the exterior regains its shatter-crisp texture. This alone justifies the air fryer’s counter space for pastry lovers.
Hash Browns and Potato Cakes
Frozen hash browns are one of the air fryer’s easiest wins. Place directly from the freezer into the preheated basket. 400°F for 10–12 minutes, flip at 6 minutes. No oil needed — the hash browns contain enough fat in their pre-formed coating. The result is dramatically crispier than oven-baked hash browns and requires none of the attention that stovetop hash browns demand. For homemade potato cakes: grate potato, squeeze out every drop of moisture in a clean towel (this step is critical — wet grated potato steams instead of crisping), mix with a beaten egg, salt, and a tablespoon of flour. Form into patties, spray with oil, and air fry at 380°F for 12–14 minutes, flipping at 7 minutes.
Breakfast Sausages
Breakfast sausages in the air fryer cook more evenly than in a pan and produce less smoke. Place sausages in a single layer — they can be close together since they shrink during cooking. 375°F for 10–12 minutes, turning at 6 minutes. The casings crisp evenly on all sides, and the interior cooks through without the burst, split skins that pan-frying often causes. For a complete breakfast, cook sausages first, keep warm, then use the same basket for eggs and toast — the residual sausage flavour on the basket adds a savoury note to everything cooked after.
French Toast Sticks
Cut thick bread into strips, dip in a mixture of 2 beaten eggs, 3 tablespoons of milk, 1 teaspoon of cinnamon, and 1 teaspoon of vanilla extract. Let the bread soak for 30 seconds per side. Place in the basket in a single layer, spray with oil. 350°F for 8–10 minutes, flipping at 5 minutes. The exterior becomes golden and crispy while the interior stays custardy. Serve with maple syrup for dipping. This is a weekend breakfast that children can help prepare — the dipping and arranging is engaging for young cooks, and the air fryer does the rest safely.
Granola
Homemade granola in the air fryer is faster and more evenly toasted than oven-baked versions. Mix 2 cups of rolled oats with 2 tablespoons of honey, 1 tablespoon of melted coconut oil, a pinch of salt, and any additions (nuts, seeds, coconut flakes — add dried fruit after cooking). Spread in the basket — it can be slightly mounded since you’ll shake it twice. 300°F for 12–15 minutes, shaking at 5 and 10 minutes. The granola toasts more evenly than in an oven because the air fryer’s circulation reaches all surfaces, and the smaller batch size means less monitoring. Cool completely before storing — it crisps further as it cools.
Diet-Specific Air Fryer Cooking
The air fryer’s ability to create crispy, satisfying textures with minimal oil makes it a natural fit for specific dietary approaches. Whether you’re cooking keto, vegan, gluten-free, or low-calorie meals, the air fryer produces results that satisfy textural cravings without relying on the deep-frying or heavy oil that other cooking methods require.
Keto and Low-Carb Air Frying
The air fryer is arguably the best appliance for keto cooking. High-fat proteins and low-carb vegetables are exactly what it excels at. The key keto air fryer techniques:
- Pork rind breading: crush pork rinds into fine crumbs and use as a 1:1 replacement for breadcrumbs. Dip chicken, fish, or zucchini sticks in beaten egg, then coat in crushed pork rinds mixed with parmesan and garlic powder. Air fry at 380°F for 12–15 minutes. The pork rind coating becomes extraordinarily crispy — crispier than breadcrumbs — and adds fat and flavour rather than carbs. This single technique transforms keto cooking from restrictive to indulgent.
- Almond flour coating: for a nuttier flavour profile, use almond flour mixed with spices as a coating. It browns slightly less evenly than pork rinds but produces a more subtle, sophisticated crust. Best for fish and chicken tenders.
- Cheese crisps: place small mounds of grated parmesan (1 tablespoon each) on the basket floor with gaps between them. 375°F for 4–5 minutes until golden and bubbling. Cool on a paper towel — they crisp into lacy, crunchy wafers that serve as crackers, taco shells, or salad toppers. Zero carbs, maximum crunch.
- Avocado fries: slice firm avocado into wedges, coat in almond flour mixed with everything bagel seasoning, spray with oil. 380°F for 8–10 minutes. The exterior crisps while the avocado interior warms to creamy. Serve immediately — avocado fries don’t hold well.
- Bacon-wrapped everything: the air fryer renders bacon fat efficiently, making it ideal for bacon-wrapped asparagus, jalapeño poppers (stuffed with cream cheese), and bacon-wrapped chicken thighs. The bacon crisps evenly on all sides without the pan-frying mess. 375°F for 15–18 minutes for most bacon-wrapped items.
Vegan and Plant-Based Air Frying
The air fryer transforms plant-based proteins and vegetables into texturally satisfying meals that rival their meat counterparts. The key is understanding which plant-based ingredients benefit most from the air fryer’s dry, high-heat environment:
- Extra-firm tofu (pressed and cornstarch-coated): as described in the advanced techniques section, this produces golden, crispy cubes that absorb sauce beautifully. The cornstarch coating is the critical element — it creates a micro-crust that holds up under sauce without becoming soggy for 15–20 minutes after cooking.
- Tempeh strips: slice tempeh into 5mm strips, marinate in soy sauce, maple syrup, and smoked paprika for 30 minutes. Air fry at 375°F for 12–15 minutes, shaking at 8 minutes. The strips become chewy, smoky, and deeply flavoured — an excellent bacon substitute for sandwiches and salads.
- Seitan: cut into chunks or strips, toss with oil and spices. 380°F for 12–15 minutes. The air fryer gives seitan a crispy exterior that pan-frying achieves only with significant oil. The interior stays chewy and protein-dense.
- Cauliflower wings: break cauliflower into florets, dip in a batter of flour (or chickpea flour for gluten-free), plant milk, and spices. Air fry at 375°F for 12 minutes, then toss in buffalo sauce and return to the air fryer for 3 more minutes to set the sauce. The cauliflower becomes tender inside with a crispy, sauce-coated exterior.
- Chickpea fritters: mash drained chickpeas with diced onion, garlic, cumin, coriander, and a tablespoon of flour. Form into small patties, spray with oil. 375°F for 14–16 minutes, flipping at 8 minutes. Crispy outside, soft inside — excellent in pita bread with tahini sauce.
- Vegetable chips: thinly slice sweet potato, beetroot, or parsnip with a mandoline (2mm thickness). Toss with a minimal amount of oil and salt. 350°F for 10–14 minutes, shaking every 4 minutes. Watch carefully in the final minutes — they go from golden to burnt quickly. These are dramatically better than store-bought vegetable chips and contain no preservatives or excess oil.
Gluten-Free Air Frying
The air fryer is a natural ally for gluten-free cooking because it produces the crispy textures that gluten-free diets often miss without requiring wheat-based coatings. The best gluten-free breading alternatives for the air fryer:
- Rice flour coating: produces an exceptionally light, crispy crust. Mix rice flour with salt, pepper, and garlic powder. Dip food in beaten egg, then coat in rice flour. Air fry at 380°F. The rice flour crisps faster than wheat flour and stays crunchy longer.
- Cornmeal crust: for a Southern-style crunch, use fine cornmeal mixed with spices. Excellent on chicken tenders and fish fillets. The cornmeal adds a subtle sweetness and a texture that wheat breadcrumbs cannot replicate.
- Crushed gluten-free crackers or crisps: any gluten-free cracker crushed into crumbs works as a coating. Rice crackers, corn chips, or gluten-free pretzels all produce interesting textures and flavours.
- Polenta coating: roll food in cooked, cooled polenta (cut into cubes) for a thick, crunchy shell. Air fry at 380°F for 15–18 minutes. The polenta develops a golden crust while the interior stays creamy.
Low-Calorie and Weight-Loss Air Frying
The air fryer’s primary health advantage is oil reduction — most air fryer recipes use 1–2 teaspoons of oil where deep frying would use cups. But the calorie advantage goes beyond just less oil:
- Vegetable-forward cooking: the air fryer makes vegetables genuinely enjoyable to eat. Roasted broccoli, charred Brussels sprouts, and crispy cauliflower are more satisfying than steamed or boiled alternatives, making it easier to fill half the plate with vegetables.
- Lean protein preparation: chicken breast, white fish, and shrimp — all low-calorie proteins — develop better texture in the air fryer than in a pan with minimal oil. The dry heat creates a surface crust that holds in moisture, preventing the rubbery texture that lean proteins develop when pan-cooked without sufficient fat.
- Portion control: the basket’s physical size naturally limits portion sizes. You can’t overfill a 5-Qt basket the way you can pile food onto a sheet pan. The batch-cooking requirement also creates a natural pause between servings — the time it takes to cook the second batch gives your body time to register satiety from the first.
- Healthy snack alternatives: air-fried apple chips (thinly sliced, cinnamon-dusted, 300°F for 12 minutes), kale chips (150°F for 2 hours), and roasted chickpeas (400°F for 15 minutes) satisfy crunchy snack cravings at a fraction of the calories in packaged crisps or crackers.
Air Fryer Meal Prep — Cook Once, Eat All Week
The air fryer’s speed and batch-cooking capability make it an excellent meal prep tool — but only if you approach it strategically. Randomly air frying a week’s worth of food produces a refrigerator full of items that degrade at different rates and reheat with varying success. The following system produces a week of meals from two focused air fryer sessions.
The Sunday Prep Session (90 Minutes)
Dedicate 90 minutes on Sunday to cooking three core components that form the base of five weeknight dinners:
- Batch 1 — Protein (30 minutes): cook 6–8 chicken thighs or 4 chicken breasts. Season half with a spice rub (paprika, garlic powder, onion powder, salt, pepper) and half with a different profile (lemon zest, oregano, thyme). Two flavour profiles from one protein prevents meal fatigue across the week. Cook at 375°F, checking internal temperature to 165°F. Rest, slice, and store in separate containers.
- Batch 2 — Roasted Vegetables (25 minutes): two full baskets of mixed vegetables — one tray of Mediterranean (courgette, red onion, bell pepper, cherry tomatoes) and one tray of root vegetables (sweet potato, carrot, parsnip). Both at 390°F for 12–15 minutes per basket. Store separately to maintain distinct flavour profiles.
- Batch 3 — Grain or Starch (20 minutes): air fryer baked potatoes (400°F, 38 minutes) or crispy rice cakes (cooked rice pressed into patties, 380°F for 12 minutes). These provide the carbohydrate base for assembled meals.
From these three batches, you can assemble five different dinners in under 10 minutes each night: chicken and vegetable grain bowls, chicken wraps with roasted vegetables, loaded baked potatoes with sliced chicken, stir-fry with pre-cooked protein and vegetables, and chicken salad with crispy rice cakes.
The Wednesday Refresh (30 Minutes)
By Wednesday, the Sunday prep is running low or the textures have degraded. A focused 30-minute session refreshes the week:
- Quick protein: salmon fillets (400°F, 10 minutes) or shrimp (400°F, 6 minutes) — these cook fast and stay good for 2–3 days refrigerated.
- Fresh vegetables: broccoli or asparagus — both cook in under 10 minutes and are best eaten within 2 days of cooking.
- Snack prep: a batch of crispy chickpeas or kale chips for healthy snacking through the rest of the week.
Storage and Reheating for Meal Prep
Freezer-Friendly Air Fryer Meal Prep
Certain air-fried items freeze exceptionally well and can go directly from freezer to air fryer for a meal in under 20 minutes:
- Chicken tenders: bread and air fry as normal, cool completely, freeze on a baking sheet, then transfer to freezer bags. Reheat from frozen at 375°F for 10–12 minutes. They come out nearly identical to freshly cooked.
- Veggie fritters: grate vegetables, mix with egg and flour, form into patties, air fry, cool, and freeze. Reheat from frozen at 375°F for 12 minutes.
- Breakfast egg muffins: make a batch of 12 egg muffins with various fillings, cool, freeze individually wrapped. Reheat from frozen at 300°F for 8–10 minutes. A hot, protein-rich breakfast in under 10 minutes with zero morning prep.
- Stuffed peppers: fill halved peppers with a mixture of rice, beans, cheese, and spices. Air fry at 350°F for 15 minutes, cool, freeze. Reheat from frozen at 350°F for 18–20 minutes.
Global Cuisine in the Air Fryer
The air fryer’s versatility extends well beyond Western comfort food. With the right techniques, it produces authentic results for cuisines from around the world — often faster and with less oil than traditional methods.
Japanese Air Fryer Cooking
- Tonkatsu (breaded pork cutlet): pound a pork loin cutlet to 1cm thickness. Coat in flour, dip in beaten egg, press into panko breadcrumbs. Spray generously with oil. 380°F for 12–14 minutes, flipping at 7 minutes. The panko becomes golden and shatteringly crisp — the defining characteristic of proper tonkatsu. Serve with shredded cabbage and tonkatsu sauce.
- Karaage (Japanese fried chicken): marinate bite-sized chicken thigh pieces in soy sauce, ginger, garlic, and mirin for 30 minutes. Coat in potato starch (not flour — potato starch produces the distinctive light, crackly karaage crust). Air fry at 390°F for 12 minutes, shaking at 6 minutes. The potato starch coating creates a texture that wheat flour cannot replicate — lighter, crispier, and more delicate.
- Takoyaki (octopus balls): use a takoyaki pan insert or silicone mould in the air fryer. Fill with batter and octopus pieces. 350°F for 12–15 minutes. While not identical to the traditional pan-turned version, the air fryer produces a passable result for home cooks without a dedicated takoyaki pan.
- Edamame: toss frozen edamame (in pods) with sesame oil and salt. 380°F for 8–10 minutes. The pods blister and char slightly, concentrating the flavour. A dramatically better snack than boiled edamame.
Middle Eastern and Mediterranean
- Falafel: blend soaked (not canned) chickpeas with onion, garlic, parsley, cumin, and coriander. Form into balls, spray with oil. 375°F for 14–16 minutes, flipping at 8 minutes. The air fryer falafel develops a crispy crust while staying moist inside — closer to deep-fried falafel than oven-baked versions, with a fraction of the oil.
- Shawarma-spiced chicken: coat chicken thighs in a paste of yogurt, cumin, coriander, turmeric, paprika, cinnamon, and lemon juice. Marinate 2–4 hours. Pat off excess marinade, air fry at 375°F for 20–22 minutes. The spice crust caramelises into a deeply flavoured exterior while the thigh meat stays juicy.
- Halloumi fries: cut halloumi into finger-width strips. Coat lightly in flour mixed with za’atar. Spray with oil. 380°F for 8–10 minutes, turning at 5 minutes. The exterior becomes golden and crunchy while the interior softens to a satisfying squeaky texture. Serve with a squeeze of lemon and honey drizzle.
- Stuffed vine leaves (dolma): arrange prepared dolma in a single layer in the basket, brush with olive oil. 325°F for 15–18 minutes. The grape leaves crisp slightly on the exposed surfaces while the rice filling steams inside. A faster alternative to the traditional oven method.
Indian Air Fryer Cooking
- Samosas: fill prepared samosa wrappers (or filo pastry triangles) with spiced potato and pea filling. Brush with oil. 375°F for 12–14 minutes, flipping at 7 minutes. The pastry becomes flaky and golden — not identical to deep-fried samosas but dramatically better than oven-baked versions, and with 80% less oil.
- Tandoori chicken: marinate chicken pieces in yogurt, tandoori spice mix, lemon juice, and garlic for 4–12 hours. Shake off excess marinade. 375°F for 22–25 minutes for bone-in pieces. The yogurt marinade tenderises the meat while the high heat chars the spice crust, producing the characteristic tandoori colour and flavour without a tandoor oven.
- Pakoras: coat vegetable pieces (onion, spinach, potato) in a spiced chickpea flour batter. Spray with oil. 375°F for 10–12 minutes, flipping at 6 minutes. The chickpea flour batter crisps effectively in the air fryer, producing a satisfying crunch that’s close to deep-fried pakoras.
- Papadums: place store-bought papadums (the dried, uncooked kind) directly in the basket. 350°F for 1–2 minutes. They puff and crisp almost instantly — faster and more evenly than microwaving, with no oil needed. Watch constantly — they go from perfect to burnt in seconds.
Mexican and Latin American
- Chicken flautas: fill flour tortillas with seasoned shredded chicken, roll tightly, secure with a toothpick, spray with oil. 380°F for 10–12 minutes, turning at 6 minutes. The tortilla becomes crispy and golden while the filling stays moist. Serve with guacamole, sour cream, and salsa.
- Elote (Mexican street corn): air fry corn on the cob at 390°F for 12–14 minutes, turning halfway. Brush with a mixture of mayonnaise, lime juice, chili powder, and cotija cheese immediately after cooking. The char from the air fryer mimics the grill marks of traditional elote.
- Empanadas: fill prepared empanada dough with your choice of filling (beef, chicken, cheese). Crimp edges with a fork, brush with egg wash. 375°F for 12–15 minutes. The pastry becomes flaky and golden, and the filling heats through without the oil absorption of deep frying.
- Churros: pipe churro dough directly onto perforated parchment in the basket. 375°F for 10–12 minutes. While the texture differs slightly from deep-fried churros (less oily, slightly drier), rolling in cinnamon sugar immediately after cooking produces a satisfying result. The air fryer churro is lighter and less greasy than its deep-fried counterpart.
East Asian
- Spring rolls (fresh, not frozen): fill rice paper wrappers with vermicelli noodles, vegetables, and shrimp or tofu. Spray with oil. 375°F for 8–10 minutes, turning at 5 minutes. The rice paper crisps into a shatteringly thin shell — completely different from the soft fresh spring roll, and arguably more delicious.
- Korean fried chicken: double-fry technique adapted for the air fryer. Coat chicken pieces in cornstarch, air fry at 350°F for 15 minutes (first fry). Rest 5 minutes. Increase to 400°F and cook for 8 more minutes (second fry). Toss in gochujang sauce immediately. The double-cook creates the ultra-crispy shell that defines Korean fried chicken.
- Chinese five-spice pork belly: score the pork belly skin, rub with five-spice powder and salt. 350°F for 25 minutes, then 400°F for 10 minutes to crisp the skin. The result is crackling pork belly with tender, spiced meat — a dish that traditionally requires a much longer oven roast.
- Gyoza / dumplings: place frozen dumplings in a single layer, spray with oil. 375°F for 10–12 minutes, shaking at 6 minutes. The bottoms become golden and crispy while the tops stay soft — mimicking the pan-fried potsticker texture without the careful stovetop attention.
Seafood Mastery in the Air Fryer
Seafood is where the air fryer truly differentiates itself from other cooking methods. The rapid, dry heat cooks fish and shellfish quickly enough to prevent the overcooking that turns delicate proteins rubbery, while still developing the surface browning that steaming and poaching cannot achieve.
Fish Fillets — The Complete Guide
The single most important rule for air fryer fish: do not overcook. Fish goes from perfectly done to dry and flaky in a window of 1–2 minutes. Start checking 2 minutes before you expect the fish to be done. The fish is ready when it flakes easily with a fork and the interior is just opaque — not translucent, not dry.
Shellfish Techniques
- Shrimp / prawns: the air fryer’s speed is ideal for shrimp, which overcook in seconds. Large shrimp at 400°F for 6–8 minutes, shaking at 4 minutes. They’re done when pink and curled into a C shape — an O shape means overcooked. For garlic butter shrimp, toss in garlic butter after cooking, not before (butter burns at air fryer temperatures).
- Scallops: pat completely dry (the single most important step — wet scallops steam instead of sear). Season with salt and pepper. 400°F for 5–6 minutes. Do not flip — the top browns under the heating element while the bottom develops a crust against the hot basket. The result is a golden, caramelised exterior with a buttery, translucent centre.
- Lobster tails: split the shell, expose the meat, brush with garlic butter. 380°F for 8–10 minutes. The meat stays succulent while the butter bastes the surface. Baste with additional butter at the 5-minute mark. This is dramatically easier than the traditional boiling or steaming method and produces more flavourful results because the butter baste adds richness that water-based cooking cannot.
- Calamari rings: coat in seasoned flour, then beaten egg, then panko breadcrumbs. Spray with oil. 400°F for 6–8 minutes. The key is high heat and short time — overcooked calamari becomes rubbery. At 6 minutes, the coating is golden and the squid inside is tender.
Fish Cakes and Fish Burgers
The air fryer produces superior fish cakes to pan-frying because all surfaces crisp simultaneously rather than just the two sides that contact the pan. Form fish cake mixture (flaked cooked fish, mashed potato, herbs, lemon zest, bound with egg), chill for 30 minutes to firm up, spray with oil. 375°F for 14–16 minutes, flipping at 8 minutes. The chilling step is critical — warm fish cake mixture falls apart in the air fryer’s airflow. For fish burgers, form seasoned fish mince into patties, air fry at 380°F for 12–14 minutes. The patty develops a firm, crispy exterior while staying moist inside.
Troubleshooting Guide — Fixing Common Problems
When air fryer results disappoint, the cause is almost always one of a handful of fixable issues. This troubleshooting guide addresses the most common problems in order of frequency.
Problem: Food Is Soggy, Not Crispy
Problem: Food Is Dry and Overcooked
Problem: Uneven Cooking — Some Pieces Burnt, Others Raw
Problem: Air Fryer Produces Smoke
Problem: Food Sticks to the Basket
Problem: Food Is Cooked on Top but Raw on the Bottom
This is the most common complaint from new air fryer users and it has one simple solution: flip the food at the midpoint. The heating element is above the food in most air fryers, which means the top surface receives more direct radiant heat than the bottom. For items that can’t be flipped (loose vegetables, small items), shaking the basket redistributes the food so all surfaces cycle through the top position. If you’re already flipping and still getting uneven results, the basket may be overcrowded — the bottom layer of a crowded basket receives almost no direct airflow.
The Science Behind Air Frying
Understanding why the air fryer works the way it does helps you troubleshoot problems, adapt recipes, and make better cooking decisions. The science is straightforward but the practical implications are significant.
Convection vs Radiation vs Conduction
Traditional ovens cook primarily through radiation (heat radiating from the heating element) and conduction (heat transferring from the hot air to the food surface). The air fryer adds a third, dominant mechanism: forced convection. A powerful fan circulates hot air at high velocity across all exposed food surfaces. This forced convection strips away the boundary layer of cool, moist air that naturally surrounds food in a conventional oven — the same boundary layer that insulates food and slows browning. By removing this insulating layer, the air fryer delivers heat to the food surface much more efficiently, which is why air fryers cook 20–25% faster than conventional ovens at the same temperature setting.
The Maillard Reaction in the Air Fryer
The Maillard reaction — the chemical process that produces browning, complex flavours, and appealing aromas — requires three conditions: temperatures above 280°F (140°C), the presence of amino acids (from protein), and low surface moisture. The air fryer excels at creating all three conditions simultaneously. The high-velocity air rapidly evaporates surface moisture, the compact chamber reaches target temperature quickly, and the concentrated heat delivers temperatures well above the Maillard threshold to the food surface. This is why air-fried food often has more pronounced browning and flavour development than the same food cooked in a conventional oven at the same temperature — the oven’s slower moisture evaporation delays the onset of the Maillard reaction.
Why Overcrowding Ruins Everything — The Physics
When food pieces touch in the basket, the contact surfaces create a sealed pocket where moisture cannot escape. This pocket becomes a micro-environment of 100% humidity — essentially a tiny steam chamber. In 100% humidity, the temperature cannot exceed 212°F (100°C) regardless of how hot the air fryer is set, because all additional energy goes into converting water to steam rather than raising the temperature. Since the Maillard reaction requires temperatures above 280°F, the surfaces between touching food pieces never brown. They steam. This is why a single layer with gaps produces crispy food and a crowded basket produces pale, soft food — it’s not a minor difference in quality, it’s a fundamental difference in the physics of what’s happening at the food surface.
Oil’s Role — More Than Just Fat
Oil in the air fryer serves three functions beyond adding flavour: (1) it acts as a heat transfer medium, conducting heat from the hot air to the food surface more efficiently than air alone — oil conducts heat approximately 5 times better than air; (2) it fills microscopic surface irregularities on the food, creating a smoother surface that browns more evenly; (3) it raises the effective cooking temperature at the food surface because oil can reach temperatures above 400°F while water-based surfaces are limited to 212°F until all surface moisture evaporates. This is why a light coat of oil produces dramatically crispier results than cooking dry — you’re not just adding fat, you’re fundamentally changing the heat transfer physics at the food surface.
Why the Air Fryer Dries Food Faster
The same forced convection that makes the air fryer efficient at crisping also makes it efficient at drying. The high-velocity air strips moisture from food surfaces continuously — there’s no humidity build-up inside the compact chamber because the exhaust vent constantly expels moist air. This is why lean proteins (chicken breast, white fish) overcook more quickly in the air fryer than in an oven — the drying effect is more aggressive. The practical implication: lean proteins need oil to protect the surface, moderate temperatures to slow moisture loss, and careful timing to prevent overcooking. Fatty proteins (chicken thighs, salmon, pork belly) are naturally protected by their fat content, which melts slowly and bastes the surface during cooking.
Seasonal & Holiday Air Fryer Cooking
The air fryer earns its counter space year-round, but certain seasons and holidays bring specific cooking challenges that the air fryer handles exceptionally well — often better than the oven that’s monopolised by the turkey or roast.
Summer — When You Don’t Want to Heat the Kitchen
The air fryer’s compact chamber produces a fraction of the ambient heat that a full oven generates. In summer, this means you can cook crispy, satisfying meals without raising the kitchen temperature by several degrees. The best summer air fryer applications:
- Burgers: 375°F for 10–12 minutes for beef patties, flip at 6 minutes. The fat renders and drips away, producing a leaner burger than pan-frying, with a crispy exterior that grilling sometimes misses.
- Grilled vegetables: courgette, aubergine, corn, and peppers char beautifully at 390°F for 10–15 minutes. Toss with olive oil and herbs before cooking.
- Fish tacos: breaded white fish strips at 400°F for 10 minutes. The air fryer produces the crispy fish that makes great tacos without the deep fryer setup and cleanup.
- BBQ chicken wings: air fry plain wings at 400°F for 22 minutes, then toss in BBQ sauce and return to the air fryer for 2 minutes to caramelise the sauce. The sauce sets into a sticky glaze rather than remaining wet and sliding off.
Autumn — Comfort Food Season
- Roasted butternut squash: cubed, tossed with oil, maple syrup, and cinnamon. 380°F for 15–18 minutes. The natural sugars caramelise into a sweet, deeply browned exterior.
- Apple chips: thinly sliced apples dusted with cinnamon. 300°F for 12–15 minutes, shaking every 5 minutes. They crisp as they cool — a healthy autumn snack that costs pennies per batch.
- Stuffed mushrooms: remove stems, fill caps with a mixture of cream cheese, garlic, herbs, and breadcrumbs. 350°F for 10–12 minutes. The mushroom caps soften while the filling browns and bubbles.
- Roasted chestnuts: score an X on the flat side of each chestnut. 375°F for 15–18 minutes. The shells peel easily after air frying, and the nut inside is tender and sweet.
Winter Holiday Cooking
When the oven is occupied by a turkey or roast, the air fryer becomes the side-dish workhorse:
- Roast potatoes:
- Pigs in blankets: wrap cocktail sausages in streaky bacon. 375°F for 12–14 minutes. The bacon crisps evenly on all sides — something that oven-cooked pigs in blankets rarely achieve because the bottom sits in rendered fat on the baking sheet.
- Brussels sprouts with bacon: halve sprouts, toss with diced bacon and oil. 380°F for 14–16 minutes, shaking at 8 minutes. The sprouts char on their cut faces while the bacon renders and crisps. A side dish that converts Brussels sprout skeptics.
- Cranberry brie bites: place small squares of puff pastry in silicone mini muffin cups, add a cube of brie and a teaspoon of cranberry sauce. 350°F for 10–12 minutes. The pastry puffs and the cheese melts into a gooey, festive appetiser.
- Yorkshire puddings: heat oil in silicone muffin cups at 425°F for 5 minutes, pour in batter, cook at 400°F for 12–15 minutes. The air fryer’s intense top heat helps the puddings rise and crisp, though results vary by model — some produce excellent puddings, others are inconsistent. Worth testing with your specific machine.
Spring — Lighter Cooking
- Asparagus with lemon and parmesan: 400°F for 5–6 minutes, finish with lemon zest and shaved parmesan. The fastest spring side dish.
- Spring vegetable fritters: grated courgette, peas, mint, and feta bound with egg and flour. 375°F for 12 minutes, flipping at 6 minutes. Light, fresh, and crispy.
- Lamb cutlets: season with rosemary and garlic. 380°F for 8–10 minutes for medium-rare, flipping at 4 minutes. The air fryer produces a beautiful sear on lamb that’s difficult to achieve in a pan without setting off every smoke alarm.
Kid-Friendly Air Fryer Meals
The air fryer is a secret weapon for parents because it produces the crispy textures that children universally prefer while using significantly less oil than deep frying. The following recipes have been tested with children aged 3–12 and consistently receive enthusiastic reception.
The Golden Rules of Kid Air Fryer Cooking
- Crispy wins every time. Children prefer crispy textures over soft ones. The air fryer’s ability to crisp the exterior of almost anything — from chicken nuggets to broccoli — is its greatest asset for family cooking.
- Mild seasoning first, bold later. Air fry kid portions with minimal seasoning (salt, a little garlic powder) and add stronger flavours (hot sauce, chilli, strong herbs) to adult portions separately after cooking.
- Involve them in preparation. Children who help coat chicken in breadcrumbs or arrange vegetables in the basket are significantly more likely to eat the result. The air fryer’s simplicity makes it safe for children to help with preparation (not operation — the basket and interior are dangerously hot during and after cooking).
- Shape matters. The same mixture shaped into fingers, balls, or mini patties receives a better reception from children than the same food in an unfamiliar shape. Use silicone moulds to create fun forms.
Kid-Approved Recipes
- Homemade chicken nuggets: cut chicken breast into bite-sized pieces. Coat in flour, dip in beaten egg, roll in panko breadcrumbs mixed with a little parmesan. Spray with oil. 380°F for 12 minutes, shaking at 6 minutes. These taste dramatically better than frozen nuggets and contain no preservatives. Make a double batch and freeze half — reheat from frozen at 375°F for 10 minutes.
- Mac and cheese bites: mix cooked macaroni with cheese sauce, press into silicone muffin cups, top with breadcrumbs. 350°F for 10 minutes. The top becomes crispy while the interior stays creamy. Children love the individual portions and the crunchy top.
- Mini pizza rolls: roll prepared pizza dough into small circles, add sauce and cheese, fold and seal. Brush with garlic butter. 375°F for 10–12 minutes. Better than store-bought pizza rolls and you control the ingredients.
- Sweet potato chips: cut sweet potato into chip shapes, toss with a tiny amount of oil and salt. 380°F for 14–16 minutes, shaking at 8 minutes. Sweeter and more appealing to children than regular chips, with more nutritional value.
- Apple chips with cinnamon: thinly slice apples, dust with cinnamon sugar. 300°F for 12–15 minutes. A healthy snack that satisfies the crunch craving. Children can arrange the slices in the basket (with supervision).
- Fish fingers: cut white fish into finger shapes, coat in flour, egg, and breadcrumbs seasoned with a little lemon zest. 380°F for 12 minutes. Homemade fish fingers that taste better than frozen and contain no additives.
- Veggie tots: mix grated broccoli and carrot with cheese, breadcrumbs, and egg. Form into small cylinder shapes. 375°F for 12–14 minutes, flipping at 7 minutes. The crispy exterior hides the vegetables inside — a technique that has converted many vegetable-resistant children.
Energy Efficiency & Cost Savings
The air fryer’s energy consumption is significantly lower than a conventional oven, and for small to medium cooking tasks, it’s the most energy-efficient cooking appliance in most kitchens. Understanding the numbers helps justify the counter space and the purchase.
Air Fryer vs Oven — Energy Comparison
When the Oven Is More Efficient
The air fryer’s efficiency advantage diminishes with large quantities. If you’re cooking for 6+ people and would need 3–4 air fryer batches to cook what fits on one oven sheet pan, the oven may use less total energy because you’re running the air fryer for 3–4 times as long. The crossover point is approximately 1.5 kg of food — below that, the air fryer wins on energy; above it, the oven may be more efficient. For most daily cooking tasks (1–4 servings), the air fryer is the clear energy winner.
Reducing Oil Costs
A household that switches from deep frying to air frying reduces oil consumption by approximately 90%. A deep fryer uses 2–3 litres of oil per session; an air fryer uses 1–2 teaspoons. At typical cooking oil prices, this represents a saving of $3–5 per deep-frying session. For households that deep fry weekly, the annual oil saving alone is $150–$250 — more than the cost of a mid-range air fryer.
Time Savings — The Hidden Economy
The air fryer’s faster cooking times save 10–15 minutes per meal compared to a conventional oven (including preheat time). For someone who cooks dinner 5 times a week, that’s 50–75 minutes saved weekly — approximately 40–60 hours annually. The time saving compounds with the reduced cleanup: air fryer baskets are typically dishwasher-safe and take 30 seconds to rinse, versus the scrubbing that oven-roasted pans require. Over a year, the air fryer saves the average household 50+ hours of cooking and cleanup time.
Perfect Side Dishes & Pairings
One of the air fryer’s overlooked strengths is its ability to produce restaurant-quality side dishes while the main course cooks elsewhere. These pairings are designed to cook alongside a main protein — either in a dual-basket air fryer or in sequence — and complement rather than compete with the main dish.
Protein + Side Pairing Guide
Five-Minute Side Dishes
When the main course is cooking in the oven or on the stovetop, these air fryer sides are ready in 5 minutes or less:
- Garlic bread: slice a baguette, spread with garlic butter. 350°F for 3–4 minutes. Crispy, buttery, and faster than the oven.
- Pita chips: cut pita into triangles, brush with olive oil and za’atar. 350°F for 4–5 minutes. Serve with hummus.
- Cherry tomatoes: toss with oil and salt. 400°F for 5 minutes. They burst and concentrate into intense, sweet flavour bombs — excellent alongside grilled chicken or fish.
- Naan bread: brush with butter. 350°F for 2–3 minutes. Puffs slightly and develops charred spots. Better than microwave-warmed naan by a wide margin.
- Crispy capers: drain, pat dry, toss with oil. 350°F for 5 minutes. They pop open and become crunchy, salty garnishes for fish, salads, and pasta.
Sauces, Glazes & Finishing Touches
The air fryer excels at cooking proteins and vegetables, but the difference between good air fryer food and exceptional air fryer food often comes down to what happens after cooking — the sauces, glazes, and finishing touches that add moisture, flavour complexity, and visual appeal. Understanding which sauces work in the air fryer, which must be added after cooking, and how to build flavour in layers separates competent air fryer cooking from genuinely impressive results.
Sauces That Go On Before Cooking
These sauces and coatings can withstand the air fryer’s high heat and actually benefit from it — the heat caramelises sugars, sets glazes, and intensifies flavours:
Sauces That Go On After Cooking
These sauces contain ingredients that break down, separate, or burn at air fryer temperatures. Always add them to already-cooked food:
Building a Complete Sauce Strategy
The most effective approach is a three-layer flavour system: (1) a dry seasoning or oil-based marinade applied before cooking for base flavour; (2) a glaze or sticky sauce applied in the final 3–5 minutes for caramelised sweetness and visual appeal; (3) a fresh finishing sauce or squeeze of citrus applied at the table for brightness and moisture. This three-layer approach produces food with depth, complexity, and textural contrast that a single seasoning cannot achieve. A practical example: chicken wings seasoned with salt, pepper, and garlic powder before cooking (layer 1), tossed in honey-garlic glaze in the final 3 minutes (layer 2), and served with a blue cheese dipping sauce on the side (layer 3). Each layer adds a dimension that the others cannot provide.
Compound Butters for Air Fryer Finishing
Compound butter — softened butter mixed with flavourings — is one of the simplest and most effective finishing techniques for air-fried proteins. Place a tablespoon of compound butter on a hot steak, chicken breast, or fish fillet immediately after removing from the air fryer. The residual heat melts the butter, creating an instant sauce that bastes the food in flavoured fat. The most versatile compound butter combinations:
- Garlic herb: softened butter, minced garlic, chopped parsley, salt, lemon zest. The universal finishing butter for chicken, steak, fish, and vegetables.
- Blue cheese: softened butter, crumbled blue cheese, cracked black pepper. Exceptional on steak and burgers.
- Chilli lime: softened butter, lime zest, chilli flakes, salt. Perfect for corn on the cob, sweet potato, and shrimp.
- Miso: softened butter, white miso paste, a touch of honey. The umami-rich miso butter transforms simple grilled chicken and roasted vegetables into something restaurant-worthy.
- Sun-dried tomato and basil: softened butter, chopped sun-dried tomatoes, fresh basil, garlic. Excellent on chicken breast and pork chops.
Make compound butter in advance, roll into a log in cling film, and refrigerate for up to 2 weeks or freeze for 3 months. Slice a coin of butter each time you need a finishing touch. The cost is negligible and the impact on flavour is enormous.
Batch Cooking Mastery — Feeding a Crowd
Cooking for more than two people in an air fryer requires strategy. Without a plan, you’ll spend an hour producing lukewarm, unevenly cooked food in frustrating small batches. With a plan, you can serve a hot, crispy meal for four to six people in 30–40 minutes using a single-basket air fryer.
The Sequential Batch System
The key insight: not all foods suffer equally from waiting. Proteins retain heat and texture longer than starches, which retain heat longer than vegetables. Cook in this order to maximise quality:
- First: longest-cooking proteins. Chicken thighs, pork chops, or thick fish fillets that need 20+ minutes. These stay hot on a wire rack in a warm oven (200°F) while everything else cooks. Proteins hold well for 15–20 minutes without significant quality loss.
- Second: starches and dense vegetables. Chips, roasted potatoes, sweet potato cubes. These hold reasonably well for 10–15 minutes in a warm oven, especially if spread on a wire rack (stacking creates steam that destroys crispiness).
- Third: quick-cooking vegetables and delicate items. Asparagus, broccoli, leafy greens. These cook in 5–8 minutes and should go straight from basket to plate. They degrade within minutes of cooking, so time them to finish last.
The Dual-Basket Advantage
If you own a dual-basket air fryer, batch cooking becomes dramatically simpler. Cook the protein in one basket and the side in the other, both at compatible temperatures. For temperature mismatches, cook the item that tolerates holding first, then use both baskets for the final cook. Example: cook chicken thighs at 375°F in basket 1 (they hold well), then use basket 1 for a quick re-crisp of the chicken while basket 2 cooks broccoli at 400°F for the final 8 minutes.
Quantity Planning
Keeping the First Batch Crispy
The biggest challenge in batch cooking is maintaining the crispiness of the first batch while the second cooks. These techniques, ranked by effectiveness:
- Wire rack in a warm oven (best): place cooked food on a wire rack set over a baking sheet in an oven at 170–200°F. The wire rack allows air to circulate around all surfaces, preventing the bottom from steaming against a solid surface. Food stays hot and crispy for 15–20 minutes.
- Air fryer Keep Warm function: if your machine has this setting (typically 170°F), it holds food without further cooking. However, the food sits in the basket where the bottom surface contacts the crisper plate — the bottom may soften slightly. Better than a covered container but not as good as a wire rack.
- Uncovered on a plate at room temperature: for short waits (under 10 minutes), simply leave cooked food uncovered on a plate. It will cool slightly but retain most of its crispiness. Never cover with foil or a lid — trapped steam destroys crispiness within minutes.
Spice Blends & Seasoning Recipes
Having a collection of pre-mixed spice blends ready to grab eliminates the most common barrier to flavourful air fryer cooking: the temptation to use only salt and pepper because mixing individual spices feels like too much effort for a weeknight meal. Make these blends in bulk, store in airtight jars, and you’re always 30 seconds away from a complex seasoning.
Universal All-Purpose Blend
This blend works on virtually everything — chicken, pork, fish, vegetables, tofu, and potatoes. Mix in these proportions: 2 tablespoons garlic powder, 2 tablespoons onion powder, 1 tablespoon smoked paprika, 1 tablespoon salt, 1 teaspoon black pepper, 1 teaspoon dried thyme, ½ teaspoon cayenne (optional). Store in an airtight jar. Use 1–2 teaspoons per portion of protein, 1 teaspoon per basket of vegetables. This single blend eliminates the “what should I season this with?” decision for 80% of air fryer cooking.
Specialty Blends
Seasoning Application Tips
- Apply oil first, then seasoning. Oil acts as an adhesive that holds spice blends to the food surface. Without oil, loose spices fall off during cooking and collect in the drip tray — wasted flavour.
- Pat dry, then season. Moisture on the food surface dilutes spice blends and prevents them from adhering. Pat proteins and vegetables dry before applying oil and seasoning.
- Season the flat side that faces up. In the air fryer, the top surface receives the most direct heat and develops the most browning. Apply slightly more seasoning to the upward-facing surface for maximum flavour development.
- Toast whole spices before grinding. If you make blends from whole spices (cumin seeds, coriander seeds, peppercorns), toast them in a dry pan for 2 minutes before grinding. The heat releases volatile oils that intensify the spice’s flavour by 30–50%. This extra step takes 2 minutes and transforms a good blend into an exceptional one.
Transforming Leftovers — Beyond Simple Reheating
The air fryer’s reheating capability is well known — but reheating is only the beginning. The air fryer can transform yesterday’s leftovers into entirely new dishes that taste freshly made, not like warmed-over remnants. This section goes beyond the reheating tips covered earlier to show how leftover ingredients become the foundation for new meals.
Leftover Roast Chicken — Three New Meals
- Chicken quesadillas: shred leftover chicken, mix with cheese, peppers, and a pinch of cumin. Fill flour tortillas, fold, spray with oil. 375°F for 8–10 minutes, flipping at 5 minutes. The tortilla becomes crispy and the cheese melts into the chicken. Serve with salsa and sour cream.
- Crispy chicken salad topper: toss shredded chicken with a teaspoon of oil and your favourite spice blend. Spread in a single layer. 380°F for 6–8 minutes until the edges are crispy and golden. The shredded chicken develops crunchy edges that add textural contrast to salads — far more interesting than cold leftover chicken on greens.
- Chicken fried rice: press cold cooked rice into a thin layer in a small oven-safe dish. Top with diced leftover chicken, frozen peas, and a beaten egg seasoned with soy sauce. 350°F for 12–15 minutes, stirring at 8 minutes. The rice develops crispy bits while the chicken reheats and the egg scrambles through the mixture.
Leftover Rice and Grains
Day-old rice is actually superior to fresh rice for certain air fryer applications because the dried-out grains crisp more aggressively:
- Crispy rice cakes: press cold cooked rice into patties (about 1cm thick), brush with soy sauce and sesame oil. 380°F for 12–15 minutes, flipping at 8 minutes. The exterior becomes golden and crunchy while the interior stays chewy. Top with avocado, a fried egg, or spicy tuna for a complete meal.
- Arancini (rice balls): form cold risotto or seasoned rice around a cube of mozzarella. Coat in flour, egg, and breadcrumbs. 375°F for 12–14 minutes. The breadcrumb coating crisps while the cheese inside melts. A zero-waste way to use leftover risotto that tastes better than the original dish.
- Stuffed peppers: mix leftover rice with beans, corn, cheese, and spices. Stuff into halved bell peppers. 350°F for 18–22 minutes. The pepper roasts and softens while the filling heats through and the cheese browns on top.
Leftover Vegetables
- Veggie fritters: mash or finely chop leftover roasted vegetables. Mix with a beaten egg, a tablespoon of flour, and grated cheese. Form into patties. 375°F for 12–14 minutes, flipping at 7 minutes. The exterior crisps while the interior stays soft and flavourful. Works with virtually any leftover vegetable — broccoli, sweet potato, courgette, carrots, cauliflower.
- Vegetable-loaded flatbread: spread leftover roasted vegetables on a naan or flatbread with cheese and a drizzle of olive oil. 350°F for 5–6 minutes. The bread crisps, the cheese melts, and the vegetables warm through. A 6-minute meal from leftovers that tastes like it came from a restaurant.
- Soup topper croutons: cube day-old bread, toss with oil, garlic powder, and herbs. 350°F for 5–7 minutes, shaking at 3 minutes. These air fryer croutons are crunchier and more evenly toasted than oven-baked versions and take half the time. Scatter over any soup for textural contrast.
Leftover Bread and Bakery Items
- French toast from stale bread: stale bread actually makes better French toast than fresh bread because it absorbs more of the egg mixture without falling apart. Dip thick slices in a mixture of eggs, milk, cinnamon, and vanilla. 350°F for 8–10 minutes, flipping at 5 minutes. The air fryer produces French toast that’s crispy outside and custardy inside — better than most restaurant versions.
- Bread pudding cups: tear stale bread into pieces, mix with a custard of eggs, milk, sugar, and vanilla. Press into silicone muffin cups. 325°F for 14–16 minutes. Individual bread puddings with a crispy top and soft, custardy centre. Add raisins, chocolate chips, or diced apple for variety.
- Croutons and breadcrumbs: stale bread becomes either crunchy croutons (cubed, oiled, seasoned, 350°F for 5–7 minutes) or fine breadcrumbs (air fry bread slices at 300°F for 8 minutes until completely dry, then pulse in a food processor). Homemade breadcrumbs are superior to store-bought in both flavour and texture, and they cost nothing when made from bread that would otherwise be discarded.
Air Fryer Desserts — Sweet Endings
The air fryer’s ability to create crispy exteriors and evenly heated interiors extends to desserts — and some of the best air fryer results are sweet rather than savoury. The concentrated top heat creates caramelised sugar crusts, the rapid cooking preserves moist interiors, and the small batch size is perfect for desserts that are best eaten fresh.
Fruit-Based Desserts
- Apple crumble: slice apples into a small oven-safe dish, top with a mixture of oats, flour, brown sugar, butter, and cinnamon. 325°F for 18–22 minutes. The topping becomes golden and crunchy while the apples soften into a bubbling, cinnamon-scented filling. Serve with vanilla ice cream. The air fryer produces a superior crumble topping to the oven because the concentrated heat from above crisps the oat mixture more aggressively.
- Banana boats: split a banana lengthwise (in the skin), fill the gap with chocolate chips and mini marshmallows. Wrap loosely in foil. 350°F for 8–10 minutes. The banana caramelises, the chocolate melts, and the marshmallows toast. Unwrap and eat with a spoon. A campfire dessert made in the kitchen.
- Grilled pineapple: slice pineapple into rings, brush with a mixture of brown sugar and cinnamon. 380°F for 8–10 minutes, flipping at 5 minutes. The sugar caramelises into a dark, sticky glaze while the pineapple softens and intensifies in sweetness. Serve with coconut ice cream for a tropical dessert.
- Peach halves with mascarpone: halve peaches, remove the pit, fill the cavity with a spoonful of mascarpone mixed with honey and vanilla. 350°F for 10–12 minutes. The peach softens and caramelises while the mascarpone warms into a creamy filling. Dust with cinnamon before serving.
Chocolate Desserts
- Molten lava cakes: pour chocolate cake batter into greased ramekins (fill ¾ full). 325°F for 10–12 minutes. The exterior sets while the centre remains liquid — the defining characteristic of a lava cake. The air fryer’s top heat creates a slightly domed, set top that cracks when you spoon into it, revealing the molten chocolate beneath. Check at 10 minutes — the difference between a liquid centre and a set centre is 60–90 seconds.
- Chocolate chip cookie cups: press cookie dough into silicone muffin cups. 325°F for 10–12 minutes. The edges become crispy and golden while the centre stays soft and chewy. Add a scoop of ice cream to the warm cookie cup for an instant dessert that looks and tastes impressive.
- S’mores dip: spread chocolate chips in a small oven-safe dish, top with mini marshmallows. 350°F for 5–6 minutes until the marshmallows are toasted and the chocolate is melted. Serve with graham crackers for dipping. All the flavour of campfire s’mores without the fire pit.
- Churro bites with chocolate sauce: cut store-bought puff pastry into small squares, brush with melted butter, air fry at 375°F for 6–8 minutes. Toss in cinnamon sugar immediately after cooking. Serve with a chocolate dipping sauce made from melted chocolate thinned with a splash of cream.
Pastry and Dough Desserts
- Hand pies: fill circles of pie dough with fruit filling (apple, cherry, blueberry), fold into half-moons, crimp edges with a fork, brush with egg wash. 350°F for 12–15 minutes. The pastry becomes flaky and golden while the filling bubbles inside. These are portable, portion-controlled, and dramatically better than store-bought hand pies.
- Cinnamon rolls (from tube dough): separate pre-made cinnamon roll dough and place in the basket with gaps between them. 325°F for 10–12 minutes. The rolls bake through and develop a golden exterior while staying soft inside. Apply the included icing while still warm. Faster than the oven and the rolls develop a crispier exterior.
- Donut holes: cut biscuit dough (from a tube) into small balls. Air fry at 350°F for 5–6 minutes. Toss in cinnamon sugar or glaze with a simple icing (powdered sugar + milk). The dough puffs into light, airy donut holes with a slightly crispy exterior. A 10-minute dessert from start to finish.
- Baklava bites: layer filo pastry sheets (brushed with melted butter between layers) with chopped nuts and honey in a small oven-safe dish. Score into portions. 325°F for 15–18 minutes. The filo becomes shatteringly crisp and the honey-nut filling caramelises. Pour additional honey syrup over the hot pastry immediately after cooking.
Expanded FAQ — Your Questions Answered
Air Fryer Myths Debunked
The air fryer’s popularity has generated a significant amount of misinformation — some from marketing departments overstating capabilities, some from early adopters generalising from limited experience, and some from the natural telephone game of online recipe sharing. Separating fact from fiction helps you use the air fryer correctly and avoid the frustration of following advice that doesn’t work.
Myth 1: “Air fryers are just small convection ovens”
This is the most common dismissive claim about air fryers, and it’s technically partially true but practically misleading. Yes, both air fryers and convection ovens use a fan to circulate hot air. But the differences in chamber size, fan speed, and airflow design produce meaningfully different cooking results. A convection oven’s fan moves air gently through a large chamber — the air velocity at the food surface is low. An air fryer’s fan moves air aggressively through a compact chamber — the air velocity at the food surface is 3–5 times higher than a convection oven. This higher velocity strips the boundary layer of cool, moist air from the food surface more effectively, producing faster browning, crispier textures, and shorter cook times. Calling an air fryer “just a small convection oven” is like calling a sports car “just a small sedan” — the engineering differences produce fundamentally different performance.
Myth 2: “Air fryers don’t need any oil”
While air fryers use dramatically less oil than deep frying, cooking completely oil-free produces inferior results for most foods. Oil serves as a heat transfer medium that accelerates browning, creates a smoother surface for even crisping, and adds flavour. Lean proteins (chicken breast, fish, tofu) and fresh vegetables produce significantly better results with 1–2 teaspoons of oil per basket load. Foods that work well without added oil are those with natural fat content (chicken thighs, sausages, bacon) or pre-coated frozen items that already contain fat in their breading. The “no oil needed” marketing claim is technically true — the food will cook without oil — but the quality difference with a minimal amount of oil is dramatic enough that skipping oil entirely is false economy.
Myth 3: “You can’t cook for a family in an air fryer”
This myth stems from people buying undersized air fryers for their household. A 2-Qt air fryer cannot cook for a family of four — but a 5.8-Qt or larger model handles family dinners with one or two batches. A dual-basket model eliminates most batch cooking entirely. The key is matching the air fryer capacity to your household size (see the Types & Sizes section above). With the right size machine and a batch-cooking strategy, feeding a family of four takes 25–35 minutes — comparable to oven cooking but with crispier results and less energy.
Myth 4: “Air fryer food tastes the same as deep-fried food”
This overclaim from enthusiastic air fryer advocates sets unrealistic expectations. Air-fried food is very good — often excellent — but it is not identical to deep-fried food. Deep frying submerges food in oil, which conducts heat more aggressively and uniformly than air, producing a specific texture (shatteringly crisp, uniformly golden, oil-infused) that air frying approximates but does not replicate. Air-fried food is typically drier on the surface, slightly less uniformly browned, and lacks the oil-rich mouthfeel of deep-fried food. The honest comparison: air-fried food is 80–90% as good as deep-fried food at 10–20% of the oil, cost, mess, and health impact. That’s an excellent trade-off — but expecting identical results leads to disappointment.
Myth 5: “You should never preheat an air fryer”
Some online sources claim preheating is unnecessary because the air fryer heats up so quickly. This is wrong for most cooking tasks. While the air fryer does heat faster than an oven, those first 2–3 minutes of cooking in a cold basket produce steamed, pale food rather than crispy, browned food. The preheat ensures the basket, the heating element, and the interior walls are all at cooking temperature before food enters. The exceptions (thin items that cook in under 5 minutes, items you want to warm gently) are narrow. For the vast majority of air fryer cooking, preheating is not optional.
Myth 6: “Air fryers are only good for frozen food and chips”
This myth comes from owners who haven’t explored beyond the obvious. While the air fryer excels at frozen food and chips, it’s equally capable with fresh proteins (steak, salmon, chicken, shrimp), all vegetables, baked goods (muffins, brownies, cookies), breakfast items (eggs, bacon, hash browns), and global cuisine (falafel, tonkatsu, samosas). The air fryer is a general-purpose cooking appliance that happens to be marketed primarily through its frozen food capability. The full range of what it can do is covered throughout this guide.
Myth 7: “Bigger air fryers are always better”
A larger air fryer has advantages (more capacity, fewer batches) but also disadvantages: longer preheat times, higher energy consumption, more counter space, and — critically — potentially less efficient air circulation if the food quantity doesn’t fill the larger basket. A single chicken thigh in a 10-Qt basket sits in a vast air volume that circulates less efficiently than in a 5-Qt basket. The right size is the one that matches your typical cooking quantity, not the largest you can afford. Oversized air fryers for small households waste energy and counter space while producing no improvement in food quality.
Myth 8: “You can’t open the air fryer during cooking”
Unlike a pressure cooker, opening the air fryer basket during cooking is completely safe and has minimal impact on cooking. The compact chamber reheats to target temperature within seconds of closing — the heat loss from a 10-second opening is negligible. Checking food at the midpoint, flipping items, and shaking the basket are all recommended practices that require opening the machine. The myth likely originates from conflation with pressure cookers, where opening the lid mid-cycle is genuinely disruptive and potentially dangerous.
Air Fryer vs Other Appliances — Honest Comparisons
Understanding where the air fryer wins, loses, and ties against other common kitchen appliances helps you decide when to reach for the air fryer and when another tool is the better choice. These comparisons are based on practical cooking results, not marketing claims.
Air Fryer vs Deep Fryer
Air Fryer vs Oven
Air Fryer vs Microwave
Air Fryer vs Grill / BBQ
Hosting & Entertaining with Your Air Fryer
The air fryer’s ability to produce hot, crispy food in small batches makes it an excellent tool for entertaining — not as the sole cooking appliance for a dinner party, but as a dedicated station for appetisers, snacks, and components that keep guests fed while the main course finishes elsewhere.
The Air Fryer Appetiser Station
Set up the air fryer as a self-serve appetiser station during gatherings. Pre-prepare items that cook quickly and serve them in rotation throughout the event:
- First wave (guests arrive): crispy chickpeas (pre-made, served at room temperature) and cheese crisps (pre-made, stored in an airtight container). Both require zero last-minute cooking.
- Second wave (30 minutes in): frozen spring rolls (9 minutes at 375°F) and mozzarella sticks (6–7 minutes at 375°F). These go straight from freezer to basket with zero prep.
- Third wave (1 hour in): halloumi fries (8–10 minutes at 380°F) and stuffed mushrooms (10–12 minutes at 350°F). These require 5 minutes of prep but cook while you socialise.
- Fourth wave (dinner transition): garlic bread (3–4 minutes at 350°F) and roasted cherry tomatoes (5 minutes at 400°F) to accompany the main course.
Each wave takes 5–10 minutes of air fryer time and produces enough appetisers for 4–6 guests. The air fryer’s speed means you’re never more than 10 minutes away from the next round of hot, crispy food.
Build-Your-Own Air Fryer Bar
For casual entertaining, set up a build-your-own bar where guests customise their own items and you air fry them to order:
- Nacho bar: lay tortilla chips on the basket, top with cheese, jalapeños, and beans. 375°F for 3–4 minutes until the cheese melts. Each guest customises their own nachos.
- Flatbread pizza station: provide naan bread, sauce, cheese, and toppings. Guests build their own flatbread pizzas. 375°F for 5–6 minutes per pizza. The air fryer produces personal pizzas faster than delivery.
- Slider bar: form mini burger patties in advance. Guests choose their toppings. 375°F for 8–10 minutes per batch of sliders. Provide brioche buns, lettuce, tomato, cheese, pickles, and various sauces.
Dinner Party Strategy
For a sit-down dinner party, use the air fryer as a supporting appliance rather than the primary one. The oven handles the main roast or large protein; the air fryer handles the components that benefit from its speed and crisping ability:
- Starter: air-fried halloumi with honey and za’atar (8 minutes) while guests have drinks.
- Side dish 1: crispy roast potatoes (25 minutes, two batches) — the air fryer produces crispier roast potatoes than the oven.
- Side dish 2: charred broccoli or asparagus (5–8 minutes) — timed to finish when the main course is plated.
- Dessert: individual molten lava cakes (10–12 minutes) — the air fryer’s small-batch capability is perfect for individual desserts that feel special.
This approach uses the air fryer’s strengths (crispy textures, fast cooking, individual portions) while the oven handles what it does best (large roasts, slow cooking). The result is a multi-course meal where every component is cooked using the method that produces the best result for that specific dish.
Seasonal Produce Guide for Air Frying
Fresh, in-season produce not only tastes better — it air fries better. In-season vegetables have lower water content, more concentrated sugars, and denser cell structures that all contribute to superior caramelisation and texture in the air fryer. This seasonal guide helps you select the best produce for air frying throughout the year, with specific techniques for each season’s peak ingredients.
Spring Produce (March–May)
Summer Produce (June–August)
Autumn Produce (September–November)
Winter Produce (December–February)
Related Guides
Top-rated models tested — best picks at every price point.
Our #1 rated air fryer reviewed in full — the Ninja DZ401.
Which wins for each cooking task? A 25-food comparison.
The two best air fryer brands compared in full detail.


