
The 9 Must-Have Kitchen Appliances: An Expert’s Guide
- Tier 1: Foundations
- Tier 2: Game-Changers
- Tier 3: Convenience
- Knife Care & Sharpening
- Air Fryer Size Guide
- Stand Mixer Attachments
- Instant Pot Time Chart
- Blender vs Processor
- Budget vs Premium
- Small Kitchen Solutions
- Meal Prep Guide
- Appliance Care
- Common Mistakes
- Kitchen Safety
- Diet-Specific Guide
- Countertop Organization
- Warranty & Longevity
- Cooking for One
- Energy Efficiency
- Smart Kitchen Tech
- FAQ
Setting up a kitchen can feel like navigating a minefield of smart gadgets and AI-powered gizmos. You’re bombarded with ads for the latest “revolutionary” chopper or Wi-Fi-enabled toaster that promises to change your life. The result? Crowded counters, empty wallets, and appliances that gather more dust than compliments.
This is not that kind of list. As someone who has spent years testing, using, and abusing kitchen equipment, I’ve learned a critical lesson: a truly great kitchen isn’t built on novelty, but on a foundation of versatile, powerful, and reliable workhorses. These are the tools that don’t just perform one task well; they unlock new ways of cooking, save you precious time, and deliver consistently delicious results.
In this definitive guide, we will cut through the noise. We’ll explore the nine truly essential appliances, tiered by their foundational importance, that every modern American kitchen should have. From the undisputed champions that form the bedrock of any culinary space to the modern game-changers that redefine weeknight meals, this is your expert-curated list for building a kitchen that truly works. Beyond the core nine, we’ll dive deep into maintenance guides, size selection, budget breakdowns, meal prep strategies, and everything else you need to make informed decisions about your kitchen investments.
Tier 1: The Unquestionable Foundations
These are the non-negotiables. The titans of the countertop. Investing in high-quality versions of these three items will pay dividends in every single meal you prepare for years to come. They are the definition of “buy it for life.”
1. The Chef’s Knife: An Extension of Your Hand
Okay, it’s not an “appliance,” but no list of kitchen essentials is complete without it. Your chef’s knife is, without question, the single most important tool you will ever own. It’s used in virtually every recipe. A great knife makes prep work faster, safer, and more enjoyable. A bad knife makes cooking a frustrating, dangerous chore.

Our Pick: Victorinox Fibrox Pro 8-Inch Chef’s Knife
Before you spend $200, start here. The Victorinox Fibrox Pro is arguably the best value in the culinary world. It’s beloved by home cooks and professional chefs alike for its razor-sharp edge, comfortable non-slip grip, and incredible durability. It proves that you don’t need to break the bank to get world-class performance.
- Why it’s a must-have: It handles 90% of your cutting tasks—dicing onions, mincing garlic, chopping vegetables, and slicing meat—with effortless precision.
- What to look for: A full-tang blade (where the metal runs the full length of the handle) for balance, high-carbon stainless steel for edge retention, and a comfortable grip. This knife ticks all the boxes.
2. The Stand Mixer: The Culinary Workhorse
For a long time, the stand mixer was seen as a luxury item for avid bakers. Not anymore. It has rightfully earned its place as a foundational appliance due to its raw power and surprising versatility. It doesn’t just mix; it automates the most labor-intensive kitchen tasks.

Our Pick: KitchenAid Artisan Series 5-Quart Stand Mixer
The KitchenAid Artisan is an American icon for a reason. Its powerful motor can knead dense bread dough without breaking a sweat, its planetary mixing action ensures everything is perfectly incorporated, and its vast ecosystem of attachments can transform it into a pasta maker, meat grinder, or spiralizer. It’s a lifetime investment.
- Why it’s a must-have: It frees up your hands and your time. It whips egg whites to stiff peaks, kneads dough to perfection, and even shreds cooked chicken in seconds with the paddle attachment.
- Beyond Baking: Use it for making meatballs, guacamole, mashed potatoes, and more. It’s a true multi-tasker.
3. The Multi-Cooker: The Champion of Convenience
If one appliance defines the modern, time-crunched kitchen, it’s the multi-cooker. Popularized by the Instant Pot, these devices are the Swiss Army knives of the countertop, combining a pressure cooker, slow cooker, rice cooker, steamer, and saute pan into one compact unit.

Our Pick: Instant Pot Duo Plus 9-in-1 (6-Quart)
The Instant Pot Duo Plus is the gold standard. Its pressure cooking function is a miracle for weeknight meals, turning tough cuts of meat tender in under an hour and cooking beans from scratch in minutes. The ability to saute in the same pot you pressure cook in means deeper flavor and fewer dishes.
- Why it’s a must-have: It dramatically slashes cooking times for historically long-cooking meals. It’s a “set it and forget it” device that makes meal prepping and weeknight dinners almost effortless.
- Key Functions: Pressure Cooker, Slow Cooker, Rice Cooker, Steamer, Saute Pan, Yogurt Maker, and Warmer. It replaces at least three other appliances.
Tier 2: The Modern Game-Changers
These appliances have fundamentally changed the way we cook. They bring speed, health, and restaurant-quality results to the home kitchen. If you have the foundations, your next investment should be here.
4. The Air Fryer: The King of Crisp and Speed
No modern “must-have” list is complete without an air fryer. This appliance has single-handedly revolutionized weeknight cooking by delivering the crispy, golden texture of fried food with a fraction of the oil. The sheer number of benefits of using an air fryer—from health to speed to easy cleanup—is simply staggering.
It works by circulating super-heated air at high speed, cooking food faster than a conventional oven and creating an unparalleled crispy crust. Mastering air fryer temperature control is the key to unlocking its full potential, from roasting vegetables to “frying” chicken wings. For those just starting, there are countless easy air fryer recipes for beginners that build confidence and deliver amazing results.
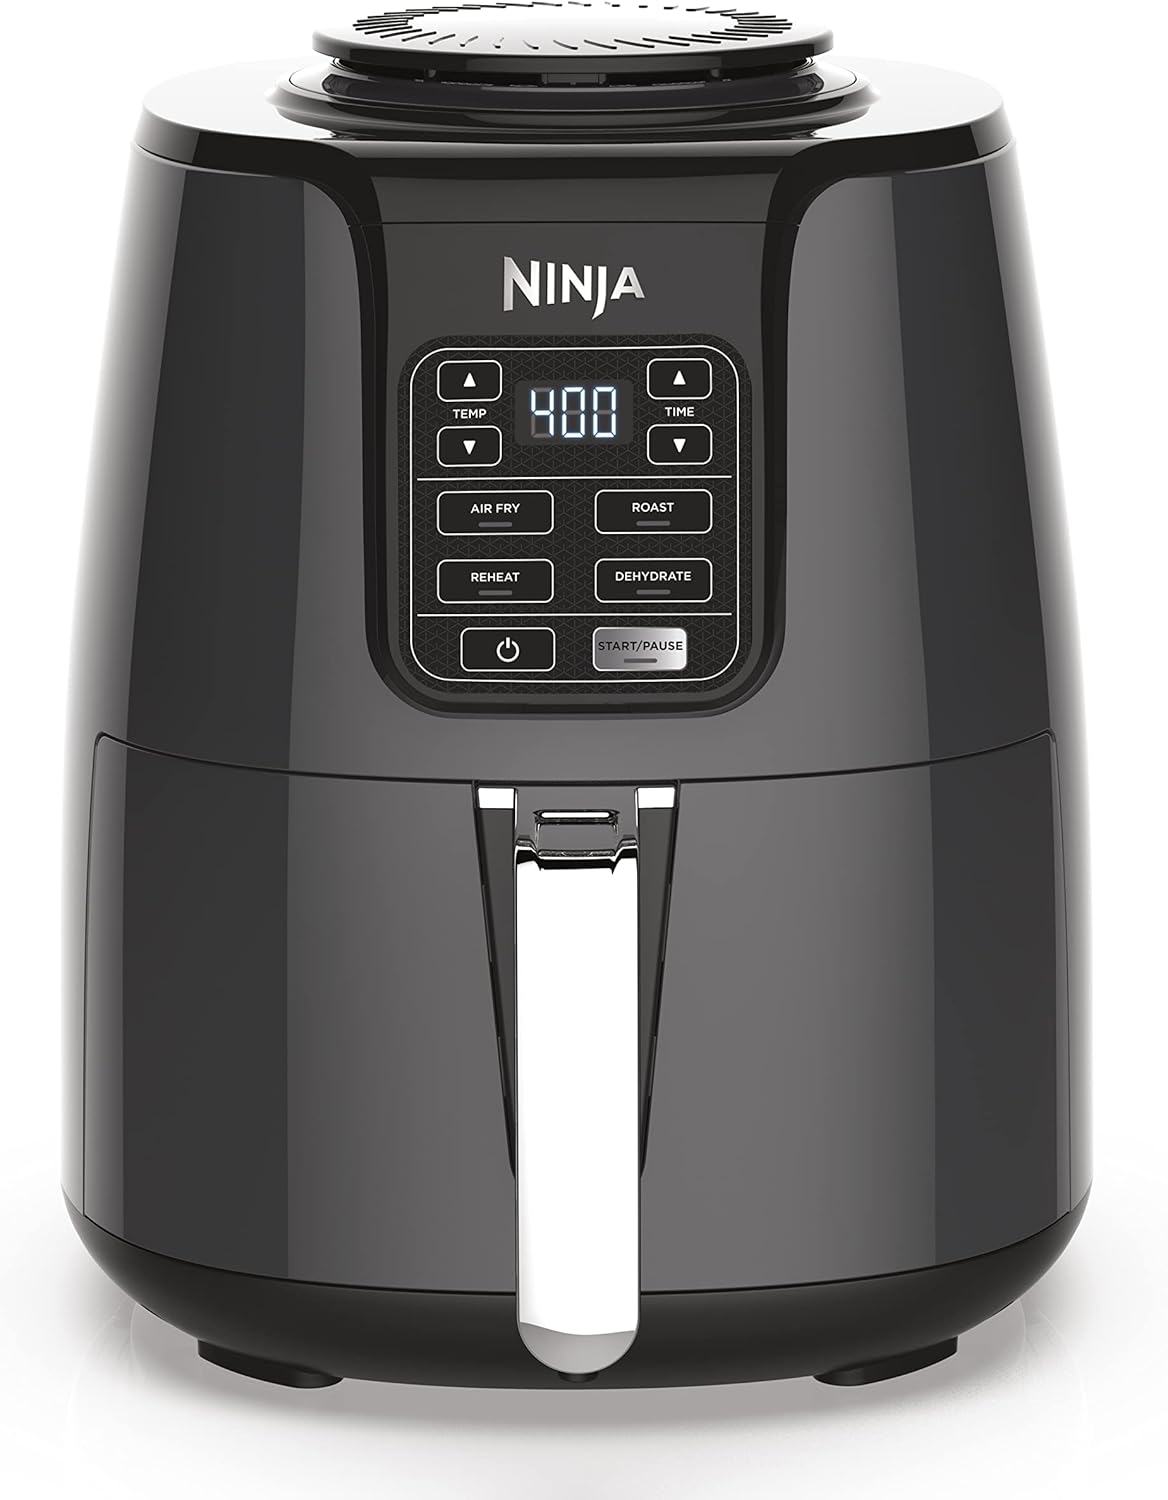
Our Pick: Ninja AF101 Air Fryer (4-Quart)
The Ninja AF101 is a consistent top performer known for its power and ability to produce exceptionally crispy results. Its wide temperature range gives you flexibility, and the ceramic-coated basket is durable and easy to clean. The 4-quart size is perfect for 2-3 people.
- Why it’s a must-have: It’s the fastest way to get truly crispy food. It reheats leftovers (especially pizza) better than any other appliance, restoring their original texture. It’s also incredibly versatile for roasting, baking, and dehydrating.
- Making a Choice: The choice between a digital vs. manual air fryer often comes down to budget and desired precision, with digital models offering more control. For larger families, one of the best digital toaster oven air fryers might be a better fit, combining air frying with countertop oven functionality.
5. The High-Performance Blender: The Smoothie and Soup Superstar
Forget the cheap $30 blender that struggles with ice. A high-performance blender is a different beast entirely. With powerful motors and precision-engineered blades, these machines can pulverize anything you throw at them, creating velvety-smooth textures that are impossible to achieve otherwise.

Our Pick: Vitamix Explorian Blender
Vitamix is the undisputed champion of the blender world. The Explorian is one of their more accessible models, but it still packs the legendary power and durability the brand is known for. It can create silky green smoothies, hot soups from friction alone, and homemade nut butters. It’s an investment in your health and culinary creativity.
- Why it’s a must-have: It unlocks a world of healthy options. Silky soups, fiber-rich smoothies, homemade flours, and frozen desserts are all just minutes away. Its quality is unmatched.
- What it does that cheap blenders can’t: Pulverize fibrous greens like kale, blend nuts and seeds into smooth butters, and create perfectly emulsified sauces and dressings.
6. The Immersion (Stick) Blender: The Champion of Convenience
An immersion blender is the high-performance blender’s nimble little cousin. Its genius lies in its simplicity: instead of transferring hot soup to a blender (a messy and often dangerous task), you bring the blender to the pot.

Our Pick: Breville Control Grip Immersion Blender
The Breville Control Grip stands out for its ergonomic design and unique bell-shaped base that reduces suction and splashing. It’s powerful enough to blend soups, sauces, and smoothies right in your pot, measuring cup, or pan. Many models also come with a mini chopper and whisk attachment, adding even more value.
- Why it’s a must-have: It saves an incredible amount of cleanup time and effort. It’s perfect for pureeing creamy tomato soup, making a quick pesto, or creating a smooth gravy right in the roasting pan.
Tier 3: The “Makes Life Better” Essentials
You can live without these, but once you have them, you’ll wonder how you ever managed. These appliances solve specific problems and bring a level of convenience and precision that elevates your entire kitchen experience.
7. A Quality Coffee Maker
For millions of Americans, the day doesn’t start without coffee. Investing in a machine that makes coffee you genuinely love saves money from daily coffee shop runs and makes your morning routine more enjoyable.

Our Pick: Technivorm Moccamaster KBGV Select
If you love classic drip coffee, the Moccamaster is your endgame. Handmade in the Netherlands, it’s certified by the Specialty Coffee Association for its ability to brew at the perfect temperature (196-205 degrees F) for optimal flavor extraction. It makes an exceptionally smooth, flavorful pot of coffee and will last for decades.
- Why it’s a must-have: It elevates a daily ritual into a craft experience. The quality of the coffee is noticeably better than standard drip machines, rivaling a professional pour-over.
8. The Food Processor: The Prep-Work Eliminator
While a blender is for liquids, a food processor is for solids. It’s your personal sous chef, designed to chop, shred, slice, and puree with incredible speed. It takes the tedious knife work out of so many recipes.

Our Pick: Cuisinart 14-Cup Food Processor
The Cuisinart is a legend in the food processor world. With a powerful motor and a large capacity, it’s built for serious work. It comes with blades for shredding cheese (a game-changer!), slicing vegetables, and mixing doughs like pie crust or biscuits.
- Why it’s a must-have: It saves enormous amounts of time and manual effort. Making pesto, hummus, pie crust, or shredding a block of cheese takes seconds, not minutes.
9. The Digital Kitchen Scale: The Secret to Consistency
American cooking has long relied on volume (cups), but professional bakers and serious cooks know the secret to perfect, repeatable results is weight (grams/ounces). A digital scale is an inexpensive tool that brings scientific precision to your kitchen.

Our Pick: Escali Primo Precision Kitchen Scale
The Escali Primo is simple, accurate, durable, and easy to use. It has a “tare” function that lets you zero out the weight of a container, so you can measure multiple ingredients in one bowl. For baking, it’s absolutely essential. Once you start weighing your flour, you’ll never go back.
- Why it’s a must-have: It eliminates the variability of “packed” vs. “loose” cups of flour, guaranteeing your baked goods turn out the same way every time. It’s also great for portion control and weighing coffee beans for the perfect brew.
Building Your Kitchen Over Time
Don’t feel like you need to buy all of these at once! Start with Tier 1 and a great Chef’s Knife. Master those. Then, add an appliance from Tier 2 that best suits your lifestyle (if you love crispy foods, get the air fryer; if you love smoothies, get the blender). A great kitchen is built, not bought.
Knife Care and Sharpening: Protecting Your Most Important Investment
A quality chef’s knife is only as good as its edge. Many home cooks spend good money on a blade and then neglect it, allowing it to dull to the point where it becomes dangerous. A dull knife requires more pressure to cut, which means it’s more likely to slip and cause injury. Proper knife maintenance isn’t just about performance—it’s about safety.
Understanding Knife Steel and Edge Retention
The steel in your knife determines how long it holds an edge and how easy it is to sharpen. High-carbon stainless steel, like what’s used in the Victorinox Fibrox Pro, offers an excellent balance: it resists rust and staining while still being easy to hone and sharpen at home. Pure carbon steel knives take a sharper edge but require more maintenance to prevent oxidation. Ceramic blades hold their edge incredibly long but are brittle and difficult to sharpen at home.
Edge retention is measured in Rockwell Hardness (HRC). Most kitchen knives fall between 56-62 HRC. Higher numbers mean harder steel that holds its edge longer but can be more brittle and harder to sharpen. Lower numbers mean softer steel that’s easier to sharpen but needs more frequent attention. Understanding your knife’s steel helps you develop the right maintenance routine.
Honing vs. Sharpening: What’s the Difference?
This is one of the most misunderstood concepts in knife care. Honing and sharpening are two completely different processes, and most home cooks only need to do one of them regularly.
Honing realigns the microscopic edge of your blade. Every time you cut something, the thin metal at the very edge of the blade bends slightly out of alignment. A honing steel (that long metal rod that comes in knife sets) pushes that edge back into place. You should hone your knife before every major cooking session—think of it like combing your hair. It takes 30 seconds and makes a dramatic difference in cutting performance.
Sharpening actually removes metal to create a new edge. This is done with a whetstone, electric sharpener, or pull-through sharpener. You only need to sharpen your knife a few times per year (for home cooks), depending on how much you use it. Over-sharpening removes metal unnecessarily and shortens your knife’s lifespan.
How to Hone Your Knife Properly
Hold the honing steel vertically with the tip resting on a cutting board. Place the heel of your knife near the top of the steel at roughly a 15-20 degree angle. Draw the knife down and toward you, moving from heel to tip, applying light pressure. Repeat 4-5 times on each side. The key is maintaining a consistent angle—don’t worry about being perfect; consistency matters more than precision. Alternate sides with each stroke.
Some people prefer to hone with the steel held horizontally, pulling the knife toward them at a downward angle. Either method works. The important thing is that you do it regularly. A quick honing session before you start cooking takes less than a minute and keeps your knife performing at its best.
How to Sharpen with a Whetstone
Whetstone sharpening is the gold standard for knife maintenance. It gives you the most control and produces the sharpest edge. Start with a two-sided stone (1000/3000 grit or 1000/6000 grit is ideal for most home cooks). Soak the stone in water for 5-10 minutes before use.
Place the stone on a stable surface with a damp towel underneath to prevent slipping. Hold your knife at a 15-20 degree angle (a good trick: imagine the angle of a matchbook). Starting with the coarse side, draw the knife across the stone in smooth, sweeping motions, maintaining that consistent angle. Apply even pressure throughout the stroke. Work the entire length of the blade, from heel to tip. Do 10-15 strokes per side on the coarse grit, then switch to the fine side for 5-10 strokes per side to polish the edge.
You’ll feel a slight burr (a tiny fold of metal) develop on the opposite side of the blade as you sharpen. This is normal and indicates you’ve created a new edge. The fine grit side removes this burr and leaves you with a razor-sharp finish. Rinse the knife and stone when you’re done, and test the edge by slicing through a sheet of paper—a sharp knife will glide through cleanly.
Electric and Pull-Through Sharpeners
If whetstone sharpening sounds intimidating, electric sharpeners and pull-through sharpeners are excellent alternatives. They’re faster and require less skill, though they remove more metal and give you less control over the final edge angle. For most home cooks, they’re perfectly adequate. Use them a few times per year, and hone with a steel between sharpenings.
Proper Knife Storage
How you store your knives affects both their longevity and your safety. Tossing knives loose in a drawer is the worst option—the blades bang against other utensils, dulling the edges and creating a hazard when you reach in. Here are the best storage methods:
- Magnetic knife strip: The preferred option for most serious cooks. Keeps knives visible, accessible, and the blades don’t touch anything.
- Knife block: The classic option. Choose one with horizontal slots to protect the edges.
- In-drawer knife organizer: If counter space is limited, an in-drawer organizer with individual slots protects the blades while keeping them organized.
- Blade guards: If you must store knives in a drawer, use individual blade guards that cover the edge.
Cutting Board Matters
Your cutting board has a bigger impact on knife longevity than most people realize. Hard surfaces like glass, ceramic, marble, or granite will destroy your knife’s edge in a single cooking session. Always use a wood or high-quality plastic cutting board. Wood is actually the best choice—it’s gentle on blades, has natural antimicrobial properties, and self-heals minor cuts. End-grain maple or walnut boards are the gold standard.
Pro Tip: The “paper test” is the easiest way to check your knife’s sharpness. Hold a sheet of paper by one corner and try to slice through it with the knife. A sharp knife will glide through cleanly. If the paper tears or the knife catches, it’s time to hone or sharpen.
Air Fryer Size Guide: Choosing the Right Capacity for Your Household
One of the most common mistakes people make when buying an air fryer is choosing the wrong size. Too small, and you’ll be cooking in multiple batches, negating the time-saving benefits. Too large, and you’ll waste counter space and energy. Getting the right size air fryer for your household is crucial for maximizing its usefulness.
Understanding Air Fryer Capacities
Air fryer capacity is measured in quarts, and it refers to the total volume of the cooking basket. However, the actual usable cooking space is less than the stated capacity because you need room for air to circulate around the food. As a general rule, plan for about half the stated capacity in usable space. A 4-quart air fryer effectively holds about 2 quarts of food in a single layer.
The shape of the basket also matters. Square or rectangular baskets offer more usable cooking surface than round baskets of the same capacity. Some air fryers have multiple tiers or racks, which effectively double your cooking space without increasing the footprint.
Size Recommendations by Household
| Household Size | Recommended Capacity | Best For | Considerations |
|---|---|---|---|
| 1 person | 2-3 quarts | Single servings, snacks, reheating | Compact footprint; perfect for small kitchens or dorms |
| 2 people | 3-4 quarts | Couples, small meals | The Ninja AF101 (4qt) is ideal for this range |
| 3-4 people | 5-6 quarts | Family dinners, meal prep | Most popular size; good balance of capacity and footprint |
| 5+ people | 7-10 quarts | Large families, batch cooking | Consider dual-basket models for cooking two foods at once |
| Entertaining | 10+ quarts | Parties, large gatherings | Oven-style air fryers with multiple racks work best |
Single Basket vs. Dual Basket Models
Dual-basket air fryers have become incredibly popular, and for good reason. They let you cook two different foods at different temperatures and times, finishing at the same moment. Imagine cooking crispy chicken wings in one basket and perfectly roasted vegetables in the other, both ready to serve simultaneously. The Ninja Foodi Dual Zone is the standout in this category.
Single-basket models are simpler, more compact, and usually less expensive. If you primarily cook one-component meals or use your air fryer for reheating and snacks, a single basket is perfectly adequate. If you regularly cook complete meals with multiple components, the dual basket is worth the extra investment and counter space.
Countertop Footprint Considerations
Air fryers need clearance on all sides for ventilation—typically 5 inches behind and above, and 1-2 inches on the sides. Before buying, measure your available counter space and account for this clearance. Some models have rear-mounted fans that need more space behind them, while others vent from the top. A 5-quart air fryer typically measures about 11×14 inches at the base, while a dual-basket model might be 15×16 inches.
If counter space is at a premium, consider an air fryer that can be stored in a cabinet when not in use. Some models are designed to be more compact for this purpose. Just remember that the easier it is to access, the more you’ll use it—an air fryer buried in a cabinet won’t get the same workout as one sitting on the counter.
Quick Size Decision Guide
- Cooking for 1-2: 3-4 quarts is your sweet spot
- Family of 3-4: 5-6 quarts handles most meals
- Large family or meal prepper: 7+ quarts or dual basket
- Love to entertain: Consider an oven-style air fryer
The Complete Stand Mixer Attachments Guide
The KitchenAid stand mixer’s true power lies in its attachment ecosystem. What starts as a mixing machine can transform into over a dozen different kitchen tools. Understanding which attachments are worth the investment—and which are gimmicks—can save you money and counter space while dramatically expanding what your mixer can do.
The Essential Three Attachments
Every KitchenAid mixer comes with three attachments, and mastering all three is the first step to getting your money’s worth out of the machine.
The Flat Beater (Paddle): This is your general-purpose workhorse. Use it for creaming butter and sugar, mixing cookie dough, mashing potatoes, making meatballs, shredding cooked chicken (run it on low for 30 seconds and watch the magic happen), and preparing frostings. The paddle’s flat edges scrape the sides of the bowl as it rotates, ensuring even mixing without you having to stop and scrape down the sides manually.
The Dough Hook: Shaped like a C or a spiral, the dough hook mimics the kneading motion of human hands. Use it for bread dough, pizza dough, pasta dough, and any recipe that calls for kneading. The mixer’s motor does the hard work while you prep other ingredients. A stand mixer can knead bread dough for 8-10 minutes without fatigue—try doing that by hand.
The Wire Whip: This balloon-shaped attachment incorporates air into mixtures. Use it for whipping cream, beating egg whites to stiff peaks, making meringue, preparing whipped frostings, and creating airy batters like angel food cake. The wire whip’s multiple tines create maximum air incorporation, producing lighter, fluffier results than you could achieve by hand.
Must-Have Add-On Attachments
Beyond the basics, several add-on attachments genuinely expand your mixer’s capabilities:
Pasta Roller and Cutter Set: This is the attachment that converts skeptics into stand mixer evangelists. Feed sheets of pasta dough through the roller to create perfectly thin, uniform sheets for lasagna, fettuccine, or ravioli. The cutters produce restaurant-quality fettuccine and spaghetti. Fresh pasta is a different beast entirely from dried—silkier texture, richer flavor, and it cooks in 2-3 minutes.
Food Grinder: This attachment turns your mixer into a meat grinder. Grind your own burger blends (a mix of chuck and brisket is legendary), make sausage, or grind vegetables for sauces. Grinding your own meat means you control the fat content, freshness, and cut.
Spiralizer: Create vegetable noodles from zucchini, sweet potatoes, beets, and more. It’s a game-changer for low-carb cooking and adds variety to your meal prep.
Ice Cream Maker: The freeze-bowl attachment lets you make fresh ice cream, sorbet, and frozen yogurt at home. The quality surpasses most store-bought options, and you control every ingredient.
Attachments to Skip (For Most People)
Some attachments sound appealing but have limited practical use for most home cooks. The grain mill is fascinating but only worthwhile if you regularly grind your own flour. The juicer attachment works but dedicated juicers are more efficient. Evaluate your actual cooking habits before investing in niche attachments—they’re not cheap, and they take up storage space.
Pro Tip: KitchenAid attachments go on sale during Black Friday, Amazon Prime Day, and holiday weekends. If you’re interested in a specific attachment, wait for a sale. You can often save 30-40% by being patient.
The Complete Instant Pot Cooking Times Reference
The Instant Pot’s pressure cooking function is its most valuable feature, but the learning curve can feel steep. Knowing exactly how long to cook different ingredients under pressure is the difference between perfectly tender results and mushy disasters. This reference guide covers the most common ingredients and their ideal pressure cooking times.
Meat and Poultry Pressure Cooking Times
| Ingredient | Cut | Pressure Cook Time | Release Method | Notes |
|---|---|---|---|---|
| Chicken Breast | Boneless, skinless | 8-10 minutes | Natural 10 min | Fresh, not frozen. Add 2-3 min if frozen |
| Chicken Thighs | Bone-in | 12-15 minutes | Natural 10 min | Fall-off-the-bone tender |
| Whole Chicken | 3-4 lbs | 25-30 minutes | Natural 15 min | Use trivet; add 1 cup broth |
| Beef Chuck Roast | 2-3 lb chunks | 45-60 minutes | Natural 15 min | Cube for faster cooking |
| Pork Shoulder | 3-4 lb pieces | 60-90 minutes | Natural 20 min | Pull-apart texture for tacos/bbq |
| Pork Ribs | Baby back, rack | 25-30 minutes | Natural 15 min | Finish under broiler for char |
| Ground Beef | 1 lb, browned | 5-8 minutes | Quick release | For chili, bolognese, taco meat |
| Beef Stew Meat | 1.5-inch cubes | 20-25 minutes | Natural 10 min | Add vegetables in last 5 min |
| Lamb Shanks | Whole | 35-45 minutes | Natural 15 min | Classic braised texture |
Beans and Legumes
| Bean Type | Soaked | Unsoaked | Release |
|---|---|---|---|
| Black Beans | 8-10 min | 25-30 min | Natural 15 min |
| Chickpeas | 12-15 min | 35-40 min | Natural 15 min |
| Kidney Beans | 10-12 min | 25-30 min | Natural 15 min |
| Pinto Beans | 8-10 min | 25-30 min | Natural 15 min |
| Lentils (Green) | 8-10 min | 12-15 min | Natural 10 min |
| Lentils (Red) | 4-6 min | 8-10 min | Quick release |
Cooking beans from scratch in the Instant Pot is one of its greatest superpowers. What takes 8+ hours of soaking and 1-2 hours of stovetop cooking can be done in under an hour with no pre-soaking required. The texture is consistently perfect—creamy interiors with intact skins. Plus, cooking your own beans saves a fortune compared to canned, and you control the sodium content.
Grains and Rice
| Grain | Water Ratio | Cook Time | Release |
|---|---|---|---|
| White Rice | 1:1 | 4-6 min | Natural 10 min |
| Brown Rice | 1:1.25 | 22-25 min | Natural 10 min |
| Quinoa | 1:1.25 | 1-2 min | Natural 10 min |
| Steel Cut Oats | 1:3 | 10-12 min | Natural 10 min |
| Barley | 1:3 | 20-25 min | Natural 10 min |
Understanding Natural vs. Quick Pressure Release
The release method matters as much as the cook time. Natural release means you let the pressure drop on its own after cooking, which takes 10-25 minutes depending on the amount of liquid. This is gentler on the food and prevents foamy or starchy liquids from sputtering through the valve. Use natural release for meats, beans, and grains.
Quick release means you manually turn the valve to vent immediately after cooking. This stops the cooking process quickly and is ideal for vegetables, delicate foods, and recipes where you need to add ingredients partway through. Be careful with quick release on starchy foods—the steam can sputter and make a mess.
Pro Tip: The “Pot-in-Pot” method is a game-changer for the Instant Pot. Place a heat-safe bowl on a trivet inside the pot with water underneath. You can cook rice, cheesecake, lasagna, or multiple foods simultaneously without flavors mixing. It also makes cleanup a breeze.
Blender vs. Food Processor: When to Use Which
One of the most common questions in the kitchen is whether to reach for the blender or the food processor. They look somewhat similar, and some tasks overlap, but they’re designed for fundamentally different purposes. Understanding the distinction will help you use each tool to its full potential and avoid the frustration of subpar results.
The Core Difference: Liquids vs. Solids
The simplest way to think about it: Blenders are designed for liquids, and food processors are designed for solids. A blender’s tall, narrow jar creates a vortex that pulls ingredients down through the blades, incorporating air and creating smooth, pourable results. A food processor’s wide, flat bowl allows the blades to chop, slice, and shred solid ingredients without turning them into a puree.
This fundamental difference drives everything else. When you try to chop onions in a blender, you end up with onion juice. When you try to make a smoothie in a food processor, you get chunky, uneven results. Each tool excels at its intended task and struggles with the other’s.
When to Use a Blender
- Smoothies and shakes: This is the blender’s bread and butter. The vortex action perfectly combines fruits, greens, liquids, and supplements into a smooth, drinkable consistency.
- Soups: Whether you’re making a silky butternut squash soup or a creamy tomato bisque, a blender creates the velvety texture that defines restaurant-quality soups.
- Sauces and dressings: Vinaigrettes, pesto, chimichurri, and creamy dressings all benefit from the blender’s ability to emulsify and combine ingredients smoothly.
- Frozen desserts: High-performance blenders can turn frozen fruit into “nice cream” or sorbet in seconds.
- Nut milks and nut butters: With enough power, a blender can process nuts into smooth, creamy spreads and milks.
When to Use a Food Processor
- Chopping vegetables: Onions, garlic, carrots, celery—the food processor chops uniformly in seconds, saving you from tears and tedious knife work.
- Making dough: Pie crust, biscuit dough, and cookie dough all come together quickly in a food processor without overworking the gluten.
- Shredding and slicing: A food processor with the right attachment can shred a block of cheese or slice a pound of potatoes in seconds.
- Making dips and spreads: Hummus, baba ganoush, and tapenade have the perfect thick, textured consistency when made in a food processor.
- Grinding nuts and seeds: The food processor’s pulse function gives you control over texture, from coarse crumbs to fine meal.
The Overlap Zone
Some tasks work in both, but one tool usually does it better. Pesto, for example, can be made in either, but a food processor gives you more control over the final texture—chunky or smooth. Salsa works in both, but the food processor’s pulse function prevents over-processing into a watery mess. Nut butter works in high-powered blenders but requires more liquid; the food processor produces a thicker, more traditional result.
| Task | Blender | Food Processor | Winner |
|---|---|---|---|
| Smoothies | Excellent | Poor | Blender |
| Hot soup | Excellent | Not recommended | Blender |
| Chopping onions | Poor (over-processes) | Excellent | Food Processor |
| Pie crust dough | Not designed for this | Excellent | Food Processor |
| Pesto | Good (more liquid needed) | Excellent | Food Processor |
| Hummus | Good (needs more liquid) | Excellent | Food Processor |
| Shredding cheese | Not possible | Excellent | Food Processor |
| Nut butter | Good (needs liquid) | Good (thicker result) | Depends on preference |
The Bottom Line
Both tools are valuable, but they serve different purposes. If you could only have one, the choice depends on your cooking style. If you make a lot of smoothies, soups, and drinkable recipes, prioritize a blender. If you do more baking, chopping, and solid food prep, a food processor is more useful. Ideally, have both—they’re complementary tools, not competitors.
Budget vs. Premium: What You Really Get for Your Money
The price difference between budget and premium kitchen appliances can be staggering. A $30 blender versus a $500 Vitamix. A $50 non-stick pan versus a $300 stainless steel skillet. Are premium appliances really worth it, or are you just paying for a brand name? The answer depends entirely on the appliance category, your cooking frequency, and what you’re trying to achieve.
When Budget Options Are Perfectly Fine
Not every kitchen tool needs to be premium. Here are the categories where budget options deliver excellent value:
Budget-Friendly (Great Value)
- Digital kitchen scales: A $15-25 scale like the Escali Primo is just as accurate as a $100 model. The measurement technology is simple and well-established.
- Immersion blenders: Mid-range models ($30-60) perform nearly identically to premium ones for most tasks. The motor and blade design don’t vary dramatically.
- Cutting boards: A good quality plastic or bamboo board ($15-30) works just as well as expensive end-grain wood boards for everyday use.
- Measuring cups and spoons: Stainless steel measuring cups are cheap, durable, and accurate. There’s no reason to spend more.
- Mixing bowls: A basic stainless steel or glass set is perfectly functional. The expensive nested sets with silicone bottoms are nice but not necessary.
Mid-Range Sweet Spot (Best Value for Most Cooks)
- Chef’s knives: The $30-80 range (like the Victorinox Fibrox Pro) delivers 80-90% of the performance of $200+ knives. You only need to go premium if you’re a professional or extremely serious home cook.
- Non-stick pans: A $30-50 T-fal or Calphalon pan lasts 2-3 years with proper care and performs nearly identically to $100+ options. Since non-stick wears out regardless, mid-range is the smart play.
- Stand mixers: KitchenAid’s Artisan line ($300-400) hits the sweet spot between performance, durability, and attachment ecosystem. Going cheaper means less power and fewer options.
- Air fryers: The $80-150 range delivers excellent performance. The Ninja AF101 sits in this sweet spot. You only need to go premium for dual-basket or large-capacity models.
Worth the Splurge (Premium Makes a Real Difference)
- High-performance blenders: This is the one category where premium is genuinely better. A Vitamix ($350-500) pulverizes ingredients in ways that $50 blenders simply cannot. The motor power, blade design, and container geometry create results that are qualitatively different, not just quantitatively better.
- Coffee makers: A Technivorm Moccamaster ($300) brews at the perfect temperature and produces noticeably better coffee than a $30 drip machine. If you drink coffee daily, the difference is worth it.
- Cast iron skillets: A Lodge skillet ($20-30) is already premium quality at a budget price. Don’t overpay for boutique brands unless you want the aesthetic. But do buy cast iron instead of cheap non-stick.
- Stainless steel cookware: A quality tri-ply stainless steel set ($300-600) from All-Clad or Demeyere lasts a lifetime and performs beautifully. Cheap stainless warps, discolors, and heats unevenly.
The Total Cost of Ownership
When evaluating budget vs. premium, consider the total cost over time. A $30 non-stick pan that needs replacing every 2 years costs $150 over a decade. A $200 stainless steel pan that lasts 30 years costs $200 over the same period. The premium option is cheaper long-term. But a $15 digital scale that lasts 10 years is already the most economical choice—spending $100 on a “premium” scale gains you nothing functional.
The key insight: premium matters most in categories where quality directly affects the final product (blenders, coffee makers, knives) and least in categories where the tool is simple and the technology is mature (scales, measuring tools, bowls).
Pro Tip: Buy budget first, then upgrade what you actually use. If you buy a $30 immersion blender and use it every day for a year, you’ve earned the right to upgrade to a Breville. If you use it twice, you’ve saved yourself hundreds. Let your habits guide your spending.
Small Kitchen Solutions: Maximizing a Compact Space
Not everyone has the luxury of a sprawling kitchen with an island and endless counter space. Apartment dwellers, dorm residents, and anyone in a small home knows the struggle of trying to cook with limited room. The good news: with the right strategy and appliance choices, a small kitchen can be just as functional as a large one.
The Countertop Space Hierarchy
When counter space is limited, you need to prioritize ruthlessly. Here’s the hierarchy of what deserves permanent counter real estate versus what should live in a cabinet:
- Keep on counter (use daily): Coffee maker (if you drink coffee daily), knife block or magnetic strip
- Keep on counter (use 3+ times/week): Air fryer, Instant Pot, or stand mixer (pick ONE)
- Store in cabinet (use weekly): Blender, food processor, second appliance from the above list
- Store in cabinet (use occasionally): Immersion blender, specialty attachments, backup appliances
The key principle: if you don’t use it at least 3 times per week, it doesn’t earn counter space. An air fryer that sits on the counter gets used for quick lunches and snacks. An air fryer buried in a cabinet gets used twice a month.
Multi-Function Appliances: Friend or Foe?
In a small kitchen, the temptation is to buy multi-function appliances that combine several tools into one. The Instant Pot is the poster child—it replaces a pressure cooker, slow cooker, rice cooker, steamer, and sauté pan. For small kitchens, these are genuine space-savers.
However, be wary of appliances that try to do everything and end up doing nothing well. A combination blender-food-juicer might save space, but if the blender function is mediocre, you’ll still want a real blender. Multi-function appliances work best when each function is genuinely good at its primary task.
Vertical Storage Solutions
When horizontal space is limited, think vertically. Wall-mounted magnetic knife strips free up drawer and counter space while keeping knives accessible. Wall-mounted pot racks or hanging rails can hold frequently used pans. Over-the-sink cutting boards and colanders extend your workspace. Stackable container sets and nesting bowl sets maximize cabinet efficiency.
The inside of cabinet doors is often overlooked real estate. Mount spice racks, measuring cup hooks, or lid organizers on the inside of doors. It’s amazing how much you can store when you use every available surface.
The “One In, One Out” Rule
Small kitchens demand discipline. For every new appliance you bring in, one must leave. This prevents the slow accumulation of gadgets that crowd your space and never get used. Be honest with yourself: if you bought an air fryer and haven’t used your microwave in six months, the microwave can go. If the stand mixer has been gathering dust for a year, it might be time to sell it and reclaim that counter space.
Small Kitchen Essentials Checklist
- Magnetic knife strip (wall-mounted)
- Over-the-sink cutting board
- Nesting mixing bowl set
- Collapsible colander
- Multipurpose Instant Pot (replaces 3+ appliances)
- Compact air fryer (3-4 quart) OR toaster oven air fryer combo
- Immersion blender (takes up almost no space)
- Wall-mounted spice rack
Meal Prep Mastery: Using Your Appliances to Cook Once, Eat All Week
Meal prepping is the single most effective strategy for eating well on a busy schedule. It eliminates the daily “what’s for dinner?” stress, reduces food waste, and saves significant money compared to takeout. The nine appliances in this guide are the ultimate meal prep toolkit—each one excels at a different aspect of preparing large batches of food efficiently.
The Sunday Meal Prep Blueprint
Here’s a realistic Sunday meal prep workflow that uses multiple appliances simultaneously and produces a week’s worth of lunches and dinners in about 2-3 hours:
Hour 1 — Pressure Cook and Chop: Start the Instant Pot with a large batch of chicken thighs or pork shoulder (it does the work while you prep other things). While the pressure cooker runs, use the food processor to chop onions, carrots, celery, and bell peppers for the week’s recipes. Shred a block of cheese for toppings and snacks. Wash and portion out salad ingredients.
Hour 2 — Roast and Blend: Transfer seasoned vegetables to sheet pans and roast in the oven (or use the air fryer for smaller batches). Use the blender to make a batch of salad dressing, a sauce for the week, or a smoothie base. The stand mixer can make a batch of energy bites or cookie dough portions for the freezer.
Hour 3 — Assemble and Store: Portion the pressure-cooked meat into containers. Divide roasted vegetables among meal prep containers. Assemble grain bowls, salads, or wrap fillings. Label everything with the date and contents. Stack in the fridge, and you’re set for the week.
Appliance-Specific Meal Prep Strategies
Instant Pot: The MVP of meal prep. Make large batches of shredded chicken, pulled pork, beef stew, chili, or beans in one session. The “keep warm” function lets you cook multiple batches back-to-back without starting over. Cook grains (rice, quinoa, farro) while the protein rests.
Air Fryer: Perfect for meal prep sides that stay crispy all week. Roast sweet potato cubes, bake chicken tenders, or make crispy chickpeas for salads. The air fryer reheats prepped meals beautifully—far better than the microwave.
Food Processor: Batch-chop vegetables for the week’s cooking. Make large batches of hummus, pesto, or salsa. Shred cheese for the week’s meals. The food processor turns hours of knife work into minutes.
Stand Mixer: Make large batches of cookie dough or muffin batter to freeze in portions. Shred cooked chicken in seconds (paddle attachment on low). Mix energy bite dough or protein bar mixtures. Knead bread dough for homemade sandwich bread.
Blender: Make a week’s worth of smoothie packs (pre-portioned frozen ingredients in bags, blend with liquid in the morning). Prepare salad dressings in bulk. Blend soups for the week’s lunches.
Storage Tips for Maximum Freshness
How you store prepped food matters as much as how you cook it. Glass containers with airtight lids are the gold standard—they don’t stain, don’t absorb odors, and can go from fridge to microwave. Mason jars are excellent for salads, soups, and overnight oats. Silicone freezer bags are great for portioning proteins and soups for the freezer.
Most prepped meals last 4-5 days in the fridge. If you’re prepping for a full week, consider freezing half on Wednesday and moving it to the fridge Thursday night to thaw. This extends freshness without sacrificing convenience.
Pro Tip: The Instant Pot’s “Pot-in-Pot” method is perfect for meal prep. Cook rice on the bottom, steam vegetables in a basket above, and keep cooked protein warm on a trivet. Three components in one pot, ready in the time it takes to cook rice alone.
Appliance Maintenance and Care: Making Your Investment Last
Kitchen appliances are significant investments, and proper maintenance can double or triple their lifespan. A well-maintained Vitamix runs for 20+ years. A neglected one might struggle after five. The good news: most maintenance routines are simple, take just a few minutes, and prevent costly repairs or replacements.
Blender Maintenance
The most important rule: clean your blender immediately after use. Dried-on smoothie residue is ten times harder to remove than fresh. The easiest cleaning method: fill the blender halfway with warm water, add a drop of dish soap, and run on high for 30 seconds. Rinse, and you’re done. For stubborn stains or odors, blend a mixture of water and white vinegar, or water and baking soda.
Deep-clean the blade assembly monthly by removing it (if your model allows) and cleaning around the base where food particles accumulate. Check the rubber gasket for cracks or wear—this is the most common point of failure and is inexpensive to replace. Never put the motor base in water; wipe it down with a damp cloth.
Stand Mixer Maintenance
The stand mixer is one of the lowest-maintenance appliances, but a few steps keep it running perfectly. Wipe down the body after each use—flour dust can accumulate in crevices and attract moisture. The bowl and attachments are all dishwasher safe, but hand-washing extends their life.
Periodically check the beater-to-bowl clearance. If your flat beater is scraping the bottom of the bowl or not reaching the sides, the adjustment screw on the mixer head can be turned to fine-tune the height. The KitchenAid manual explains this process, and it takes about two minutes. A properly adjusted mixer incorporates ingredients more efficiently and reduces wear on the motor.
Instant Pot Maintenance
The sealing ring is the most critical maintenance item. It absorbs odors (especially from garlic and onion-heavy dishes) and can develop cracks over time. Most manufacturers recommend replacing the sealing ring every 12-18 months. Keep two rings—one for savory dishes and one for sweet (like yogurt or cheesecake)—to prevent flavor transfer.
Clean the steam release valve and float valve after every use. Food particles can clog these components, affecting pressure building and release. Remove the valve (it usually pops off) and rinse under hot water. Check the anti-block shield (the small metal cap under the lid) for debris. The inner pot, rack, and lid are all dishwasher safe.
Air Fryer Maintenance
The basket and tray should be washed after every use. Most are dishwasher safe, but hand-washing with warm, soapy water is gentler on the non-stick coating. Never use abrasive scrubbers or metal utensils on the basket—they’ll damage the coating.
The heating element and fan should be cleaned monthly. Unplug the unit, remove the basket, and wipe the interior with a damp cloth. For stuck-on grease, use a paste of baking soda and water. The drip tray (if separate from the basket) should be cleaned regularly to prevent grease buildup, which can smoke and affect flavor.
Coffee Maker Maintenance
Mineral buildup from water is the coffee maker’s worst enemy. It affects temperature, flow rate, and ultimately taste. Descale your coffee maker every 1-3 months (more often if you have hard water). Run a cycle with equal parts white vinegar and water, followed by two cycles of plain water to rinse.
For the Moccamaster specifically: replace the water filter regularly, and never let water sit in the reservoir for extended periods. Wipe down the hot plate after each use to prevent burnt coffee stains. The carafe should be washed by hand with warm, soapy water—dishwasher detergent can cloud glass over time.
Knife Maintenance Quick Reference
| Action | Frequency | Time Required | Tools Needed |
|---|---|---|---|
| Honing | Before every major cooking session | 30-60 seconds | Honing steel |
| Sharpening (whetstone) | 2-4 times per year | 15-20 minutes | Whetstone (1000/3000 grit) |
| Sharpening (electric) | 2-4 times per year | 5-10 minutes | Electric sharpener |
| Deep clean | Monthly | 5 minutes | Bar Keeper’s Friend, soft cloth |
| Handle treatment (wood) | Monthly | 5 minutes | Food-grade mineral oil |
Warning: Never put high-quality knives in the dishwasher. The high heat, harsh detergents, and jostling against other utensils will dull the edge, damage the handle, and can cause the blade to chip. Always hand-wash and dry knives immediately after use.
Common Kitchen Appliance Mistakes (And How to Avoid Them)
Even experienced home cooks make mistakes with their appliances that reduce performance, shorten lifespan, or create safety hazards. Here are the most common mistakes I see and how to avoid them.
Mistake 1: Overcrowding the Air Fryer
The air fryer works by circulating hot air around food. If you cram too much into the basket, the air can’t circulate, and you end up with soggy, unevenly cooked food. The cardinal rule: food should be in a single layer with space between pieces. If you need to cook more, do it in batches. Yes, it takes slightly longer, but the results are worth it.
Mistake 2: Not Preheating the Air Fryer
Some recipes skip preheating, but it makes a noticeable difference. A preheated air fryer starts cooking immediately, creating that crispy exterior faster. Preheat for 3-5 minutes for most recipes. The exception: if you’re cooking something very delicate that might burn, skip the preheat.
Mistake 3: Using Metal Utensils on Non-Stick Surfaces
Metal spatulas, tongs, and whisks scratch non-stick coatings on air fryer baskets, Instant Pot inner pots, and non-stick pans. Once the coating is scratched, it degrades faster and can flake into food. Invest in silicone, nylon, or wooden utensils for non-stick surfaces. They’re cheap and protect your investment.
Mistake 4: Ignoring the Instant Pot Sealing Ring
If your Instant Pot won’t come to pressure, the sealing ring is almost always the culprit. It might be improperly seated, cracked, or worn out. Always check the ring before troubleshooting other issues. A warped or cracked ring won’t seal properly, preventing pressure from building.
Mistake 5: Running the Blender Too Long
High-performance blenders like Vitamix are designed for extended use, but cheaper blenders can overheat if run continuously for more than 2-3 minutes. If you’re blending a thick mixture (like nut butter), stop and scrape down the sides every 30-60 seconds. This prevents motor strain and ensures even processing.
Mistake 6: Washing Cast Iron with Soap
While a tiny amount of mild soap won’t destroy cast iron, repeated soap use strips the seasoning that makes cast iron non-stick. Clean cast iron with hot water and a stiff brush. For stuck-on food, use coarse salt as an abrasive. Dry immediately and rub with a thin layer of oil to maintain the seasoning.
Mistake 7: Storing Knives in a Drawer
This is covered in the knife maintenance section, but it bears repeating because it’s so common and so damaging. Loose knives in a drawer bang against other utensils, dull the edge, and create a serious safety hazard when you reach in. Even a simple magnetic strip or blade guard is infinitely better.
Mistake 8: Using the Wrong Cutting Board
Glass, ceramic, and granite cutting boards look beautiful but will destroy your knife edge in minutes. Marble is slightly better but still too hard. Always use wood or high-quality plastic. End-grain wood boards are the best option—they’re gentle on blades and naturally antimicrobial.
Mistake 9: Not Using the Tare Function on Your Scale
Many home cooks place a bowl on the scale, add an ingredient, then place the bowl back on and add the next ingredient, manually calculating the difference. This is unnecessary work. The tare (or zero) button resets the display to zero with the bowl on it, letting you add ingredients sequentially and measure each one accurately. Master the tare function and your baking will immediately improve.
Mistake 10: Buying Appliances Based on Features Instead of Needs
Marketing departments are excellent at creating features that sound impressive but rarely get used. Wi-Fi connectivity, dozens of presets, and “smart” functions add complexity and cost without improving the core cooking performance. Focus on the features you’ll actually use: reliable temperature control, adequate capacity, and easy cleaning. Everything else is gravy.
Safety First: Never leave a running blender unattended, especially when blending hot liquids. The steam pressure can build and cause the lid to pop off, spraying hot contents. Always remove the center cap from the blender lid when blending hot liquids and cover with a folded towel to allow steam to escape safely.
Kitchen Safety: Protecting Yourself and Your Appliances
Kitchen safety goes beyond basic knife handling. Each appliance has specific safety considerations that, when followed, prevent accidents and ensure years of reliable use.
Knife Safety Fundamentals
The most important rule: a sharp knife is a safe knife. A dull knife requires more force to cut, which means it’s more likely to slip. Keep your knives sharp and use a proper cutting technique: curl your fingertips under (the “claw grip”) so your knuckles guide the blade, not your fingertips.
Never try to catch a falling knife. Step back and let it fall. A knife handle-down is usually fine; it’s the blade-down fall that’s dangerous. When passing a knife to someone, set it down on the counter and let them pick it up—never hand it directly.
Blender Safety
Hot liquids in a blender require special care. The steam from hot soup can build pressure and blow the lid off, causing serious burns. When blending hot liquids: fill the blender no more than one-third full, remove the center cap from the lid, and cover the opening with a folded kitchen towel. Start blending on the lowest speed and gradually increase. The towel allows steam to escape while containing any splashes.
Never put your hand or a utensil into a running blender, even to push ingredients down. Turn it off first. The blades are sharp and moving at high speed. If ingredients are stuck, stop the blender, use a spatula to push them down, then resume.
Pressure Cooker Safety
Modern electric pressure cookers like the Instant Pot have multiple safety mechanisms that make them far safer than stovetop models. However, a few rules are non-negotiable: never fill the pot more than two-thirds full (half for foods that expand, like beans and grains), always ensure the steam release valve is in the “Sealing” position before starting, and never force the lid open. If the float valve is up, there’s still pressure inside—wait for it to drop naturally.
When doing a quick release on starchy foods (pasta, potatoes, beans), stand back and use a long utensil to turn the valve. The steam can sputter and spray starchy liquid. Point the valve away from cabinets and yourself.
Electrical Safety
Kitchen appliances draw significant power. Never use an extension cord with high-wattage appliances like blenders or stand mixers—it can overheat and create a fire hazard. Plug appliances directly into grounded outlets. Keep cords away from hot surfaces and water. Unplug appliances when not in use, especially if you have curious children or pets.
If an appliance sparks, smokes, or produces a burning smell, unplug it immediately and stop using it. These are signs of an electrical fault that could cause a fire. Don’t attempt to repair electrical components yourself—take it to a qualified repair service or replace it.
Fire Prevention
Grease fires are the leading cause of kitchen fires. Never use water on a grease fire—it spreads the flames. Instead, slide a lid over the pan to smother the flames, or use baking soda (not baking powder). Keep a fire extinguisher rated for kitchen fires (Class B or K) within easy reach.
Clean your appliances regularly. Grease buildup on air fryers, toaster ovens, and stovetops is a serious fire hazard. A few minutes of cleaning after each use prevents dangerous accumulation.
Critical Safety Rule: Never leave cooking unattended, especially when frying, broiling, or using high heat. Unattended cooking is the number one cause of kitchen fires. If you need to leave the kitchen, turn off the heat or set a timer to remind you to check.
Diet-Specific Appliance Guide: Matching Tools to Your Eating Style
Different diets have different requirements, and certain appliances are particularly well-suited to specific eating styles. Whether you’re plant-based, keto, gluten-free, or following a whole-foods approach, the right appliances make your diet easier to maintain and more enjoyable.
Plant-Based and Vegan Cooking
A high-performance blender is the cornerstone of plant-based cooking. It creates silky smooth nut milks, creamy cashew-based sauces, smooth hummus, and rich smoothie bowls. The Vitamix can make hot soup from raw vegetables entirely through friction heat—no stove required. A food processor is equally essential for making veggie burgers, energy balls, raw desserts, and nut-based cheese alternatives.
The Instant Pot shines for plant-based cooking because it cooks dried beans, lentils, and grains quickly and perfectly. Making a large batch of perfectly cooked chickpeas for hummus takes 35 minutes from dried—no soaking required. The pressure cooker also excels at cooking tough vegetables like winter squash and root vegetables to creamy perfection.
A stand mixer with the grain mill attachment lets you grind your own flour from wheat berries, opening up a world of whole-grain baking. The pasta attachment creates fresh pasta that can be made with whole wheat or legume-based flours for added protein and fiber.
Keto and Low-Carb Cooking
The air fryer is the keto cook’s best friend. It creates crispy, satisfying textures without breading or carbohydrates. Perfect for making crispy chicken wings, bacon, cheese crisps, and roasted vegetables. The ability to cook at high heat quickly makes it ideal for the high-fat, moderate-protein meals that define keto cooking.
The Instant Pot simplifies many keto staples. Bone broth, which is foundational to many keto diets, can be made in 2 hours under pressure (versus 12-24 hours on the stove). Hard-boiled eggs peel perfectly when pressure-cooked. Carnitas, pot roast, and other fatty cuts become melt-in-your-mouth tender.
A spiralizer (stand mixer attachment or standalone) creates vegetable noodles from zucchini, cucumber, and other low-carb vegetables, replacing pasta in dishes like zucchini Bolognese or cucumber pad thai. The food processor’s shredding attachment makes cauliflower rice in seconds—a staple of low-carb cooking.
Gluten-Free Baking
Gluten-free baking is notoriously tricky because it lacks the binding properties of wheat gluten. A kitchen scale becomes absolutely essential—precision in measuring ingredients is the difference between a successful gluten-free cake and a crumbly disaster. Weighing ingredients in grams rather than cups eliminates the variability that can ruin gluten-free recipes.
The stand mixer is invaluable for gluten-free baking because it mixes batters thoroughly without overworking them (which can make gluten-free baked goods tough). The paddle attachment combines wet and dry ingredients evenly, and the dough hook handles the heavier gluten-free bread doughs that benefit from extended mixing.
A high-performance blender can make your own gluten-free flour blends from whole grains and nuts. Blend dried oats (certified gluten-free), rice, tapioca, and almond flour into custom blends that are fresher and more affordable than store-bought options.
Whole-Foods and Clean Eating
If you’re focused on whole, unprocessed foods, the food processor is your primary tool. It chops, slices, and dices fresh vegetables in seconds, making the increased vegetable preparation that whole-foods eating demands much more manageable. Making your own nut butter, energy balls, and whole-food snack bars is fast and easy.
The high-performance blender enables you to make everything from scratch: salad dressings without preservatives, nut milks without additives, smoothies packed with whole fruits and vegetables, and hot soups from fresh ingredients. The ability to control every ingredient is the whole-foods cook’s greatest advantage.
The Instant Pot supports whole-foods cooking by making it easy to cook from scratch. Dried beans, whole grains, and tough cuts of meat that need long cooking times become weeknight-friendly. The slow cooker function lets you prep ingredients in the morning and come home to a whole-foods meal that’s been simmering all day.
Diet-Appliance Quick Match
- Plant-Based: High-performance blender + food processor + Instant Pot
- Keto: Air fryer + Instant Pot + spiralizer
- Gluten-Free: Kitchen scale + stand mixer + blender
- Whole-Foods: Food processor + blender + Instant Pot
- Meal Prep: Instant Pot + air fryer + food processor + containers
Countertop Organization: Designing a Kitchen That Works
How you organize your kitchen counters directly impacts how often you use your appliances and how enjoyable cooking is. A cluttered, disorganized kitchen creates friction—every time you want to cook, you have to move things around, search for tools, and clear space. An organized kitchen invites cooking.
The Zones Method
Divide your kitchen into functional zones, each centered around a task and the appliances that support it. This creates an efficient workflow where everything you need for a particular task is within arm’s reach.
Coffee Zone: Your coffee maker, mugs, coffee beans or grounds, filters, and sugar all live together. This eliminates the morning scavenger hunt and makes your daily ritual efficient. If you have a grinder, it goes here too.
Prep Zone: This is your primary workspace, ideally near the sink. The cutting board, knives (magnetic strip or block), food processor, and mixing bowls all live here. Keep frequently used tools within arm’s reach of your main prep surface.
Cooking Zone: Near the stove and oven. The Instant Pot, air fryer (if used for main cooking), cooking utensils, and frequently used spices and oils live here. Pots and pans should be stored nearby—in a cabinet directly below the stove or on a hanging rack above.
Cleaning Zone: Around the sink and dishwasher. Dish soap, sponges, drying rack, and cleaning supplies. This zone should be clear of cooking appliances to prevent water damage.
Appliance Garage Strategies
An “appliance garage” is a cabinet or designated area where appliances live when not in use but can be quickly accessed. The key is making it easy enough that you’ll actually use the appliances. If it takes three steps to get the blender out, you won’t make smoothies.
Consider a cabinet with a roll-up or lift-up door near your prep zone. Store your most-used “occasional” appliances here: the blender, food processor, and immersion blender. Keep the cord wrapped neatly (velcro cord organizers are inexpensive and invaluable) so the appliance slides out ready to use.
The Rule of Thirds
A simple organizational principle: divide your counter space into thirds. One-third for your primary appliance (the one you use most), one-third for prep space, and one-third for staging (where you set ingredients before cooking and finished dishes after). This prevents the common problem of counters so cluttered with appliances that you have no room to actually cook.
Visual Harmony Matters
This might seem superficial, but it’s practical: if your kitchen looks chaotic, you’ll feel chaotic, and you’ll cook less. Group appliances by color family when possible. Keep cord clutter to a minimum with cord organizers or by using outlet strips tucked behind appliances. A visually calm kitchen is a more inviting kitchen.
Consider the footprint of each appliance. Some air fryers and stand mixers have significant counter depth. Measure your counter depth before purchasing to ensure the appliance doesn’t overhang or block cabinet doors. An appliance that juts out past the counter edge creates a visual and physical obstacle.
Pro Tip: The “30-second rule”: if any appliance takes more than 30 seconds to access and set up, you won’t use it regularly. Design your organization so your most-used appliances are accessible in under 30 seconds. This single principle will dramatically increase how often you actually use your tools.
Warranty, Longevity, and When to Replace
Understanding warranties and expected lifespans helps you make smarter purchasing decisions and know when it’s time to replace an appliance versus repair it.
Expected Lifespans by Appliance
| Appliance | Average Lifespan | With Proper Maintenance | Signs It’s Time to Replace |
|---|---|---|---|
| Chef’s Knife | 10-15 years | 20+ years | Deep chips, cracked handle, persistent dullness after sharpening |
| Stand Mixer | 15-20 years | 25-30+ years | Motor straining, excessive noise, attachment wobble |
| Instant Pot | 5-8 years | 10+ years | Won’t pressurize (after seal ring replacement), error codes, heating element failure |
| Air Fryer | 3-5 years | 5-7 years | Inconsistent heating, peeling non-stick coating, burnt smell, broken basket latch |
| High-Performance Blender | 10-15 years | 20+ years | Blade dullness, motor straining, cracked container |
| Immersion Blender | 5-8 years | 10+ years | Motor failure, blade looseness, cracked housing |
| Coffee Maker | 5-8 years | 15+ years (Moccamaster) | Inconsistent temperature, leaking, mineral buildup that won’t descale |
| Food Processor | 7-10 years | 15+ years | Motor straining, blade dullness, bowl cracks, lid fit issues |
| Kitchen Scale | 5-10 years | 15+ years | Inconsistent readings, display failure, unresponsive buttons |
Understanding Warranties
Kitchen appliance warranties vary dramatically. Here’s what to know:
Standard warranties (1-2 years): Most appliances come with a 1-year warranty covering manufacturing defects. This is the minimum. If an appliance fails within this period, the manufacturer should repair or replace it.
Extended warranties: Retailers often push extended warranties, and they’re usually not worth it for appliances under $200. The math rarely works in your favor. For expensive items ($300+), a manufacturer’s extended warranty might be worth considering, especially for complex appliances with many moving parts.
Notable warranties: KitchenAid stand mixers come with a 5-year warranty (with options to extend). Vitamix offers a 5-10 year warranty depending on the model. Technivorm Moccamaster offers a 5-year warranty. These longer warranties reflect manufacturer confidence in durability.
Repair vs. Replace
The general rule of thumb: if the repair costs less than 50% of the replacement price, repair it. If it’s more, replace it. But factor in the age and remaining expected lifespan. A 3-year-old stand mixer with a $50 repair is worth fixing. A 12-year-old one with a $50 repair might be better replaced, even though the repair is cheap.
Many cities have small appliance repair shops that can fix mixers, blenders, and food processors for reasonable prices. YouTube is also a valuable resource—many common repairs (replacing a seal, fixing a switch, lubricating a motor) are straightforward DIY projects.
The “Cost Per Use” Calculation
A $400 Vitamix used daily for 15 years costs about 7 cents per use. A $30 blender that lasts 2 years and is used daily costs about 11 cents per use. The premium blender is actually cheaper per use AND produces better results. Apply this thinking to every appliance purchase: what’s the cost per use over the expected lifespan?
Cooking for One: Right-Sizing Your Kitchen
Cooking for one is a different challenge than cooking for a family. The temptation to rely on takeout and processed food is strong when it feels like “too much effort” for one person. But with the right appliances and strategies, cooking for one can be quick, affordable, and genuinely enjoyable.
The Solo Cook’s Essential Trio
If you’re cooking for one, you don’t need all nine appliances on this list. Here are the three that make the biggest difference:
The Air Fryer (3-4 quart): This is the solo cook’s secret weapon. It preheats in 2 minutes, cooks a single chicken breast in 12 minutes, and reheats leftovers better than a microwave. It’s fast, uses minimal energy, and the small basket is perfectly sized for one. The cleanup is trivial—one basket and one tray.
The Instant Pot (3-quart): The 3-quart Instant Pot is the perfect size for one person. It makes single servings of soup, grains, beans, and one-pot meals without the waste of a larger model. Cook a batch of chili on Sunday and eat it for lunches all week.
A Great Chef’s Knife: No matter how many people you’re cooking for, a sharp, comfortable knife makes prep work fast and enjoyable. For solo cooking, the knife is often the only tool you need—chop directly into the pan or pot.
Batch Cooking for One
The biggest misconception about cooking for one is that you should cook single servings every time. That’s exhausting and wasteful. Instead, cook in batches and freeze portions. A batch of soup, chili, or stew made in the Instant Pot yields 4-6 individual portions. Freeze them in single-serving containers and you have homemade meals ready in minutes.
The air fryer excels at cooking proteins in batches. Grill four chicken breasts at once, slice them for salads, wraps, and grain bowls throughout the week. Cook a batch of meatballs and freeze them for quick pasta nights. The key is cooking once and portioning, not cooking every single meal from scratch.
The Single-Serving Mindset Shift
Stop thinking of cooking as an event and start thinking of it as assembly. Keep prepped ingredients on hand: cooked grains, washed vegetables, pre-portioned proteins, and homemade sauces. When it’s time to eat, assemble rather than cook. A grain bowl with pre-cooked quinoa, roasted vegetables from the air fryer, a protein, and a drizzle of dressing takes 5 minutes.
The blender is your smoothie and shake machine. Prep smoothie bags (pre-portioned frozen fruit, greens, and supplements in freezer bags) on Sunday. Each morning, dump a bag in the blender with liquid, blend for 60 seconds, and go. It’s faster than driving to a smoothie shop and infinitely healthier.
Pro Tip: Invest in quality single-serving storage containers. Glass mason jars (pint and quart sizes) are perfect for salads, overnight oats, soups, and grain bowls. They’re microwave-safe, dishwasher-safe, and double as serving vessels.
Energy Efficiency: Saving Money and the Planet
Kitchen appliances account for a significant portion of household energy use. Understanding which appliances are energy hogs and which are efficient helps you make choices that save money on utility bills and reduce your environmental footprint.
Energy Consumption by Appliance
| Appliance | Average Wattage | 30-Minute Energy Cost | Efficiency Notes |
|---|---|---|---|
| Air Fryer | 1,200-1,800W | $0.09-0.14 | Uses 50-75% less energy than a full oven |
| Instant Pot | 700-1,000W | $0.05-0.08 | Very efficient; pressure cooking reduces cook time dramatically |
| Stand Mixer | 300-500W | $0.02-0.04 | Low energy use; runs for short periods |
| High-Performance Blender | 1,200-1,500W | $0.09-0.12 | Very short run times (60-90 seconds typical) |
| Coffee Maker (Drip) | 900-1,200W | $0.07-0.09 | Runs 5-10 minutes; very efficient per cup |
| Food Processor | 600-1,000W | $0.05-0.08 | Very short run times; highly efficient |
| Immersion Blender | 200-300W | $0.02-0.02 | Extremely low energy use |
| Conventional Oven | 2,000-5,000W | $0.15-0.38 | The baseline comparison; uses the most energy |
Energy-Saving Strategies
Use the air fryer instead of the oven: For meals serving 1-4 people, the air fryer uses significantly less energy than heating a full oven. It also preheats in 2-3 minutes versus 10-15 minutes for an oven. Over a year, this adds up to meaningful savings.
Pressure cook instead of stovetop: The Instant Pot’s pressure cooking function reduces cook times by 60-70%. Less time cooking means less energy consumed. A pot of beans that takes 2 hours on the stove takes 25 minutes under pressure.
Cook multiple items simultaneously: Use the Instant Pot’s Pot-in-Pot method to cook multiple dishes at once. Use the air fryer’s rack to cook protein on top and vegetables below. Batch cooking is more energy-efficient than cooking single servings multiple times.
Don’t preheat when it doesn’t matter: For air fryer foods that cook for 15+ minutes, preheating makes minimal difference. Save the preheating for foods that benefit from immediate high heat (like fresh proteins or foods you want extra crispy).
Unplug idle appliances: Stand mixers, blenders, and food processors draw a small amount of phantom power when plugged in but not running. It’s minimal per appliance, but it adds up over dozens of appliances. Unplug what you’re not using.
Annual Energy Cost Comparison
Using an air fryer instead of an oven for 5 meals per week saves approximately $50-80 per year in energy costs. Using an Instant Pot instead of stovetop for beans, grains, and stews saves another $20-30. Combined with the time savings, these appliances pay for themselves within a year.
Smart Kitchen Technology: Worth It or Gimmick?
Wi-Fi-connected appliances, app-controlled cooking, and voice-activated kitchen assistants are the latest trend in kitchen technology. But do they actually improve your cooking experience, or are they just expensive novelties? The answer is nuanced—some smart features are genuinely useful, while others are solutions looking for problems.
Smart Features That Actually Help
Smart thermometers: Wireless meat thermometers that send temperature alerts to your phone are genuinely useful. They eliminate the need to hover over the grill or oven, and they ensure perfectly cooked meat every time. The ThermoWorks Signals and MEATER are excellent examples.
Instant Pot app connectivity: The ability to monitor and control your Instant Pot from another room is convenient, especially for long cook times. Getting a notification that your roast is done while you’re in the living room is a nice quality-of-life improvement.
Coffee maker scheduling: Waking up to freshly brewed coffee because your smart coffee maker started on schedule is a legitimate luxury. Technivorm and some higher-end Breville models offer this feature.
Smart Features That Are Mostly Gimmicks
Wi-Fi-enabled air fryers: You’re typically standing right next to the air fryer when you use it. Do you really need to check the timer from your phone? The physical controls on most air fryers are already simple and intuitive.
App-controlled stand mixers: You need to be present to add ingredients, scrape the bowl, and monitor the mixing process. Remote control adds no value. KitchenAid’s app features are more about recipes than actual mixer control.
Smart refrigerators with touchscreens: These are expensive, prone to technology obsolescence, and the features (recipe suggestions, family calendars, music streaming) are better served by a $30 tablet stuck to the fridge with a magnet.
The Technology Obsolescence Problem
Kitchen appliances last 10-20+ years. Technology becomes obsolete in 3-5 years. A “smart” appliance purchased today may have an app that stops being supported in five years, leaving you with a perfectly functional appliance that has a useless screen and dead Wi-Fi chip. The underlying cooking technology—heat, pressure, blades—doesn’t change. The “smart” layer is temporary.
If you want smart features, buy them as standalone devices (smart thermometers, smart plugs, smart displays) that can be upgraded independently of your cooking appliances. This way, your $400 stand mixer doesn’t become “obsolete” because the companion app was discontinued.
When Smart Makes Sense
Smart features add the most value when they solve a genuine problem you have. If you frequently forget that something is cooking and want alerts, smart connectivity helps. If you have a disability or mobility issue that makes it difficult to reach appliance controls, voice control is transformative. If you travel frequently and want to monitor home appliances remotely, smart features provide peace of mind.
For most home cooks, however, the core cooking performance matters more than connectivity. A great air fryer with manual controls will outcook a mediocre smart air fryer every time. Focus on the fundamentals first.
Pro Tip: If you’re tempted by a smart appliance, wait 6 months after release. Early adopters pay premium prices and discover the bugs. By waiting, you’ll get a lower price, a more polished experience, and real user reviews that tell you whether the smart features are worth it.
Frequently Asked Questions
What’s the first kitchen appliance I should buy when setting up a new kitchen?
Start with a great chef’s knife (the Victorinox Fibrox Pro) and a multi-cooker (Instant Pot). The knife handles all your prep work, and the Instant Pot handles cooking, from pressure cooking to slow cooking to rice making. Together, these two tools can make an incredible variety of meals with minimal counter space. Add an air fryer next if you want quick, crispy meals.
Is a Vitamix worth the price over a cheaper blender?
For most people, yes—especially if you make smoothies, soups, or nut butters regularly. The difference in motor power, blade design, and container geometry produces qualitatively different results: smoother textures, finer purees, and the ability to blend hot liquids safely. If you only blend occasionally, a mid-range blender ($50-100) is perfectly adequate. But daily users will notice and appreciate the Vitamix difference.
Can I use my air fryer to replace my oven?
For meals serving 1-4 people, an air fryer can handle most tasks that a conventional oven does—roasting, baking, reheating, and “frying.” However, it can’t replace an oven for large batches, baking large items (like a whole turkey or a large pizza), or recipes that require specific oven functions like broiling or convection baking. Think of it as a supplement that handles 70-80% of what you’d use the oven for, with greater speed and energy efficiency.
How often should I sharpen my kitchen knives?
For home cooks, sharpen your knives 2-4 times per year (depending on use). More important is honing—use a honing steel before every major cooking session. Honing takes 30 seconds and keeps the edge aligned between sharpenings. A sharp knife is safer than a dull one because it requires less pressure and is less likely to slip.
What’s the best size Instant Pot for a family of four?
The 6-quart is the ideal size for a family of four. It’s large enough to cook a whole chicken, a batch of chili, or a pot of soup for the family, but not so large that it wastes energy for smaller meals. The 8-quart is better for families of 5+ or for serious meal preppers who cook large batches. The 3-quart is too small for family cooking.
Should I buy a food processor or an immersion blender first?
If you do more baking, chopping, and solid food prep, get the food processor. If you make more soups, sauces, and smoothies, get the immersion blender. The food processor is more versatile for general cooking, while the immersion blender is more convenient for liquid-based tasks. Both are relatively affordable, so if budget allows, get both eventually.
Are refurbished kitchen appliances worth buying?
Refurbished appliances from reputable manufacturers (especially KitchenAid and Vitamix) can be excellent deals. They’ve been inspected, repaired if needed, and typically come with a limited warranty. You can save 30-50% off retail price. However, avoid refurbished appliances from unknown sellers—the savings aren’t worth the risk of hidden damage or missing warranty coverage.
How do I clean burnt-on grease from my air fryer basket?
Fill the basket with hot water and a tablespoon of baking soda. Let it soak for 15-30 minutes, then scrub with a non-abrasive sponge. For stubborn spots, make a paste of baking soda and water, apply it to the affected area, and let it sit for 15 minutes before scrubbing. Never use steel wool or abrasive cleaners—they’ll damage the non-stick coating.
What’s the difference between an immersion blender and a hand mixer?
They’re completely different tools. An immersion blender (stick blender) has rotating blades at the end of a shaft and is used for blending and pureeing liquids—soups, sauces, smoothies. A hand mixer has two beaters and is used for whipping and mixing—whipped cream, cake batter, mashed potatoes. An immersion blender blends; a hand mixer beats. Some immersion blenders come with a whisk attachment that can do light whipping, but it’s not a replacement for a dedicated hand mixer.
Can I put my Instant Pot inner pot in the oven?
Yes, the stainless steel inner pot is oven-safe up to 500 degrees F. This opens up possibilities like finishing a pot roast under the broiler for a crispy crust, baking a cheesecake in the inner pot, or making pot-in-pot lasagna. The non-stick inner pot (if you have one) is NOT oven-safe—the coating can release harmful fumes at high temperatures.
How long do air fryers typically last?
Air fryers typically last 3-5 years with regular use, though some models last longer. The heating element and fan are the most common failure points. The non-stick coating on the basket also degrades over time. Premium models from Ninja and Breville tend to last longer than budget options. If you clean it regularly and avoid abrasive cleaners, you’ll maximize its lifespan.
Is it worth buying a stand mixer if I’m not a big baker?
Absolutely. While bakers get the most use, a stand mixer is surprisingly versatile for non-baking tasks. It shreds cooked chicken in 30 seconds (paddle on low), makes mashed potatoes effortlessly, mixes meatball and burger meat, whips cream for desserts, and makes guacamole for parties. The hands-free operation is the real luxury—you add ingredients and walk away. If you cook regularly, you’ll find uses for it beyond baking.
What should I look for when buying a food processor?
Key factors: (1) Capacity—11-14 cups for families, 7-9 cups for individuals. (2) Motor power—600+ watts for tough tasks like nut butter and dough. (3) Feed tube size—a wide feed tube means less pre-chopping. (4) Blade options—look for both S-blade (chopping) and disc attachments (slicing/shredding). (5) Ease of cleaning—dishwasher-safe parts save time. The Cuisinart 14-Cup is the gold standard for a reason, but the 11-Cup model is excellent if you have less counter space.
How do I prevent my blender from leaking?
Blender leaks are usually caused by a worn or improperly seated gasket (the rubber ring between the blade assembly and the container). Check the gasket first—it should be seated flat in its groove with no cracks or warping. If the gasket is fine, make sure the blade assembly is tightened securely. Over time, the gasket wears out and needs replacement. Most manufacturers sell replacement gaskets for a few dollars. Also, don’t overfill the blender past the maximum line.
Can I use metal utensils in my Instant Pot?
Yes, you can use metal utensils in the stainless steel inner pot without worry. The stainless steel is durable and won’t be damaged by metal spoons, tongs, or whisks. However, if you have the non-stick inner pot, use only silicone, nylon, or wooden utensils to avoid scratching the coating.
What’s the best way to store leftover food from meal prep?
Use glass containers with airtight lids for most meals—they don’t stain, don’t absorb odors, and go from fridge to microwave safely. Mason jars work great for soups, salads, and overnight oats. Label everything with the date. Most prepped meals last 4-5 days in the fridge. For longer storage, freeze individual portions in freezer-safe containers or bags. When reheating, the air fryer (for crispy items) or Instant Pot (for soups and stews) produces better results than the microwave.
Should I buy a set of kitchen knives or individual knives?
Individual knives are almost always better than sets. A knife set looks impressive, but most people only use 2-3 knives regularly (chef’s knife, paring knife, and serrated bread knife). The rest collect dust. Buy a great chef’s knife first (the Victorinox Fibrox Pro), then add a paring knife and bread knife as needed. This approach gets you better quality knives for less money than a mediocre set.
How do I clean my coffee maker properly?
Descale every 1-3 months (more often with hard water) by running a cycle with equal parts white vinegar and water, followed by two cycles of plain water. Clean the carafe and filter basket after every use with warm, soapy water. Wipe down the hot plate to prevent burnt coffee buildup. For the Moccamaster, replace the water filter regularly and never leave water sitting in the reservoir for extended periods. Never put the carafe in the dishwasher—it can cloud the glass over time.
What’s the best cutting board material for kitchen knives?
Wood is the best overall material—specifically end-grain maple, walnut, or cherry. It’s gentle on knife edges, has natural antimicrobial properties, and self-heals minor cuts. High-quality plastic (HDPE) is a good budget alternative—it’s dishwasher-safe and affordable, though it doesn’t last as long as wood. Avoid glass, ceramic, marble, and granite boards—they’ll destroy your knife edge in minutes. Bamboo is decent but harder than wood and can dull knives faster.
Is it safe to blend hot liquids in a Vitamix?
Yes, Vitamix blenders are specifically designed to handle hot liquids. The container is vented to allow steam to escape, and the motor and blades are built to handle the thermal stress. However, always follow safety guidelines: fill no more than halfway for hot liquids, remove the center lid cap, cover with a towel, start on low speed, and gradually increase. Never seal the lid completely when blending hot liquids—the steam pressure can blow the lid off.
How many watts should a good blender have?
For a high-performance blender, look for 1,200-1,500 watts (peak power). The Vitamix Explorian has 1,400 watts, which is sufficient for virtually any blending task including hot soups, frozen desserts, and nut butters. For a basic blender used mainly for smoothies, 600-800 watts is adequate. Below 500 watts, the blender will struggle with ice, frozen fruit, and fibrous greens. Note: wattage alone doesn’t tell the whole story—blade design, container shape, and motor quality matter as much as raw power.
Can I make bread dough in a food processor?
Yes, a food processor can make bread dough, though it’s not ideal for large batches. The S-blade cuts through dough quickly, and you can process a basic bread dough in about 60 seconds. However, food processors can overheat with extended kneading, and the bowl size limits how much dough you can make. For serious bread baking, a stand mixer with a dough hook or hand-kneading is better. The food processor is great for pizza dough, pie crust, and biscuit dough in smaller quantities.
What’s the best way to organize kitchen drawers?
Use drawer dividers or inserts to create dedicated spots for each category: utensils, measuring tools, baking supplies, and miscellaneous items. Store items where you use them—measuring cups near the prep area, pot holders near the oven, serving utensils near the dining area. The “prime real estate” drawers (easily accessible, at waist height) should hold your most-used items. Lower and higher drawers hold less frequently used items. A drawer organizer for knives (if you don’t use a magnetic strip) keeps blades separated and safe.
Final Thoughts
Building a great kitchen is a journey, not a destination. Start with the essentials—a great knife, a versatile multi-cooker, and a reliable stand mixer—and build from there based on your actual cooking habits. Ignore the marketing hype, focus on quality over quantity, and invest in appliances that solve real problems in your daily cooking. The nine appliances in this guide aren’t just tools—they’re the foundation of a kitchen that makes cooking a joy instead of a chore.


