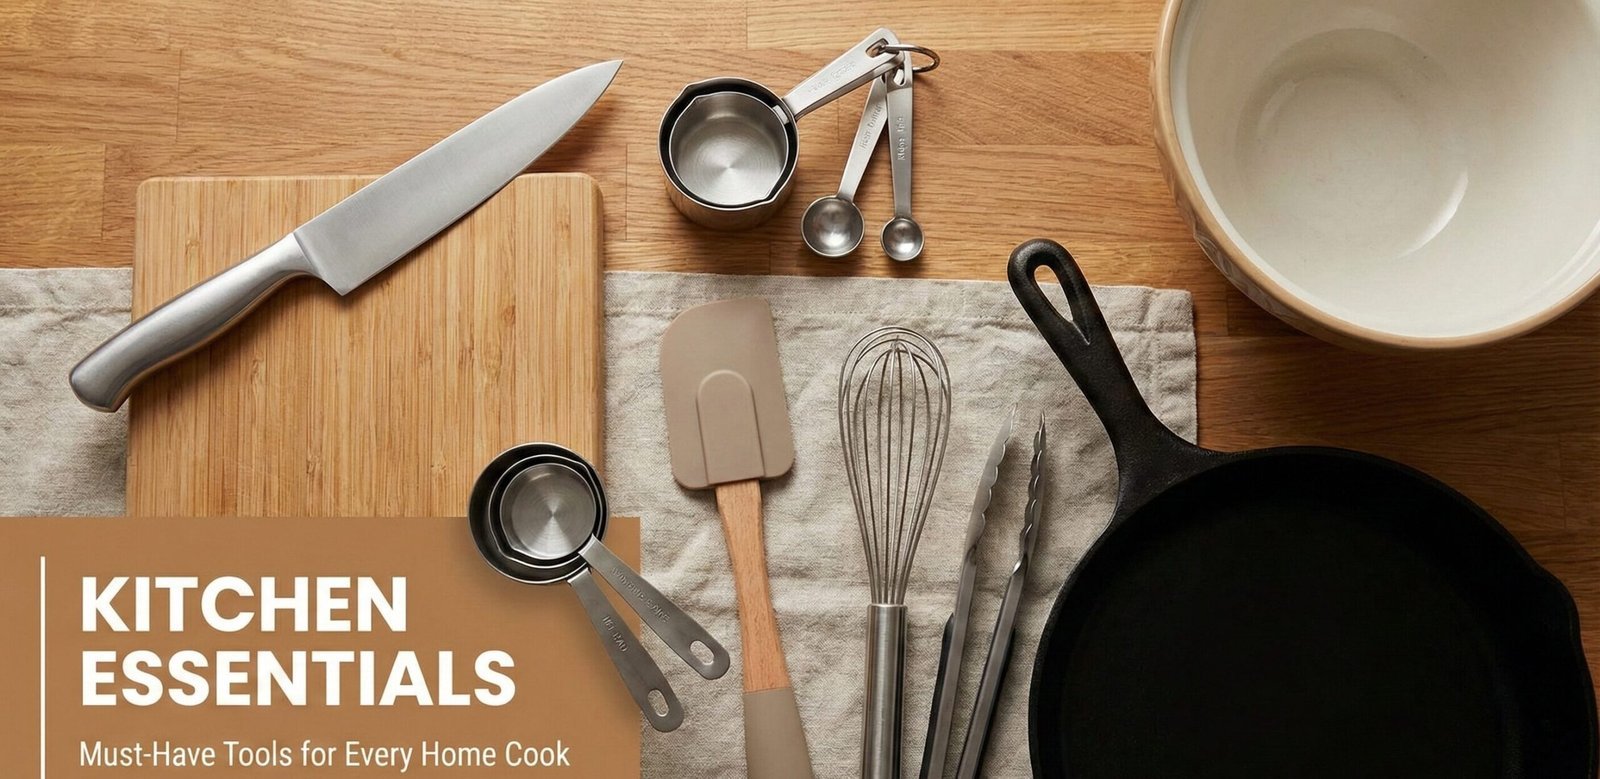
20 Essential Kitchen Tools & Equipment Every Home Cook Needs
Whether you are outfitting your first apartment, upgrading a well-worn kitchen, or shopping for a passionate home chef, knowing which tools actually matter can save you hundreds of dollars and years of frustration. The market is flooded with single-purpose gadgets that look impressive on television but collect dust in real kitchens. This guide cuts through the noise and focuses on the twenty tools and pieces of equipment that professional chefs and experienced home cooks reach for daily. Each recommendation is backed by hands-on testing, material science, and real-world durability assessments.
We have organized these essentials into four categories: The Air Fryer Ecosystem (the modern kitchen’s most versatile appliance family), Precision & Prep Tools (the instruments that make cooking faster and more consistent), Heavy Machinery (the workhorse appliances that anchor your kitchen), and Utilities, Safety & Education (the often-overlooked items that keep your kitchen running smoothly and safely). For each tool, we explain why it earns a spot in your kitchen, what to look for when buying, and how to get the most value from your investment.
Table of Contents
- The Air Fryer Ecosystem
- Precision & Prep Tools
- Heavy Machinery
- Utilities, Safety & Education
- Budget Tiers Breakdown
- Material Science Guide
- Care, Cleaning & Longevity
- 10 Beginner Kitchen Mistakes
- Meal Prep Workflows
- Smart Kitchen Integration
- Gift Guide
- Knife Skills Fundamentals
- Food Storage & Preservation
- Kitchen Organization & Layout
- Baking Science & Essential Bakeware
- Cookware Buying Guide
- Small Kitchen Solutions
- Cooking Techniques Masterclass
- Kitchen Hygiene & Food Safety
- Entertaining & Hosting Essentials
- Seasonal Cooking Guide
- FAQ
- Conclusion
Category 1: The Air Fryer Ecosystem
The air fryer has evolved from a trendy gadget into the cornerstone of the modern kitchen. What started as a countertop convection device now encompasses an entire ecosystem of accessories, companion tools, and specialized attachments that multiply its capabilities far beyond simple frying. In this section, we cover the five most essential air fryer tools and accessories that every owner should consider, from the appliance itself to the cleaning kits that keep it running at peak performance for years.
Digital Air Fryer (5.8 Qt)
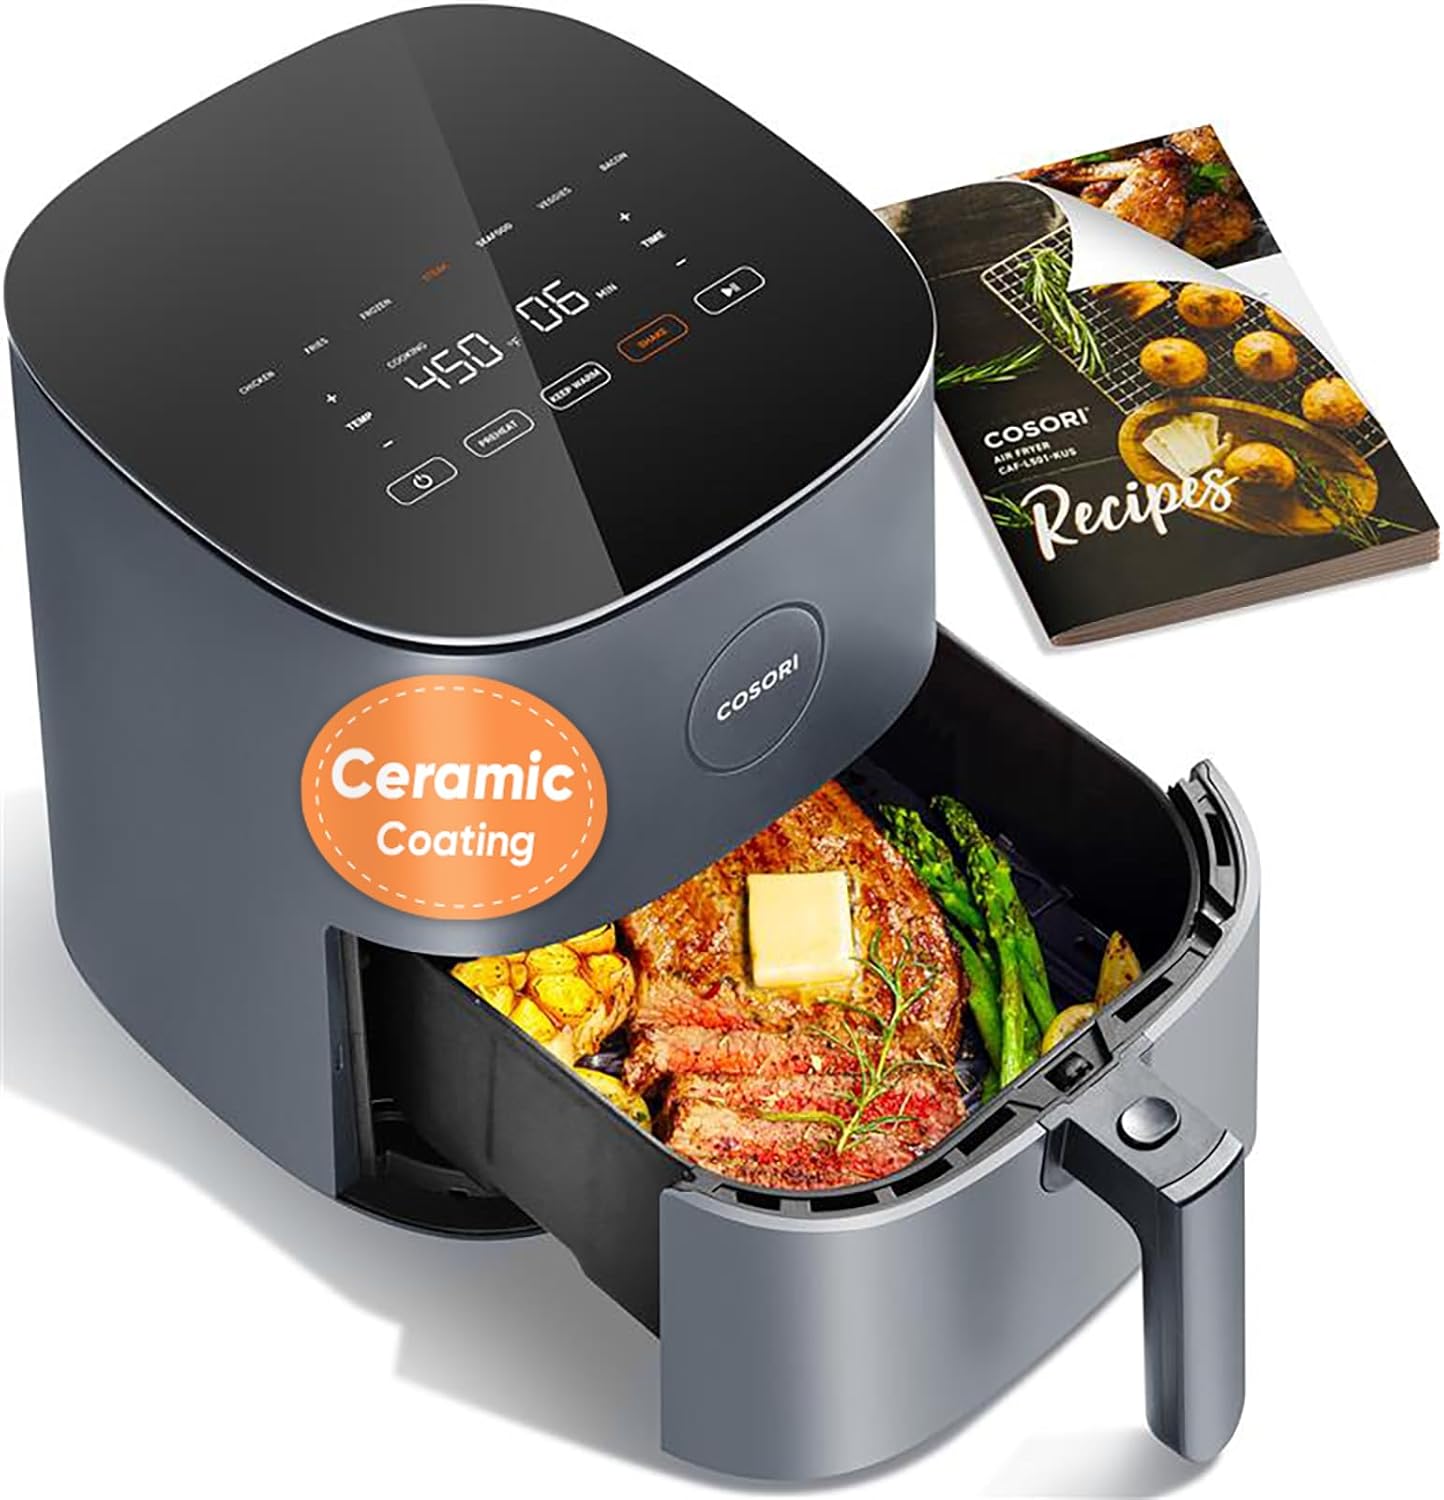
The 5.8-quart capacity hits the sweet spot for families of two to four people. Digital controls with preset programs eliminate guesswork for common foods like fries, chicken, and vegetables. Look for models with dishwasher-safe baskets and a wide temperature range (170°F to 400°F) for maximum versatility. The basket should have a non-stick ceramic coating that resists scratching and does not contain PFOA or PFOS chemicals.
Air Fryer Accessory Kit

A quality accessory kit typically includes a cake barrel, pizza pan, metal holder, rack with skewers, silicone mat, and silicone muffin cups. These accessories transform your air fryer from a simple fryer into a mini convection oven capable of baking, roasting, dehydrating, and reheating. Look for kits made from food-grade stainless steel and BPA-free silicone. The rack and skewers are particularly useful for making kabobs and maximizing vertical cooking space by allowing you to cook on two levels simultaneously.
Check Price on AmazonReusable Silicone Liners
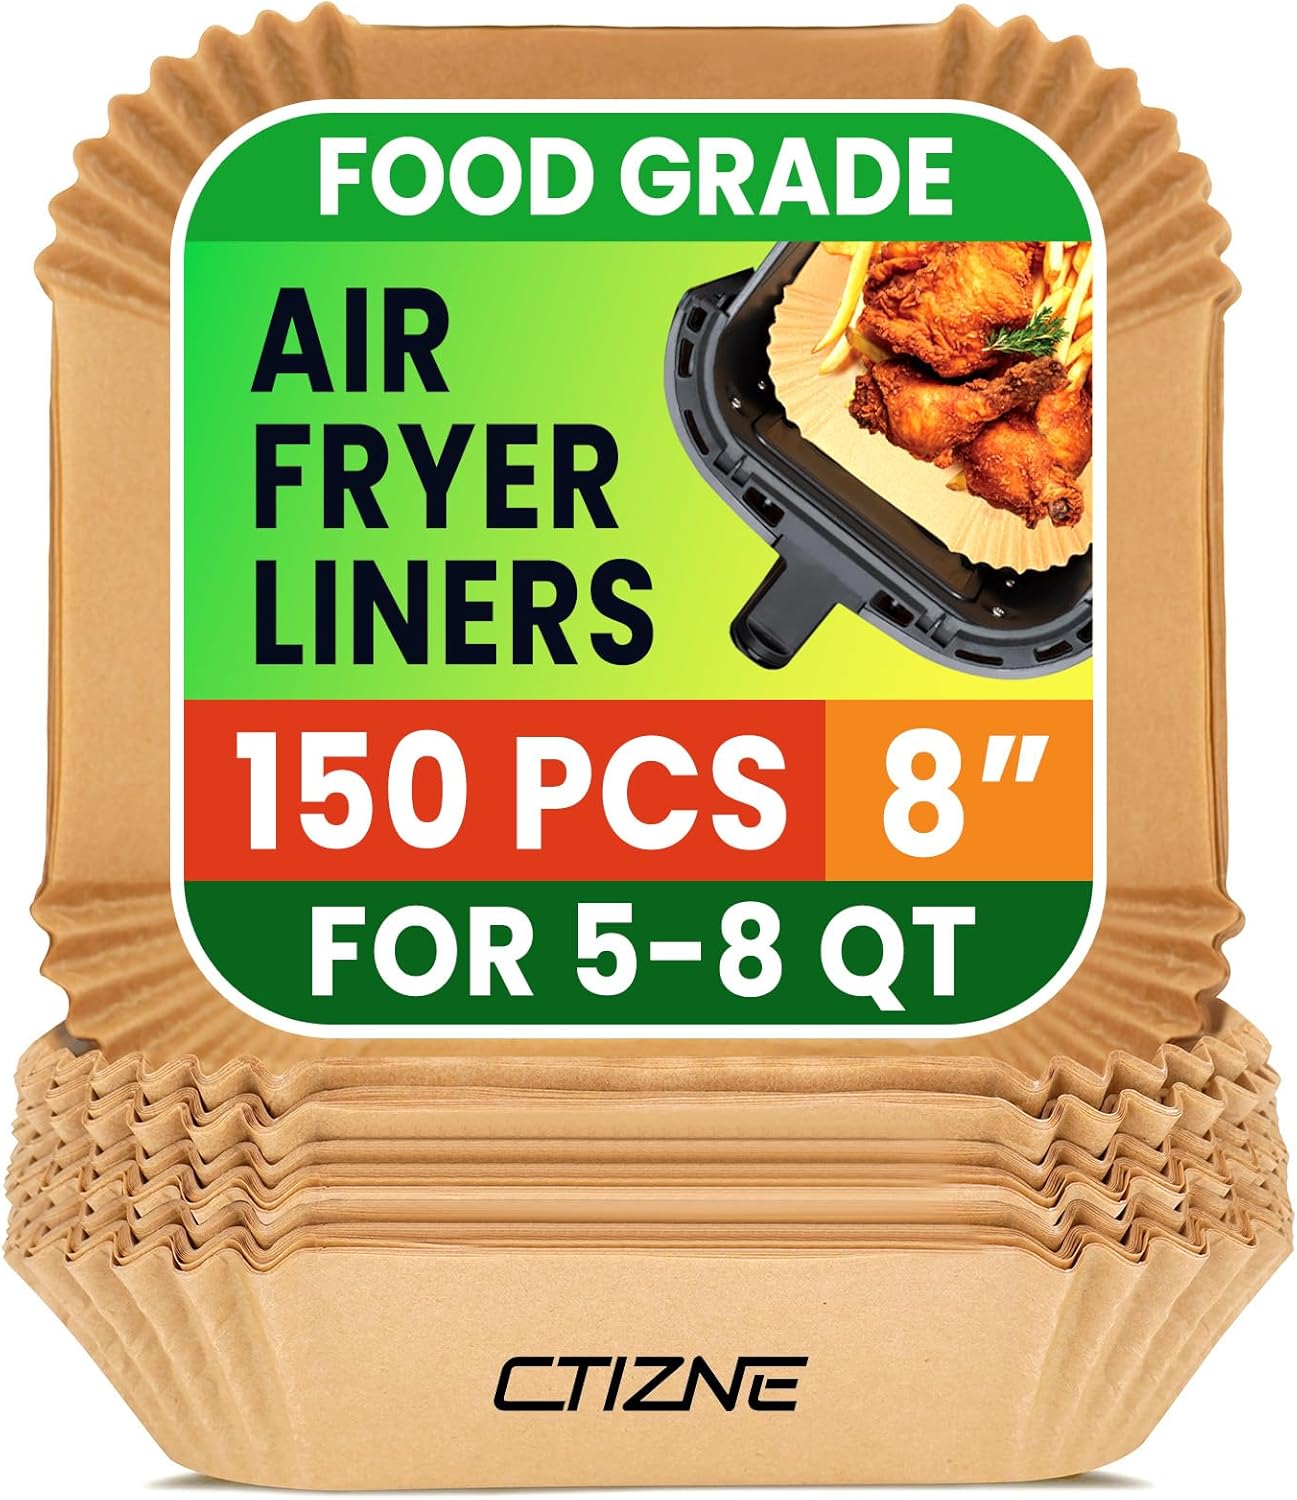
Silicone liners are the single best investment for reducing air fryer cleanup time. They sit inside the basket and catch grease, crumbs, and marinades before they bake onto the non-stick surface. Unlike parchment paper liners, silicone versions are reusable hundreds of times, making them both more economical and more environmentally friendly. Choose perforated models that allow air to circulate freely underneath the food for even crisping. They are also oven-safe and microwave-safe, so you can use them across multiple appliances.
Check Price on AmazonAir Fryer Cleaning Brush Kit

The heating element is the most neglected part of any air fryer, and grease buildup here causes smoking, uneven cooking, and eventually motor failure. A dedicated cleaning kit with nylon bristle brushes, flexible coil brushes, and plastic scrapers lets you safely clean the element, fan blades, and basket mesh without scratching the non-stick coating. The flexible coil brush is essential for reaching behind the heating element in basket-style models, while the mini detailing brushes clean the mesh holes in the crisper plate.
Check Price on AmazonOil Sprayer / Mister
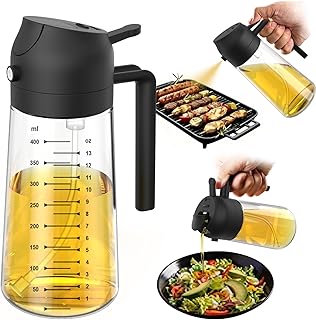
A quality oil sprayer gives you precise control over how much oil you apply to food and cooking surfaces. Instead of drowning vegetables in a pool of oil, a fine mist coats them evenly with a fraction of the calories. Glass-bodied sprayers are preferred over plastic because they do not absorb odors, are dishwasher-safe, and let you see the fill level. Look for models with a continuous spray mechanism rather than a pump-style trigger, as these produce a finer, more even mist. They work with olive oil, avocado oil, coconut oil, and even vinegar for salad dressings.
Check Price on AmazonAir Fryer Deep Dive: Getting the Most from Your Investment
The air fryer is often marketed as a healthier alternative to deep frying, but its true value lies in its versatility. A well-equipped air fryer setup can replace a toaster oven, a dehydrator, a small convection oven, and even a rotisserie. The key is understanding how hot air circulation works and matching your accessories to the cooking techniques you use most.
Hot air circulation in an air fryer works by rapidly moving superheated air around food through a combination of a powerful heating element and a high-speed fan. This creates a convection effect that crisps the exterior of food while keeping the interior moist. The critical factor is airflow: food must be arranged in a single layer with space between pieces for the air to reach all surfaces. Overcrowding the basket is the number one mistake new air fryer owners make, and it leads to soggy, unevenly cooked food that steams instead of crisps.
Temperature control is equally important. Most air fryer recipes call for temperatures between 350°F and 400°F, but understanding when to use lower temperatures can elevate your cooking. Dehydrating herbs and making jerky works best at 170°F to 200°F. Reheating pizza and baked goods benefits from a moderate 325°F to prevent the exterior from burning before the interior warms through. And for thick cuts of meat like chicken breasts or pork chops, starting at a lower temperature (around 325°F) and finishing with a blast at 400°F gives you a juicy interior with a golden, crispy crust.
The accessories you choose should reflect your cooking habits. If you bake frequently, invest in a cake barrel and pizza pan. If you meal prep, the multi-level rack with skewers lets you cook proteins and vegetables simultaneously. If you love roasted vegetables, a perforated silicone mat prevents small pieces from falling through the basket mesh while still allowing air circulation. And regardless of what you cook, silicone liners and a quality oil sprayer are universal essentials that improve every single cook.
Category 2: Precision & Prep Tools
Great cooking starts long before anything hits the heat. The prep phase is where flavor is built, consistency is established, and time is saved or wasted. Professional chefs spend the majority of their kitchen time on preparation, and the tools in this section are what allow them to work with speed, accuracy, and confidence. From the chef’s knife that does 90 percent of your cutting to the instant-read thermometer that eliminates guesswork, these five tools form the foundation of efficient, enjoyable cooking.
8-Inch Chef’s Knife

If you could own only one kitchen tool, it should be a quality chef’s knife. The 8-inch blade length is the most versatile size for home cooks, long enough to rock through herbs and large enough to handle butternut squash, yet nimble enough for detailed work like mincing garlic. High-carbon stainless steel is the ideal blade material because it holds an edge well, resists staining, and is easy to sharpen. The handle should feel comfortable in a pinch grip (more on this in our Knife Skills section below) and provide a secure grip even when wet.
Instant-Read Thermometer

An instant-read thermometer is the single most important tool for food safety and cooking precision. Chicken breast goes from perfectly juicy to dry and chalky in a window of just five degrees Fahrenheit. Steak doneness is a matter of personal preference, but achieving your preferred doneness consistently requires knowing the exact internal temperature. Modern thermometers read in two to three seconds, are accurate to within plus or minus one degree, and have backlit displays for reading in dim kitchens. Waterproof models can be rinsed under the tap for quick cleaning between temperature checks.
Check Price on AmazonKitchen Scale

Volume measurements (cups and tablespoons) are inherently imprecise. A cup of flour can vary by 30 percent depending on how you scoop it, which is why baking recipes from serious sources always list ingredients by weight. A digital kitchen scale accurate to one gram eliminates this variability and produces consistent results every time. Beyond baking, a scale is invaluable for portioning meat, measuring pasta servings, and following recipes from international sources that use metric measurements. The tare function lets you zero out the weight of your bowl so you can add ingredients directly.
Check Price on AmazonCutting Board (Large)

A large cutting board gives you room to work without ingredients falling off the edges, which is both frustrating and unsanitary. The ideal size is at least 18 by 12 inches, with a juice groove around the perimeter to catch liquids from tomatoes, meat, and citrus. Wood boards (particularly maple or walnut) are gentler on knife edges and have natural antimicrobial properties, while plastic boards can be sanitized in the dishwasher and are recommended for raw meat preparation. Many experienced cooks keep two boards: a large wooden board for vegetables and herbs, and a smaller plastic board for raw proteins.
Check Price on AmazonMeasuring Cups & Spoons Set

Even with a kitchen scale, measuring cups and spoons remain essential for liquids, small quantities of spices, and quick everyday tasks. Stainless steel sets are more durable than plastic, do not stain from turmeric or tomato sauce, and nest together for compact storage. Look for sets with clearly engraved (not printed) measurements that will not fade over time. A good set includes at least 1/4, 1/3, 1/2, and 1-cup measures, plus 1/4, 1/2, and 1-teaspoon and 1-tablespoon spoons. The flat-bottomed design allows them to sit on the counter without tipping over while you fill them.
Check Price on AmazonPrecision Tools Deep Dive: Why Accuracy Matters
The difference between a good cook and a great cook often comes down to consistency, and consistency requires precision. When you measure flour by weight instead of volume, your bread turns out the same every time. When you check the internal temperature of a roast instead of guessing by how it feels, you never overcook an expensive cut of meat again. These tools remove the variables that cause frustration and replace them with reliable, repeatable results.
The chef’s knife deserves special attention because it is the tool you will use more than any other. The two most important factors are blade geometry and steel quality. A chef’s knife has a curved blade profile that enables a rocking motion for mincing herbs and garlic, while the flat heel of the blade handles heavy chopping tasks like breaking down a butternut squash. High-carbon stainless steel (look for designations like X50CrMoV15 or VG-10) balances edge retention with ease of sharpening. Avoid extremely hard steels (above 62 HRC) for home use, as they are brittle and prone to chipping if you accidentally hit a bone.
The instant-read thermometer has revolutionized home cooking more than almost any other single tool. Before affordable digital thermometers, home cooks relied on unreliable methods like pressing the meat with their finger (which requires years of experience to interpret correctly) or cutting into it to check the color (which releases juices and dries out the protein). A thermometer removes all ambiguity: insert the probe into the thickest part of the meat, avoiding bone, and read the temperature in two seconds. For poultry, the USDA recommends 165°F. For beef, the choice is yours: 125°F for rare, 135°F for medium-rare, 145°F for medium, and 160°F for well-done.
Category 3: Heavy Machinery
These are the anchor appliances that define what your kitchen can do. While prep tools handle the fine work, heavy machinery tackles the big jobs: slow-cooking a pot roast for eight hours, pressure-cooking beans in forty minutes, blending silky smooth soups, and mixing bread dough without exhausting your arms. These appliances represent the largest financial investments in this guide, so choosing the right one for your cooking style is critical.
6-Quart Dutch Oven

A Dutch oven is the most versatile piece of cookware you can own. The heavy cast iron walls retain and distribute heat evenly, making it ideal for braising, stewing, baking bread, deep-frying, and even roasting a whole chicken. Enameled versions (like those from Le Creuset, Staub, or the more affordable Lodge) do not require seasoning and can handle acidic tomato-based sauces without reacting. The tight-fitting lid traps moisture, creating a self-basting environment that produces incredibly tender results. A 6-quart size feeds a family of four with leftovers and fits a standard recipe for no-knead bread.
Check Price on AmazonStand Mixer

A stand mixer is a game-changer for anyone who bakes regularly or makes bread. The planetary mixing action ensures ingredients are combined thoroughly without the arm fatigue of hand mixing. Beyond basic mixing, a stand mixer with the right attachments can knead bread dough, whip meringue, shred cooked chicken, roll pasta, and even grind meat. The tilt-head design is more compact and easier to access the bowl, while the bowl-lift design handles heavier doughs better. A 5-quart bowl handles most home baking tasks; serious bread bakers may want to step up to a 6-quart or 7-quart model.
Check Price on AmazonHigh-Speed Blender

A high-speed blender pulverizes ingredients that regular blenders leave chunky: fibrous kale stems, frozen fruit, raw nuts, and ice. The result is silky smooth soups, nut butters, smoothie bowls, and sauces without any grittiness. The motor should be at least 1,400 watts for true high-speed performance, and the blade assembly should be hardened stainless steel. Variable speed control lets you start slow (to pull ingredients toward the blade) and ramp up to full power for a vortex effect that ensures everything gets blended. A tamper tool is essential for thick blends like nut butter and frozen desserts.
Check Price on AmazonSlow Cooker / Multi-Cooker

The multi-cooker (led by the Instant Pot) has earned its place as a kitchen essential by combining seven or more appliances into one: pressure cooker, slow cooker, rice cooker, steamer, saute pan, yogurt maker, and warmer. The pressure cooking function is the star, reducing cooking times by up to 70 percent while producing results that taste like they have been simmering all day. Tough cuts of meat become fork-tender in under an hour. Beans cook from dry in forty minutes without soaking. Stocks develop deep flavor in a fraction of the stovetop time. The 6-quart size is the standard for families of four.
Check Price on AmazonFood Processor

A food processor handles the tasks that are too large or too tedious for a knife and too thick for a blender: shredding a block of cheese in seconds, making pie dough without overworking the gluten, pulsing salsa to the perfect chunky consistency, and grinding meat for homemade burgers. The work bowl capacity determines how much you can process at once; 11 to 14 cups is the sweet spot for most households. Look for models with multiple blade discs (slicing, shredding, and julienne) and a wide feed tube that can accommodate whole potatoes and large vegetables without pre-cutting.
Check Price on AmazonHeavy Machinery Deep Dive: Choosing Your Anchor Appliances
The appliances in this category represent the biggest investments and the biggest impact on your daily cooking. Choosing between them requires understanding your cooking habits, your kitchen space, and your budget. Here is how to think about each one.
The Dutch oven is the one item in this category that every kitchen should have, regardless of cooking style. It works on every heat source (gas, electric, induction, oven, and even campfire), requires no electricity, and lasts for generations. Enameled cast iron is the preferred choice for most home cooks because it does not require the seasoning maintenance of bare cast iron and can handle acidic ingredients like wine, tomatoes, and citrus without damage. The trade-off is weight: a 6-quart enameled Dutch oven weighs about 12 pounds empty, which can be challenging for some users to lift in and out of the oven.
The stand mixer decision comes down to how often you bake. If you bake bread, cookies, or cakes more than twice a month, a stand mixer will save you significant time and effort. If you rarely bake, a hand mixer (which costs a fraction of the price) may be more appropriate. The key advantage of a stand mixer is its hands-free operation: you can add ingredients, prep other components, or clean up while the mixer works. The planetary mixing action (where the beater rotates in one direction while the shaft rotates in the opposite direction) ensures that every part of the bowl is reached, eliminating the need to stop and scrape down the sides constantly.
High-speed blenders and food processors serve different purposes despite some overlap. A blender excels at liquid-based tasks: smoothies, soups, sauces, and purees. A food processor excels at dry or semi-dry tasks: chopping, shredding, slicing, and dough-making. If you can only afford one, choose based on what you cook more: if you make a lot of smoothies, soups, and sauces, get the blender. If you do a lot of meal prep, cheese shredding, and baking, get the food processor. Ideally, both earn their counter space in a well-equipped kitchen.
Category 4: Utilities, Safety & Education
The final category covers the tools that keep your kitchen organized, safe, and continuously improving. These items may not be as exciting as a new knife or a stand mixer, but they are the glue that holds a functional kitchen together. From the humble can opener to the fire extinguisher you hope you never need, these five items round out your essential toolkit.
Stainless Steel Cookware Set

A quality stainless steel cookware set forms the backbone of your stovetop cooking. Unlike non-stick pans, stainless steel can handle high heat for searing, goes from stovetop to oven seamlessly, and develops fond (the browned bits that form the base of pan sauces). Look for multi-clad construction where aluminum or copper cores are sandwiched between layers of stainless steel. This provides even heat distribution without hot spots. A basic set should include an 8-inch skillet, a 10-inch skillet, a 2-quart saucepan with lid, a 3-quart saucepan with lid, and an 8-quart stockpot with lid.
Check Price on AmazonNon-Stick Skillet

Even the most dedicated stainless steel advocates keep a non-stick skillet for eggs, crepes, and delicate fish. The key is to treat non-stick as a specialty tool rather than your default pan. Use it at medium heat or below (high heat degrades the coating), use silicone or wooden utensils (metal scratches the surface), and plan to replace it every two to three years as the coating wears. Ceramic non-stick coatings are a PTFE-free alternative that perform well at moderate temperatures, though they tend to lose their non-stick properties faster than traditional PTFE coatings.
Check Price on AmazonFire Extinguisher

Kitchen fires are more common than most people realize, and they escalate faster than you can react without the right equipment. A Class K fire extinguisher is specifically designed for cooking oil and grease fires, which cannot be put out with water (water causes a grease fire to explode). Keep it mounted within arm’s reach of the stove, check the pressure gauge monthly, and replace it according to the manufacturer’s expiration date. Every person in the household should know where it is and how to use it: Pull the pin, Aim at the base of the fire, Squeeze the handle, and Sweep side to side (the PASS technique).
Check Price on AmazonKitchen Shears

Kitchen shears are the most underrated tool in the kitchen. They cut herbs faster than a knife, spatchcock a whole chicken in seconds, trim pizza, cut parchment paper to size, open packaging, and snip chives directly over a dish. The best kitchen shears have come-apart blades for thorough cleaning (food gets trapped in the pivot joint), micro-serrated edges for gripping slippery poultry skin, and comfortable handles that accommodate different grip styles. Heavy-duty models can cut through poultry bones, which eliminates the need for a cleaver for most home butchering tasks.
Check Price on AmazonQuality Cookbook

A great cookbook is more than a collection of recipes; it is an education in technique, flavor, and the science of cooking. The best cookbooks teach you principles that you can apply to any ingredient, not just the specific dishes listed. Look for books that explain the “why” behind each step, include technique photographs, and offer variations for different dietary needs. A well-chosen cookbook accelerates your learning curve dramatically, turning years of trial and error into months of confident, intuitive cooking. Keep it on a cookbook stand near your prep area for easy reference while you cook.
Check Price on AmazonUtilities Deep Dive: The Overlooked Essentials
The tools in this category rarely make “top kitchen gadgets” lists, but experienced cooks know they are indispensable. Stainless steel cookware, for example, is the professional standard for a reason: it responds quickly to temperature changes, develops fond for pan sauces, can handle metal utensils without damage, and lasts a lifetime with basic care. The learning curve for cooking with stainless steeper than non-stick (food sticks if you do not preheat properly), but once you master the technique of preheating the pan, adding oil, and waiting for the oil to shimmer before adding food, you will find that stainless steel produces better results for almost everything except eggs and crepes.
Kitchen shears deserve more respect than they typically receive. In professional kitchens, shears are used constantly: snipping herbs, portioning flatbreads, trimming the fins off fish, cutting pizza, and breaking down poultry. The come-apart design is critical for hygiene because the pivot joint accumulates food residue that is impossible to clean if the blades cannot be separated. After each use, take the shears apart, wash both blades with hot soapy water, dry them immediately to prevent rust, and reassemble. This thirty-second routine keeps them sanitary and sharp for years.
The fire extinguisher is the one tool on this list that you hope to never use, but its presence is non-negotiable. Kitchen fires account for nearly half of all home fires, and most of them start on the stovetop. A Class K extinguisher uses a potassium acetate-based agent that saponifies (turns to soap) when it contacts hot cooking oil, creating a blanket that smothers the fire and prevents re-ignition. Never use water on a grease fire; it will cause a steam explosion that spreads burning oil across the kitchen. Mount the extinguisher near the kitchen exit so you can grab it on your way out if the fire is too large to fight.
Budget Tiers: What You Get at Every Price Point
Building a kitchen does not have to happen all at once. Many experienced cooks built their toolkit over years, upgrading individual pieces as their skills and budgets grew. This tiered approach lets you start cooking immediately with functional tools while saving for the premium versions that will last a lifetime. Here is a realistic breakdown of what you can expect at each budget level.
| Tier | Total Budget | What You Get | Best For |
|---|---|---|---|
| Starter | $150 – $300 | Victorinox chef’s knife, plastic cutting board, basic non-stick skillet, 1 saucepan, measuring set, instant-read thermometer, can opener | First apartment, college dorm, tight budget |
| Solid Home Cook | $300 – $700 | Everything in Starter plus: quality stainless steel skillet, Dutch oven, air fryer, kitchen scale, kitchen shears, oil sprayer, silicone liners | Home cooks who cook 4–5 times per week |
| Serious Enthusiast | $700 – $1,500 | Everything in Solid Home Cook plus: stand mixer, high-speed blender, food processor, multi-clad cookware set, end-grain cutting board, knife sharpening system | Passionate home cooks, meal preppers, bakers |
| Prosumer | $1,500 – $3,000+ | Everything in Serious Enthusiast plus: premium Japanese or German knife, Le Creuset/Staub Dutch oven, Vitamix blender, premium stand mixer, full accessory kit, fire extinguisher system | Home chefs who want restaurant-quality tools |
Material Science: Understanding What Your Tools Are Made Of
The materials used in your kitchen tools directly affect their performance, durability, maintenance requirements, and safety. Understanding the basics of kitchen material science helps you make informed purchasing decisions and get the longest life from your investment. Here is a deep dive into the most common materials you will encounter.
High-Carbon Stainless Steel
Used in: Knives, cookware, mixing bowls
Pros: Excellent edge retention, resists staining and corrosion, easy to sharpen, does not react with acidic foods. The carbon content (typically 0.5% to 1.0%) increases hardness and edge retention compared to standard stainless steel.
Cons: More expensive than standard stainless, can rust if left wet for extended periods, heavier than some alternatives.
Care: Hand wash and dry immediately. Sharpen every 2–4 weeks. Store on a magnetic strip or in a knife block, never loose in a drawer.
Cast Iron (Bare)
Used in: Skillets, griddles, Dutch ovens
Pros: Superior heat retention, naturally non-stick when seasoned, incredibly durable (lasts generations), inexpensive, works on all heat sources including induction and campfire.
Cons: Heavy, requires regular seasoning, reacts with acidic foods (tomatoes, wine), cannot go in the dishwasher, can rust if not dried properly.
Care: Wash with hot water and a stiff brush (soap is fine on well-seasoned pans), dry immediately on the stovetop over low heat, apply a thin layer of oil after each use.
Enameled Cast Iron
Used in: Dutch ovens, braisers, baking dishes
Pros: All the heat retention of cast iron without the seasoning maintenance, non-reactive (safe for acidic foods), beautiful colors, dishwasher-safe, oven-safe to 500°F.
Cons: Very heavy, expensive (premium brands cost $300+), enamel can chip if dropped or struck, not suitable for high-heat searing (enamel can crack from thermal shock).
Care: Hand wash with non-abrasive sponge. For stains, soak with baking soda paste. Avoid thermal shock (do not add cold liquid to a hot pot).
Hard-Anodized Aluminum
Used in: Non-stick pans, roasting pans
Pros: Excellent heat conductivity (heats quickly and evenly), lightweight, durable surface that resists scratching, often has non-stick coating applied.
Cons: Not induction-compatible unless bonded with a steel disc, non-stick coating degrades over time, cannot use metal utensils on coated versions.
Care: Hand wash with soft sponge. Avoid cooking sprays (they create a sticky residue that is hard to remove). Replace non-stick pans every 2–3 years.
Carbon Steel
Used in: Woks, crepe pans, skillets
Pros: Lighter than cast iron with similar heat properties, develops a natural non-stick patina over time, heats up faster than cast iron, preferred by professional chefs for wok cooking.
Cons: Requires seasoning like bare cast iron, reacts with acidic foods, can rust, not dishwasher-safe.
Care: Season before first use. Clean with hot water and a brush, dry immediately, oil lightly. The patina improves with use.
Borosilicate Glass
Used in: Baking dishes, measuring cups, storage containers
Pros: Does not absorb odors or stains, microwave-safe, dishwasher-safe, transparent (you can see the contents), oven-safe, non-reactive with all foods.
Cons: Can break if dropped, heavier than plastic, can crack from extreme thermal shock (do not move from freezer directly to hot oven).
Care: Dishwasher-safe. Avoid sudden temperature changes. Stack with cloth or paper towels between pieces to prevent chipping.
Care, Cleaning & Longevity: Making Your Tools Last
The most expensive kitchen tool is the one you have to replace because you did not take care of it properly. Proper maintenance extends the life of your tools by years or even decades, saves money, and ensures consistent performance. Here is a comprehensive care guide organized by tool type.
Knife Care
- Hand wash immediately after use. Never put knives in the dishwasher. The detergent is abrasive, the heat can warp the handle, and the blade can damage other items (or be damaged by them). Wash with warm soapy water, holding the spine of the blade away from you.
- Dry thoroughly before storing. Water left on the blade causes spots and, over time, can lead to pitting corrosion even on stainless steel. Dry with a clean towel immediately after washing.
- Store properly. A magnetic knife strip is the best storage option because it keeps blades separated and visible. A knife block is the second-best option. Never store knives loose in a drawer where they bang against other utensils and dull the edge.
- Hone before each use. A honing steel does not sharpen the blade; it realigns the microscopic edge that bends during normal use. Five to six strokes per side at a 15 to 20-degree angle before each cooking session keeps the edge performing at its best.
- Sharpen regularly. Honing maintains the edge, but sharpening actually removes metal to create a new edge. Use a whetstone (the gold standard), a pull-through sharpener (convenient but removes more metal), or have them professionally sharpened every three to six months depending on use.
- Use the right cutting surface. Wood and plastic cutting boards are knife-friendly. Glass, marble, granite, and ceramic surfaces will dull your blade rapidly. Never cut directly on a countertop or plate.
Cookware Care
Stainless steel cookware develops a patina of fine scratches over time that is purely cosmetic and does not affect performance. To remove stubborn stains, make a paste of Bar Keeper’s Friend and water, apply with a soft cloth, and rinse thoroughly. For burnt-on food, fill the pan with water and a tablespoon of baking soda, bring to a boil, and let it soak for thirty minutes before scrubbing. Never plunge a hot stainless steel pan into cold water, as the thermal shock can cause warping.
Cast iron care is simpler than most people think. The old rule about never using soap on cast iron comes from a time when soap contained lye, which stripped seasoning. Modern dish soap is mild enough to use occasionally without damaging a well-established seasoning layer. The key is to dry the pan immediately after washing and apply a thin layer of oil while it is still warm. If the seasoning gets damaged (food sticks, the surface looks dull or patchy), simply re-season by coating with a thin layer of flaxseed or vegetable oil and baking it upside down in a 450°F oven for one hour.
Appliance Maintenance Schedule
| Appliance | After Each Use | Weekly | Monthly | Annually |
|---|---|---|---|---|
| Air Fryer | Wash basket and crisper plate | Wipe exterior and vents | Deep clean heating element | Inspect cord and plug |
| Stand Mixer | Wash attachments | Wipe body with damp cloth | Check attachment hub for debris | Lubricate gears (if applicable) |
| Blender | Rinse with warm soapy water | Deep clean blade assembly | Check gasket for wear | Inspect motor base vents |
| Food Processor | Wash bowl, lid, and blades | Wipe motor base | Check blade sharpness | Inspect feed tube and pusher |
| Slow Cooker | Wash inner pot and lid | Wipe exterior | Check cord for damage | Test temperature accuracy |
10 Beginner Kitchen Mistakes (And How to Avoid Them)
Every cook makes mistakes, especially in the beginning. The difference between a frustrating kitchen experience and a joyful one often comes down to recognizing and correcting these common errors early. Here are the ten most frequent mistakes we see from new home cooks, along with practical solutions.
Mistake #1: Not Preheating the Pan
Adding food to a cold or lukewarm pan is the number one cause of sticking, especially with stainless steel. A properly preheated pan creates a barrier between the food and the metal. Test readiness by flicking a few drops of water onto the surface: if they sizzle and evaporate immediately, the pan is ready. If they bead up and dance, you have reached the Leidenfrost point and the pan is at the ideal temperature for searing.
Mistake #2: Overcrowding the Pan
When too many pieces of food are crammed into a pan, the temperature drops rapidly and the food steams instead of browning. You lose the Maillard reaction (the chemical process that creates flavor and color on the surface of cooked food). Cook in batches with space between each piece, and do not be afraid to use two pans simultaneously if you are cooking for a crowd.
Mistake #3: Using a Dull Knife
A dull knife requires more pressure to cut, which increases the likelihood of the blade slipping off the food and into your hand. It also crushes delicate ingredients like herbs instead of cutting them cleanly, causing bruising and faster oxidation. Sharpen your knives regularly and hone them before each use.
Mistake #4: Not Reading the Recipe Completely
Starting a recipe without reading it through leads to surprises: ingredients you do not have, steps that require marinating overnight, or equipment you have not preheated. Read the entire recipe before you begin, gather all ingredients (mise en place), and identify any steps that require advance planning.
Mistake #5: Lifting the Lid Too Often
Every time you lift the lid on a slow cooker, pressure cooker, or covered pot, you release accumulated heat and moisture. A slow cooker can lose 15 to 20 minutes of cooking time each time the lid is removed. Trust the process and resist the urge to peek. If you must check, do it quickly and replace the lid immediately.
Mistake #6: Not Resting Meat After Cooking
When meat cooks, the juices are pushed toward the center by the expanding muscle fibers. If you cut into it immediately, those juices pour out onto the cutting board instead of staying in the meat. Resting allows the fibers to relax and the juices to redistribute. Rest steaks for 5 to 10 minutes, roasts for 15 to 20 minutes, and whole poultry for 20 to 30 minutes, loosely tented with foil.
Mistake #7: Seasoning Only at the End
Adding all your salt at the end of cooking produces a surface-level saltiness rather than deep, integrated flavor. Season in layers: salt the protein before cooking, season the vegetables as they saute, add salt to the pasta water, and adjust the final seasoning at the end. This builds complexity and ensures every component is properly seasoned.
Mistake #8: Using the Wrong Oil for the Temperature
Every oil has a smoke point, the temperature at which it starts to break down and produce acrid, bitter flavors and harmful compounds. Extra virgin olive oil has a relatively low smoke point (around 375°F) and is best for low-heat sauteing and finishing. For high-heat searing, use avocado oil (520°F), refined peanut oil (450°F), or light olive oil (465°F). Butter burns at 350°F; clarify it (remove the milk solids) to raise the smoke point to 450°F.
Mistake #9: Thawing Meat on the Counter
Leaving frozen meat on the counter to thaw allows the outer layer to reach the “danger zone” (40°F to 140°F) while the interior is still frozen. Bacteria double every 20 minutes in this temperature range. Instead, thaw in the refrigerator (allow 24 hours per 5 pounds), in cold water (change the water every 30 minutes), or in the microwave (cook immediately after thawing).
Mistake #10: Neglecting to Clean as You Go
A messy kitchen creates stress, wastes time looking for tools, and increases the risk of cross-contamination. Professional chefs clean as they cook: wash the cutting board between ingredients, wipe down counters after spills, and soak pots and pans while the meal finishes cooking. By the time dinner is served, the kitchen should be nearly clean.
Meal Prep Workflows: Using Your Tools Efficiently
Meal prep is where your kitchen tools truly earn their keep. By dedicating two to three hours on a weekend to preparing ingredients and meals for the week, you save time every weeknight, reduce food waste, eat healthier, and spend less money on takeout. The key is having a workflow that maximizes the use of your tools and minimizes downtime. Here is a step-by-step system that experienced meal preppers follow.
The Sunday Meal Prep Workflow
- Plan your menu for the week. Choose three to four recipes that share common ingredients. For example, if you roast a whole chicken on Sunday, use the leftover meat for chicken salad on Monday, chicken tacos on Tuesday, and chicken soup on Wednesday. This reduces the number of unique ingredients you need to buy and prep.
- Write a prep list organized by tool. Group tasks by the equipment they require: all knife work together (dicing onions, mincing garlic, slicing vegetables), all oven tasks together (roasting vegetables, baking chicken), and all stovetop tasks together (cooking grains, making sauces). This prevents the chaos of switching between tools constantly.
- Start with the longest tasks first. Put the chicken in the oven, start the rice cooker, and begin the slow cooker soup base. While these cook passively, you can focus on active prep work like chopping vegetables and assembling salads.
- Use the food processor for bulk prep. Shred a block of cheese, slice a pound of mushrooms, and chop onions in the food processor in minutes instead of spending thirty minutes with a knife. The slicing disc handles uniform cuts that would take significant knife skill to replicate by hand.
- Portion and store properly. Use glass containers for meals you will reheat (they do not absorb odors or stain from tomato sauce). Use airtight containers for dry ingredients. Label everything with the date and contents. Most prepped meals last three to four days in the refrigerator; anything beyond that should be frozen.
- Clean as you go. While the chicken roasts, wash the cutting board and knife. While the grains cook, wipe down the counters. By the time the last component finishes cooking, your kitchen should be nearly clean and your meals should be portioned and stored.
- Prep grab-and-go snacks. Wash and cut celery, carrots, and bell peppers into sticks and store them in water-filled containers in the fridge. Portion nuts, trail mix, and hummus into individual servings. Having healthy snacks ready prevents reaching for processed alternatives when hunger strikes.
Smart Kitchen Integration: Technology Meets Cooking
The smart kitchen is no longer science fiction. From Wi-Fi-connected thermometers that alert your phone when the roast reaches the target temperature to smart scales that walk you through recipes step by step, technology is making cooking more precise, more accessible, and more enjoyable. But not every smart gadget is worth the premium, and some traditional tools remain superior to their connected counterparts. Here is an honest assessment of where smart technology helps and where it falls short.
Where Smart Kitchen Tech Excels
- Remote monitoring: Wi-Fi thermometers let you monitor meat temperature from your phone while you are in another room, eliminating the need to hover by the oven.
- Precision cooking: Sous vide circulators maintain water temperature within 0.1°F, producing perfectly cooked proteins that are impossible to achieve with traditional methods.
- Recipe guidance: Smart scales and connected displays walk you through recipes with real-time instructions, timers, and ingredient measurements.
- Inventory tracking: Smart refrigerators and pantry apps track expiration dates and suggest recipes based on what you have on hand, reducing food waste.
- Consistent results: Programmable multi-cookers and smart ovens eliminate the guesswork from complex cooking processes like pressure cooking, slow roasting, and proofing bread dough.
- Energy efficiency: Smart appliances can optimize energy usage by adjusting cooking times and temperatures based on the food’s actual state rather than preset timers.
Where Smart Kitchen Tech Falls Short
- Reliability: Wi-Fi connections drop, apps crash, and firmware updates can temporarily disable features. A traditional thermometer always works.
- Cost: Smart versions of basic tools cost two to five times more than their traditional counterparts, and the added functionality rarely justifies the premium for casual cooks.
- Planned obsolescence: Smart appliances depend on apps and cloud services that manufacturers may discontinue, turning an expensive appliance into a dumb one.
- Complexity: Some smart kitchen gadgets add unnecessary complexity to simple tasks. You do not need a Bluetooth-connected whisk.
- Maintenance: Smart appliances have more components that can fail: sensors, displays, Wi-Fi modules, and batteries. Traditional tools have no electronics to break.
- Privacy: Connected kitchen devices collect usage data that may be shared with third parties. Read the privacy policy before connecting any appliance to your home network.
Kitchen Tool Gift Guide: Perfect Presents for Every Cook
Finding the right kitchen gift means matching the tool to the recipient’s skill level, cooking style, and kitchen space. A beginner does not need a $400 stand mixer, and an experienced baker probably already owns one. Here are thoughtful gift ideas organized by category and budget.
For the Beginner Cook
$25 – $75A quality chef’s knife (Victorinox Fibrox Pro), an instant-read thermometer, or a set of measuring cups and spoons. These foundational tools build confidence and make cooking more enjoyable from day one.
For the Home Baker
$30 – $150A kitchen scale for precise measurements, a set of silicone baking mats, a quality loaf pan, or a Danish dough whisk. Serious bakers will appreciate a stand mixer attachment like a dough hook or pasta roller.
For the Health-Conscious Cook
$40 – $200An air fryer for oil-free cooking, a high-speed blender for smoothies and soups, a spiralizer for vegetable noodles, or a set of glass meal prep containers for portion control.
For the Grill Master
$20 – $100A wireless meat thermometer with phone alerts, a cast iron grill press, a set of premium grilling tools, or a smoking wood chip variety pack. These enhance the outdoor cooking experience without taking up indoor kitchen space.
For the Minimalist Kitchen
$30 – $120A multi-functional tool like a Dutch oven (which replaces a stockpot, braiser, bread oven, and deep fryer), a quality multi-cooker, or a nesting measuring cup set that stores in minimal space.
For the Tech-Savvy Cook
$50 – $300A sous vide circulator, a smart kitchen scale with app integration, a Wi-Fi-connected meat thermometer, or a precision coffee maker with programmable brewing profiles.
For the Entertainer
$25 – $100A charcuterie board set with cheese knives, a set of elegant serving platters, a cocktail shaker kit, or a fondue set. These tools make hosting easier and more impressive.
Stocking Stuffers
$5 – $25Kitchen shears, an oil sprayer, silicone spatulas, a microplane zester, herb scissors, or a set of magnetic spice jars. Small tools that make a big difference in daily cooking.
Knife Skills Fundamentals: The Foundation of Efficient Cooking
Knife skills are the single most impactful cooking skill you can develop. A cook with excellent knife skills prep ingredients faster, more consistently, and more safely than someone relying on a food processor for every task. Professional chefs spend years perfecting their cuts, but home cooks can achieve impressive results by mastering just five fundamental cuts and two essential techniques. This section breaks down everything you need to know to transform your relationship with your chef’s knife.
The 5 Essential Cuts Every Home Cook Needs
These five cuts cover the vast majority of kitchen tasks. Mastering them will handle everything from a rustic stew to an elegant dinner party presentation. Each cut has a specific purpose, and understanding when to use each one elevates both the appearance and the cooking quality of your dishes.
1. The Dice (Large, Medium, and Small)
Dicing is the workhorse cut of the kitchen. A proper dice produces uniform cubes that cook evenly, which is critical for soups, stews, stir-fries, and sauces. The technique starts with squaring off the ingredient (cutting rounded sides flat to create a stable surface), then slicing it into planks, stacking the planks into sticks (batons), and finally cutting the sticks crosswise into cubes. A large dice produces cubes roughly three-quarters of an inch, a medium dice yields half-inch cubes, and a small dice gives you quarter-inch cubes. Uniformity matters more than precision; the goal is that all pieces are roughly the same size so they cook at the same rate. When dicing onions, leave the root end intact while you make your horizontal and vertical cuts; it holds the layers together and prevents the onion from falling apart.
2. The Mince
Mincing reduces ingredients to the smallest possible pieces, typically one-eighth of an inch or smaller. This cut is used for garlic, shallots, herbs, and ginger, where you want the ingredient to dissolve into the dish and distribute its flavor evenly. The technique involves first finely chopping the ingredient, then gathering it into a pile and running the knife over it repeatedly with a rocking motion, keeping the tip of the blade on the cutting board. For garlic, a sprinkle of salt acts as an abrasive that helps break down the cells and creates a paste-like consistency. For herbs, a sharp knife is essential; a dull blade bruises the leaves, causing them to blacken and lose their aromatic oils. Chiffonade (see below) is the first step when mincing leafy herbs like basil or mint.
3. The Julienne
Julienne cuts produce thin, uniform matchstick strips approximately one-eighth inch wide and two to three inches long. This cut is used for stir-fries, salads, garnishes, and slaws, where you want the ingredient to cook quickly or present elegantly. The technique is similar to dicing but stops at the baton stage: square off the ingredient, cut into thin planks, stack the planks, and cut lengthwise into matchsticks. Julienne cuts are particularly important for vegetables that need to cook quickly and evenly in a stir-fry, where thick pieces would remain raw while thin pieces burn. Carrots, bell peppers, zucchini, and daikon radish are classic julienne candidates. A mandoline slicer can speed up the initial plank-cutting step, but always use the hand guard to protect your fingers.
4. The Chiffonade
Chiffonade is a specialized cut for leafy herbs and greens that produces thin, elegant ribbons. The technique is simple: stack several leaves of basil, mint, sage, or spinach, roll them tightly into a cigar shape, and slice the roll crosswise into thin strips. The tighter you roll and the thinner you slice, the finer the ribbons. Chiffonade is the preferred presentation for fresh basil on caprese salads, mint on desserts, and sage on pasta dishes. It is also the first step in mincing leafy herbs: chiffonade first, then gather the ribbons and rock the knife over them to reduce them to a mince. The key to a clean chiffonade is a razor-sharp knife; a dull blade will crush and bruise the leaves instead of slicing them cleanly.
5. The Brunoise
Brunoise is the finest dice, producing tiny cubes approximately one-eighth inch on each side. It is the most technically demanding cut and is used for refined garnishes, consomme, delicate sauces, and dishes where ingredients should be barely visible but evenly distributed. The technique begins with a julienne cut to create matchsticks, then the matchsticks are gathered and cut crosswise into tiny cubes. Brunoise requires patience and a very sharp knife; the pieces are small enough that even slight inconsistencies are visible. Classic brunoise includes carrot, celery, onion, and turnip, often combined to create a garnish called “brunoise garnish” that appears in classical French cooking. For home cooks, mastering brunoise is less about daily necessity and more about developing the control and precision that improves all your other cuts.
Proper Claw Grip Technique for Safety
The claw grip is the single most important safety technique in the kitchen. It protects your fingertips from the blade while giving you maximum control over the ingredient. Many kitchen injuries occur because the cook holds the food with flat, extended fingers, presenting the blade with a wide target. The claw grip tucks the fingertips inward and uses the knuckles as a guide for the blade.
- Curl your fingertips inward. Place the fingertips of your non-knife hand on top of the ingredient, then curl them under so that the nails face the blade and the first knuckles protrude slightly forward. The fingertips should never extend beyond the knuckles.
- Position your knuckles as a guide. The flat side of the knife blade should rest against the middle knuckles of your guiding hand. As you slice, the knuckles move backward in small increments, and the blade rides along them, always staying a fixed distance from your fingertips.
- Keep your thumb behind the fingers. Your thumb should be positioned behind the curled fingers, gripping the ingredient from the back. Never extend your thumb forward alongside the blade; it should stay behind the line of the knuckles at all times.
- Move the guiding hand backward in steady increments. Each time you make a cut, slide the guiding hand backward by the width of the desired cut. This controls the thickness of each slice and keeps the motion consistent. Rushing this step leads to uneven cuts and increases the risk of the blade slipping off the knuckle guide.
- Keep the blade in contact with the cutting board. For a rocking motion (mincing, herbs), the tip of the knife stays on the board while the heel rises and falls. For a slicing motion (dicing, julienne), the blade moves straight down through the ingredient. In both cases, the blade should never leave the cutting board surface entirely, which reduces control and increases the chance of the knife landing on a finger.
How to Hold a Chef’s Knife Correctly
There are two primary grips for holding a chef’s knife, and the one you choose dramatically affects your control, comfort, and cutting precision. Most home cooks use the handle grip instinctively, but the pinch grip is the professional standard for good reason.
The Pinch Grip (Recommended): Pinch the blade itself just forward of the bolster (the metal junction between the blade and handle) between your thumb on one side and your curled index and middle fingers on the other. Your remaining three fingers wrap around the handle. This grip places your hand directly over the blade’s center of gravity, giving you maximum control and reducing fatigue during extended cutting sessions. It feels awkward at first if you are used to gripping the handle, but after a few days of practice, it becomes natural and you will notice a dramatic improvement in your cutting precision.
The Handle Grip: Wrap all five fingers around the handle with no contact on the blade itself. This feels more natural to beginners because it resembles how you would hold any tool. However, it places your hand behind the blade’s balance point, which reduces control and requires more wrist force to guide the knife. For heavy chopping tasks like breaking down a butternut squash, the handle grip provides more downward force, but for precision work like mincing garlic or julienne cuts, the pinch grip is superior in every way.
Cutting Board Materials Comparison
Your cutting board is the surface where you spend the most time in the kitchen, and the material you choose affects knife longevity, food safety, maintenance, and even the quality of your cuts. Here is a detailed comparison of the four most common cutting board materials.
Wood & Bamboo
- Naturally antimicrobial: Wood fibers trap and kill bacteria over time, making it safer than many people assume.
- Knife-friendly: The soft surface absorbs the blade’s impact, keeping your knife sharper longer.
- Durable: A quality end-grain maple board can last decades with proper care.
- Self-healing: End-grain wood fibers close around knife cuts, reducing visible scarring.
- Beautiful: Doubles as a serving board for cheese, charcuterie, and bread.
Plastic & Composite
- Dishwasher-safe: Can be sanitized at high temperatures in the dishwasher, which is recommended for raw meat boards.
- Lightweight: Easier to move and store than heavy wood boards.
- Inexpensive: Replaceable when worn, making them practical for dedicated raw meat use.
- Non-porous: Does not absorb juices from raw meat, though deep cuts can harbor bacteria.
- Color-coded: Available in multiple colors for food safety systems (red for meat, green for vegetables).
Food Storage & Preservation: Maximizing Freshness and Reducing Waste
The average household wastes approximately 30 to 40 percent of the food it purchases, much of it due to improper storage. Understanding how to store food correctly extends freshness, preserves nutritional value, saves money, and reduces the environmental impact of food waste. This section covers the tools, techniques, and systems that keep your ingredients at their best for as long as possible.
Airtight Container Materials: Glass vs Plastic vs Stainless Steel
The container you choose for food storage affects freshness, safety, convenience, and environmental impact. Each material has distinct advantages that make it better suited for specific storage tasks.
Glass Containers
Best for: Meal prep, reheating, long-term refrigerator storage
Pros: Non-porous (does not absorb odors, stains, or flavors), microwave-safe, oven-safe (without the lid), dishwasher-safe, transparent for easy identification, environmentally friendly (infinitely recyclable), does not leach chemicals into food.
Cons: Heavy, breakable if dropped, more expensive than plastic, can crack from extreme temperature changes (do not move from freezer directly to a hot oven).
Top brands: Pyrex, Glasslock, OXO, Anchor Hocking. Look for borosilicate glass with snap-lock lids that include a silicone gasket for an airtight seal.
Plastic Containers
Best for: Lunches, dry goods storage, kids’ lunches, freezer storage
Pros: Lightweight, inexpensive, shatterproof, available in every size and shape, stackable, many are dishwasher-safe on the top rack.
Cons: Absorbs odors and stains over time (especially from tomato sauce and turmeric), can warp in the microwave, may leach chemicals (look for BPA-free and avoid heating in plastic), degrades with repeated dishwasher cycles.
Top brands: Rubbermaid Brilliance, Sistema, IKEA 365+. Always check for BPA-free labeling and avoid using plastic containers that are scratched, cloudy, or warped.
Stainless Steel Containers
Best for: Lunches, dry goods, pantry organization, outdoor activities
Pros: Virtually indestructible, does not absorb odors or stains, lightweight, dishwasher-safe, does not leach chemicals, excellent for dry goods like flour, sugar, rice, and pasta.
Cons: Not microwave-safe, not transparent (you cannot see the contents without opening), more expensive than plastic, limited availability in some markets.
Top brands: LunchBots, Klean Kanteen, U Konserve. Stainless steel is particularly popular for lunch containers and pantry canisters where visibility is less important than durability.
Freezer Storage Guidelines
Freezing is the most effective long-term preservation method for most foods, but each food type has an optimal storage window beyond which quality degrades significantly. These guidelines represent the period during which frozen food maintains its best flavor, texture, and nutritional value. Food stored beyond these times is still safe to eat (freezing prevents bacterial growth indefinitely), but the quality may suffer from freezer burn, texture changes, and flavor loss.
| Food Category | Specific Items | Optimal Freezer Time | Storage Tips |
|---|---|---|---|
| Raw Steaks & Chops | Beef, pork, lamb steaks and chops | 4 – 12 months | Wrap tightly in plastic wrap, then foil, then place in a freezer bag. Remove as much air as possible. |
| Ground Meat | Ground beef, turkey, pork, chicken | 3 – 4 months | Portion into meal-sized amounts before freezing. Flatten bags for faster thawing and stackable storage. |
| Poultry (Whole) | Whole chicken, turkey, duck | 12 months | Remove giblets before freezing. Wrap in heavy-duty foil or freezer paper. |
| Poultry (Parts) | Chicken breasts, thighs, wings | 9 months | Separate pieces with parchment paper for easy portioning. |
| Fish & Shellfish | Salmon, shrimp, cod, tuna | 3 – 6 months | Flash freeze on a baking sheet first, then transfer to bags. Vacuum sealing extends quality significantly. |
| Cooked Soups & Stews | All types of soups, chili, stews | 2 – 3 months | Cool completely before freezing. Leave headspace in containers for expansion. Freeze in portions for easy reheating. |
| Vegetables (Blanched) | Broccoli, green beans, corn, peas | 8 – 12 months | Blanch before freezing to preserve color, texture, and nutrients. Spread on a baking sheet to freeze individually before bagging. |
| Bread & Baked Goods | Sliced bread, rolls, muffins, tortillas | 3 – 6 months | Slice bread before freezing for easy single-serving thawing. Wrap tightly to prevent freezer burn. |
| Fruits (Berries) | Strawberries, blueberries, raspberries | 6 – 12 months | Flash freeze on a baking sheet in a single layer before transferring to bags. Do not wash before freezing (moisture causes clumping). |
| Cooked Grains & Pasta | Rice, quinoa, cooked pasta | 1 – 2 months | Cool completely, portion into individual servings, and freeze flat in bags. Reheat with a splash of water to restore moisture. |
Vacuum Sealing: When It Is Worth the Investment
A vacuum sealer removes air from around food before sealing it in a bag, dramatically slowing the oxidation process that causes freezer burn, flavor loss, and texture degradation. Vacuum-sealed food lasts three to five times longer in the freezer compared to conventional storage methods. The investment makes sense if you buy meat in bulk, hunt or fish, meal prep extensively, or garden and preserve seasonal produce. A basic vacuum sealer costs between $30 and $80, with replacement bags running about $0.20 to $0.50 each. For occasional use, the water displacement method (submerging a zip-top bag in water to push out the air before sealing) provides a free alternative that captures most of the benefit.
Pantry Organization Systems
An organized pantry reduces food waste, saves time during meal prep, and prevents the frustration of buying duplicate ingredients you already own. The key principles are visibility (everything should be visible at a glance), accessibility (frequently used items at eye level), and rotation (first in, first out). Clear, airtight containers for dry goods like flour, sugar, rice, pasta, and cereals keep pests out, maintain freshness, and let you see when supplies are running low. Label every container with the contents and the date it was opened. Use shelf risers, lazy Susans, and door-mounted organizers to maximize vertical space and keep small items like spice jars and sauce packets from getting lost in the back.
Kitchen Organization & Layout: Designing an Efficient Workspace
A well-organized kitchen is not about having the most space; it is about using the space you have intelligently. The difference between a frustrating kitchen and a joyful one often comes down to layout, workflow, and organization rather than square footage or expensive renovations. This section covers the principles of kitchen organization that professional designers use and that you can apply to any kitchen, regardless of size.
Zone-Based Organization
Modern kitchen design organizes the space into functional zones, each dedicated to a specific type of activity. This approach is more flexible than the traditional work triangle because it accounts for the reality that kitchens serve multiple functions beyond just cooking.
The Prep Zone: This is where you chop, measure, mix, and assemble ingredients. It should be located near the refrigerator (for easy access to ingredients) and have the most counter space. Your cutting boards, knives, measuring tools, mixing bowls, and prep utensils should all live within arm’s reach of this zone. A large, uninterrupted stretch of counter space is the most valuable asset in a kitchen, so resist the temptation to clutter it with appliances you use infrequently.
The Cooking Zone: This zone centers on the stove and oven. Your pots, pans, cooking utensils (spatulas, tongs, ladles), oils, and frequently used spices should be stored here. A hanging pot rack, a magnetic knife strip, or a utensil crock on the counter keeps tools accessible without cluttering drawers. The area directly above the stove is prime storage real estate for a mounted shelf or spice rack.
The Cleaning Zone: Centered on the sink and dishwasher, this zone stores dish soap, sponges, trash bags, the dish rack, and cleaning supplies. Under-sink storage is often underutilized; a pull-out organizer or tension rod for hanging spray bottles can double the usable space. Keep a small compost bin on the counter for food scraps during prep.
The Storage Zone: This includes the pantry, refrigerator, and any cabinets dedicated to food storage. The principle of “first in, first out” (FIFO) applies here: when you buy new items, place them behind the existing stock so you use the oldest items first. Clear containers, labels, and shelf organization systems make this zone function efficiently.
Counter Space Optimization Strategies
Counter space is the most contested resource in any kitchen. Every appliance that lives on the counter permanently reduces your working area. The general rule is that only daily-use appliances earn permanent counter residency: the coffee maker, the knife block (or magnetic strip), and perhaps a utensil crock. Everything else (the stand mixer, the blender, the food processor, the toaster) should be stored in a cabinet or pantry and brought out only when needed. If you have deep counters, use the back zone for appliances and keep the front zone clear for active prep. A rolling cart or kitchen island can add counter space and storage without a renovation.
Knife Storage: Magnetic Strips vs Blocks vs In-Drawer Organizers
How you store your knives affects their longevity, your safety, and your kitchen’s aesthetics. Each storage method has distinct trade-offs.
Magnetic Wall Strip
Magnetic strips mount on the wall and hold knives by their blades. They save counter and drawer space, keep knives visible and accessible, and allow air to circulate around the blade (preventing moisture buildup). The downside is that the magnets can scratch the blade if you are not careful when attaching or removing the knife, and they require wall mounting, which is not possible in all kitchens. Choose a strip with a strong enough magnet to hold your heaviest knife securely.
Knife Block
Traditional knife blocks sit on the counter and protect the blades from contact with other utensils. They are convenient and require no installation. However, they take up counter space, the slots collect dust and crumbs (which are difficult to clean), and they only accommodate the knives that came with the set. Universal knife blocks with flexible rods or magnetic interiors can hold knives of any size and shape.
In-Drawer Organizer
In-drawer knife organizers keep blades protected and hidden, which is ideal for minimalist kitchens or homes with children. The knives lie flat in individual slots, preventing blade-to-blade contact. The downside is that you must open the drawer to access them, which adds a step during cooking, and the drawer must be deep enough to accommodate the organizer plus the knife handles. This option works best for smaller knife collections (five to eight knives).
Loose in a Drawer (Never Do This)
Storing knives loose in a drawer with other utensils is the worst option by far. The blades bang against metal utensils, dulling the edge rapidly. Reaching into a drawer with an exposed blade is a serious safety hazard. And the constant contact damages the blade’s edge, requiring more frequent sharpening. If you have no other option, at minimum use blade guards (plastic covers that snap over the edge) to protect both the blade and your fingers.
Baking Science & Essential Bakeware: Understanding the Chemistry of Great Baked Goods
Baking is often called a science because, unlike stovetop cooking, you cannot easily adjust as you go. Once the batter is in the oven, the chemistry takes over. Understanding the basic science behind baking gives you the knowledge to troubleshoot problems, adapt recipes, and create your own. This section covers the fundamental principles and the essential bakeware every home baker needs.
Understanding Gluten Development
Gluten is the protein network that forms when flour is mixed with water. Two proteins in wheat flour, glutenin and gliadin, combine to form gluten strands that give bread its chewy structure and trap the gas produced by yeast, allowing dough to rise. The amount of gluten development directly affects the texture of your baked goods. Bread flour has a high protein content (12 to 14 percent) that produces strong gluten networks for chewy, structured loaves. Cake flour has a low protein content (7 to 9 percent) that produces tender, delicate crumbs. All-purpose flour (10 to 12 percent) falls in between and works for most recipes.
The key variable you control is mixing time. Undermixing produces weak gluten networks that collapse (flat cookies, dense cakes). Overmixing produces tough, dense results because the gluten strands become too tight and rigid. For cookies and muffins, mix until the ingredients are just combined; a few streaks of flour are acceptable. For bread, knead until the dough passes the “windowpane test”: stretch a small piece thin enough to see light through it without it tearing. This indicates a fully developed gluten network that will trap gas and produce a light, airy crumb.
The Role of Fat, Sugar, and Leavening Agents
Fat (butter, oil, shortening) tenderizes baked goods by coating gluten strands and preventing them from forming long, tough networks. It also adds moisture, richness, and flavor. The temperature of the fat matters: cold butter creates flaky layers in pie crusts and biscuits (the small pockets of butter melt during baking, creating steam that lifts the layers), while room-temperature butter creams with sugar to create a light, airy structure in cakes and cookies.
Sugar does far more than sweeten. It tenderizes by absorbing moisture that would otherwise activate gluten, it helps browning through caramelization and the Maillard reaction, it stabilizes whipped egg whites by increasing their viscosity, and it extends shelf life by retaining moisture. The type of sugar matters: granulated sugar produces crisp results, brown sugar (which contains molasses) produces chewier, moister results, and powdered sugar dissolves quickly for smooth frostings and glazes.
Leavening agents are what make baked goods rise. Baking soda (sodium bicarbonate) requires an acid (buttermilk, yogurt, vinegar, citrus juice, brown sugar, or honey) to activate and produce carbon dioxide gas. Baking powder contains both the base (sodium bicarbonate) and the acid (cream of tartar or sodium aluminum sulfate), so it activates with liquid alone. Double-acting baking powder reacts twice: once when mixed with liquid and again when heated in the oven. Yeast is a living organism that feeds on sugar and produces carbon dioxide and alcohol, creating the complex flavors and airy texture of bread. Expired leavening agents are the number one cause of flat, dense baked goods; test baking soda by mixing it with vinegar (it should fizz vigorously) and test baking powder by mixing it with hot water.
Essential Bakeware Checklist
- Half sheet pans (18 x 13 inches): The most versatile bakeware item. Used for roasting vegetables, baking cookies, sheet pan dinners, and as a base for jelly rolls. Buy at least two so you can rotate them. Heavy-gauge aluminum with a rolled edge resists warping at high temperatures.
- 9-inch round cake pans: The standard for layer cakes. Buy two matching pans so you can bake both layers simultaneously. Light-colored aluminum produces the most even browning. Dark pans absorb more heat and can overbrown the edges.
- 9 x 13 inch baking pan: The workhorse for brownies, bar cookies, casseroles, and sheet cakes. Glass (Pyrex) and ceramic versions go from oven to table beautifully. Metal versions heat faster and produce crisper edges.
- 12-cup muffin tin: Essential for muffins, cupcakes, and individual frittatas. Non-stick coatings make removal easier, but even non-stick tins benefit from a light greasing or paper liners. A standard tin produces bakery-sized muffins; a jumbo tin produces café-style oversized muffins.
- 9 x 5 inch loaf pan: The standard for quick breads (banana bread, zucchini bread), pound cakes, and meatloaf. Metal pans produce a crisper crust; glass and ceramic pans produce a softer crust with more even browning on the sides.
- Cooling racks: Wire racks that allow air to circulate around baked goods as they cool, preventing the bottoms from becoming soggy from trapped steam. They are also essential for glazing (place the rack over a sheet pan to catch drips) and for cooling fried foods. Buy racks that fit inside your sheet pans for maximum versatility.
- 9-inch pie dish: Glass pie dishes are preferred because you can see the bottom crust browning through the glass. Ceramic dishes retain heat well and look beautiful for serving. Metal pie plates heat quickly and produce the crispiest bottom crusts.
- Wire whisk and silicone spatula: The whisk incorporates air into batters and blends dry ingredients. The spatula scrapes bowls clean, folds delicate ingredients gently, and stirs custards without scratching non-stick surfaces.
Silicone vs Metal Bakeware
Metal Bakeware (Aluminum / Steel)
- Superior heat conductivity: Heats quickly and evenly, producing consistent browning.
- Crisp results: Metal surfaces produce crispier edges and bottoms, especially for cookies and roasted items.
- Durable: Heavy-gauge aluminum pans last decades without degrading.
- Warp-resistant: Thick, quality metal pans maintain their shape at high temperatures.
- Stackable: Metal pans nest efficiently for compact storage.
Silicone Bakeware
- Non-stick by nature: Food releases easily without greasing, making it ideal for muffins, bundt cakes, and shaped molds.
- Flexible: Can be bent to pop out baked goods, reducing the need for prying or scraping.
- Lightweight: Easy to handle and store, especially for travel or camping.
- Freezer-safe: Can go from freezer to oven (up to 425°F), making it versatile for frozen desserts and make-ahead meals.
- Easy to clean: Dishwasher-safe and non-stick surface releases residue easily.
Cookware Buying Guide: Choosing the Right Pots and Pans
Cookware is the most significant investment most home cooks make after their major appliances. The right set of pots and pans can last a lifetime and dramatically improve your cooking results. The wrong set wastes money, cooks unevenly, and frustrates you every time you step into the kitchen. This guide breaks down the construction, materials, and buying decisions that matter most.
Clad Stainless Steel Construction: 3-Ply vs 5-Ply vs 7-Ply
“Ply” refers to the number of layers of metal bonded together in the cookware’s construction. In multi-clad cookware, layers of stainless steel are sandwiched around a core of aluminum or copper, combining the durability and non-reactivity of stainless steel with the superior heat conductivity of the inner core.
3-Ply (Tri-Ply): The most common and cost-effective construction: stainless steel exterior, aluminum or copper core, stainless steel interior. This provides excellent heat distribution for most cooking tasks and is lighter than 5-ply or 7-ply alternatives. Brands like All-Clad D3, Cuisinart MCP, and Tramontina Tri-Ply Clad offer outstanding performance at various price points. For most home cooks, 3-ply is the sweet spot of performance and value.
5-Ply: Adds two additional layers of metal (typically alternating stainless steel and aluminum) for improved heat retention and even more uniform heat distribution. The extra layers add weight, which some cooks prefer for stability on the burner and heat retention during searing. All-Clad D5 and Hestan NanoBond are premium 5-ply options. The performance difference between 3-ply and 5-ply is subtle and primarily noticeable during high-heat searing and long braises.
7-Ply: The thickest construction, used by premium brands like Demeyere and Fissler. Seven layers of metal provide maximum heat retention and virtually eliminate hot spots. However, the added weight can make these pans difficult to handle, especially when full of food. The performance advantage over 5-ply is minimal for most home cooking tasks, and the price premium is significant. Seven-ply cookware is best suited for serious enthusiasts who prioritize absolute performance over practical considerations.
Enameled Cast Iron vs Bare Cast Iron
Both types are made from cast iron, but the enamel coating on enameled versions creates a fundamentally different cooking surface. Bare cast iron requires seasoning (a layer of polymerized oil that creates a natural non-stick surface) and reacts with acidic foods like tomatoes and wine, which can strip the seasoning and impart a metallic taste. Enameled cast iron eliminates these concerns: the glass-like enamel coating is non-reactive, does not require seasoning, and is available in beautiful colors. However, enamel can chip if the pot is dropped or struck, and it cannot be repaired. Bare cast iron is virtually indestructible and actually improves with use as the seasoning builds up over time.
For most home cooks, an enameled Dutch oven is the better first purchase because it handles the widest range of tasks without maintenance concerns. Add a bare cast iron skillet later for high-heat searing, cornbread, and stovetop-to-oven tasks where the natural non-stick seasoning is an advantage.
Non-Stick Replacement Cycle and Signs of Wear
Non-stick cookware is a consumable tool, not a lifetime investment. Even the highest-quality non-stick coatings degrade over time, and planning for replacement prevents the frustration of cooking on a surface that no longer releases food cleanly. Here are the signs that your non-stick pan needs replacing:
- Food sticks consistently even when you use oil or butter and cook at moderate temperatures.
- The surface is visibly scratched, chipped, or peeling. Deep scratches expose the aluminum core, which can react with acidic foods and is not a safe cooking surface.
- The pan has a sticky, greasy residue that does not wash off. This is caused by cooking spray buildup that bonds to the coating and creates a sticky film.
- The pan warps and no longer sits flat on the burner, causing uneven heating and oil pooling to one side.
- Discoloration that does not wash off indicates the coating has been compromised and is absorbing food residue.
With proper care (medium heat, no metal utensils, no cooking sprays, hand washing), a quality non-stick pan lasts two to three years of regular use. Budget non-stick pans may need replacement after one year. Plan for this replacement cycle in your kitchen budget rather than expecting non-stick to last like stainless steel.
Oven-Safe Cookware Ratings
| Material | Typical Oven-Safe Temperature | Notes |
|---|---|---|
| Stainless Steel (multi-clad) | 500°F – 600°F | Check manufacturer specs. Lids with plastic knobs may have lower limits. |
| Bare Cast Iron | Unlimited (any home oven temperature) | Can handle broiler temperatures. Handles get extremely hot; use oven mitts. |
| Enameled Cast Iron | 450°F – 500°F | Enamel can crack from thermal shock. Avoid sudden temperature changes. |
| Non-Stick (PTFE) | 350°F – 450°F | PTFE coatings degrade above 500°F and release fumes. Check manufacturer specs. |
| Ceramic Non-Stick | 350°F – 500°F | Varies widely by brand. Some ceramic coatings are more durable than others. |
| Carbon Steel | Unlimited (any home oven temperature) | Similar to bare cast iron. Seasoning may darken at very high temperatures. |
| Copper | 450°F – 500°F | Tin-lined copper has a lower limit (450°F). Stainless-lined copper is more oven-tolerant. |
Small Kitchen Solutions: Maximum Function in Minimum Space
A small kitchen does not have to mean limited cooking. With smart tool choices, creative storage solutions, and a willingness to prioritize multi-functional items over single-purpose gadgets, you can cook anything in a studio apartment kitchen that you can cook in a professional one. The key is intentionality: every item in a small kitchen must earn its space by serving multiple functions or being used frequently enough to justify its footprint.
Multi-Functional Tools That Save Space
The best small kitchen strategy is choosing tools that replace multiple single-purpose items. A Dutch oven replaces a stockpot, a braiser, a bread oven, and a deep fryer. A multi-cooker replaces a pressure cooker, slow cooker, rice cooker, steamer, and yogurt maker. A quality chef’s knife replaces a drawer full of specialty knives. A food processor with multiple discs replaces a mandoline, a grater, and a chopper. Each of these multi-functional tools eliminates three to five single-purpose items, freeing up cabinet and drawer space for the tools you actually use daily.
Nesting and Stackable Storage Strategies
Nesting is the small kitchen’s secret weapon. Mixing bowls that stack inside each other, measuring cups that nest, pots that fit inside larger pots, and colanders that sit inside mixing bowls all reduce the footprint of your cookware collection by 40 to 60 percent. When purchasing new cookware, prioritize sets designed to nest: look for saucepans with removable handles, stackable skillets with felt protectors between them, and bowl sets with graduated sizes. In cabinets, use shelf risers to create double-decker storage, and install pull-out drawers in deep cabinets so items in the back are accessible.
Wall-Mounted and Magnetic Storage Solutions
Walls are the most underutilized storage surface in most kitchens. A magnetic knife strip frees up an entire drawer. Wall-mounted spice racks keep spices visible and accessible without cluttering the counter. Pegboard (made famous by Julia Child’s kitchen) holds utensils, pots, and small tools in a customizable, reconfigurable layout. Tension rods inside cabinets create dividers for baking sheets, cutting boards, and pot lids. The inside of cabinet doors is prime real estate for mounted organizers that hold spice jars, measuring spoons, pot lids, or cleaning supplies.
Best Appliances for Tiny Kitchens
In a studio apartment or dorm, counter and cabinet space is so limited that every appliance must justify its existence. The highest-value appliances for tiny kitchens are, in order of priority: a quality chef’s knife and cutting board (not an appliance, but the foundation), an electric kettle (boils water faster than a stovetop kettle and uses less energy), a multi-cooker like the Instant Pot (replaces five or more appliances), a compact air fryer (replaces a toaster oven for most tasks), and an immersion blender (stores in a drawer and replaces a countertop blender for soups, smoothies, and sauces). Skip the stand mixer, full-size blender, and food processor until you have more space; an immersion blender and a box grater handle most of their tasks adequately.
Vertical Storage Ideas
When horizontal space runs out, go vertical. Stackable wire shelves inside cabinets double your storage capacity. Over-the-sink cutting boards with built-in colanders create prep space where none existed. Magnetic spice jars on the refrigerator side use otherwise dead space. Hanging baskets from the ceiling store onions, garlic, and fruit. A rolling cart that tucks between the refrigerator and the wall provides extra prep surface and storage that slides out of sight when not in use. The goal is to think in three dimensions: every cubic foot of your kitchen has potential storage volume, not just the flat surfaces you can see.
- Dutch oven (6-quart): Replaces stockpot, braiser, bread oven, and deep fryer. One pot, endless possibilities.
- Multi-cooker (Instant Pot): Replaces pressure cooker, slow cooker, rice cooker, steamer, and yogurt maker.
- Immersion blender: Stores in a drawer, replaces countertop blender for soups, sauces, and smoothies.
- Magnetic knife strip: Mounts on the wall, frees up an entire drawer or counter block.
- Nesting mixing bowl set: Five bowls that fit inside each other, taking the space of one.
- Collapsible colander and measuring cups: Fold flat for drawer storage when not in use.
- Over-the-sink drying rack: Uses vertical space above the sink instead of counter space.
- Compact air fryer (3.5-quart): Small enough for a dorm, powerful enough for daily cooking.
Wall Storage
$15 – $60Magnetic knife strips, pegboard panels, wall-mounted spice racks, and hanging pot racks. These solutions use vertical wall space to free up drawers and counters.
Drawer Organizers
$10 – $40Bamboo drawer dividers, expandable utensil trays, knife drawer blocks, and spice drawer inserts. These maximize the usable volume inside every drawer.
Stackable Solutions
$20 – $80Nesting cookware sets, stackable food containers, shelf risers for cabinets, and pull-out cabinet drawers. These double your cabinet capacity without renovation.
Multi-Functional Appliances
$30 – $150Instant Pot, immersion blender, combination toaster oven and air fryer, and electric kettle with temperature presets. One appliance that replaces five.
Cooking Techniques Masterclass: Methods That Transform Ingredients
Understanding cooking techniques is more valuable than memorizing recipes. A cook who understands why food browns, how heat transfers, and what happens at a molecular level when you deglaze a pan can improvise confidently with any ingredients on hand. This section covers the essential techniques that form the foundation of all cooking, from weeknight dinners to dinner party showstoppers.
Searing vs Sauteing vs Pan-Frying
These three techniques all use a hot pan and a small amount of fat, but they differ in temperature, timing, and purpose. Understanding the differences helps you choose the right technique for each ingredient and achieve the results you want.
Searing uses the highest heat (400°F to 500°F surface temperature) to create a deeply browned, flavorful crust on the exterior of proteins like steak, chicken thighs, and scallops. The goal is maximum Maillard reaction in minimum time, developing a dark crust while leaving the interior at your desired doneness. Searing requires a heavy pan (cast iron or stainless steel) that retains heat when cold food is added, a thin layer of high-smoke-point oil, and patience: do not move the food for two to four minutes per side. The pan should be smoking slightly before the protein goes in.
Sauteing uses medium-high heat (325°F to 375°F) to cook small, uniformly cut pieces of food quickly while developing light browning. The word “saute” comes from the French word for “to jump,” referring to the tossing motion used to keep food moving in the pan. Sauteing is the technique for cooking diced vegetables, sliced mushrooms, shrimp, and bite-sized pieces of chicken. The pan should be hot enough that food sizzles immediately upon contact but not so hot that it burns before cooking through.
Pan-frying uses medium heat (300°F to 350°F) with enough oil to come halfway up the food, creating a crispy exterior through a combination of frying and sauteing. Breaded chicken cutlets, fish fillets, and pork chops are classic pan-fried foods. The oil should be hot enough that the food sizzles actively but not so hot that the exterior burns before the interior cooks through. Flip only once for the crispiest results.
Braising and Stewing Fundamentals
Braising and stewing are slow, moist-heat cooking methods that transform tough, inexpensive cuts of meat into tender, flavorful dishes. The long, gentle cooking breaks down collagen (the connective tissue that makes cheap cuts tough) into gelatin, which gives braised and stewed meats their characteristic silky, melt-in-your-mouth texture. Braising uses a small amount of liquid (the meat is partially submerged), while stewing uses enough liquid to fully cover the meat. Both methods follow the same basic sequence: sear the meat first to develop flavor, saute aromatics (onion, garlic, celery, carrots), add liquid (stock, wine, tomatoes), cover tightly, and cook at a low temperature (300°F to 325°F) for two to four hours.
Dry Heat vs Moist Heat Cooking Methods
All cooking methods fall into two categories based on how heat is transferred to the food. Dry heat methods (roasting, grilling, broiling, sauteing, stir-frying) use hot air, direct radiation, or hot fat to cook food without added moisture. These methods produce browning, caramelization, and crispy textures. Moist heat methods (braising, stewing, poaching, steaming, simmering) use water, stock, or steam to cook food gently. These methods preserve moisture, produce tender textures, and are gentler on delicate ingredients like fish and eggs. Most great dishes combine both methods: sear a roast to develop a crust (dry heat), then finish it in the oven with stock and vegetables (moist heat).
Deglazing and Building Pan Sauces
Deglazing is the technique of adding liquid (wine, stock, vinegar, or even water) to a hot pan after searing to dissolve the fond, the browned bits stuck to the bottom. Fond is concentrated flavor, and dissolving it into a liquid creates the base for a pan sauce that can transform a simple protein into a restaurant-quality dish. The technique is straightforward: after removing the seared food from the pan, reduce the heat to medium, add a splash of liquid (about half a cup), and scrape the bottom of the pan with a wooden spoon as the liquid bubbles. The fond dissolves into the liquid, creating a flavorful base. From here, you can reduce the liquid to concentrate the flavor, add butter or cream for richness, and season with salt, pepper, and fresh herbs.
Blanching and Shocking Vegetables
Blanching is the technique of briefly cooking vegetables in boiling salted water, then immediately transferring them to an ice bath (shocking) to stop the cooking process. This technique serves multiple purposes: it sets the vibrant green color of green vegetables (the acid in the boiling water preserves the chlorophyll), it partially cooks vegetables for later use (meal prep, stir-fries, freezing), it loosens skins on tomatoes and peaches for easy peeling, and it removes bitterness from vegetables like Brussels sprouts and broccoli rabe. The key is timing: most vegetables need only one to three minutes in boiling water. Over-blanching defeats the purpose by cooking the vegetables through, resulting in the dull, olive-green color you are trying to avoid.
- Bring a large pot of generously salted water to a rolling boil. The water should taste like the ocean. The high temperature ensures rapid cooking that sets the color without overcooking the interior.
- Prepare an ice bath. Fill a large bowl with equal parts ice and water. This thermal shock is what stops the cooking instantly and preserves the bright color and crisp-tender texture.
- Add vegetables to the boiling water in small batches. Do not overcrowd the pot, which drops the water temperature and causes uneven cooking. Work in batches if necessary.
- Time carefully. Green beans: 2 minutes. Broccoli florets: 1 to 2 minutes. Asparagus: 1 to 3 minutes depending on thickness. Peas: 30 seconds. Carrots: 2 to 3 minutes. The vegetables should be bright in color and barely tender.
- Transfer immediately to the ice bath. Use a slotted spoon or spider strainer to move the vegetables from the boiling water to the ice bath. Let them cool completely (about the same time they spent in the boiling water).
- Drain and dry thoroughly. Wet vegetables will steam instead of saute when you cook them later. Spread them on a clean kitchen towel or paper towels and pat dry before storing or cooking.
Kitchen Hygiene & Food Safety: Protecting Your Family from Foodborne Illness
Foodborne illness affects an estimated 48 million Americans every year, and the vast majority of cases originate in the home kitchen. Proper hygiene and food safety practices are not complicated, but they require consistency and awareness. This section covers the critical safety practices that every home cook should follow without exception.
Safe Internal Cooking Temperatures
The only reliable way to determine if food is safely cooked is to measure its internal temperature with a calibrated instant-read thermometer. Color, texture, and cooking time are unreliable indicators. A chicken breast can appear white and still harbor dangerous bacteria in the thickest part, and a burger can be brown throughout and still be undercooked. Here are the USDA-recommended safe minimum internal temperatures.
| Food | Safe Minimum Temperature | Rest Time | Key Notes |
|---|---|---|---|
| Poultry (all types) | 165°F (74°C) | None required | Includes chicken, turkey, duck, ground poultry. Check the thickest part of the breast and the innermost part of the thigh. |
| Ground Meats | 160°F (71°C) | None required | Includes beef, pork, lamb, and veal burgers and meatloaf. Ground meat must reach a higher temp than whole cuts because bacteria are mixed throughout during grinding. |
| Beef Steaks & Roasts | 145°F (63°C) | 3 minutes | The 3-minute rest time is part of the safety protocol; the temperature continues to rise during resting. For personal preference, many cooks pull steaks 5°F below target. |
| Pork (all cuts) | 145°F (63°C) | 3 minutes | The USDA lowered the pork recommendation from 160°F to 145°F. Modern pork is safe at this temperature and remains juicy and slightly pink. |
| Fish & Shellfish | 145°F (63°C) | None required | Fish is done when it flakes easily with a fork and is opaque throughout. Shrimp turns pink and firm. |
| Eggs | 160°F (71°C) | None required | Cook until both the yolk and white are firm. For recipes using raw eggs (Caesar dressing, meringue), use pasteurized eggs. |
| Leftovers & Casseroles | 165°F (74°C) | None required | Reheat all leftovers to 165°F. Do not rely on microwave “hot spots”; stir and check temperature in multiple places. |
| Ham (fresh) | 145°F (63°C) | 3 minutes | Pre-cooked ham should be reheated to 165°F. Check the label to determine if the ham is fresh or pre-cooked. |
Proper Handwashing Technique
Handwashing is the single most effective way to prevent the spread of foodborne illness, yet most people do not wash their hands correctly or frequently enough in the kitchen. The proper technique takes at least 20 seconds and involves five steps: wet hands with warm running water, apply soap, scrub all surfaces (palms, backs of hands, between fingers, under nails) for at least 20 seconds, rinse thoroughly under running water, and dry with a clean towel or air dry. Wash your hands before and after handling raw meat, after touching your face or hair, after handling trash, after sneezing or coughing, and before handling ready-to-eat foods.
Cutting Board Sanitation
The safest practice is to maintain separate cutting boards for raw proteins and ready-to-eat foods. Many professional kitchens use color-coded boards: red for raw meat, yellow for poultry, green for vegetables, blue for fish, and white for dairy and bread. At home, the simplest system is to have one large wooden board for vegetables, herbs, and bread, and a smaller plastic board for raw meat that goes in the dishwasher after every use. If you only have one board, always prepare ready-to-eat foods first, wash the board with hot soapy water, then prepare raw proteins last.
Food Storage Temperature Zones in the Refrigerator
Your refrigerator is not the same temperature everywhere. The door is the warmest area (because it is opened frequently and is farthest from the cooling element), the upper shelves are slightly warmer than the lower shelves, and the bottom shelf near the back is the coldest zone. Store raw meat, poultry, and seafood on the bottom shelf in a container or on a plate to catch any drips that could contaminate food below. Store dairy products (milk, yogurt, cheese) on the upper shelves where the temperature is most consistent. Store condiments, beverages, and items with natural preservatives (jams, pickles) in the door. The crisper drawers have adjustable humidity settings: high humidity for leafy greens and herbs, low humidity for fruits and vegetables that emit ethylene gas (apples, tomatoes, avocados).
Expiration Dates vs Sell-By Dates vs Use-By Dates
Understanding date labels on food packaging prevents both food waste and foodborne illness. “Sell-by” dates are for retailers and indicate how long the product should be displayed for sale. Food is typically safe to eat for several days after the sell-by date if stored properly. “Best by” or “best before” dates indicate peak quality, not safety. The food is safe to eat after this date but may have diminished flavor, texture, or nutritional value. “Use-by” dates are the most safety-relevant and indicate the last date recommended for consumption at peak quality. For infant formula, the use-by date is a safety deadline and should not be exceeded. When in doubt, rely on your senses: if food smells off, looks discolored, or has an unusual texture, discard it regardless of the date on the package.
Entertaining & Hosting Essentials: Tools and Strategies for Effortless Gatherings
Hosting a dinner party, holiday meal, or casual gathering should be enjoyable for the host, not a stressful ordeal that leaves you exhausted and unable to enjoy your own event. The right tools and a smart strategy make the difference between a frazzled host who spends the entire evening in the kitchen and a relaxed one who mingles with guests while the food practically serves itself. This section covers the essential serving ware, setup strategies, and cleanup systems that make entertaining effortless.
Serving Ware Essentials
Every home cook needs a basic collection of serving ware that transitions from everyday meals to entertaining without requiring a separate set of dishes. The foundation includes large platters for proteins and main dishes, medium bowls for salads and sides, a gravy boat or sauce bowl, a bread basket, and a set of serving utensils (large forks, spoons, and tongs). White or neutral-colored serving pieces are the most versatile because they complement any food color and any table setting style. Ceramic and stoneware pieces are durable and dishwasher-safe; wooden boards and platters add warmth and texture for casual gatherings.
Charcuterie and Cheese Board Assembly
A well-assembled charcuterie and cheese board is the easiest impressive appetizer for any gathering. The key is variety: include three to five types of cheese (one soft like brie, one hard like aged cheddar, one blue, and one semi-soft like gouda), two to three types of cured meat (prosciutto, salami, sopressata), crackers or sliced baguette, fresh fruit (grapes, figs, apple slices), dried fruit (apricots, cranberries), nuts (almonds, walnuts, marcona almonds), and a condiment (honey, fig jam, grainy mustard). Arrange items in groups rather than spreading them evenly, and fill gaps with nuts and dried fruit. Provide a separate knife for each cheese to prevent flavor mixing. The board should be assembled no more than one hour before serving to prevent the cheese from drying out and the crackers from absorbing moisture.
Beverage Station Setup
A self-serve beverage station frees the host from playing bartender all evening and gives guests the freedom to refill at their own pace. For a coffee and tea station, set out a thermal carafe of hot water, a French press or drip carafe of coffee, an assortment of tea bags, sugar, cream, and mugs. For a cocktail station, pre-batch a signature cocktail in a large pitcher or dispenser, set out glasses, ice, garnishes (lemon wheels, mint sprigs, olives), and a bucket of ice. For a non-alcoholic station, offer infused water (cucumber-mint, citrus-berry), sparkling water, and a selection of juices. The station should be on a separate surface from the food to prevent congestion.
Buffet-Style Serving Logistics
Buffet-style serving is the most practical format for gatherings of eight or more people. The key to a smooth buffet is the flow: plates at the beginning, proteins and main dishes first, sides next, bread and condiments near the end, and utensils and napkins at the end (so guests do not have to juggle them while filling their plates). Use risers (inverted bowls or small boxes under the tablecloth) to create height variation, which makes the buffet look more abundant and helps guests see all the options. Keep hot foods hot in chafing dishes or on warming trays, and keep cold foods cold by nesting serving bowls in larger bowls filled with ice.
Cleanup Strategy for Large Gatherings
The best cleanup strategy starts before the party: line trash cans with extra bags, have a bus tub near the dining area for quick plate clearing, and fill the dishwasher with the first load before guests arrive so it is ready to run as soon as the first round of dirty dishes comes in. During the party, clear plates as guests finish (do not wait until everyone is done), scrape food waste into the compost, and stack dishes by type near the sink. After guests leave, load and run the dishwasher immediately, hand-wash serving pieces that are not dishwasher-safe, wipe down all surfaces, and take out the trash. The goal is to go to bed with a clean kitchen; waking up to a disaster zone ruins the post-party glow.
Serving Platters & Boards
$20 – $80Large white ceramic platters, wooden cutting boards for charcuterie, tiered serving stands, and slate cheese boards with chalk for labeling.
Beverage Equipment
$15 – $60French press, thermal carafe, glass drink dispenser, cocktail shaker set, wine decanter, and insulated ice bucket.
Warming & Cooling
$25 – $100Chafing dishes, electric warming trays, nested serving bowls for ice baths, and insulated food carriers for potlucks.
Table Setting
$10 – $50Cloth napkins, napkin rings, table runners, candle holders, place card holders, and charger plates for formal settings.
Hosting Checklist
- Plan the menu 3 to 5 days ahead. Choose dishes that can be partially or fully prepared in advance. Avoid recipes that require last-minute attention during the party.
- Shop 2 days before the event. Buy non-perishables first, then fresh ingredients the day before. Always buy 20 percent more than you think you need.
- Prep the day before. Chop vegetables, marinate proteins, bake desserts, make sauces, and set the table. The day of the party should be for cooking and assembling, not prepping.
- Set up the beverage station 1 hour before guests arrive. Fill ice buckets, set out glasses, brew coffee, and batch the signature cocktail.
- Start cooking 2 hours before the event. Begin with the dish that takes the longest and work backward. Everything should be done or in a holding pattern 30 minutes before guests arrive.
- Greet guests with a ready drink. Have a cocktail, wine, or non-alcoholic option poured and ready when the first guest walks in. This sets a relaxed tone immediately.
- Clear and reset between courses. For sit-down dinners, clear each course before serving the next. For buffets, refresh platters when they are half empty.
- Enjoy your own party. If you have planned and prepped properly, the actual event should be enjoyable for you too. Do not be afraid to accept help when guests offer to clear dishes or refill drinks.
Seasonal Cooking Guide: Adapting Your Kitchen Tools and Techniques to the Seasons
Cooking with the seasons is not just a trendy philosophy; it is a practical approach that produces better-tasting food, reduces grocery costs, and keeps your cooking fresh and exciting throughout the year. Each season brings different ingredients, different cooking methods, and different tool priorities. Understanding how your kitchen shifts with the seasons helps you make the most of your tools and your ingredients year-round.
Spring: Light Cooking, Fresh Herbs, and Grilling Season Prep
Spring is the season of renewal in the kitchen. After months of heavy braises and comfort food, the first asparagus spears, peas, artichokes, and fresh herbs signal a shift toward lighter, brighter cooking. Your tool priorities shift accordingly: the Dutch oven moves to the back of the cabinet, and the grill pan, steamer basket, and salad spinner move to the front. Spring is the time to sharpen your knives (you will be doing a lot of delicate vegetable prep), stock up on fresh herbs (plant a windowsill herb garden if you have not already), and clean your grill in preparation for outdoor cooking season. Blanching and shocking become essential techniques for preserving the vibrant colors and crisp textures of spring vegetables.
Summer: No-Cook Meals, Cold Soups, and Outdoor Entertaining
Summer cooking is about minimizing heat in the kitchen and maximizing time outdoors. The air fryer becomes even more valuable because it cooks with less heat output than a full-size oven. Cold soups (gazpacho, cucumber-dill, chilled corn), grain salads, and no-cook meals (ceviche, wraps, caprese) dominate the menu. Your blender works overtime for smoothies, frozen cocktails, and cold soups. The grill becomes the primary cooking surface, and tools like grill baskets, meat thermometers, and long-handled tongs are in constant use. For entertaining, set up outdoor beverage stations, use large platters for family-style serving, and invest in a quality cooler for keeping perishable foods safe at picnics and barbecues.
Fall: Baking Season, Slow Cooker, and Pressure Cooker Heavy Use
Fall is when the kitchen comes alive with the aromas of baking bread, simmering soups, and roasting root vegetables. The stand mixer earns its counter space with bread, pie dough, and cookie batter. The Dutch oven returns to prominence for soups, stews, and braises. The slow cooker and multi-cooker see daily use for hands-off cooking that fills the house with warmth while you go about your day. Apple crisps, pumpkin bread, roasted squash, and chili become weekly staples. Your baking sheets are in constant rotation for roasting vegetables, and your stockpot simmers homemade stock from the Thanksgiving turkey carcass. Fall is also the time to preserve the last of the summer harvest: freeze berries, can tomatoes, and make jams and pickles.
Winter: Braising, Soups, Stews, and Comfort Food
Winter cooking is about warmth, nourishment, and the deep satisfaction of a slow-cooked meal on a cold night. The Dutch oven, slow cooker, and pressure cooker are the stars of the kitchen. Braised short ribs, beef stew, French onion soup, pot roast, and chili are the dishes that define winter cooking. Your knife skills are tested by the dense root vegetables (butternut squash, turnips, parsnips, celery root) that form the base of winter soups and roasts. Baking continues to be a major activity: bread, rolls, cinnamon rolls, and hearty casseroles. The kitchen becomes the warmest room in the house, and the act of cooking becomes a form of self-care against the cold and dark.
How Tools Shift in Priority by Season
Spring Priorities
Top tools: Chef’s knife (delicate prep), steamer basket, salad spinner, grill pan, mandoline slicer, herb scissors
Key techniques: Blanching and shocking, light sauteing, grilling, raw preparations (salads, ceviche)
Ingredients: Asparagus, peas, artichokes, strawberries, fresh herbs, spring onions, radishes
Summer Priorities
Top tools: Air fryer (to avoid heating the kitchen), blender (smoothies and cold soups), grill and grill tools, large platters for serving, cooler for outdoor events
Key techniques: Grilling, no-cook preparations, cold soups, quick pickling, ice cream making
Ingredients: Tomatoes, corn, zucchini, berries, peaches, watermelon, fresh basil, peppers
Fall Priorities
Top tools: Dutch oven, stand mixer (baking), baking sheets, stockpot, slow cooker, canning supplies
Key techniques: Roasting, baking bread and pies, slow braising, stock making, preserving
Ingredients: Apples, squash, sweet potatoes, mushrooms, cranberries, Brussels sprouts, pears
Winter Priorities
Top tools: Dutch oven, slow cooker, pressure cooker, stockpot, immersion blender (pureeing soups), heavy-duty chef’s knife (dense root vegetables)
Key techniques: Braising, stewing, soup making, slow cooking, baking casseroles, bread baking
Ingredients: Root vegetables (carrots, parsnips, turnips, celery root), citrus, dried beans, hearty greens (kale, collards), winter squash
Frequently Asked Questions
A: For everyday cooking, wood (particularly end-grain maple or walnut) is the best all-around cutting board material. It is gentle on knife edges, has natural antimicrobial properties, and develops a self-healing surface that closes around knife cuts. However, keep a separate plastic board for raw meat because it can be sanitized in the dishwasher. The combination of a large wooden board for vegetables and herbs, and a smaller plastic board for raw proteins, is the ideal setup for most home kitchens.
A: Start by removing any appliance you use less than once a week from the counter. Use wall-mounted storage (magnetic knife strips, pegboard, spice racks) to free up drawer and cabinet space. Choose multi-functional tools that replace several single-purpose items (a Dutch oven replaces a stockpot, braiser, and bread oven). Use nesting and stackable storage solutions, shelf risers inside cabinets, and drawer organizers to maximize every cubic inch. The most important principle is that every item must earn its space by being used frequently or serving multiple functions.
A: A beginner baker needs just five items to get started: two half sheet pans (18 x 13 inches) for cookies and roasting, two 9-inch round cake pans for layer cakes, a 9 x 13 inch baking pan for brownies and casseroles, a 12-cup muffin tin, and a 9 x 5 inch loaf pan for quick breads. Add a set of cooling racks and a roll of parchment paper, and you can bake virtually any recipe. Expand from there based on what you bake most: pie dishes, springform pans, and specialty molds can wait until you know your preferences.
A: Searing uses very high heat (400°F to 500°F) to create a deeply browned crust on proteins like steak and chicken thighs. The food is placed in a smoking-hot pan and left undisturbed for two to four minutes per side. Sauteing uses medium-high heat (325°F to 375°F) to cook small, uniformly cut pieces of food quickly with light browning and constant movement. Searing is about maximum crust development on large pieces; sauteing is about quick, even cooking of small pieces. Both techniques rely on the Maillard reaction, but searing pushes it further for a darker, more intense crust.
A: Freezing prevents bacterial growth indefinitely, so frozen food is technically safe to eat forever. However, quality degrades over time due to freezer burn, moisture loss, and oxidation. For best quality: raw steaks and chops last 4 to 12 months, ground meat lasts 3 to 4 months, poultry parts last 9 months, fish and shellfish last 3 to 6 months, cooked soups and stews last 2 to 3 months, and bread lasts 3 to 6 months. Vacuum sealing extends these windows significantly by preventing air contact. Always label frozen food with the date and contents.
A: Multi-clad stainless steel (3-ply construction) is the best all-around cookware material for everyday cooking. It handles high heat for searing, goes from stovetop to oven, develops fond for pan sauces, is dishwasher-safe, and lasts a lifetime. Pair it with one non-stick skillet for eggs and delicate fish, and one cast iron skillet for high-heat searing and oven-to-table serving. This three-pan combination (stainless skillet, non-stick skillet, cast iron skillet) handles 95 percent of home cooking tasks. Add a Dutch oven for braises, soups, and bread baking, and you have a complete stovetop arsenal.
A: The most effective prevention strategy is separation. Use separate cutting boards for raw proteins and ready-to-eat foods (a wooden board for vegetables and a plastic board for raw meat). Wash your hands with soap and warm water for at least 20 seconds after handling raw meat. Clean all surfaces, utensils, and tools with hot soapy water before they contact other foods. Store raw meat on the bottom shelf of the refrigerator in a container to prevent drips from contaminating food below. Never place cooked food on a plate that previously held raw meat without washing it first.
A: For entertaining, you need serving platters (at least two large ones), a set of serving utensils (large forks, spoons, and tongs), a cheese board with cheese knives, a beverage dispenser or thermal carafe, and enough plates, glasses, and flatware for your guest count. A chafing dish or warming tray keeps hot food at safe temperatures during a buffet. For casual gatherings, a large wooden cutting board doubles as a serving platter for charcuterie. The most important tool for entertaining is advance preparation: choose dishes that can be made ahead so you can enjoy the party instead of cooking through it.
A: Hone your knives with a honing steel before every use (this realigns the edge, it does not remove metal). Sharpen your knives with a whetstone or pull-through sharpener every two to four weeks depending on how frequently you cook. A sharp knife is safer and more efficient than a dull one. If you are not comfortable sharpening at home, many kitchen stores and farmers markets offer professional sharpening services for $5 to $10 per knife. Test sharpness by slicing a piece of paper: a sharp knife cuts cleanly without tearing.
A: A convection oven and an air fryer work on the same principle (rapid hot air circulation), but the air fryer’s smaller chamber creates a more intense convection effect that crisps food faster and more evenly. The air fryer also preheats in two to three minutes versus ten to fifteen for a full-size oven, uses less energy, and does not heat up the kitchen. If you cook for one to four people and primarily want to reheat leftovers, roast vegetables, and cook frozen foods, an air fryer is a worthwhile addition even with a convection oven. If you already have a high-quality convection oven and cook large batches, the air fryer may be redundant.
A: The safest method is thawing in the refrigerator, which keeps the meat at a safe temperature (below 40°F) throughout the process. Allow approximately 24 hours for every 5 pounds of meat. For faster thawing, submerge the sealed meat in cold water, changing the water every 30 minutes. A pound of meat thaws in about an hour using this method. The microwave defrost function works for immediate use, but you must cook the meat immediately after thawing because some areas may begin to cook during the process. Never thaw meat on the counter at room temperature, as the outer layer enters the danger zone (40°F to 140°F) while the interior is still frozen.
A: To season new cast iron, wash it with warm soapy water (this is the one time you will use soap), dry it completely, coat it with a thin layer of flaxseed or vegetable oil (wipe off any excess until it looks dry), and bake it upside down in a 450°F oven for one hour. Let it cool in the oven. To maintain the seasoning, wash with hot water and a stiff brush after each use (mild soap is fine on well-seasoned pans), dry immediately on the stovetop over low heat, and apply a thin layer of oil while the pan is still warm. If the seasoning gets damaged, repeat the oven seasoning process.
A: Set your refrigerator to 40°F (4°C) or below, and your freezer to 0°F (-18°C). Use a separate refrigerator thermometer to verify the temperature, as built-in gauges are often inaccurate. Check the temperature in multiple locations: the door is typically 5 to 10 degrees warmer than the back of the bottom shelf. Store raw meat on the bottom shelf in a container to catch drips, and keep the refrigerator organized so air can circulate freely around all items. A crowded refrigerator has poor air circulation, which creates warm spots where bacteria can grow.
A: Yes, metal utensils are safe on stainless steel cookware. Stainless steel is extremely durable and will not be damaged by metal spatulas, whisks, or tongs. You may notice fine scratches on the cooking surface over time, but these are purely cosmetic and do not affect performance. In fact, many cooks prefer the slight texture that develops on well-used stainless steel because it improves the non-stick properties of the seasoned surface. Never use metal utensils on non-stick or ceramic-coated pans, as they will scratch and destroy the coating.
A: Replace your non-stick pan when food consistently sticks even with proper preheating and oiling, when the surface is visibly scratched, chipped, or peeling, when the pan has warped and no longer sits flat on the burner, or when a sticky residue builds up that does not wash off. With proper care (medium heat, no metal utensils, no cooking sprays, hand washing), a quality non-stick pan lasts two to three years. Budget pans may need replacement after one year. Non-stick is a consumable tool, not a lifetime investment like stainless steel or cast iron.
Conclusion: Building Your Kitchen, One Tool at a Time
Building a well-equipped kitchen is a journey, not a single purchase. The twenty tools in this guide represent the foundation that every home cook needs, but the order in which you acquire them should reflect your personal cooking style, your budget, and the dishes you make most often. Start with the essentials: a quality chef’s knife, a large cutting board, a Dutch oven, and an instant-read thermometer. These four items alone will transform your cooking from frustrating guesswork into confident, enjoyable meal preparation.
As your skills grow, add tools that match your evolving interests. If you discover a love for baking, invest in a stand mixer and quality bakeware. If you become obsessed with perfectly seared steaks, add a cast iron skillet and a reliable meat thermometer. If meal prep becomes your Sunday ritual, a food processor and a set of glass containers will save you hours every week. The key is to buy intentionally, choosing quality over quantity and multi-function over single-purpose.
Remember that the most important tool in any kitchen is knowledge. Understanding knife skills, cooking techniques, food safety, and the science behind your recipes will make you a better cook regardless of what equipment you own. A skilled cook with a $30 knife and a basic skillet will produce better meals than an inexperienced cook with a $300 knife and a professional-grade range. Invest in your skills alongside your tools, and your kitchen will become the most productive, creative, and enjoyable room in your home.
Whether you are outfitting your first kitchen from scratch, upgrading specific pieces as your skills develop, or shopping for a passionate home chef in your life, we hope this guide has given you the knowledge and confidence to make informed decisions. Every tool on this list has been tested, compared, and evaluated for real-world performance, not just laboratory specifications. Cook boldly, maintain your tools carefully, and enjoy every meal you create.


Pingback: How to Replace a Kitchen Faucet: A Complete Step-by-Step Guide