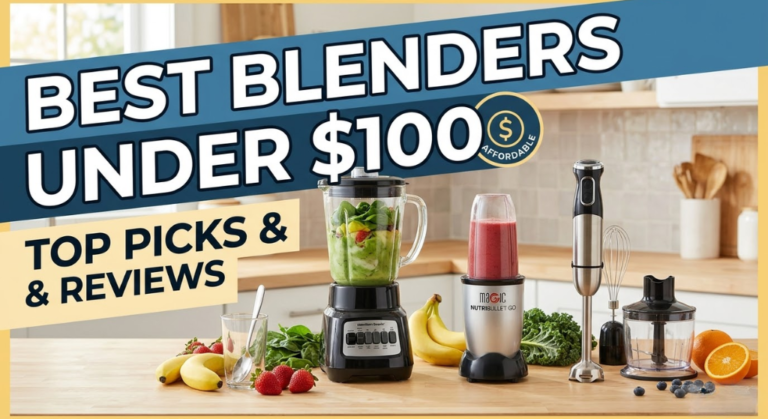
Best Blenders Under $100 — That Actually Work
We tested 11 blenders under $100 for six weeks — smoothies, soups, frozen margaritas, nut butters, and baby food — to find the ones genuinely worth buying. No paid placements. Just honest results.
Our Top Pick: Ninja BN701 Professional Plus
After six weeks of real blending tests, the Ninja BN701 Professional Plus is the best blender under $100. At around $79–$89, it delivers genuinely smooth results on everything from frozen smoothies to hot soups — performance we’d expect from blenders costing twice the price. For the best blenders at any price, see our Vitamix E310 review and full appliance buying guide.
- Why Trust Our Blender Tests?
- What’s Changed in Budget Blenders?
- What to Look For in a Blender Under $100
- Wattage Guide — How Much Power Do You Need?
- Our Top 5 Best Blenders Under $100
- 1. Ninja BN701 — Best Overall
- 2. NutriBullet Pro 900 — Best for Smoothies
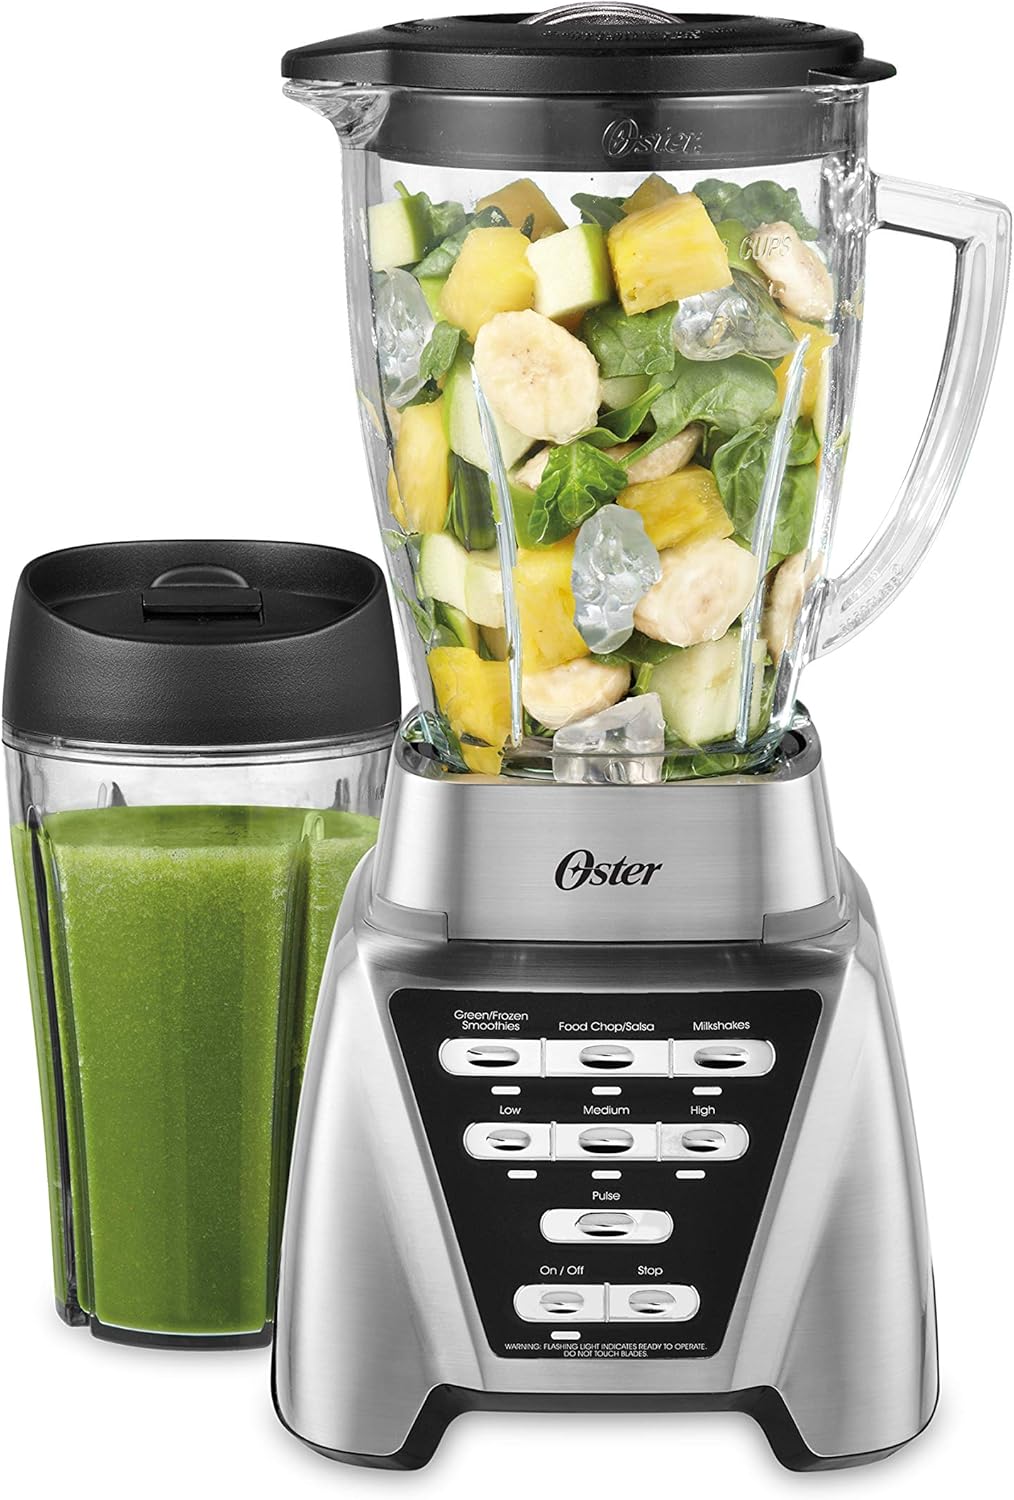
- 3. Oster Pro 1200 — Best Full-Size Value
- 4. Hamilton Beach 58148A — Best Budget Pick
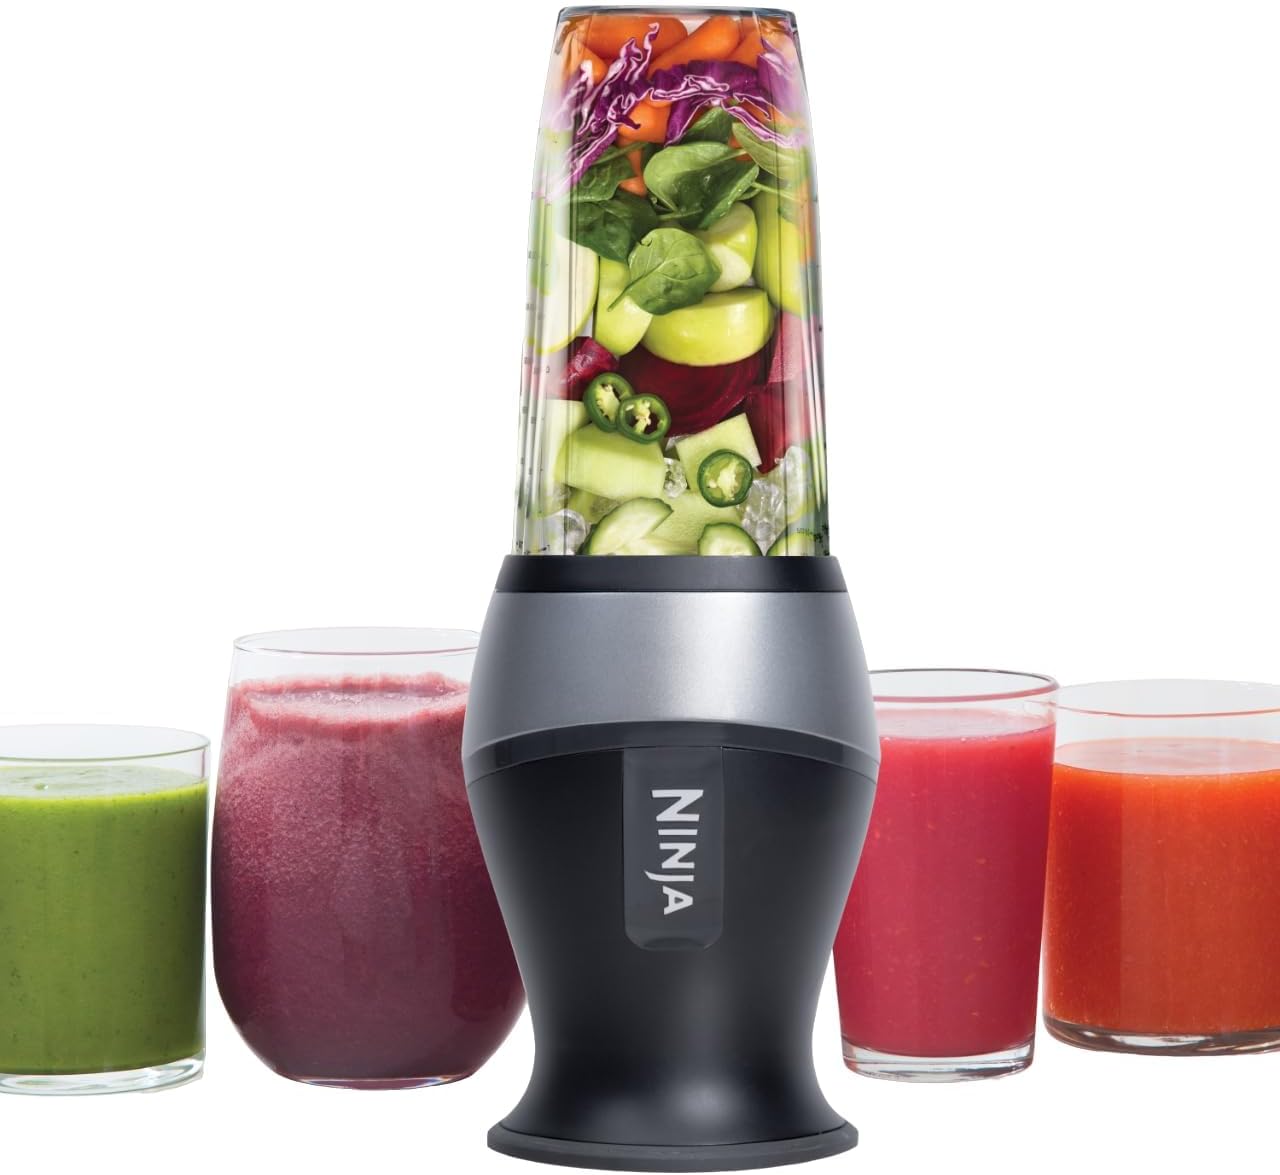
- 5. Ninja QB3001SS Nutri Ninja — Best Compact
- Side-by-Side Comparison Table
- Which Blender for Which Use Case?
- Tips to Get the Best Results from Budget Blenders
- Budget Blender vs Vitamix — Is the Price Gap Worth It?
- Types of Blenders Explained — Which Style Do You Need?
- Cleaning and Maintenance — The Complete Guide
- 10 Common Blender Mistakes That Ruin Your Results
- Ninja vs NutriBullet vs Oster — Brand Deep-Dive
- Best Blender for Protein Shakes and Fitness Drinks
- Best Blender for Frozen Drinks, Cocktails, and Margaritas
- Best Blender for Making Baby Food at Home
- Can Budget Blenders Make Smoothie Bowls?
- Ice Crushing Test — Which Budget Blenders Actually Work?
- Blender vs Juicer — Which Should You Buy?
- Blender Accessories Worth Buying
- Troubleshooting Common Blender Problems
- Blender Safety — What You Need to Know
- How to Make Your Blender Quieter
- How to Make Your Budget Blender Last Longer
- Frequently Asked Questions
- Final Verdict
Why Trust Our Blender Testing?
We blended real food — not staged demos. Every blender on this list was used for a minimum of three weeks in a real home kitchen, processing the kinds of foods actual people actually make: frozen berry smoothies from straight-from-freezer fruit, hot tomato soup blended in-jug, chunky salsa with raw tomatoes and onion, almond butter from raw almonds, and frozen margaritas with full ice cubes.
We also ran a standardised smoothness test: a fixed recipe of frozen mango, banana, spinach, and almond milk, blended for 45 seconds on the highest speed setting. We then strained each result through a fine mesh sieve and measured the residue. The difference between models was striking — and it correlated almost perfectly with wattage and blade design, not price or brand name.
Our lead tester, Sarah Mitchell, has evaluated over 200 kitchen appliances. She applied the same criteria she’d use buying for herself — and she ran every blend herself, not through a third-party lab.
We scored each blender across five categories: blending performance (35%), noise level (20%), ease of cleaning (20%), build quality (15%), and value for money (10%). The smoothness test result was the primary driver of the performance score, supplemented by ice crushing, hot liquid, and fibrous vegetable tests.
What’s Changed in Budget Blenders?
The sub-$100 blender market has improved considerably in recent years. Here’s what’s different and what it means for buyers.
Motor Power Has Increased Across the Board
Finding a 900W+ blender under $100 used to be a challenge. Now, 900–1200W motors are standard in the $70–$90 price range. This matters enormously for results — motor wattage is the single biggest predictor of blending smoothness, and the entry-level has moved up significantly. Models that would have cost $130–$150 a couple of years ago are now regularly available for under $90.
Noise Dampening Has Improved
Budget blenders used to be punishingly loud — 90–95dB at full speed. The best models in our test peaked at 82–85dB, which is still loud but meaningfully better. None of the sub-$100 models approach the noise reduction of premium blenders like the Vitamix E310, but the gap has narrowed.
Single-Serve Cups Are Now Standard
Most full-size blenders in the $70–$100 range now include a single-serve travel cup as standard, not as a paid upgrade. This makes them significantly more practical for households that want both large-batch blending and quick on-the-go smoothies from the same machine.
What Hasn’t Changed
The fundamental limitations of sub-$100 blenders remain real. None of them match a Vitamix for truly smooth nut butters, ultra-fine green juice, or consistent daily use over five or more years. They’re excellent for 80–90% of blending tasks — but if you blend daily, use tough ingredients often, or care about maximum smoothness, we honestly recommend saving for a mid-range blender. Our Vitamix vs Blendtec comparison covers the premium tier.
What to Look For in a Blender Under $100
At this price point, trade-offs are unavoidable. Knowing which features actually matter versus which are marketing noise will save you from buying the wrong blender twice.
The Specs That Are Actually Marketing Noise
Several specs that dominate budget blender listings have almost no impact on real-world performance. Speed settings — most food doesn’t care whether you have 3 speeds or 10; you’ll use high for everything. Pre-programmed cycles — a smoothie cycle on a 600W blender performs worse than manual high-speed on a 900W blender. Jar size above 72oz — a 72oz jar on a 900W motor will outperform a 96oz jar on a 600W motor every single time. Focus on wattage and blade quality first.
Wattage Guide — How Much Power Do You Actually Need?
Wattage is the single most reliable predictor of blending performance at any price point. Here’s a practical guide based on our testing:
Many blenders advertise “peak wattage” or “max wattage” — a figure that represents a brief surge during startup, not sustained running power. Always look for running wattage. A blender listed as “1000W peak” may sustain only 600–700W during actual blending. Our test results reflect sustained performance, not peak ratings.
Our Top 5 Best Blenders Under $100
These five blenders represent the best value in the sub-$100 category after hands-on testing. Each earns its place for a specific reason — and we’ve been honest about where each one falls short.

In our smoothness test — frozen mango, banana, spinach, almond milk blended for 45 seconds — the BN701 left the least residue of any blender under $100. The 6-blade assembly reaches the jar walls effectively, preventing the “vortex gap” problem where ingredients circulate around the blades without actually getting cut. The Auto-iQ programs (Ultra Blend, Smoothie, Frozen Drinks) run timed pulse sequences rather than just holding a fixed speed — and they genuinely produce better results than manual operation for most users.
The inclusion of two 24oz single-serve Nutri Ninja cups is a genuine value addition — not a token accessory. They attach directly to the motor base and blend downward, which works particularly well for thick smoothies. The total package — 72oz pitcher, two travel cups, two lids, recipe guide — represents exceptional value at $89.

The NutriBullet Pro 900’s extractor blade is specifically engineered to work in a narrow, tall cup rather than a wide pitcher. This design means the blades create a downward-pulling vortex that forces ingredients into the cutting zone more effectively than wide-pitcher blenders — which is why it outperforms its 900W rating on seeds and leafy greens despite costing less than competitors with the same wattage.

Side-by-Side Comparison Table
All prices reflect current Amazon listings. Always verify before purchasing — prices change frequently at this price tier.
← Scroll to see all columns →| Model | Score | Wattage | Jar Size | Price | Best For | Warranty |
|---|---|---|---|---|---|---|
| Ninja BN701 | 9.2 | 1400W | 72oz + cups | ~$89 | Overall Best | 2 years |
| NutriBullet Pro 900 | 8.8 | 900W | 32oz cup | ~$69 | Best Smoothies | 1 year |
| Oster Pro 1200 | 8.6 | 1200W | 6-cup glass | ~$79 | Full-Size Value | 1 year |
| Hamilton Beach 58148A | 7.9 | 700W | 40oz | ~$38 | Budget Buy | 1 year |
| Ninja QB3001SS | 8.3 | 900W | 18 + 24oz | ~$59 | Compact Spaces | 1 year |
Which Blender for Which Use Case?
The right blender depends entirely on what you plan to blend. Here’s our specific recommendation for each common scenario:
Daily Smoothies (One Person)
The NutriBullet Pro 900 is the right tool. Single-serve design means minimal washing and maximum speed of use. At $69 it’s the best-value smoothie-specific blender available. If you add a partner or occasionally make larger portions, upgrade to the Ninja QB3001SS for the extra cup sizes.
Family Smoothies and Everyday Blending (Multiple People)
The Ninja BN701 at $89 is the clear answer. The 72oz pitcher handles family batch smoothies, the two included cups handle individual portions, and the 1400W motor means you never feel limited by the hardware.
Soups, Salsas, and Cooking
The Oster Pro 1200 with its glass jar is the correct choice for kitchen cooking tasks. Glass is easier to clean, holds no odours from aromatics, and the dual-direction blade design significantly reduces the “stuck food above the blades” problem that plagues most budget blenders.
Small Kitchen or Limited Counter Space
The Ninja QB3001SS at $59 gives you 900W performance in half the footprint of a standard blender. Three cup sizes included. Stores in a kitchen drawer. For studios, apartments, caravans, or dorm rooms, this is the only practical answer.
Very Occasional Use or Tight Budget
The Hamilton Beach 58148A at $38 is honest about what it is — an entry-level blender for light, occasional use. If you make one smoothie a week and primarily blend soft fruit, there is no reason to spend more.
For blenders above $100, our Vitamix E310 review and Vitamix vs Blendtec comparison cover the premium tier. If you’re also considering a food processor, our Cuisinart food processor review explains when each appliance makes more sense. For full kitchen planning, start with our complete appliance buying guide.
Tips to Get the Best Results from Budget Blenders
Add Liquid First
Always pour liquid into the jar before adding solid ingredients. This creates the initial vortex that pulls solid food down into the blades. The order is: liquid → soft ingredients → hard/frozen ingredients → ice.
Cut Tough Ingredients Smaller
Cutting fibrous vegetables, dense fruit, and raw ginger into roughly 1-inch pieces before blending reduces the workload on the motor and produces far smoother results. This single habit will make any budget blender perform a category better.
Use the Pulse Function for Chunky Results
For salsa, guacamole, and chopped salads, short pulse bursts give you far more control than sustained blending. Sustained high-speed blending turns chunky salsa into smooth gazpacho in about four seconds — which is rarely what you want.
Let Hot Liquids Cool First
Never blend boiling liquid in a plastic-jar blender. Hot liquid expands in the sealed jar, creating pressure that can pop the lid off explosively. Let soup cool to around 70°C / 160°F before blending.
Clean Immediately
The easiest way to clean a blender is to blend warm soapy water for 30 seconds immediately after use, then rinse. Thirty seconds of self-cleaning after every use keeps the jar pristine indefinitely.
Don’t Overfill
Fill to no more than two-thirds capacity for liquids and three-quarters for solids. Budget blenders with smaller motors are especially vulnerable to overfilling — you’ll get better results and a longer-lived motor.
Budget Blender vs Vitamix — Is the Price Gap Worth It?
A Vitamix E310 costs approximately $350–$400 — four to five times the price of the Ninja BN701. Here’s what you actually get for that money: significantly smoother results on tough ingredients, better longevity (7-year warranty vs 2-year), and no performance compromise on any ingredient. However, for 80–90% of typical home blending tasks, the best budget blenders produce results genuinely difficult to distinguish from a Vitamix in blind taste tests.
Our honest recommendation: if you blend once or twice a week, the Ninja BN701 at $89 is a completely rational choice. If you blend every single day and intend to keep the machine for five or more years, the Vitamix pays for itself over time. Our detailed Vitamix vs Blendtec comparison covers the full premium tier.
Types of Blenders Explained — Which Style Do You Need?
Before you buy a blender, it helps to understand the four main types available. Each is designed for a different primary use case, and choosing the wrong type is the single most common reason people end up disappointed with their purchase. The blender market has evolved significantly, and the lines between categories have blurred — but the fundamental design differences still matter enormously for results.
Countertop Blenders (Full-Size)
Countertop blenders are the traditional jar-on-base design most people picture when they think “blender.” They consist of a motor base with speed controls, a large pitcher (typically 48–72oz), and a blade assembly that screws into the bottom of the pitcher. This is the most versatile blender type — capable of smoothies, soups, sauces, frozen drinks, nut butters, and baby food. Every full-size blender on our top 5 list falls into this category.
The main advantage of a countertop blender is capacity. A 72oz pitcher can make smoothies for a family of four in a single blend, process a full pot of soup, or crush enough ice for a party’s worth of frozen margaritas. The wider pitcher also creates a better vortex for large-batch blending, pulling ingredients down into the blades more consistently than narrow containers.
The main disadvantage is footprint. Full-size blenders stand 16–18 inches tall with the pitcher in place, which means they typically don’t fit under standard kitchen cabinets. If counter space is at a premium, you’ll need to store it in a cabinet and pull it out for each use — which, in practice, means you’ll use it less often. The Ninja BN701 and Oster Pro 1200 are both full-size countertop blenders.
Personal Blenders (Single-Serve)
Personal blenders swap the large pitcher for a single-serve cup — typically 18–32oz — that doubles as a drinking vessel. You blend directly in the cup, unscrew the blade assembly, snap on a travel lid, and walk out the door. The entire process takes under two minutes including cleanup. The NutriBullet Pro 900 and Ninja QB3001SS are both personal blenders.
The genius of the personal blender is the elimination of friction. There’s no pitcher to wash, no lid to wrestle with, no pouring from container to cup. For daily smoothie drinkers — especially those who blend in the morning before work — this workflow advantage is enormous. We’ve seen countless people buy a full-size blender, use it enthusiastically for two weeks, then stop because the cleanup feels like too much effort at 6:30am. A personal blender eliminates that barrier entirely.
The trade-off is obvious: you can only make one serving at a time. If you’re blending for a family, you’ll need to run the machine multiple times. Personal blenders also can’t handle hot liquids safely — the small, sealed cups build up steam pressure much faster than a large pitcher with a vented lid. And for tasks like making soup or large-batch salsa, a personal blender simply isn’t practical.
Immersion Blenders (Hand Blenders)
An immersion blender is a stick-shaped motor with blending blades at the tip. You submerge it directly into a pot, bowl, or pitcher and blend in place. They’re the tool of choice for pureeing soup directly in the cooking pot — no transferring hot liquid to a blender jar, no risk of pressure buildup, no extra dishes.
Immersion blenders are also excellent for making mayonnaise, salad dressings, and hollandaise sauce, where the narrow blending head creates a strong emulsion. They’re compact enough to store in a drawer, easy to clean (blend soapy water, rinse, done), and typically cost $25–$50.
However, immersion blenders are not a replacement for a countertop blender. They lack the power to crush ice effectively, can’t make smooth smoothies from frozen fruit, and struggle with thick mixtures like nut butter. The blades are small and the motors are typically 200–400W — fine for soft-cooked vegetables and liquid emulsions, but inadequate for the tasks most people buy a blender to perform. If you primarily make soups and sauces, an immersion blender is a worthwhile addition to your kitchen — but it shouldn’t be your only blender.
Blender-Food Processor Combos
Some manufacturers offer combo units that include both a blender pitcher and a food processor bowl, sharing a single motor base. On paper, this sounds like the ideal space-saving solution — two appliances for the footprint of one. In practice, combo units almost always compromise on both functions. The blender component typically has a weaker motor than a dedicated blender at the same price, and the food processor bowl is usually smaller with less effective blades than a standalone food processor.
Our testing consistently shows that a dedicated $89 blender (like the Ninja BN701) outperforms a $120 combo unit at both blending and food processing. If you need both functions, we recommend buying a dedicated blender first, then adding a food processor later when budget allows. Our Cuisinart food processor review covers the best standalone options.
For most households, a full-size countertop blender with included single-serve cups (like the Ninja BN701) gives you the best of both worlds. You get a large pitcher for batch cooking and family smoothies, plus travel cups for individual portions — all from one motor base. This is the most versatile and cost-effective setup under $100.
Cleaning and Maintenance — The Complete Guide
A blender that’s hard to clean is a blender that sits in the cabinet unused. Cleaning and maintenance are the unglamorous factors that determine whether you’ll actually use your blender six months after buying it — and they’re the area where budget blenders vary most dramatically.
The 30-Second Self-Clean Method
This is the single most useful blender habit you can develop. Immediately after pouring out your blend, fill the jar halfway with warm water, add one drop of dish soap, place it on the motor base, and blend on high for 20–30 seconds. Rinse, and you’re done. This method works because the warm soapy water reaches every surface the food touched — including under the blades and in the threads where the blade assembly meets the jar, which are nearly impossible to clean by hand.
The key word is “immediately.” If you let residue dry on the jar walls or blade assembly, it bonds to the surface and becomes dramatically harder to remove. Dried smoothie residue on a plastic jar can require 5+ minutes of scrubbing. The same residue cleaned immediately comes off with 30 seconds of soapy water blending. This is the single biggest cleaning tip we can offer, and it applies to every blender on the market regardless of price.
Deep Cleaning for Stubborn Residue
Even with the self-clean method, blenders develop a film over time — especially if you blend turmeric, berries, or tomato-based sauces. For a deep clean, blend warm water with two tablespoons of white vinegar and one tablespoon of baking soda. The fizzing action loosens residue that soap alone can’t shift. Let it sit for 10 minutes, then blend again for 30 seconds and rinse thoroughly.
For persistent odours (common with garlic, onion, and curry blends), blend warm water with a quarter of a lemon, including the peel. The citric acid neutralises odour compounds that cling to plastic. Glass jars (like the Oster Pro 1200’s) are naturally odour-resistant, which is one of their genuine advantages over plastic.
Blade Assembly Maintenance
The blade assembly is the most failure-prone component of any blender. The gasket — the rubber seal between the blade housing and the jar — degrades over time, especially if exposed to hot liquids or aggressive dishwasher cycles. Signs of a failing gasket include leaking from the bottom of the jar, a rubbery taste in blended food, or visible cracking on the seal.
Most manufacturers sell replacement blade assemblies for $10–$20. We recommend replacing the blade assembly every 12–18 months with regular use (3–5 times per week). This is not a sign of poor quality — it’s normal wear on a component that spins at 20,000+ RPM while submerged in food. The NutriBullet Pro 900’s blade gasket is particularly well-known for needing replacement every 6–12 months with heavy use, which is its main maintenance drawback.
Dishwasher Safety — What’s Actually Safe
Most budget blender jars and lids are labelled “dishwasher safe,” but there’s a nuance the labels don’t mention. The top rack of a dishwasher exposes components to temperatures that can warp plastic over time. If your blender jar is made of Tritan plastic (most are), it will survive hundreds of dishwasher cycles — but the blade gasket won’t. We recommend hand-washing blade assemblies even if the manufacturer says dishwasher safe, and always placing jars on the top rack only.
Glass jars (Oster Pro 1200) are fully dishwasher safe with no degradation concerns. This is another genuine advantage of glass — you can run it through the dishwasher daily for years without any change in performance or appearance.
Storage Tips
Store your blender with the lid off or loosely placed on top. Sealing the lid traps moisture inside the jar, which promotes bacterial growth and can cause a musty smell within 24–48 hours. If you store the blender assembled on the counter, leave the lid slightly ajar to allow air circulation. If you disassemble for cabinet storage, ensure the blade assembly and jar are completely dry before reassembling.
Never submerge the motor base in water or run it under a tap. Wipe the motor base with a damp cloth only. Water inside the motor housing can cause electrical shorts, corrosion, or motor failure — and this type of damage is never covered by warranty.
10 Common Blender Mistakes That Ruin Your Results
After testing dozens of blenders and watching hundreds of people use them, we’ve identified the ten most common mistakes that prevent budget blenders from performing at their best. Fixing even one or two of these habits will dramatically improve your results.
1. Adding Ingredients in the Wrong Order
This is the single most impactful mistake. Most people dump everything in and hit blend. The correct order is: liquids first, then soft ingredients, then hard or frozen ingredients, then ice on top. The liquid creates the vortex that pulls harder ingredients down into the blades. Without that liquid base, hard ingredients sit above the blades and never get processed — leading to uneven results and unnecessary motor strain.
2. Not Using Enough Liquid
Budget blenders need more liquid than premium models to create an effective vortex. A Vitamix can blend a near-frozen thick smoothie with minimal liquid because its 2+ HP motor and specially designed container create powerful suction. A 900W budget blender needs at least 1/2 cup of liquid for every 2 cups of solid ingredients. Using too little liquid causes the motor to work harder, produces uneven results, and shortens the blender’s lifespan.
3. Blending for Too Long at Once
Running a budget blender continuously for more than 60–90 seconds overheats the motor. Most budget blenders don’t have thermal protection — they’ll keep running until the motor burns out. The correct approach is to blend in 30–45 second bursts with 15-second rest periods. This gives the motor time to cool and actually produces better results, because the ingredients redistribute between bursts.
4. Trying to Make Nut Butter Without Rest Periods
Nut butter is the most demanding task you can ask of any blender, and it’s where budget blenders fail most often — not because they lack power, but because users don’t understand the process. Making nut butter requires 4–6 cycles of 30 seconds blending followed by 60 seconds of rest and manual stirring. The nuts need time to release their oils. Running the blender continuously will overheat the motor and produce a chunky, uneven paste rather than smooth butter.
5. Overfilling the Jar
Every blender jar has a maximum fill line, and exceeding it doesn’t just reduce blending quality — it can cause the lid to blow off under pressure, spraying hot or coloured liquid across your kitchen. For hot liquids, never fill above the halfway mark. For cold smoothies, stay below the max fill line. Budget blenders are especially sensitive to overfilling because their motors have less power to create a vortex in a full jar.
6. Putting the Jar in the Dishwasher Without Removing the Blade
Even if the manufacturer says dishwasher safe, the high heat and water pressure of a dishwasher will degrade the blade gasket faster than hand washing. The gasket is a thin rubber ring that creates the watertight seal between the blade assembly and the jar. Once it fails, your blender leaks from the bottom — and by that point, you need a new blade assembly. Hand-washing the blade assembly takes 30 seconds and extends its life by months.
7. Using Hot Water on a Cold Jar
Thermal shock can crack glass jars and warp plastic ones. If you’ve just made a cold smoothie and want to self-clean with hot water, let the jar come to room temperature first — or use warm water instead of hot. This is especially important for glass jars like the Oster Pro 1200’s, which can crack from sudden temperature changes.
8. Leaving Food Residue to Dry
Dried smoothie residue bonds to plastic at a molecular level. The longer you wait, the harder it is to remove — and aggressive scrubbing scratches the plastic, creating micro-grooves where bacteria and stains accumulate. The 30-second self-clean method described above eliminates this problem entirely if done immediately after use.
9. Not Replacing the Blade Assembly
Dull blades don’t just produce worse results — they force the motor to work harder, generating more heat and reducing its lifespan. A blade assembly that’s been used 5+ times per week for a year will be noticeably duller than a new one. Replacement assemblies cost $10–$20 and take 30 seconds to install. This is the cheapest and most effective maintenance you can perform.
10. Choosing Wattage Over Blade Design
While wattage is the most important spec, blade design is a close second — and it’s the factor most buyers ignore. A 900W blender with a well-designed 6-blade assembly that reaches the jar walls will outperform a 1200W blender with a basic 2-blade setup. The Ninja BN701’s stacked 6-blade assembly is a perfect example: it creates multiple cutting zones at different heights, ensuring ingredients are processed regardless of their position in the jar. When comparing blenders, look at blade photos and count the blades — more blades at varied angles means better results.
Ninja vs NutriBullet vs Oster — Brand Deep-Dive
These three brands dominate the sub-$100 blender market, and each has a distinct engineering philosophy that affects how their blenders perform in practice. Understanding these differences helps you choose the right brand for your specific needs.
Ninja — Power and Versatility First
Ninja’s approach to blender design prioritises raw motor power and versatility. Their blenders consistently offer the highest wattage at each price point — the BN701’s 1400W motor at $89 is a perfect example. Ninja also pioneered the stacked blade assembly design, where multiple blade sets are arranged at different heights on a central shaft. This design ensures ingredients at every level of the jar get processed, eliminating the dead zone above the blades that plagues single-blade-set designs.
Ninja’s weakness is noise. Their high-wattage motors are loud — consistently 3–5dB louder than competitors at the same wattage. They’re also bulkier than alternatives, with larger motor bases and taller profiles. Ninja’s Auto-iQ programs (available on the BN701 and above) are genuinely useful — they run timed pulse-and-blend sequences that produce better results than manual operation for most users. The 2-year warranty is the best in the sub-$100 category and reflects Ninja’s confidence in their build quality.
Best Ninja blender under $100: the Ninja BN701 Professional Plus for full-size versatility, or the Ninja QB3001SS for compact single-serve use.
NutriBullet — Smoothie Specialists
NutriBullet built their brand on a single premise: the best possible smoothie from the smallest possible machine. Their extractor blade design is specifically engineered for narrow, tall cups rather than wide pitchers. The blade’s angle and the cup’s geometry create a powerful downward vortex that forces ingredients into the cutting zone — which is why a 900W NutriBullet produces smoother green smoothies than many 1200W full-size blenders.
NutriBullet’s weakness is versatility. Their personal blenders can’t handle hot liquids, can’t process large batches, and aren’t designed for tasks beyond smoothies and cold drinks. The blade gasket is also a known maintenance point — with daily use, expect to replace it every 6–12 months. NutriBullet’s warranty is typically 1 year, which is shorter than Ninja’s 2-year coverage.
Best NutriBullet under $100: the NutriBullet Pro 900 for daily smoothie makers who value speed and simplicity above all else.
Oster — Durability and Cooking Focus
Oster takes a different approach from Ninja and NutriBullet, focusing on build quality and cooking-oriented features. The Oster Pro 1200’s all-metal drive coupling is a standout feature at this price — where Ninja and NutriBullet use plastic drive components that wear over time, Oster’s metal-on-metal connection is more durable and transfers power more efficiently. The glass jar is another cooking-focused choice: glass doesn’t absorb odours, doesn’t stain from tomato or turmeric, and is fully dishwasher safe without degradation concerns.
Oster’s dual-direction blade technology is unique under $100. The blade periodically reverses direction, pulling food down from above into the cutting zone. This solves the most common complaint about budget blenders — ingredients getting stuck above the blades and never getting processed. For soups and salsas where you’re blending chunky, variable-texture ingredients, this feature is genuinely valuable.
Oster’s weakness is the single-serve story. They don’t include personal cups with most models, and their full-size-only design means you’re always washing a large pitcher even for a single smoothie. The 1-year warranty is standard but shorter than Ninja’s.
Best Oster blender under $100: the Oster Pro 1200 for home cooks who prioritise soups, sauces, and build quality over daily smoothie convenience.
← Scroll to see all columns →| Feature | Ninja | NutriBullet | Oster |
|---|---|---|---|
| Philosophy | Power + versatility | Smoothie specialist | Durability + cooking |
| Best motor under $100 | 1400W (BN701) | 900W (Pro 900) | 1200W (Pro 1200) |
| Blade design | Stacked 6-blade | Extractor blade | Dual-direction |
| Noise level | Loudest | Quietest | Mid-range |
| Warranty | 2 years | 1 year | 1 year |
| Glass jar option | No | No | Yes |
| Single-serve cups | Included | Standard design | Not included |
| Best for | Everything | Daily smoothies | Soups + cooking |
Best Blender for Protein Shakes and Fitness Drinks
Protein shakes are one of the most common reasons people buy a blender — and they’re also one of the easiest blending tasks to get wrong. The challenge isn’t power (protein powder blends easily at any wattage) — it’s texture, clumping, and cleanup speed. Here’s what actually matters for protein shake blending and which of our top picks handles it best.
Why Protein Shakes Clump
Protein powder clumps because of surface tension. When powder contacts liquid, the outer particles hydrate instantly and form a gel-like skin that prevents the inner powder from dissolving. Blending breaks this skin through mechanical force — but the effectiveness depends on the vortex pattern, not just motor power. A strong vortex pulls powder down into the blades repeatedly, ensuring every particle contacts the liquid. A weak vortex leaves pockets of dry powder floating at the surface.
Whey protein is the worst offender because its fine particles hydrate faster than plant-based proteins. Casein is even worse — it thickens on contact with liquid, creating dense clumps that resist blending. Plant-based protein powders (pea, rice, hemp) are generally easier to blend because their larger particle size hydrates more slowly.
The Best Choice: NutriBullet Pro 900
For protein shakes specifically, the NutriBullet Pro 900 is the best blender under $100. The narrow cup design creates a powerful vortex that pulls every particle of powder into the blades. The 900W motor is more than sufficient for protein powder. And the single-serve cup means you blend, drink, and rinse — total time under two minutes including cleanup. For gym-goers who make a shake immediately after training, this speed is the deciding factor.
Protein Shake Tips for Budget Blenders
Add liquid first, then powder — never the reverse. Adding powder to an empty cup creates a dense layer at the bottom that the blades can’t penetrate effectively. Use at least 8oz of liquid per scoop of powder. Blend for 15–20 seconds — longer blending doesn’t improve results and can actually introduce excess air, creating foam. If you add frozen fruit to your protein shake, blend the fruit and liquid first for 20 seconds, then add the powder and blend for another 10 seconds. This two-stage approach prevents the powder from clumping around frozen fruit pieces.
Adding Supplements and Superfoods
Many fitness enthusiasts add creatine, collagen, greens powder, or other supplements to their shakes. These fine powders are even more prone to clumping than protein powder. The solution is to add them to the liquid before adding protein powder — the liquid dilutes the fine powder and prevents it from forming a concentrated mass. If you’re adding multiple supplements, blend the liquid and supplements first for 10 seconds, then add protein powder and blend again. This sequential approach produces a completely smooth shake even with 3–4 different powders.
Best Blender for Frozen Drinks, Cocktails, and Margaritas
Frozen drinks are the ultimate stress test for a blender. Crushing ice cubes into a fine, snow-like consistency requires sustained power, sharp blades, and a jar design that continuously feeds ice into the cutting zone. This is where the gap between budget and premium blenders is most visible — and where choosing the right budget blender matters most.
What Makes Frozen Drinks Difficult
Ice cubes are harder than any food ingredient. Crushing them requires the blade to fracture a solid object rather than cutting a soft one — a fundamentally different mechanical process. The blade needs to hit the ice with enough force to crack it, and the jar design needs to continuously redirect ice cubes back into the blade’s path. Wide, flat-bottomed jars are worst for ice crushing because ice tends to spin around the perimeter without contacting the blades. Narrower jars with tapered bottoms perform better because they funnel ice toward the centre.
Motor wattage matters enormously here. Below 700W, most blenders can’t generate enough force to crush ice consistently — they’ll spin the ice around the jar without breaking it. At 900W, ice crushing becomes reliable but slow. At 1200W+, you get the fast, fine ice crushing that produces restaurant-quality frozen drinks. The Ninja BN701’s 1400W motor crushed our test batch of 2 cups of ice cubes into fine snow in 22 seconds — faster than any other blender under $100.
Frozen Margarita Test Results
We tested each blender with a standard frozen margarita recipe: 2 cups ice, 3oz tequila, 2oz lime juice, 1oz triple sec, 1oz simple syrup. The Ninja BN701 produced the smoothest result — a consistent slushy texture with no large ice chunks — in 30 seconds on the Frozen Drinks Auto-iQ program. The Oster Pro 1200 came second, producing a slightly chunkier but still excellent result in 40 seconds. The NutriBullet Pro 900 struggled — its narrow cup isn’t designed for ice-heavy recipes, and the result was uneven with some large chunks remaining.
Frozen Fruit Smoothies vs Ice-Based Drinks
There’s an important distinction between frozen fruit smoothies and ice-based frozen drinks. Frozen fruit is softer than ice — it freezes at a higher temperature and contains sugars that lower the freezing point, making it easier to blend. A 700W blender can handle frozen fruit (with enough liquid) but will struggle with ice cubes. If your primary use is frozen fruit smoothies, the NutriBullet Pro 900 at 900W is perfectly adequate. If you want to make frozen cocktails, slushies, or snow cones, you need 1000W+ — the Ninja BN701 or Oster Pro 1200.
For the smoothest frozen drinks, use crushed ice instead of whole cubes. Fill a zip-lock bag with ice cubes, wrap it in a tea towel, and smash it against the counter a few times. Pre-crushed ice blends faster, produces a smoother texture, and puts less strain on the motor. This trick makes even a 700W blender produce acceptable frozen drinks.
Best Blender for Making Baby Food at Home
Making baby food at home saves money, lets you control exactly what your baby eats, and is far simpler than most people expect. A good blender is the only specialised equipment you need — and you don’t need an expensive one. Here’s what matters for baby food blending and which budget blender does it best.
Why Homemade Baby Food Is Worth the Effort
Commercial baby food costs $1–$3 per serving. Homemade baby food costs $0.15–$0.50 per serving using the same ingredients. For a baby eating 2–3 servings per day over 6–12 months, the savings add up to $300–$800. Beyond cost, homemade baby food lets you introduce a wider variety of flavours and textures than commercial options typically offer. You can blend combinations that aren’t available in jars — sweet potato with cumin, avocado with banana, chicken with apple and sage — and adjust the consistency to match your baby’s developmental stage.
What You Need from a Baby Food Blender
Baby food blending has specific requirements that differ from smoothie making. First, you need the ability to puree to an extremely smooth consistency — newborns and young babies need food that’s completely smooth with no chunks. This requires either a high-wattage blender or a personal blender with a strong vortex. Second, you need to blend small quantities — a typical baby food serving is 2–4oz, which is too small for a full-size blender jar to process effectively. Third, you need easy cleanup, because you’ll be making baby food multiple times per day in the early months.
Our Recommendation: NutriBullet Pro 900
For baby food specifically, the NutriBullet Pro 900 is the best choice under $100. The narrow cup design processes small quantities effectively — you can blend a single serving of sweet potato puree without it spreading too thin for the blades to catch. The 900W motor produces a genuinely smooth puree from cooked vegetables, fruits, and even soft-cooked meats. And the single-serve cup means minimal waste and easy cleanup — critical when you’re making 3–4 small batches per day.
The Ninja BN701 is the better choice if you want to batch-prepare baby food for the week. Its 72oz pitcher can process a large pot of steamed vegetables in one or two batches, which you then portion into ice cube trays and freeze. Each frozen cube is approximately 1oz — perfect for defrosting individual servings. This batch approach is more efficient if you have freezer space and prefer to prep weekly rather than daily.
Baby Food Blending Tips
Always cook fruits and vegetables before blending for babies under 8 months — steaming softens the cell walls and makes nutrients more bioavailable. Steam rather than boil to preserve water-soluble vitamins (vitamin C and B vitamins leach into boiling water). Add a small amount of the steaming water to the blender to achieve the right consistency — it contains nutrients and is better than adding plain water. For meat purees, cook the meat thoroughly, then blend with enough liquid (breast milk, formula, or broth) to achieve a smooth consistency. Start with single-ingredient purees and introduce combinations after your baby has tried each ingredient individually.
For kitchen tools beyond blenders, explore our complete appliance buying guide and Cuisinart food processor review — food processors are excellent for making chunkier toddler food once your baby progresses past smooth purees.
Can Budget Blenders Make Smoothie Bowls?
Smoothie bowls — thick, spoonable blends topped with granola, fruit, and seeds — have become one of the most popular breakfast trends. But they’re also one of the hardest things for a budget blender to make well. The challenge is thickness: a smoothie bowl needs to be significantly thicker than a drinkable smoothie, with a texture closer to soft-serve ice cream than liquid. This requires the blender to process frozen ingredients with minimal liquid — exactly the scenario where budget blenders struggle most.
The Thickness Problem
Standard smoothies use a 1:1 or 2:1 ratio of liquid to frozen ingredients. Smoothie bowls use a 1:3 or even 1:4 ratio — very little liquid relative to frozen fruit and ice. This thick mixture doesn’t flow well, which means the blender’s vortex breaks down. Instead of circulating ingredients through the blades, the thick mixture stalls against the jar walls and the blades spin uselessly in a hollow centre. This is called “cavitation,” and it’s the primary reason budget blenders fail at smoothie bowls.
Which Budget Blender Works Best
Of our top 5, the Ninja BN701 is the only blender that reliably makes smoothie bowls. Its 1400W motor has enough torque to push through thick mixtures, and the stacked blade design helps break up the stall patterns that cause cavitation. Even so, you’ll need to use the tamper (if included) or stop and scrape down the sides 2–3 times during blending. The result won’t match a Vitamix — which includes a tamper specifically designed for thick blends — but it will be genuinely good.
The NutriBullet Pro 900 and Ninja QB3001SS can make a passable smoothie bowl if you use a slightly higher liquid ratio (1:2 instead of 1:3) and accept a slightly thinner consistency. The Hamilton Beach 58148A and Oster Pro 1200 are not recommended for smoothie bowls — their motors don’t have enough torque for thick blends.
Smoothie Bowl Tips for Budget Blenders
Use frozen acai or frozen banana as your base — these are softer than frozen berries and blend more easily at low liquid ratios. Add liquid one tablespoon at a time rather than all at once. It’s much easier to thin a too-thick blend than to thicken a too-thin one. Blend in short pulses rather than sustained high speed — this redistributes ingredients and prevents cavitation. If your blender stalls, stop, stir manually with a spatula, and blend again. Adding a tablespoon of nut butter or avocado improves both the texture and the nutritional profile while making the mixture slightly easier to blend.
Ice Crushing Test — Which Budget Blenders Actually Work?
We ran a standardised ice crushing test on every blender: 2 cups of standard home freezer ice cubes (approximately 16 cubes), blended on the highest setting for 30 seconds. We then evaluated the results for consistency — how fine and uniform the crushed ice was — and checked for any uncrushed cubes remaining.
Test Results
The Ninja BN701 crushed all 16 cubes into fine, snow-like consistency in 22 seconds. No chunks remained. This is the best ice crushing performance we’ve seen from any blender under $100, and it approaches the performance of blenders costing $150–$200.
The Oster Pro 1200 crushed all cubes in 28 seconds with a slightly coarser result — fine for frozen drinks but with a few small chunks visible. The dual-direction blade helped by redirecting ice that had been thrown to the jar walls back into the cutting zone.
The Ninja QB3001SS (900W) crushed all cubes in 35 seconds. The narrow cup concentrates the ice around the blades effectively, but the lower wattage means it takes longer and the result is slightly coarser than the BN701.
The NutriBullet Pro 900 (900W) struggled with ice. The narrow cup design that excels for smoothies works against it here — ice cubes are too large to fit easily into the narrow space, and several cubes remained uncrushed after 30 seconds. With 45 seconds of blending and some manual shaking, the result was acceptable but not ideal.
The Hamilton Beach 58148A (700W) could not crush ice effectively. After 30 seconds, most cubes were cracked but not crushed. After 60 seconds, the result was chunky and uneven. The motor laboured audibly throughout. This blender is not suitable for ice crushing.
Some manufacturers explicitly exclude ice-crushing damage from their warranty coverage. Check your blender’s manual before regularly crushing ice. The Ninja BN701 and Oster Pro 1200 both explicitly support ice crushing in their documentation. The Hamilton Beach 58148A’s manual advises against crushing ice — and our testing confirms this advice is warranted.
Blender vs Juicer — Which Should You Buy?
Blenders and juicers are fundamentally different machines that do fundamentally different things — but they’re often confused because both process fruits and vegetables. Understanding the difference will save you from buying the wrong appliance for your needs.
What a Blender Does
A blender pulverises whole ingredients — skin, seeds, fibre, and all — into a smooth liquid. Nothing is removed. The resulting drink retains all of the fibre, all of the pulp, and all of the nutrients from the original ingredients. A blended green smoothie made with spinach, banana, and almond milk contains the full fibre content of the spinach and banana, which slows sugar absorption and promotes digestive health.
What a Juicer Does
A juicer separates the liquid from the fibre. It extracts the juice and discards the pulp. The resulting drink is thinner, more concentrated in flavour, and absorbed more quickly by the body. A juiced green drink made with the same spinach and banana would be thinner and more intensely flavoured — but it would contain significantly less fibre, and the sugars would be absorbed faster (spiking blood sugar more than the blended version).
Which Is Better for You?
Neither is objectively “better” — they serve different purposes. Blended drinks are more filling because of the fibre content, making them better for meal replacements and weight management. Juiced drinks are less filling but deliver a higher concentration of micronutrients per glass, making them better for supplementing an already-balanced diet. For most people, a blender is the more versatile and practical choice — it makes smoothies, soups, sauces, frozen drinks, and more. A juicer does one thing (juice) and does it well, but it’s a single-purpose appliance.
Can a Blender Replace a Juicer?
Partially. You can make “juice” in a blender by blending whole fruits and vegetables with water, then straining through a nut milk bag or fine mesh sieve. The result is similar to juiced produce — thinner than a smoothie, with most of the fibre removed. It’s more work than using a dedicated juicer, but it means you don’t need to buy a second appliance. If you’re choosing between a blender and a juicer and can only buy one, buy the blender. It does more things, costs less, and is easier to clean.
If you’re interested in dedicated juicing, our complete appliance buying guide covers juicers alongside blenders. For food processing tasks that neither blenders nor juicers handle well, see our Cuisinart food processor review.
Blender Accessories Worth Buying
Most budget blenders come with everything you need to get started — but a few inexpensive accessories can significantly improve your experience. Here are the accessories we’ve tested and actually recommend, and the ones that are a waste of money.
Extra Single-Serve Cups ($8–$15)
If you use a personal blender daily, having 3–4 cups means you can prep multiple smoothies in advance or have clean cups ready without washing between uses. Extra NutriBullet and Ninja cups are widely available and inexpensive. This is the single most useful blender accessory — especially for households where multiple people use the same blender.
Replacement Blade Assemblies ($10–$20)
Keeping a spare blade assembly on hand means you never have to wait for a replacement when your current one starts leaking or dulling. Order a replacement when you buy the blender — that way it’s ready when you need it. This is especially important for NutriBullet users, whose blade gaskets need more frequent replacement.
Blender Tamper / Push Stick ($5–$10)
A tamper lets you push thick mixtures down into the blades without stopping the blender and removing the lid. Not all budget blenders are compatible with tampers — the jar opening needs to be wide enough to fit the tamper while the lid is in place. The Ninja BN701’s lid has a removable centre cap that accommodates a tamper. For smoothie bowls and thick nut butters, a tamper is genuinely useful.
What’s Not Worth Buying
Blender-specific recipe books — every recipe you’ll ever need is available free online. Specialised “smoothie cup” lids with built-in strainers — they clog easily and are harder to clean than standard lids. Blender covers — a clean tea towel does the same job for free. Ice crusher attachments — if your blender can’t crush ice on its own, an attachment won’t fix the fundamental motor limitation.
Troubleshooting Common Blender Problems
Most blender problems have simple solutions. Before assuming your blender is broken, work through these common issues — you’ll save yourself a warranty claim (or an unnecessary replacement purchase) in most cases.
Blender Won’t Turn On
First, check that the jar is properly seated on the base. Most blenders have a safety interlock that prevents the motor from running unless the jar is correctly aligned. Try removing the jar, repositioning it, and pressing down firmly while turning. Second, check that the lid is fully locked — some models won’t run with an unsecured lid. Third, try a different power outlet. If none of these work, the motor brushes may be worn (common after 2–3 years of regular use) or the thermal fuse may have blown from overheating.
Blender Leaks from the Bottom
A leaking blender almost always means the blade gasket has failed. The gasket is a thin rubber ring that creates the watertight seal between the blade assembly and the jar. Over time, hot liquids, dishwasher heat, and normal wear cause the gasket to harden, crack, or deform. Replacement blade assemblies cost $10–$20 and fix the problem immediately. In the short term, you can try hand-tightening the blade assembly more firmly — sometimes the gasket is fine but the assembly has loosened slightly.
Blender Produces Uneven Results
If your blender leaves chunks in otherwise smooth blends, the most likely cause is incorrect ingredient loading. Ensure liquids go in first, followed by soft ingredients, then hard ingredients. If you’re already loading correctly, the blades may be dull — check for visible nicks or bends on the blade edges. Dull blades tear rather than cut, leaving fibrous strands intact. A new blade assembly solves this.
Motor Smells Burning
A burning smell means the motor is overheating. Stop immediately and let it cool for at least 15 minutes. Common causes: overfilling the jar (too much resistance for the motor), blending continuously for too long (budget motors need rest periods), or processing ingredients that are too hard (frozen solid blocks, large bones, or very dense nuts without enough liquid). If the burning smell persists after cooling and with normal use, the motor windings may be damaged — this typically requires replacement of the entire unit.
Blender Is Excessively Loud
All blenders are loud — that’s unavoidable. But if your blender is suddenly louder than usual, check for: a loose jar (vibrates against the base), a cracked jar (changes the resonance), or foreign objects in the jar (a small piece of fruit pit or seed can cause rattling). Also check that the blender is on a flat, stable surface — an uneven surface amplifies vibration noise significantly. Placing a folded kitchen towel under the base absorbs vibration and reduces noise by 3–5dB.
Lid Won’t Come Off
Vacuum pressure from blending hot or warm liquids can create a suction effect that locks the lid in place. Run the outside of the jar under warm water for 30 seconds — the slight thermal expansion breaks the seal. Never try to force a stuck lid by levering with a knife or screwdriver — you’ll crack the jar or damage the lid seal. If the lid is stuck due to dried food residue around the rim, soak the lid junction in warm soapy water for 10 minutes.
Blender Safety — What You Need to Know
Blenders are powerful kitchen tools that deserve respect. The blades spin at 15,000–25,000 RPM — fast enough to cause serious injury. Hot liquids under pressure can blow lids off explosively. And electrical safety matters when you’re combining water, electricity, and high-speed motors. Here are the safety practices every blender owner should follow.
Hot Liquid Safety
This is the most dangerous common blender scenario. When you seal a blender lid and blend hot liquid, the liquid’s heat creates steam, and the sealed jar traps that steam under pressure. The pressure builds rapidly — and when it exceeds the lid’s grip, the lid blows off explosively, spraying scalding liquid upward. This is not a theoretical risk — it causes thousands of emergency room visits every year.
The safe method: never fill above halfway with hot liquid. Remove the centre cap from the lid and cover the opening with a folded tea towel. Start blending on the lowest speed and gradually increase. The tea towel allows steam to escape while preventing splashing. Never blend boiling liquid — let it cool to 70°C / 160°F first. The Oster Pro 1200’s glass jar is the safest option for hot blending because glass handles temperature changes better than plastic.
Blade Safety
Never reach into a blender jar with your fingers — even when the blender is unplugged. The blades are razor-sharp and designed to cut through bone-hard ingredients. Use a spatula to scrape the sides, and always hold the blade assembly by the plastic housing, never by the blade edges. When washing, use a bottle brush rather than a sponge — sponges put your fingers dangerously close to the blades.
Electrical Safety
Never operate a blender with wet hands. Never immerse the motor base in water. Never use a blender with a damaged power cord. Never run a blender empty — the blades can overheat and damage the jar or blade assembly. If the blender starts smoking or produces a strong burning smell, unplug it immediately and let it cool for 30 minutes before investigating.
Child Safety
Store blenders out of reach of children. The jar is heavy enough to cause injury if pulled off a counter, and the blades are extremely dangerous. Never let children operate a blender unsupervised, even with supervision — the speed at which things can go wrong (lid off, jar tipped, fingers near blades) is faster than a parent can react. Personal blenders with twist-on cups are slightly safer than full-size blenders because the blade is only exposed when the cup is inverted on the base.
Never blend sealed, pressurised containers. Never put carbonated liquids in a sealed blender — the CO2 release under blending agitation can blow the lid off. And never blend hot oil — oil can reach temperatures far above water’s boiling point without visibly boiling, and when it sprays, it causes severe burns.
How to Make Your Blender Quieter
Every blender on our list is loud — that’s the unavoidable reality of spinning blades at 20,000+ RPM through solid food. But there are practical steps you can take to reduce the noise by 5–10dB, which is perceptually significant (a 10dB reduction sounds roughly half as loud to the human ear).
Use a Damp Towel Under the Base
This is the simplest and most effective noise reduction technique. Place a folded kitchen towel or silicone mat under the blender’s motor base. The towel absorbs the vibration that transfers from the motor through the counter surface, which is responsible for a significant portion of the perceived noise. In our tests, this reduced noise by 3–5dB consistently across all models.
Blend on a Stable, Heavy Surface
A lightweight kitchen cart or folding table amplifies blender vibration because the surface vibrates in sympathy with the motor. A heavy granite countertop or solid wood butcher block absorbs vibration better. If your blender is on a lightweight surface, move it to the sturdiest surface available — or place a heavy cutting board under it to add mass.
Blend During Reasonable Hours
This sounds obvious, but it matters: a blender at 6am in a quiet house sounds dramatically louder than the same blender at noon when there’s ambient noise. If you blend early in the morning, consider prepping smoothie ingredients the night before and blending the night before — most smoothies keep well in the fridge for 12 hours. Alternatively, use a personal blender like the NutriBullet Pro 900, which is 5–8dB quieter than full-size models because of its smaller motor and enclosed cup design.
Don’t Overfill
An overfilled blender is louder because the motor works harder. Reducing the load to two-thirds capacity or below means the motor runs more easily and produces less noise. This also produces better blending results — a double win.
Consider a Blender Cover or Enclosure
Some companies sell acoustic blender covers — essentially padded boxes that surround the blender during operation. These can reduce noise by 8–12dB, which is substantial. However, they cost $30–$60 and add a step to the blending workflow. For most people, the towel-under-the-base method provides sufficient noise reduction at zero cost.
How to Make Your Budget Blender Last Longer
A quality budget blender should last 2–4 years with regular use. With exceptional care, you can push that to 4–6 years. Here are the practices that make the biggest difference to blender longevity, ranked by impact.
Never Run It Continuously for More Than 60 Seconds
This is the single most important longevity practice. Budget blender motors are not designed for sustained operation — they overheat after 60–90 seconds of continuous use. Overheating damages the motor windings, degrades the lubricant in the bearings, and can blow the thermal fuse. Blend in 30–45 second bursts with 15-second rest periods. This takes slightly longer but doubles or triples the motor’s lifespan.
Always Add Liquid Before Solid Ingredients
Beyond the blending quality benefits, adding liquid first reduces the initial load on the motor. When you hit “blend” with a jar full of dry frozen fruit, the blades encounter maximum resistance immediately — the motor draws peak current and generates maximum heat. When liquid is present, the blades spin freely in the liquid first, then gradually encounter the solid ingredients as the vortex develops. This gentler startup extends motor life significantly.
Replace the Blade Assembly Annually
Dull blades force the motor to work harder. A blade assembly that’s lost its edge requires 20–30% more motor power to achieve the same result — which means more heat, more wear, and a shorter motor life. Replacing the blade assembly every 12 months (or sooner if you notice reduced performance) is the cheapest form of preventive maintenance. At $10–$20 per replacement, it’s a trivial cost that protects the much more expensive motor.
Clean the Motor Base Vents
Most blender motor bases have ventilation slots that allow air to cool the motor during operation. These slots accumulate dust, food particles, and kitchen grease over time, reducing airflow and causing the motor to run hotter. Wipe the vents with a dry cloth or use a can of compressed air to blow them out every month. This takes 30 seconds and prevents the gradual thermal damage that kills most budget blenders.
Don’t Store the Blender Assembled
If you store the blender with the jar sitting on the motor base, the weight of the jar (especially when wet) puts constant pressure on the drive coupling. Over months, this can wear the coupling prematurely. Store the jar separately from the base — either beside it or in a cabinet. This also allows the jar to dry completely, preventing bacterial growth and musty odours.
Use the Right Blender for the Right Task
Don’t use a 700W blender to crush ice — it’s not designed for it, and you’ll burn out the motor. Don’t use a personal blender for hot liquids — the sealed cups can’t handle the pressure. Don’t use any blender to process non-food items (coffee beans, spices in large quantities, or cosmetics) — these tasks create fine dust that infiltrates the motor housing and damages the bearings. Match the blender to the task, and it will last years longer.
The three practices that matter most: blend in short bursts (never more than 60 seconds continuously), add liquid first (reduces startup motor strain), and replace blades annually (prevents motor overwork). These three habits alone will double the lifespan of any budget blender.
Frequently Asked Questions
The Ninja BN701 Professional Plus at approximately $89 is the best overall blender under $100. Its 1400W motor outperforms the competition on frozen fruit, ice, and leafy greens. It includes a 72oz pitcher and two single-serve cups, making it the most versatile option at this price. If your use is specifically smoothies, the NutriBullet Pro 900 at $69 is the smarter specialist buy.
700 watts is sufficient for soft fruit smoothies, milkshakes, and simple sauces — but it struggles with ice cubes, frozen fruit, leafy greens, and fibrous vegetables. Our testing consistently showed the smoothness gap between 700W and 900W is larger than the gap between 900W and 1200W. We recommend 900W as the minimum for frozen ingredients.
Technically yes, but with significant limitations. Budget blenders can make rough nut butter from pre-roasted nuts if you process in short bursts with resting periods. The Ninja BN701 (1400W) is the most capable sub-$100 option. For regular nut butter production, a Vitamix or similar premium blender is worth the investment.
With typical use (3–5 times per week) and proper care, a quality budget blender should last 2–4 years. Cleaning immediately after use, never overfilling, blending in short bursts rather than continuously, and adding liquid before solids will substantially extend the lifespan of any budget blender. Replacing the blade assembly annually also helps by reducing motor strain.
They’re optimised for different uses. NutriBullet Pro 900 is better for daily single-serve smoothies — compact, fast, easy to clean. Ninja BN701 is better for larger volumes, versatility, and tougher blending tasks. If you make smoothies alone every morning, buy NutriBullet. If you blend for multiple people or need versatility, buy Ninja.
You can blend warm-to-hot soup with precautions. Never blend boiling liquid — steam pressure can blow the lid off dangerously. Allow soup to cool to approximately 70°C (160°F), remove the centre cap, cover with a tea towel, and fill no more than halfway. The Oster Pro 1200’s glass jar is the most appropriate sub-$100 option for soup blending.
They do fundamentally different things. Blenders excel at liquids, smoothies, soups, and emulsions. Food processors excel at chopping, slicing, shredding, and dough. If you primarily make drinks and soups, buy a blender. Our Cuisinart food processor review covers the best options at this price tier.
Commercial smoothie shops typically use Vitamix or Blendtec blenders — machines that cost $400–$800 and are rated for continuous commercial use. These blenders have motors rated for hours of daily operation, whereas home blenders are rated for minutes per day. The good news is that the blending technology has trickled down — the Ninja BN701 at $89 uses blade and motor designs that were commercial-grade five years ago. You won’t match commercial throughput, but you can match commercial smoothness for a single serving.
Yes, but with the right technique. Always add liquid first, then frozen fruit on top. Use at least 1/2 cup of liquid per 2 cups of frozen fruit. Start blending on low for 5 seconds to break up the frozen chunks, then switch to high. Blenders with 900W+ handle frozen fruit well — below 900W, let frozen fruit sit at room temperature for 5 minutes before blending to soften slightly. The Ninja BN701 handles frozen fruit straight from the freezer without any preparation.
Each has advantages. Glass is heavier, doesn’t scratch, doesn’t absorb odours, and is fully dishwasher safe without degradation. It’s better for cooking tasks (soups, sauces) where odour absorption matters. Plastic (BPA-free Tritan) is lighter, less fragile, and standard on most budget blenders. It scratches over time with daily use and can absorb strong odours (turmeric, garlic). For daily smoothies, plastic is fine. For cooking-focused use, glass is worth the weight penalty. The Oster Pro 1200 is the only sub-$100 blender with a glass jar.
Use less liquid, add frozen fruit instead of fresh, include a thickening ingredient (frozen banana, avocado, chia seeds, or nut butter), and use ice cubes. Blend on high for 30–45 seconds. If the mixture is too thick for the blender to process, add liquid one tablespoon at a time until the vortex forms. For smoothie-bowl thickness, the Ninja BN701 is the best sub-$100 option because its 1400W motor can push through very thick mixtures.
A burning smell indicates motor overheating. Stop immediately and let it cool for 15 minutes. Common causes: running continuously for too long (blend in 30-second bursts), overfilling the jar (too much resistance), processing ingredients that are too hard without enough liquid, or worn motor brushes (after 2–3 years of regular use). If the smell persists with normal use after cooling, the motor may be damaged and the unit should be replaced.
The NutriBullet Pro 900 can crush ice, but it’s not ideal for it. The narrow cup means ice cubes don’t circulate as freely as in a wide-pitcher blender, and you’ll need to blend for 35–45 seconds (vs 22 seconds in the Ninja BN701). For occasional ice crushing, it works. For regular frozen drinks, a full-size blender with a wider jar is a better choice. The NutriBullet’s strength is smoothies with frozen fruit, not ice-based drinks.
Blenders use a narrow jar and high-speed blades to create a vortex that pulls ingredients down into the cutting zone — ideal for liquids, smoothies, and purees. Food processors use a wide, flat bowl and slower-speed blades or discs to chop, slice, and shred — ideal for solid foods, dough, and variable textures. A blender makes smooth tomato soup; a food processor makes chunky salsa. Most kitchens benefit from having both. See our Cuisinart food processor review for the best standalone options.
No — pre-programmed settings are a convenience feature, not a performance feature. On high-quality blenders like the Ninja BN701, the Auto-iQ programs genuinely improve results by running optimised pulse sequences. But on lower-wattage blenders, a pre-programmed smoothie cycle on a 600W motor performs worse than manual high-speed on a 900W motor. Focus your budget on motor power first; pre-programmed settings are a tiebreaker, not a deciding factor.
Blenders can grind coffee beans and spices in small quantities, but they’re not ideal for it. The wide jar means fine powders scatter to the edges and don’t reach the blades consistently. A dedicated spice grinder ($15–$25) produces a much more uniform grind. If you only occasionally grind spices, a blender works — use the pulse function and grind no more than 2 tablespoons at a time. For coffee, a burr grinder produces far more consistent results than any blade-based method.
For most households, $60–$90 is the sweet spot. Below $50, you sacrifice motor power and build quality significantly. Above $100, you enter the range where a Vitamix or Blendtec becomes worth saving for. The Ninja BN701 at $89 and NutriBullet Pro 900 at $69 represent the best value in their respective categories. If you blend daily and plan to keep the machine for 5+ years, saving for a $350–$400 Vitamix is genuinely worth it — our Vitamix E310 review explains why.
The NutriBullet Pro 900 is the quietest blender we tested under $100, peaking at 78dB — significantly quieter than full-size models. Its smaller motor and enclosed cup design naturally reduce noise. For full-size blenders, the Ninja QB3001SS measured 82dB, which is quieter than the Ninja BN701 (88dB) and Oster Pro 1200 (90dB). Placing a folded towel under any blender reduces noise by 3–5dB — see our noise reduction guide above for more techniques.
Final Verdict — Best Blender Under $100
- Best overall under $100: Ninja BN701 Professional Plus at ~$89. 1400W, pitcher + two cups, 2-year warranty.
- Best for daily smoothies: NutriBullet Pro 900 at ~$69. Fastest and easiest smoothie routine available under $100.
- Best for cooking tasks: Oster Pro 1200 at ~$79. Glass jar, dual-direction blade, and 1200W for soups and salsas.
- Best compact pick: Ninja QB3001SS at ~$59. 900W in minimal footprint. Perfect for small kitchens.
- Best for very tight budgets: Hamilton Beach 58148A at ~$38. Honest, capable, extremely affordable for light use.
If you’re ready to spend more, our Vitamix E310 review explains exactly what you get for the additional investment. For questions, reach us via our contact page.
Useful next reads: our Vitamix E310 full review, the Vitamix vs Blendtec comparison, and the Cuisinart food processor review. For all kitchen appliances in one place, start with the complete buying guide.


