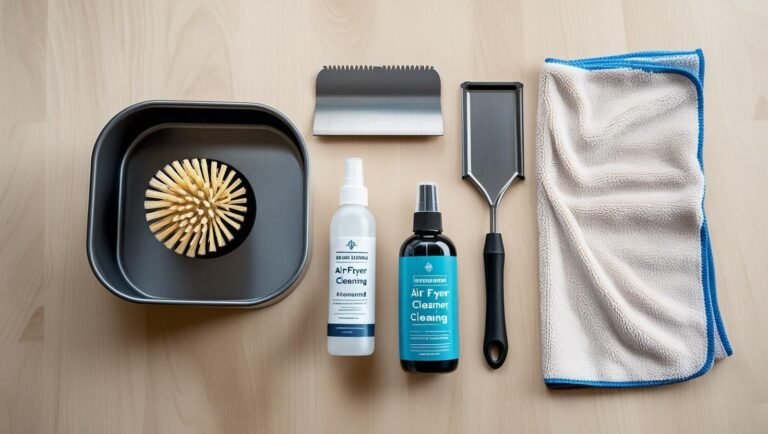
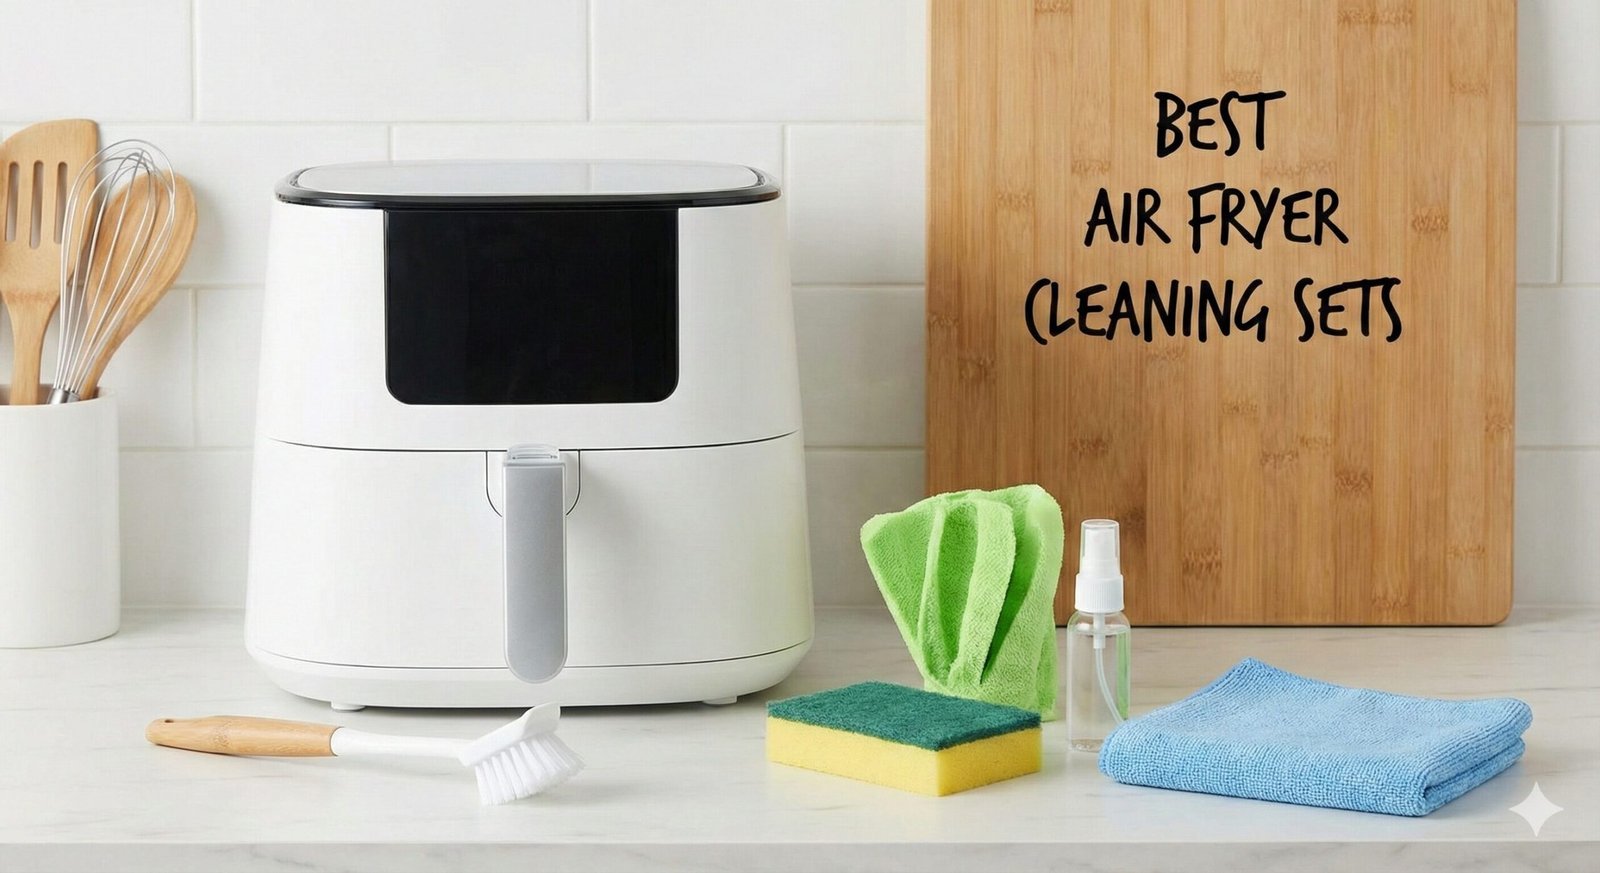
Best Air Fryer Cleaning Sets for Deep Cleaning & Longevity
- Quick Decision Guide
- Why You Need a Kit
- Top 3 Reviews
- Quick Cleaning Hacks
- Heating Element Deep Clean
- Basket & Removable Parts
- Exterior Cleaning
- Step-by-Step Guide
- Basket vs Oven-Style
- Troubleshooting
- Stop Smoking
- Odor Removal
- Maintenance Tips
- Brand-Specific Guides
- Best Degreasers
- Homemade vs Store-Bought
- Accessories Guide
- Cleaning Schedule
- Common Mistakes
- New Air Fryer First Clean
- Dishwasher-Safe Parts
- Pet & Family Safety
- Fire Hazard Facts
- Eco-Friendly Cleaning
- Tools Comparison
- Cost Comparison
- Warranty & Parts
- Storage & Care
- Buying Guide
- FAQ
We all love the crispy results of an air fryer, but nobody talks about the dark side: the grease buildup on the ceiling. Unlike a standard oven, an air fryer has a high-speed fan located directly behind a heating coil. Over time, fat splatters upward, bakes onto the metal, and turns into a sticky, smoky nightmare.
If your appliance has started smoking or smells odd, a simple sponge won’t cut it. You need the right tools to reach behind the element without damaging the delicate sensors. Here is our guide to the best cleaning sets to save your fryer.
Quick Decision Guide
In a rush? Here are the top tools based on your specific problem.
| Best For… | Tool Type | Why It Works |
|---|---|---|
| Baked-on Carbon | Nylon Bristle Brush Set | Stiff enough to scrub carbon, safe for non-stick. |
| Hard-to-Reach Fans | Flexible Bottle Brush | Bends to get behind the heating coil. |
| General Maintenance | Microfiber & Bamboo | Absorbs grease without scratching. |
Why You Need a Specialized Cleaning Kit
You might be thinking, “Can’t I just use a kitchen sponge?” For the basket, yes. For the heating unit, absolutely not.
- Access: The heating element is often covered by a grate. A square sponge simply cannot fit through the gaps.
- Sensitivity: Air fryers have thermal fuses and fan motors near the element. Soaking them with water can cause electrical shorts.
- Tough Grease: The grease on the element is polymerized (hardened by heat). Soft sponges just glide over it.
Using the wrong tools is often the reason people experience mechanical failures, such as the air fryer fan not spinning due to dislodged debris or water damage.
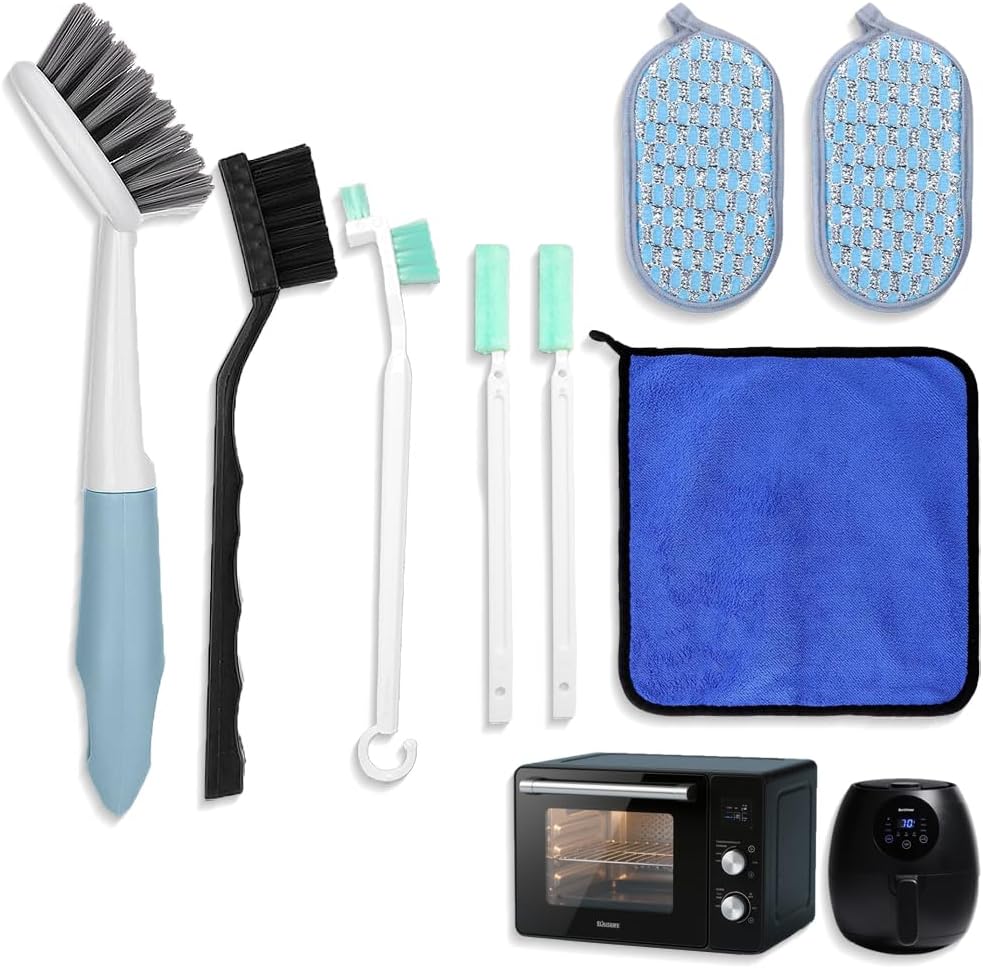
Top 3 Air Fryer Cleaning Sets Review
1. The “Detailer” Mini Brush Set
These sets usually resemble detailing tools for cars. They include tiny nylon brushes that can fit into the mesh vent holes of the basket and scrub the fan blades.
- Pros: Reaches tight corners; very cheap.
- Cons: Tedious for large surface areas.
2. The Flexible Coil Brush
This is essential for “toaster oven” style air fryers (like the Ninja AF101). The brush head is mounted on a bendable wire, allowing you to scrub the top side of the heating element which is otherwise invisible.
3. The Scraper & Pad Combo
For the basket itself, plastic scrapers are a lifesaver. They can chip off burnt cheese or marinade without scratching the ceramic coating. These are often paired with non-abrasive scour pads.
Quick Air Fryer Cleaning Hacks That Actually Work
Sometimes you do not have twenty minutes to do a full deep clean. Maybe you are between meals, cooking for guests, or just want to keep things presentable without pulling out a full brush kit. These quick cleaning hacks take five minutes or less and can dramatically extend the time between deep cleans.
The Bread Hack
This one sounds strange, but it works surprisingly well for absorbing pooled grease. After cooking something particularly oily like bacon or sausages, place a slice of plain white bread into the warm (not hot) basket and let it sit for two to three minutes. The bread acts like a sponge, soaking up the liquid fat from the bottom of the basket before it has a chance to harden. Discard the bread and give the basket a quick wipe with a paper towel. This trick is especially useful when you are cooking multiple batches back to back and need to clean the basket quickly between rounds.
The Steam Clean Method
For light-to-moderate buildup on the heating element, steam can do most of the heavy lifting. Fill an oven-safe ramekin or small bowl with equal parts water and white vinegar, place it inside the basket, and run the air fryer at 350 degrees Fahrenheit for ten minutes. The steam softens the baked-on grease, making it significantly easier to wipe away with a damp cloth once the unit cools down. This method is not a substitute for a proper deep clean, but it buys you time and reduces the elbow grease required when you do eventually break out the brushes.
The Lemon Water Cycle
Cut a lemon in half, squeeze the juice into a small oven-safe bowl of water, and drop the lemon halves in too. Run the air fryer at 350 degrees Fahrenheit for ten minutes. The citric acid in the lemon breaks down light grease films while simultaneously deodorizing the interior. After the cycle, let the unit cool and wipe everything down. This is an excellent maintenance step to run once a week if you use your air fryer daily, and it leaves the kitchen smelling fresh rather than like last night’s fish sticks.
The Dishwasher Tablet Trick
For baskets with stubborn, stuck-on residue that resists a normal scrub, place a single dishwasher tablet (the powder kind, not the gel pod) into the basket, fill with just enough hot water to cover the bottom, and let it soak for thirty minutes. The enzymes in dishwasher tablets are specifically designed to break down baked-on food, and they work just as well in an air fryer basket as they do on a casserole dish. After soaking, the residue should wipe away with minimal effort. Rinse thoroughly to remove any soap residue before your next cook.
The Cornstarch Coating Prevention
Before cooking particularly messy foods like marinated chicken wings or anything with a sugary glaze, toss the food in a light dusting of cornstarch before placing it in the basket. The cornstarch absorbs surface moisture and creates a thin barrier between the food and the basket, reducing the amount of marinade or fat that bakes directly onto the metal. This does not eliminate cleaning entirely, but it turns a twenty-minute scrub into a two-minute wipe-down.
How to Clean the Air Fryer Heating Element: The Complete Deep Dive
The heating element is the single most neglected part of any air fryer, and it is also the part where neglect has the most serious consequences. Grease that accumulates on the coil does not just sit there passively; every time you cook, it gets reheated, polymerized further, and baked into an increasingly hard, carbonized crust. Over time, this crust insulates the element, reducing its efficiency, causing uneven cooking, and eventually producing smoke that fills your kitchen every time you turn the unit on.
Understanding the Anatomy
In most basket-style air fryers, the heating element is a coiled metal tube (usually stainless steel or chrome-plated steel) mounted inside the top of the main housing, directly above where the basket sits. Behind the coil is a fan that pushes hot air downward through the food. A metal guard or grate covers the element to prevent direct contact with food, but grease vapor passes right through these openings and deposits on the coil surface. In toaster-oven-style units, the element may be visible through the glass door, and there are often two elements: one on top and one on the bottom.
Why the Element Gets So Dirty
When fat heats above its smoke point, it vaporizes into tiny particles that float upward. In a conventional oven, these particles disperse into a large cavity. In an air fryer, the compact chamber and the fan force these particles directly onto the heating coil, where the extreme surface temperature causes them to polymerize almost instantly. Polymerized fat is essentially a plastic-like coating that bonds to metal at a molecular level, which is why a regular sponge cannot remove it. You need either mechanical abrasion (brushing) or chemical softening (baking soda paste or a dedicated degreaser) to break the bond.
Tools You Will Need
- A nylon bristle brush: Stiff enough to scrub carbonized grease but soft enough to avoid scratching the metal coil or damaging the ceramic insulation around the element terminals.
- A flexible coil brush or pipe cleaner: Essential for reaching the underside of the element and the spaces between the coil loops where a rigid brush cannot fit.
- Baking soda: Mixed into a thick paste with water, this is the safest and most effective household abrasive for polymerized grease.
- A microfiber cloth: For wiping away the dissolved residue without leaving lint behind on the hot surfaces.
- A spray bottle with plain water: For lightly dampening the element before applying paste, and for rinsing afterward. Never pour or spray water directly onto the element from a running tap.
Step-by-Step Element Cleaning Process
- Unplug and cool completely: This is non-negotiable. The element retains heat for twenty to thirty minutes after cooking. Cleaning a hot element risks burns and thermal shock to the metal.
- Remove the basket and crisper plate: Set these aside to clean separately. You need clear access to the underside of the main housing.
- Invert the unit: Turn the entire air fryer upside down so the heating element faces upward. This prevents cleaning solution from dripping into the motor and fan assembly below. Place a towel under the unit to catch any drips.
- Apply baking soda paste: Mix three parts baking soda with one part water until you have a thick, spreadable paste. Using your nylon brush, apply a generous layer of paste directly onto the coil, making sure to work it into the spaces between the loops and around the guard grate.
- Let it dwell: Allow the paste to sit for fifteen to twenty minutes. For extremely heavy buildup, you can extend this to thirty minutes or reapply a second coat after the first one dries. The alkalinity of the baking soda slowly breaks down the polymerized fat, softening it enough for mechanical removal.
- Scrub methodically: Using your nylon brush, scrub the coil in small circular motions, working from one end to the other. Apply moderate pressure; let the bristles and the baking soda do the work rather than forcing it. For the tight spaces between coil loops, switch to your flexible brush or a pipe cleaner.
- Wipe and rinse: Dampen your microfiber cloth with plain water (wring it out thoroughly so it is damp, not wet) and wipe away the dissolved paste and grease residue. Repeat until the cloth comes away clean.
- Inspect and repeat if necessary: Hold the inverted unit up to a light source and look at the coil from different angles. If you see any remaining dark patches, apply another thin layer of paste, wait ten minutes, and scrub again.
- Air dry for 24 hours: Leave the unit inverted or upright in a well-ventilated area for a full day before plugging it back in. Any residual moisture trapped near the element terminals can cause a short circuit when you power on.
Dealing with Stubborn Carbon Deposits
If the baking soda paste alone is not cutting through months of accumulated carbon, you have a few escalation options. A plastic scraper (never metal) can be used to gently chip away at thick deposits after the paste has softened them. Some people have success with a paste made from cream of tartar and water, which is slightly more acidic than baking soda and can dissolve carbon that resists the alkaline approach. For the most extreme cases, a purpose-made appliance degreaser applied with a cotton swab can target specific spots without soaking the entire element. Always test any new cleaning product on a small, inconspicuous area of the coil first to make sure it does not cause discoloration or damage.
How to Clean the Air Fryer Basket and Removable Parts
While the heating element gets all the attention in deep-cleaning guides, the basket and its associated removable parts are what you interact with every single day. Keeping these components clean is not just about aesthetics; food residue left on the basket degrades the non-stick coating over time, causes food to cook unevenly, and can transfer flavors between dishes. Nobody wants their morning hash browns to taste like last night’s salmon.
The Basket
The basket is the workhorse of the air fryer, and it takes the most abuse. Grease, marinades, cheese, breadcrumbs, and sugary sauces all make direct contact with its non-stick surface. The key principle is to clean it after every single use, even if it looks relatively clean. Invisible grease films accumulate faster than you think, and they carbonize during the next cook, creating a progressively stickier surface.
For routine cleaning, remove the basket from the unit, let it cool for five minutes, then wash it with warm water and a drop of dish soap using a soft sponge or cloth. Pay special attention to the mesh bottom, where tiny food particles get trapped in the holes. A soft-bristle brush (an old toothbrush works well) can dislodge particles from the mesh without scratching the coating. Rinse thoroughly and either towel dry or air dry completely before reinserting.
For stuck-on food, fill the basket with warm soapy water and let it soak for fifteen to twenty minutes before scrubbing. Never use metal utensils, steel wool, or abrasive scouring pads on the basket. If a plastic scraper is not enough to remove the residue, try the dishwasher tablet soak method described in the hacks section above.
The Crisper Plate
The crisper plate (also called the tray or grill plate) sits inside the basket and elevates the food to allow air circulation underneath. It is usually a flat metal plate with raised bumps or a perforated design. Because fat drips through the holes during cooking, the underside of the crisper plate often collects more residue than the top. When cleaning, always flip the plate over and scrub both sides. The raised bumps can trap burnt cheese and marinade in their crevices, so use a detailing brush or toothbrush to get into these tight spots.
The Drip Tray
Some air fryer models include a separate drip tray or crumb catcher beneath the basket. This component collects the fat and food particles that fall through the mesh, and it is often the dirtiest part of the entire appliance. Empty and wipe the drip tray after every use. Once a week, wash it with hot soapy water and a degreasing dish soap. If your drip tray has a non-stick coating, treat it with the same care as the basket: no metal tools, no abrasive pads.
The Splatter Guard
Certain models include a removable splatter guard or mesh screen that sits above the food. This component catches grease vapor before it reaches the heating element, which is extremely useful for reducing element buildup. However, the guard itself gets clogged with grease quickly. Wash it after every few uses with hot soapy water and a brush. A clogged splatter guard restricts airflow, which can cause the air fryer to overheat or cook unevenly.
Restoring a Stained Basket
Over time, even well-maintained baskets develop a brownish discoloration on the non-stick surface. This is cosmetic and does not affect performance, but if it bothers you, try soaking the basket overnight in a mixture of warm water and two tablespoons of baking soda. In the morning, scrub gently with a soft sponge. The baking soda will lighten the stains without damaging the coating. Do not expect it to look factory-new; some patina is normal and unavoidable with regular use.
How to Clean the Air Fryer Exterior and Housing
The outside of your air fryer collects grease splatter, fingerprints, dust, and kitchen grime just like any other countertop appliance. While exterior cleaning is less critical than interior maintenance, neglecting it can cause problems over time. Grease that accumulates around the ventilation openings can be drawn back into the unit by the fan, and dust buildup on the intake vents restricts airflow, causing the motor to work harder and run hotter.
Stainless Steel Exteriors
Many premium air fryers have stainless steel housing that shows every fingerprint and smudge. Wipe these surfaces with a damp microfiber cloth, always moving in the direction of the metal’s grain. For stubborn spots, add a single drop of dish soap to the cloth. Avoid glass cleaners, ammonia-based products, and abrasive powders, which can dull or discolor stainless steel. After wiping, buff dry with a clean, dry microfiber cloth to prevent water spots.
Plastic Exteriors
Budget and mid-range air fryers often have plastic housing that can yellow or discolor over time, especially near the vents where heat exposure is highest. A paste of baking soda and water, applied with a soft cloth and wiped off after five minutes, can remove surface stains without scratching the plastic. For the control panel, use a lightly dampened cloth only; never spray liquid directly onto buttons or digital displays, as moisture can seep behind the panel and damage the electronics.
Ventilation Openings
The air intake and exhaust vents on the back and sides of the unit are critical for proper airflow. Use a dry, soft-bristle brush (a clean paintbrush works well) to dislodge dust and debris from the vent openings once a month. If grease has accumulated around the exhaust vent, wipe it with a cloth dampened with a vinegar-water solution. Never block the vents with cleaning cloths or push debris further inside with a vacuum nozzle; brush outward, away from the unit.
The Power Cord
It is easy to forget the power cord, but it can accumulate grease splatter over time, especially if your air fryer sits near the stove. Wipe the cord with a damp cloth and dry it thoroughly. Never wrap a damp cord around the unit for storage, as trapped moisture can degrade the insulation over time.
Step-by-Step Deep Clean Guide
Got your tools? Here is how to deep clean the “danger zone” (the heating element).
- Safety First: Unplug the unit and ensure it is completely cool.
- Invert: Remove the basket and turn the air fryer upside down. This prevents water from dripping down into the motor.
- Paste Up: Mix baking soda and a little water to form a thick paste. Apply this to the dirty heating coil using your brush. Let it sit for 15 minutes.
- Scrub: Use a damp (not dripping) stiff nylon brush to scrub the coil.
- Wipe: Use a microfiber cloth to wipe away the gritty residue.
- Dry: Let it air dry for 24 hours before plugging it back in.
Basket-Style vs. Oven-Style Air Fryers: Cleaning Differences
Not all air fryers are created equal when it comes to cleaning difficulty. The two dominant form factors, basket-style and oven-style, have fundamentally different internal layouts that affect where grease accumulates, how accessible the heating element is, and what tools you need. Understanding these differences before you buy a cleaning kit can save you money and frustration.
Basket-Style Air Fryers
Basket-style units (like the Ninja AF101, Cosori Pro, and Philips Essential) have a pull-out drawer that contains the basket and crisper plate. The heating element is hidden inside the main housing above the drawer opening. This design is generally easier to clean on a daily basis because the basket and crisper plate are fully removable and can be washed in the sink or dishwasher. However, the heating element is harder to access because you need to invert the entire unit to reach it from below. The enclosed design also means grease vapor has nowhere to escape, so it condenses on the interior walls and element more readily than in an open oven-style design.
- Daily cleaning difficulty: Easy. Remove basket, wash, dry, replace.
- Deep cleaning difficulty: Moderate to hard. Inverting the unit is awkward, and the element is partially hidden behind a guard grate.
- Grease accumulation pattern: Concentrated on the element and the ceiling of the housing directly above the basket.
- Best tools: Flexible coil brush for the element, standard sponge for the basket, detailing brush for the crisper plate bumps.
Oven-Style Air Fryers
Oven-style units (like the Ninja Foodi Digital Oven, Instant Vortex Plus, and Breville Smart Oven Air) have a glass door that opens to reveal wire racks and a visible heating element. The main advantage for cleaning is that the element is directly accessible without inverting the unit; you can see it, touch it, and scrub it from above. The downside is that the open design means grease splatters onto the interior walls, the glass door, the crumb tray, and sometimes the exterior countertop. There are more surfaces to clean, and the glass door is notoriously difficult to keep streak-free.
- Daily cleaning difficulty: Moderate. Multiple racks, a crumb tray, and the glass door all need attention.
- Deep cleaning difficulty: Easy to moderate. The element is visible and accessible, but there are more surfaces overall.
- Grease accumulation pattern: Spread across the interior walls, door glass, top element, bottom element, and crumb tray.
- Best tools: Nylon brush for the elements, glass cleaner for the door, microfiber cloth for the walls, and a scraper for the crumb tray.
| Feature | Basket-Style | Oven-Style |
|---|---|---|
| Basket cleaning | Easy (removable drawer) | N/A (uses wire racks) |
| Element access | Hard (must invert unit) | Easy (visible through door) |
| Number of surfaces | Fewer (enclosed design) | More (walls, door, racks, tray) |
| Glass door | No | Yes (needs regular cleaning) |
| Crumb tray | Some models | Almost all models |
| Overall daily effort | 2-3 minutes | 5-7 minutes |
| Overall deep clean effort | 20-30 minutes | 15-25 minutes |
Neither design is inherently “easier” to maintain overall; they just distribute the work differently. Basket-style units are quicker for daily wipe-downs but harder to deep clean. Oven-style units require more daily attention but give you better access when it is time for a thorough scrub. Choose your cleaning tools accordingly.
Troubleshooting Smells
If you’ve cleaned the unit but it still smells like a chemical fire, you might have residue trapped behind the fan or melting plastic components.
Check our detailed guide on what to do if your air fryer smells like burning plastic. Sometimes, the smell isn’t food—it’s the appliance failing.
How to Stop Your Air Fryer from Smoking
Seeing smoke billow out of your air fryer mid-cook is alarming, and it is one of the most common complaints that drives people to search for cleaning solutions. The good news is that smoking is almost always fixable with a thorough cleaning and a few behavioral adjustments. The bad news is that if you ignore it, the problem will only get worse as more grease accumulates with each cook.
Why Air Fryers Smoke
There are three primary causes of air fryer smoke, and each one has a different solution. Understanding which cause applies to your situation is the first step toward fixing it.
- Burned grease on the heating element: This is the most common cause. When fat deposits on the coil reach their smoke point during cooking, they produce a thick, acrid smoke that smells like burning oil. The solution is a deep clean of the element using the baking soda paste method described earlier in this guide.
- Excess oil in the basket: If you are using too much oil, or if fatty foods like bacon are releasing more fat than the basket can hold, the pooled oil at the bottom of the basket can reach its smoke point. Reduce the amount of oil you use, shake the basket halfway through cooking to redistribute fat, and empty the drip tray if your model has one.
- Food too close to the element: Overfilling the basket or cooking particularly tall items can bring food into direct contact with the heating element, causing instant smoke and a burning smell. Do not fill the basket more than two-thirds full, and cut large items into smaller pieces to ensure adequate clearance.
Immediate Steps When Smoking Occurs
- Do not panic: Smoke from an air fryer is almost always grease-related, not an electrical fire. However, if you see actual flames, unplug the unit immediately.
- Pause the cook: Open the basket (carefully, using oven mitts) and check for pooled grease or food touching the element.
- Remove excess oil: If there is liquid fat pooling in the basket, carefully pour it off into a heat-safe container.
- Resume at a lower temperature: If the smoking stops after removing excess oil, continue cooking at a temperature 25 to 50 degrees Fahrenheit lower than your original setting.
- Schedule a deep clean: Even if the smoking stops, it will return unless you address the underlying buildup on the element.
Preventing Future Smoke
Prevention is always easier than troubleshooting. These habits will keep your air fryer smoke-free for the long term:
- Use a small amount of oil: A light spray or a teaspoon tossed with the food is sufficient for most recipes. You do not need to pour oil into the basket.
- Shake the basket at the halfway mark: This redistributes food and prevents fat from pooling in one spot.
- Do not cook extremely fatty foods without a drip tray: If your model does not have a drip tray, place a small piece of bread at the bottom of the basket beneath the crisper plate to absorb excess fat. Replace it between batches.
- Clean the element monthly: Even if you do not see smoke, a monthly wipe-down of the element prevents gradual buildup from reaching the tipping point.
- Use silicone liners: Reusable liners catch grease before it reaches the basket floor, reducing the amount of fat that splatters upward during cooking.
How to Get Smells Out of Your Air Fryer
Air fryers are notorious for retaining odors from previous cooks. Fry fish on Monday, and your Tuesday chicken tenders might taste faintly of tilapia. This happens because odor molecules from cooking embed themselves in the non-stick coating, the interior walls, and any grease residue inside the unit. Regular cleaning prevents most odor issues, but when smells persist, you need targeted deodorizing techniques.
The Lemon Steam Method
This is the most popular and effective natural deodorizer for air fryers. Cut one lemon in half, squeeze the juice into an oven-safe bowl with one cup of water, and drop the lemon halves in. Place the bowl in the basket and run the air fryer at 350 degrees Fahrenheit for ten minutes. The steam infused with citric acid penetrates the interior surfaces and neutralizes odor molecules rather than just masking them. After the cycle, let the unit cool completely, then wipe down all interior surfaces with a damp cloth. The lemon scent dissipates quickly, leaving behind a genuinely neutral smell rather than a perfume overlay.
The Baking Soda Absorption Method
For persistent odors that survive the lemon steam treatment, baking soda’s absorbent properties can help. Place an open box or a small bowl of baking soda inside the cooled, empty air fryer, close the basket, and leave it overnight. Baking soda absorbs odor molecules from the air inside the sealed chamber. In the morning, remove the baking soda and wipe down the interior. This method works particularly well for fish and curry odors that tend to linger longer than other food smells.
The Vinegar Wipe-Down
White vinegar is a natural deodorizer and degreaser in one. Mix equal parts white vinegar and water in a spray bottle, spray a microfiber cloth (never spray directly into the unit), and wipe down all interior surfaces including the walls, the ceiling, and the basket. The vinegar smell dissipates within an hour, taking the food odors with it. This method is especially effective for removing the stale oil smell that develops when an air fryer has not been used for a few days.
The Vanilla Extract Trick
For a quick fix when guests are coming over and you do not have time for a full deodorizing session, place a few drops of vanilla extract on a damp cloth and wipe the interior of the basket and the accessible interior surfaces. Then run the air fryer empty at 300 degrees Fahrenheit for three minutes. The vanilla masks residual odors temporarily and leaves a pleasant, subtle scent. This is a cosmetic fix, not a cleaning solution, but it works in a pinch.
When Odors Signal a Problem
Not all smells are food-related. If your air fryer smells like burning plastic, electrical insulation, or something metallic and sharp, this could indicate a component failure rather than a cleaning issue. A burning plastic smell might mean a wire coating is melting, a piece of plastic packaging is stuck near the element, or a gasket is degrading from heat exposure. In these cases, stop using the unit immediately and inspect it carefully before your next cook. Refer to our guide on air fryer smells like burning plastic for detailed troubleshooting steps.
Maintenance Tips for Longevity
Prevention is easier than cure. Follow these rules to keep your fryer running for years:
- Don’t Overfill: Food touching the element causes instant smoke.
- Use Liners: Parchment or silicone liners catch the grease before it hits the bottom.
- Shake the Basket: Shake outdoors or over the sink to prevent crumbs from falling into the internal gaps.
Additional Longevity Tips Most Guides Miss
Beyond the basics, there are several habits that experienced air fryer owners swear by for extending the life of their appliance:
- Preheat properly: Running the air fryer empty for two to three minutes before adding food allows the element to reach temperature evenly, reducing the thermal stress that can warp components over time. Some models have a preheat function; if yours does, use it.
- Avoid cooking sprays: Aerosol cooking sprays like PAM contain propellants (usually lecithin and dimethyl silicone) that build up on non-stick surfaces and create a sticky residue that is extremely difficult to remove. Over time, this residue degrades the coating. Use a manual oil mister filled with plain olive oil or avocado oil instead.
- Do not slam the basket: Repeatedly slamming the basket into the housing can loosen the internal connections between the heating element and its mounting brackets. Slide the basket in gently and make sure it seats fully before starting a cook.
- Keep it level: An air fryer that sits on an uneven surface causes oil to pool on one side of the basket, leading to uneven cooking and concentrated grease buildup in one area. Use a level to check your countertop, or place the air fryer on a flat cutting board.
- Replace worn parts promptly: A basket with a peeling non-stick coating is not just a performance issue; those flakes can end up in your food. Most manufacturers sell replacement baskets and crisper plates. Replacing a worn basket costs a fraction of replacing the entire unit.
- Give it breathing room: Do not push the air fryer flush against a wall or into a tight cabinet corner. The unit needs at least four to six inches of clearance behind and on all sides for proper ventilation. Restricted airflow causes the motor to overheat and shortens its lifespan.
Brand-Specific Cleaning Guides
Not every air fryer is built the same way, and the “danger zone” you’re trying to reach can look completely different depending on the brand and model sitting on your counter. A basket-style unit hides its heating element above a removable drawer, while a toaster-oven-style unit exposes the coil right at eye level behind a glass door. Below, we break down the quirks of the most popular brands so you know exactly where grease likes to hide on your specific machine.
Ninja Air Fryers
Ninja’s dual-basket and toaster-oven-style units, including the popular Ninja Foodi line, use a wide, flat heating element mounted directly above the cooking chamber. Because the element sits so close to the food, splatter tends to concentrate in a tight band directly beneath the coil rather than spreading across the whole ceiling. Owners of models like the Ninja AF101 often report a thick, dark crust forming in this narrow strip within just a few weeks of regular use. A flexible coil brush is the single most useful tool here, since it can slide along the length of the element without needing to be repositioned constantly. For Ninja’s dual-zone baskets, remember that each drawer has its own separate crisper plate, so you’re effectively doubling your basket-cleaning workload compared to a single-basket fryer.
Philips Air Fryers
Philips popularized the “starfish” ridged basket design, and while it’s excellent for airflow, the raised ridges create dozens of tiny grease traps that a flat sponge glides right over. A stiff detailing brush with an angled head works best for getting into these grooves. Philips units also tend to have a fan guard with unusually small mesh holes, so if your brush bristles are too thick, you won’t be able to reach the fan blades at all; a needle-nose or pipe-cleaner-style brush is a worthwhile addition to your kit if you own one of these models.
Cosori Air Fryers
Cosori’s square-basket design is popular for batch cooking, but the square corners of the basket are notorious for trapping crumbs that a round brush simply can’t reach. Owners of Cosori units should prioritize a brush set that includes at least one square-tipped or corner scraper tool. The heating element on most Cosori models is also positioned slightly further back than on comparable units, so a shorter brush handle may not give you enough reach; check the length of any brush set against your own unit’s depth before assuming it will work.
Instant Vortex Air Fryers
Instant Vortex ovens, built on the toaster-oven chassis, typically have two heating elements: one on top and one on the bottom. This means twice the grease-collection area compared to a single-element basket fryer. The top element in particular is prone to smoking because splatter from foods placed on the upper rack lands directly on the hot coil. If you own a Vortex-style oven, plan on cleaning both elements on the same maintenance schedule, not just the one that’s easiest to see.
Gourmia, Chefman, and Bella Air Fryers
Budget-friendly brands like Gourmia, Chefman, and Bella often use thinner-gauge non-stick coatings on their baskets compared to premium brands. This isn’t necessarily a quality problem, but it does mean the coating can degrade faster if you use anything remotely abrasive. Stick to soft-bristle brushes and microfiber cloths on these units, and avoid baking soda paste directly on the basket surface (it’s fine on the metal heating element, but can dull thinner non-stick coatings over repeated use). These budget units also tend to have simpler fan guards with wider gaps, which is actually an advantage: standard bottle brushes usually fit without any modification.
Power XL and GoWISE Air Fryers
Power XL and GoWISE are two of the most popular budget-to-mid-range air fryer brands, and they share a common design quirk: the heating element is mounted slightly lower than on competing brands, which means food that is even slightly overfilled will make contact with the coil. Owners of these models should be especially vigilant about not exceeding the maximum fill line. The baskets on these units typically have a ceramic non-stick coating rather than Teflon, which is more durable against metal utensils but more susceptible to damage from abrasive cleaning pads. Use only soft sponges and nylon brushes on these baskets.
Cuisinart Air Fryers
Cuisinart’s air fryer toaster ovens are premium units with stainless steel interiors that are easier to clean than non-stick surfaces but show grease stains more visibly. The interior walls can be wiped with a degreasing solution without worrying about damaging a coating, but the glass door requires special attention. Cuisinart recommends using a non-abrasive glass cleaner on the door exterior and a damp cloth on the interior. The crumb tray on Cuisinart models slides out from the front, making it one of the easiest to access and clean among all oven-style air fryers.
Best Air Fryer Degreasers: Product Comparison
While baking soda and vinegar handle most cleaning jobs admirably, there are times when a purpose-made degreaser is the better choice. Heavy carbonized buildup, months of neglect, or simply wanting a faster, less labor-intensive clean are all valid reasons to reach for a commercial product. But not all degreasers are created equal, and some are actively harmful to air fryer components. Here is what you need to know before you buy.
What to Look For in an Air Fryer Degreaser
- Non-toxic and food-safe: Since the degreaser will be used inside an appliance that cooks your food, it should be free of harsh solvents, phosphates, and volatile organic compounds. Look for products labeled “food-safe” or “kitchen-safe.”
- Non-abrasive formula: The degreaser should dissolve grease chemically rather than relying on abrasive particles. Abrasive formulas can scratch non-stick coatings and heating element surfaces.
- Fragrance-free or mild scent: Strong chemical fragrances can linger inside the enclosed air fryer chamber and transfer to your food during the next cook. Unscented or naturally scented products (citrus, eucalyptus) are preferable.
- Spray-on application: A spray bottle allows you to apply the degreaser precisely to the brush or cloth rather than dumping liquid into the unit. This gives you better control and reduces the risk of liquid reaching electrical components.
Top Degreaser Categories
| Category | Best For | Pros | Cons |
|---|---|---|---|
| Citrus-Based Degreasers | Moderate grease buildup | Pleasant scent, biodegradable, effective on oils | Can leave oily residue if not rinsed well |
| Enzymatic Cleaners | Baked-on food and protein residue | Work without scrubbing, food-safe, gentle on surfaces | Slower acting, require longer dwell time |
| Plant-Based Surfactant Degreasers | General degreasing | Non-toxic, effective, widely available | May need multiple applications on heavy buildup |
| Alkaline Degreasers | Heavy, carbonized grease | Most powerful option, fast-acting | Can damage thin non-stick coatings if left too long |
How to Use a Commercial Degreaser Safely
Regardless of which product you choose, the application method matters as much as the product itself. Always spray the degreaser onto your brush or cloth, never directly into the air fryer. Work in small sections, scrubbing gently and wiping away the dissolved grease with a damp cloth. After using any commercial degreaser, wipe all surfaces a second time with a cloth dampened with plain water to remove any chemical residue. Allow the unit to air dry completely before using it for cooking. If you notice any chemical smell during your first cook after cleaning, run an empty cycle at 350 degrees Fahrenheit for ten minutes to burn off any remaining residue, then ventilate the kitchen.
Homemade vs. Store-Bought Cleaning Solutions
One of the most common questions we get is whether it’s worth buying a dedicated appliance degreaser or whether a pantry-staple solution will do the job just as well. The honest answer is: it depends on how bad the buildup is.
The Baking Soda Paste Method
For light-to-moderate grease, a paste made from three parts baking soda to one part water is genuinely effective. Baking soda is mildly abrasive and alkaline, which helps break down polymerized fat without scratching metal or ceramic-coated surfaces. Apply the paste, let it sit for fifteen to twenty minutes so it has time to soften the residue, then scrub gently with a nylon brush. This method costs pennies and uses ingredients almost everyone already has at home.
The White Vinegar Soak
For removable parts like the basket and crisper plate, a soak in a mixture of equal parts white vinegar and warm water can loosen stuck-on grease before you even pick up a brush. Vinegar’s mild acidity dissolves grease differently than baking soda’s alkalinity does, so some people find combining the two methods (vinegar soak followed by a baking soda scrub) produces the best results on baskets that have gone unwashed for a while. Never use vinegar on the heating element itself, since it’s not designed to be submerged in liquid.
Dish Soap and Warm Water
For everyday maintenance, plain dish soap and warm water remain the gold standard for the basket and crisper plate. Look for a soap that specifically states it’s safe for non-stick cookware; some heavily fragranced or antibacterial dish soaps contain ingredients that can leave a residue on porous ceramic coatings over time.
When Store-Bought Degreasers Make Sense
Purpose-made appliance degreasers earn their keep when you’re dealing with heavily baked-on carbon that’s been building for months, or when you want a fragrance-free option that won’t leave a chemical smell behind during your next cook. These products are typically formulated to break down polymerized oils faster than a homemade paste, cutting your scrubbing time significantly. If you cook oily or fried foods multiple times a week, a dedicated degreaser paired with your brush set will save you real time over the long run.
Homemade Solutions
- Nearly free to make
- No harsh chemical fumes
- Ingredients you likely already own
Store-Bought Degreasers
- Faster on heavy, baked-on carbon
- More consistent results
- Costs more per use
Air Fryer Cleaning Accessories That Make a Difference
Beyond brushes and degreasers, there is a growing market of accessories designed to reduce the cleaning burden of air fryer ownership. Some of these are genuinely useful; others are gimmicks that cost money without delivering meaningful results. Here is an honest assessment of the accessories worth buying.
Reusable Silicone Liners
Silicone liners are bowl-shaped inserts that sit inside the basket and catch grease, crumbs, and marinade before they reach the basket surface. They are the single most effective accessory for reducing cleaning time. Good silicone liners have perforated bottoms to allow air circulation (which is essential for the air fryer to crisp food properly) and raised edges to contain spills. They are dishwasher-safe and can be reused hundreds of times. The main downside is that they slightly reduce the basket capacity, and very thin or cheap silicone liners can impart a faint rubbery smell to food during the first few uses. Look for food-grade, BPA-free silicone that is rated for temperatures above 400 degrees Fahrenheit.
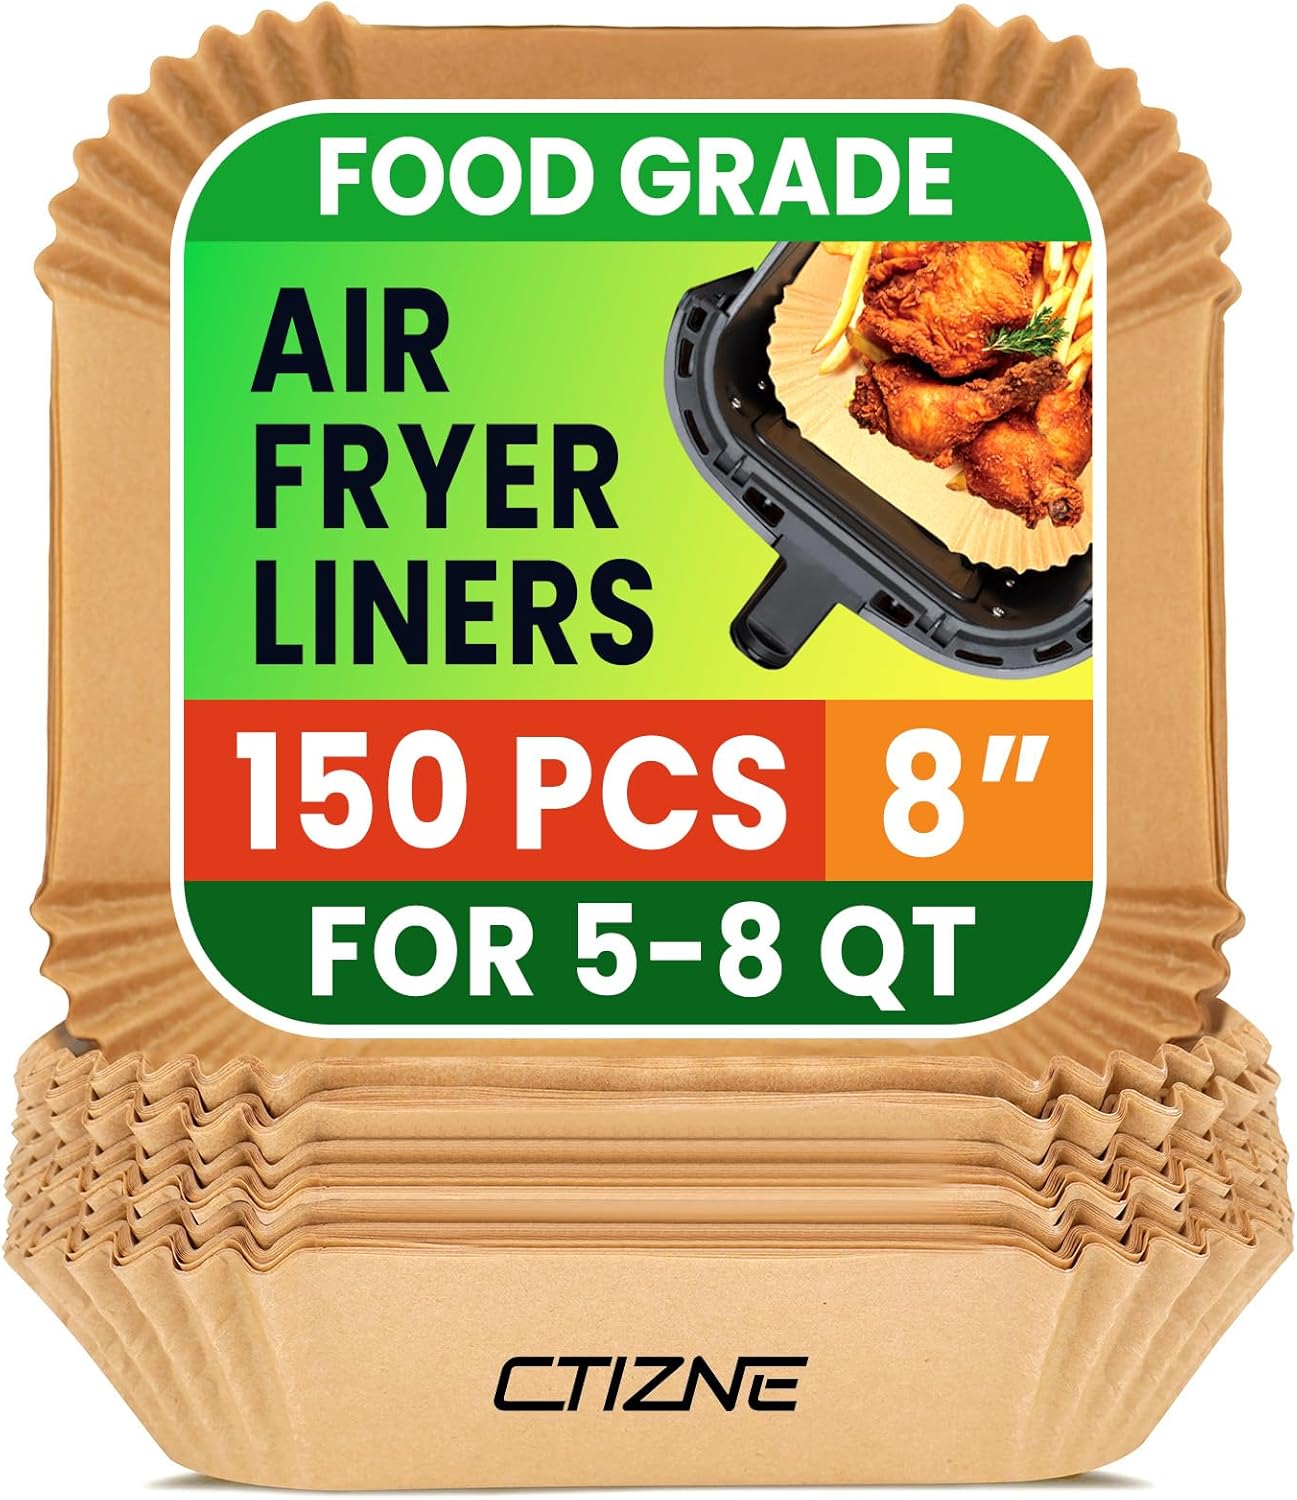
Parchment Paper Liners
Disposable parchment paper liners are a convenient alternative to silicone, especially for messy foods like marinated chicken or fish. They come pre-cut in round or square shapes to fit standard basket sizes, with perforations for airflow. The advantage over silicone is that there is nothing to wash; you simply discard the liner after cooking. The disadvantage is the ongoing cost and the environmental impact of single-use paper products. If you use your air fryer daily, the cost of disposable liners adds up quickly compared to a one-time investment in reusable silicone.
Oil Mist Sprayers
As mentioned in the maintenance section, aerosol cooking sprays damage non-stick coatings over time. A manual oil mister or spray bottle filled with your preferred cooking oil is the recommended alternative. Pump-style misters give you a fine, even spray that uses significantly less oil than pouring from a bottle, which reduces the amount of fat that ends up in the basket and ultimately on the heating element. Look for misters with a glass or stainless steel body, as plastic misters can absorb oil odors over time.
Silicone Tongs and Spatulas
Using metal tongs or forks to flip food inside the basket scratches the non-stick coating. Silicone-tipped tongs and spatulas are gentle on the surface and heat-resistant enough to use inside a hot air fryer. This is a small investment that pays dividends in coating longevity. Keep a dedicated pair near your air fryer so you are never tempted to grab a metal fork in a hurry.
Heat-Resistant Mats
Placing a heat-resistant silicone mat beneath your air fryer protects the countertop from heat damage and catches any grease that drips down the outside of the unit during cooking. Some mats also have a raised edge that contains spills, making cleanup of the surrounding area much easier. This is particularly useful for oven-style air fryers, which tend to splatter more than basket-style models.
Appliance Covers
A fitted dust cover keeps your air fryer clean between uses, preventing dust, pet hair, and kitchen grime from settling on the exterior and potentially being drawn into the ventilation system. Make sure the cover is breathable (fabric, not plastic) to prevent moisture from being trapped against the unit. Only cover the air fryer after it has cooled completely and the basket has been removed and dried separately.
Recommended Cleaning Schedule by Usage
How often you should clean your air fryer depends heavily on what you’re cooking and how frequently you use it. A household that air-fries fatty proteins like bacon or wings four times a week has very different needs than someone who occasionally reheats vegetables. Use the guide below to build a realistic maintenance routine.
| Usage Level | Basket & Crisper Plate | Heating Element | Exterior & Fan Guard |
|---|---|---|---|
| Light (1-2 uses/week) | After every use | Every 4-6 weeks | Monthly wipe-down |
| Moderate (3-5 uses/week) | After every use | Every 2-3 weeks | Every 2 weeks |
| Heavy (daily use, oily foods) | After every use | Weekly | Weekly |
If you notice visible smoke, a burning smell, or a rattling fan at any point, don’t wait for your next scheduled cleaning; address it immediately. These are signs that grease has already reached a point where it’s affecting performance or safety, not just appearance.
Seasonal Deep Clean Calendar
Beyond the regular maintenance schedule, it is worth marking your calendar for a thorough deep clean four times a year, ideally at the start of each season. A seasonal deep clean goes beyond the monthly element wipe-down and includes disassembling every removable component, soaking them all in hot soapy water, scrubbing the element with baking soda paste, wiping down the interior walls and exterior housing, cleaning the ventilation openings, and inspecting the power cord for damage. This is also a good time to check whether any parts need replacing, such as a worn basket coating or a frayed cord. Think of it like changing the oil in your car: the small, regular maintenance keeps things running, but the periodic thorough service catches problems before they become expensive.
What Happens When You Skip Scheduled Cleaning
The consequences of neglecting your air fryer’s cleaning schedule compound over time. In the first month of skipped cleanings, you might notice a slight smell during cooking. By month two, the smell becomes persistent and starts transferring to food. By month three, visible smoke appears during normal cooking temperatures. By month six, the carbonized grease on the element becomes thick enough to insulate it, reducing cooking efficiency and causing the unit to run longer and hotter to achieve the same results. Beyond six months of neglect, you risk motor failure from grease infiltrating the fan assembly, non-stick coating degradation from trapped residue, and in extreme cases, a genuine fire hazard from accumulated fat near the heating element. The cleaning schedule above exists to prevent this cascade, and following it consistently is far easier than trying to reverse months of buildup.
Common Cleaning Mistakes That Damage Your Air Fryer
A surprising number of air fryer replacements happen not because the appliance wore out naturally, but because of avoidable cleaning mistakes. Here are the ones we see most often.
Submerging the Whole Unit
The base of an air fryer houses the motor, fan, and electrical components. Submerging the entire unit in a sink, or even letting water pool in the base while cleaning the basket, is one of the fastest ways to cause an electrical short. Only the removable basket and crisper plate should ever touch standing water.
Using Steel Wool or Abrasive Scrubbers
It bears repeating: metal scouring pads will scratch through non-stick coatings in just a few uses. Once the coating is compromised, food sticks more, cooking becomes uneven, and tiny flecks of the coating can end up in your food. Stick to nylon, silicone, or bamboo tools rated safe for non-stick surfaces.
Spraying Cleaner Directly Into the Vents
As mentioned earlier in this guide, spraying liquid cleaner directly into the fan assembly or vent holes can cause it to pool on internal electrical components. Always apply cleaner to your brush or cloth first, then work it into hard-to-reach areas.
Cleaning While the Unit Is Still Warm
Applying a cold, wet cloth to a hot heating element can cause the metal to warp slightly over repeated thermal shocks, and it’s also a burn risk. Always wait until the unit has cooled completely, which typically takes twenty to thirty minutes after cooking.
Ignoring the Underside of the Basket
Grease doesn’t just collect on the inside of the basket; it also drips through the mesh bottom and coats the underside and the drip tray beneath it. Skipping this area is one of the most common reasons an air fryer starts smoking even after the visible parts have been cleaned.
Forcing Bent or Warped Brush Wires Into the Fan Guard
If a flexible brush wire has become bent from previous use, forcing it into the fan guard can push debris further into the fan rather than removing it, or worse, nick the fan blades themselves. Replace brush heads once the wire loses its shape.
Using the Wrong Cleaning Products
Beyond steel wool and abrasive pads, there are several cleaning products that should never come near an air fryer. Oven cleaner is far too caustic for the delicate non-stick coatings and can release toxic fumes when heated during the next cook. Bleach can corrode metal components and leave a persistent chemical odor. Window cleaner contains ammonia that can damage non-stick surfaces. Even some “all-purpose” cleaners contain ingredients that leave a residue on cooking surfaces. When in doubt, stick to baking soda, white vinegar, mild dish soap, or a degreaser specifically labeled as safe for non-stick cookware and kitchen appliances.
Reassembling Before Everything Is Dry
Putting the basket back into a damp housing traps moisture against the metal surfaces, which can promote rust on any exposed (uncoated) metal and encourage mold growth in the warm, enclosed environment. After cleaning, let every component air dry completely before reassembling. If you are in a hurry, towel-dry the basket and crisper plate, then use a dry cloth to wipe out the interior of the housing before reinserting the basket.
How to Clean a Brand-New Air Fryer Before First Use
It is tempting to take a new air fryer out of the box and start cooking immediately, but there are good reasons to give it a thorough cleaning before its maiden voyage. New air fryers often have manufacturing residue on their surfaces, including machine oils, dust from the factory and shipping process, and sometimes a thin protective coating on the heating element that needs to be burned off. Cooking food in an uncleaned new air fryer can result in a strange chemical taste or smell that taints your first meal.
The First-Clean Checklist
- Remove all packaging: Take out every piece of tape, foam insert, cardboard divider, and plastic wrap. Check inside the basket, beneath the crisper plate, and around the heating element for any packing materials that might have been tucked into crevices.
- Wash the removable parts: Wash the basket, crisper plate, drip tray (if included), and any other removable components in warm water with a drop of dish soap. Rinse thoroughly and dry completely.
- Wipe the interior: Use a damp microfiber cloth to wipe down the interior walls, the heating element, and the inside of the housing. This removes factory dust and any residual machine oil.
- Wipe the exterior: Remove fingerprints, dust, and shipping grime from the exterior surfaces with a damp cloth.
- Run an empty burn-in cycle: Place the clean, empty basket back in the unit and run the air fryer at 400 degrees Fahrenheit for fifteen to twenty minutes in a well-ventilated kitchen. This burns off any remaining manufacturing residue on the heating element. You may notice a slight smell during this cycle; that is normal and expected. Open a window or turn on your range hood.
- Cool and wipe again: After the burn-in cycle, let the unit cool completely, then give the interior one final wipe with a damp cloth to remove any ash from the burned-off residue.
After completing these steps, your air fryer is ready for its first cook. This initial cleaning takes about thirty minutes, but it ensures that your first meal tastes like food, not factory chemicals.
Dishwasher-Safe Parts: What You Can and Can’t Put In
Many modern air fryer baskets and crisper plates are marketed as dishwasher-safe, but that label deserves a closer look before you rely on it every day.
What’s Usually Safe
The removable basket and crisper plate on most mid-range and premium models are designed to withstand dishwasher heat and detergent. Manufacturers typically test these parts specifically because they know most owners will want the convenience. If your manual explicitly lists the basket as dishwasher-safe, using the top rack (which experiences gentler water pressure and lower heat) is generally the safer choice over the bottom rack.
What You Should Never Put in the Dishwasher
The main housing unit, which contains the heating element, fan, and all electrical components, should never go anywhere near a dishwasher. Some drip trays and crumb catchers on budget models are also not dishwasher-safe, even if the basket itself is, because they may have a thinner non-stick layer that isn’t rated for high-heat dishwasher cycles. When in doubt, hand-washing is always the safer default, and it won’t void your warranty the way an incorrect dishwasher cycle sometimes can.
Why Repeated Dishwasher Cycles Can Shorten Coating Life
Even on parts labeled dishwasher-safe, the combination of high heat, harsh detergent, and the tumbling of other dishes against the basket can accelerate wear on non-stick coatings compared to gentle hand-washing. If you want to maximize the lifespan of your basket, consider hand-washing most of the time and reserving the dishwasher for occasions when you’re short on time.
Dishwasher Tips for Air Fryer Parts
If you do use the dishwasher, these tips will help minimize coating damage:
- Always use the top rack: The top rack is further from the heating element at the bottom of the dishwasher, which means lower temperatures and gentler water pressure.
- Avoid harsh dishwasher pods: Some dishwasher detergents are formulated with aggressive enzymes and bleach that can dull non-stick coatings over time. Look for a gentler formula, or use about three-quarters of the recommended amount.
- Do not nest other dishes against the basket: Metal pots, pans, and utensils pressed against the basket during the wash cycle can scratch the coating from the vibration and tumbling. Give the basket its own space on the rack.
- Skip the heated dry cycle: The high-heat drying cycle at the end of a dishwasher run is one of the most damaging stages for non-stick coatings. Open the dishwasher door after the wash cycle and let the basket air dry instead.
- Inspect after each dishwasher cycle: Check the basket for any signs of coating wear, discoloration, or rough patches after each dishwasher wash. If you notice the surface becoming less smooth, switch to hand-washing exclusively.
Air Fryer Cleaning Safety for Pet Owners and Families
If you have curious pets or small children in the house, air fryer cleaning introduces a few safety considerations that go beyond the usual “unplug before cleaning” advice. The combination of cleaning chemicals, hot components, and an appliance that often sits at child-accessible height on the countertop means a little extra caution goes a long way.
Keeping Pets Safe During Cleaning
Cats and dogs are naturally attracted to the smell of grease and food residue, which means a cooling air fryer with its basket removed is essentially an open invitation for a curious nose. During cleaning, keep pets out of the kitchen or at least out of arm’s reach of the disassembled components. The baking soda paste is non-toxic if ingested in small amounts, but commercial degreasers can be harmful to animals. More importantly, the heating element retains heat for a long time after cooking, and a pet that jumps onto the counter to investigate could burn their paws on a still-warm coil.
Child Safety During and After Cleaning
Small children are drawn to appliances at counter height, and an air fryer that has been inverted for element cleaning is at a particularly accessible level. During the cleaning process, keep children out of the kitchen entirely if possible. If that is not practical, place the inverted unit on a surface that is out of their reach, and never leave cleaning chemicals unattended. After cleaning, make sure the unit is fully dry and reassembled before allowing children back into the kitchen, and store any degreaser products in a locked cabinet.
Safe Storage of Cleaning Supplies
Baking soda and vinegar are harmless to have around, but if you use commercial degreasers, store them the same way you would store any household chemical: in their original containers, with labels intact, on a high shelf or in a locked cabinet away from food preparation areas. Never transfer degreasers into food containers or unlabeled spray bottles, as this is one of the most common causes of accidental ingestion in households with young children.
Ventilation During Cleaning
When using any cleaning product stronger than dish soap, ensure the kitchen is well-ventilated. Open a window or turn on the range hood to prevent fumes from accumulating, especially in small kitchens. This is important for everyone in the household, but particularly for children, elderly family members, and anyone with respiratory sensitivities. Even natural cleaning agents like vinegar produce fumes that can irritate eyes and airways in a closed room.
Fire Hazard and Safety Facts You Should Know
Grease buildup in an air fryer isn’t just a cosmetic issue: it’s a genuine fire risk that’s worth taking seriously. Because the heating element in most air fryers sits just inches from the food and operates at very high temperatures, accumulated fat has both the fuel and the ignition source it needs sitting right next to each other.
How Grease Fires Start in Air Fryers
When polymerized grease builds up on or near the heating coil, continued exposure to high heat can eventually cause it to smoke, and in more extreme cases, ignite. This is more likely to happen with high-fat foods like bacon, wings, or anything marinated in oil, especially if the basket is overfilled and the food sits too close to the element.
Warning Signs You Shouldn’t Ignore
- Persistent burning smell that doesn’t go away after wiping down the basket.
- Visible smoke coming from the vents during normal cooking temperatures.
- A rattling or grinding fan noise, which can indicate grease has built up enough to unbalance the blades.
- Discoloration or scorch marks around the vent openings.
If you ever notice actual flames or sparking, unplug the unit immediately if it’s safe to do so, and never use water on a grease fire. Smothering with a lid or using a Class B or K fire extinguisher is the appropriate response, the same as you would with any kitchen grease fire.
Why Manufacturer Cleaning Schedules Exist
Most manufacturer manuals recommend cleaning the heating element at least monthly for a reason: it’s not just about performance, it’s a safety recommendation grounded in how these appliances are engineered. Skipping this step for months at a time is one of the leading causes of premature appliance failure and, in rare cases, house fires reported to consumer safety agencies.
What to Do If a Fire Occurs
In the unlikely event that your air fryer does catch fire, follow these steps in order:
- Do not open the basket: Opening the basket introduces oxygen to the fire, which can cause it to flare up dramatically. Leave the basket closed.
- Unplug the unit: If you can safely reach the plug, disconnect the power. If the cord is hot or the plug area is damaged, do not touch it.
- Smother the fire: If the fire is small and contained within the unit, place a metal lid or baking sheet over the air fryer to cut off the oxygen supply. Do not use water on a grease fire.
- Use a fire extinguisher if needed: A Class K (kitchen) fire extinguisher is ideal. A Class B (flammable liquid) extinguisher also works. Aim at the base of the fire, not the flames.
- Call emergency services: If the fire does not go out within thirty seconds, or if it spreads beyond the air fryer, evacuate the kitchen and call your local emergency number immediately.
Eco-Friendly and Non-Toxic Cleaning Options
If you’re cooking food in the appliance you’re cleaning, it makes sense to want cleaning products that won’t leave harmful residue behind. Fortunately, some of the most effective cleaning methods for air fryers are also among the gentlest on the environment.
Reusable Cleaning Tools
Bamboo-handled brushes and reusable microfiber cloths reduce the amount of disposable scouring pads and paper towels you go through over the appliance’s lifetime. Bamboo is also naturally resistant to bacterial growth compared to some plastics, which is a nice bonus for a tool that touches your cooking equipment.
Plant-Based Degreasers
A growing number of appliance-safe degreasers are formulated without petroleum-based solvents, relying instead on citrus oil or plant-derived surfactants to break down grease. These tend to be gentler on skin and produce less harsh fumes than traditional degreasers, which matters if you’re cleaning in a small kitchen with limited ventilation.
Baking Soda and Vinegar as a Sustainable Default
As covered earlier, baking soda and vinegar are both biodegradable, inexpensive, and widely available without special packaging or shipping footprint. For most households, leaning on these two pantry staples for routine cleaning and reserving store-bought degreasers only for stubborn, heavily baked-on messes strikes a reasonable balance between effectiveness and environmental impact.
Reducing Waste in Your Cleaning Routine
Paper towels are the default cleaning tool in most kitchens, but they generate a surprising amount of waste when used for regular air fryer maintenance. Switching to washable microfiber cloths or reusable bamboo cloths eliminates this waste entirely. A single microfiber cloth can be washed and reused hundreds of times, and it actually outperforms paper towels for grease absorption. Similarly, replacing disposable parchment liners with reusable silicone liners reduces your weekly waste output. These small changes add up over the lifetime of the appliance, and they save money at the same time.
Water Conservation During Cleaning
Air fryer cleaning does not require running water continuously. Fill a basin with warm soapy water for soaking the basket, and use a spray bottle for rinsing rather than holding parts under a running tap. The inverted cleaning method for the heating element uses minimal water by design; you apply a paste with a brush and wipe it off with a damp cloth, rather than rinsing the entire interior under a stream. These habits conserve water while still achieving a thorough clean.
Air Fryer Cleaning Tools: Side-by-Side Comparison
With so many cleaning tools on the market, choosing the right combination for your specific air fryer and cleaning needs can be overwhelming. This comparison table breaks down the most common tool types, their strengths, their limitations, and which parts of the air fryer they are best suited for.
| Tool | Best For | Safe on Non-Stick? | Durability | Price Range |
|---|---|---|---|---|
| Nylon Bristle Brush | Heating element, basket mesh | Yes | 6-12 months with regular use | Low |
| Flexible Coil Brush | Behind heating element, fan blades | Yes | 3-6 months (wire bends over time) | Low |
| Silicone Scrubber | Basket interior, crisper plate | Yes | 12+ months | Low |
| Microfiber Cloth | Wiping residue, drying, exterior | Yes | 100+ washes | Very low |
| Bamboo Detail Brush | Tight corners, mesh holes, grooves | Yes | 6-12 months | Low |
| Plastic Scraper | Burnt cheese, stuck-on food | Yes | 12+ months | Very low |
| Pipe Cleaner / Chenille Stem | Fan guard mesh, tiny vent holes | Yes | Single use (disposable) | Very low |
| Old Toothbrush | Crisper plate bumps, basket corners | Yes | Replace every 3 months | Free |
| Wire / Metal Brush | Outdoor grills only | No – will damage coating | 12+ months | Low |
| Steel Wool / Scour Pad | Not recommended for air fryers | No – will destroy coating | Single use | Very low |
The ideal cleaning toolkit for most air fryer owners consists of a nylon bristle brush for the heating element, a flexible coil brush for hard-to-reach areas, a silicone scrubber or soft sponge for the basket, a microfiber cloth for wiping and drying, and a plastic scraper for stubborn residue. This combination covers every cleaning scenario you are likely to encounter and costs very little to assemble.
Cost Comparison: DIY Cleaning Kits vs. Professional Appliance Cleaning
Some owners, particularly those with heavily neglected units, wonder whether it’s worth paying a professional appliance cleaning service rather than tackling the job themselves.
| Approach | Typical Cost | Time Required | Best For |
|---|---|---|---|
| DIY Brush Kit + Pantry Staples | One-time cost, reused indefinitely | 15-30 minutes | Regular maintenance |
| DIY + Store-Bought Degreaser | Small ongoing cost per bottle | 20-40 minutes | Heavier, infrequent buildup |
| Professional Appliance Cleaning | Significantly more than a DIY kit, per visit | Scheduled appointment | Severely neglected or commercial-use units |
For the vast majority of home users, a one-time investment in a proper brush set pays for itself almost immediately compared to the ongoing cost of professional cleaning, especially since a good brush kit can last for years with basic care. Professional cleaning tends to make more sense for restaurant-grade or commercial air fryers that see daily heavy use and where downtime for a from-scratch DIY clean simply isn’t practical.
The True Cost of Neglect
When comparing cleaning costs, it is worth factoring in the cost of not cleaning. A neglected air fryer that fails prematurely due to grease buildup costs the full replacement price of the unit, which ranges from fifty dollars for a basic basket model to three hundred dollars or more for a premium oven-style unit. A basic cleaning kit costs less than a single fast-food meal and can extend the life of your air fryer by years. When framed this way, the cost comparison is not really between DIY and professional cleaning; it is between spending a small amount on cleaning supplies now or spending a large amount on a replacement appliance later.
Warranty, Replacement Parts, and When to Replace Your Air Fryer
Even with perfect cleaning habits, air fryer components wear out over time. Knowing when to replace individual parts versus the entire unit can save you significant money and prevent safety issues.
Understanding Your Warranty
Most air fryer manufacturers offer a one to two year limited warranty that covers defects in materials and workmanship. What the warranty typically does not cover is damage caused by improper cleaning, such as using abrasive tools that destroy the non-stick coating, submerging the main unit in water, or using chemical cleaners that corrode internal components. This is another reason to follow the cleaning methods described in this guide; they protect not just the appliance, but your warranty coverage as well. Keep your receipt and register your product with the manufacturer as soon as you buy it, as some brands require registration to activate the warranty.
Parts You Can Replace
Most major air fryer brands sell replacement parts directly through their websites or through authorized retailers. The most commonly replaced parts include:
- Baskets: The non-stick coating on baskets degrades over time, especially with frequent dishwasher use or abrasive cleaning. A replacement basket typically costs between fifteen and forty dollars depending on the brand and model.
- Crisper plates: These wear out at roughly the same rate as baskets and are usually available as a separate purchase for ten to twenty-five dollars.
- Drip trays and crumb catchers: These thin metal trays can warp or rust over time and are inexpensive to replace.
- Splatter guards: If your model includes a removable splatter guard, it can usually be ordered separately if the original becomes too clogged to clean effectively.
When to Replace the Entire Unit
Some problems are not worth fixing with replacement parts. If the heating element itself is damaged, corroded, or no longer heats evenly, replacing the element is often not possible or not cost-effective compared to buying a new unit. Similarly, if the motor is making grinding or rattling noises that persist after cleaning the fan, the motor bearings may be failing, which is a terminal issue for most consumer air fryers. Other signs that it is time for a full replacement include a cracked housing, a power cord that shows exposed wiring, persistent electrical smells that survive thorough cleaning, and any visible sparking or arcing from the unit during operation.
Recycling Your Old Air Fryer
When the time comes to replace your air fryer, do not throw it in the regular trash. Air fryers contain electrical components, heating elements, and sometimes non-stick coatings that should not go to a landfill. Many municipalities have e-waste recycling programs that accept small kitchen appliances. Some retailers also offer take-back programs when you purchase a new unit. Check with your local waste management authority for the nearest drop-off location.
Storage and Between-Use Care
How you store your air fryer between uses has a bigger impact on grease buildup and odor than most people realize.
Let It Cool and Dry Completely Before Storing
Storing a still-damp basket inside the closed unit traps moisture, which can encourage mildew growth and lock in odors. Always let both the basket and the main unit air out for at least thirty minutes with the basket removed before pushing the appliance back against a wall or into a cabinet.
Keep the Basket Out When Not Actively Cooking
Many owners store their air fryer with the basket left inside the unit between uses. This can trap residual grease smell inside the closed chamber. Where possible, store the basket separately, or at minimum leave it slightly ajar rather than fully seated, to allow air circulation.
Avoid Covering a Warm Unit
If you use a dust cover or keep your air fryer inside an appliance garage, make sure it has fully cooled first. Covering a still-warm unit traps residual moisture and heat, which can degrade both the housing and any lingering food residue into a harder, stickier deposit than it would otherwise become.
Optimal Storage Locations
The best place to store an air fryer is on an open countertop with adequate ventilation on all sides. If counter space is limited and you must store it in a cabinet, make sure the cabinet is dry, well-ventilated, and large enough that the unit is not cramped. Avoid storing the air fryer near the stove, where grease splatter from cooking on the burners can accumulate on the air fryer’s exterior and ventilation openings. A pantry shelf or a dedicated appliance shelf in the garage are both acceptable alternatives, as long as the storage area is dry and temperature-stable.
Long-Term Storage
If you are storing the air fryer for an extended period (a month or more), such as during a long vacation or a kitchen renovation, give it a thorough deep clean before putting it away. Any grease left on the element or inside the housing will harden and become much more difficult to remove after sitting undisturbed for weeks. Wrap the power cord loosely (do not wrap it tightly, as this can stress the internal wiring) and place the unit in a breathable dust cover or a pillowcase. Store the basket and crisper plate separately, either in the same location or in a nearby cabinet, to allow both the basket and the housing to air out independently.
Buying Guide: How to Choose the Right Cleaning Brush Set
With dozens of similar-looking brush kits on the market, it helps to know what actually separates a good set from a mediocre one.
Bristle Material
Nylon bristles are the standard for a reason: they’re stiff enough to dislodge baked-on residue but won’t scratch non-stick coatings or metal heating elements. Avoid any kit that includes wire or metal-bristle brushes, regardless of how the packaging markets them, since these are designed for grill grates and outdoor cookware, not delicate appliance interiors.
Handle Length and Flexibility
Measure the depth of your specific air fryer model before assuming a brush will reach the back of the heating element. A set that includes at least one flexible, bendable-wire brush will cover toaster-oven-style units and basket-style units alike, since the flexibility lets you angle around obstacles that a rigid handle can’t navigate.
Variety of Brush Heads
Look for a kit that includes multiple head shapes and sizes: a small detailing brush for tight mesh gaps, a wider brush for flat surfaces like the basket floor, and a narrow pipe-style brush for fan blades. A single one-size brush will always involve some compromise depending on which part of the unit you’re cleaning.
Storage and Durability
Since you’ll be using this kit repeatedly for years, consider whether it comes with its own storage caddy or hanging option, which keeps bristles from getting crushed in a drawer. Bamboo or reinforced-plastic handles tend to outlast cheaper thin plastic over repeated washing.
Red Flags to Watch For
When shopping for a cleaning brush set, be wary of these warning signs that indicate a low-quality product:
- Bristles that shed on first use: If the bristles fall out when you run your hand over the brush, they will shed into your air fryer during cleaning, creating a new problem instead of solving one.
- Metal ferrules without coating: The metal band that holds the bristles to the handle should be coated or covered. Exposed metal ferrules can scratch the heating element or basket surface.
- Handles that are too short: A brush with a handle shorter than six inches will not reach the back of most air fryer heating elements. Measure before you buy.
- No flexible brush included: Any kit that only includes rigid brushes is missing a critical tool for reaching behind the element and into the fan guard.
- Extremely low price with many pieces: A kit that includes twenty pieces for a suspiciously low price is likely using cheap materials that will not last. A quality set of four to six well-made brushes is more useful than a drawer full of flimsy tools.
Frequently Asked Questions
Can I use a magic eraser on my air fryer?
You can use a magic eraser on the exterior plastic housing, but avoid using it on the non-stick basket or the heating element, as the micro-abrasives can degrade the coating.
How do I clean the grease out of the fan?
This is tricky. You will need a long, thin bottle brush. With the unit unplugged and inverted, gently poke the brush through the element guard to dust off the fan blades. Do not force it, or you may bend the blades.
My basket coating is peeling, can I still use it?
If the non-stick coating is flaking into your food, you should replace the basket or use a silicone liner. Ingesting Teflon flakes is generally not recommended.
How often should I replace my air fryer brush set?
Nylon bristle brushes typically last six to twelve months with regular use. Replace them when the bristles become splayed, flattened, or start shedding. Flexible coil brushes should be replaced every three to six months, or sooner if the wire loses its ability to hold a bent shape.
Can I use baking soda on the basket’s non-stick coating?
Baking soda paste is safe for the metal heating element but can be mildly abrasive on thinner non-stick coatings over repeated use. For the basket, stick to dish soap and a soft sponge for routine cleaning, and reserve baking soda for occasional deep cleans only.
Why does my air fryer smell like fish after cleaning?
Fish odors are particularly persistent because the oils penetrate into the non-stick coating’s microscopic pores. After cleaning, run a lemon water cycle (lemon halves in a bowl of water at 350 degrees Fahrenheit for ten minutes) to neutralize the odor. If the smell persists, place an open box of baking soda inside the cooled, empty unit overnight.
Is it normal for a new air fryer to smell during the first use?
Yes, a slight chemical smell during the first one to three uses is normal and comes from manufacturing residue on the heating element. Run an empty burn-in cycle at 400 degrees Fahrenheit for fifteen minutes before cooking food for the first time. If the smell persists beyond the third use, contact the manufacturer.
Can I clean my air fryer with just water?
Water alone can handle light residue on the basket and crisper plate, but it will not dissolve polymerized grease on the heating element. You need at least baking soda or dish soap to break down the grease bonds. Water is fine for a quick rinse between uses, but it is not sufficient for deep cleaning.
How do I remove rust from my air fryer basket?
Light surface rust on exposed metal edges (where the non-stick coating has worn away) can be removed with a paste of baking soda and water applied with a soft cloth. Rinse thoroughly and dry immediately. If the rust is extensive or the basket has a perforated rust pattern, the basket should be replaced, as compromised metal can affect food safety.
Should I clean my air fryer after cooking frozen foods?
Yes. Even though frozen foods like french fries or nuggets seem “clean,” they release starch, small amounts of oil, and moisture during cooking. These residues accumulate on the basket and, over time, on the heating element. A quick wipe-down after every use, regardless of what you cooked, is the best maintenance habit.
Can I use a steam cleaner on my air fryer?
A handheld steam cleaner can be effective for loosening grease on the heating element and interior walls, but use it with caution. Direct a focused steam jet at the element only, and avoid steaming the fan assembly, control panel, or any electrical connections. After steaming, wipe away the loosened residue with a microfiber cloth and allow the unit to dry completely before plugging it in.
What temperature should I run the lemon cleaning cycle at?
350 degrees Fahrenheit is the optimal temperature for a lemon cleaning cycle. This is hot enough to produce effective steam from the lemon water but not so hot that it scorches the lemon or creates additional smoke from any existing residue. Run the cycle for ten minutes, then let the unit cool naturally before wiping down.
Do air fryer liners affect cooking performance?
Perforated silicone liners have minimal impact on cooking performance because the holes allow air to circulate freely. Solid (non-perforated) liners or parchment paper without holes can significantly reduce airflow, resulting in food that is less crispy on the bottom. Always use liners with adequate perforation for the best results.
How do I clean an air fryer that has been stored for months?
An air fryer that has been in storage will likely have hardened grease and dust buildup. Start by removing all removable parts and soaking them in hot soapy water for thirty minutes. Wipe down the interior with a damp cloth to remove dust, then inspect the heating element. If there is visible buildup, apply baking soda paste and follow the deep cleaning process described in this guide. Run an empty burn-in cycle at 400 degrees Fahrenheit for fifteen minutes before cooking food.
Can I use rubbing alcohol to clean my air fryer?
Rubbing alcohol (isopropyl alcohol) can be used to clean the exterior plastic housing and the control panel, as it evaporates quickly and leaves no residue. However, do not use it on the non-stick basket or the heating element, as it is flammable and can leave a residue that produces fumes when heated during cooking. For interior surfaces, stick to baking soda, vinegar, or dish soap.
Looking for more kitchen upgrades? Check out our list of smart lifestyle upgrades to modernize your home cooking experience.
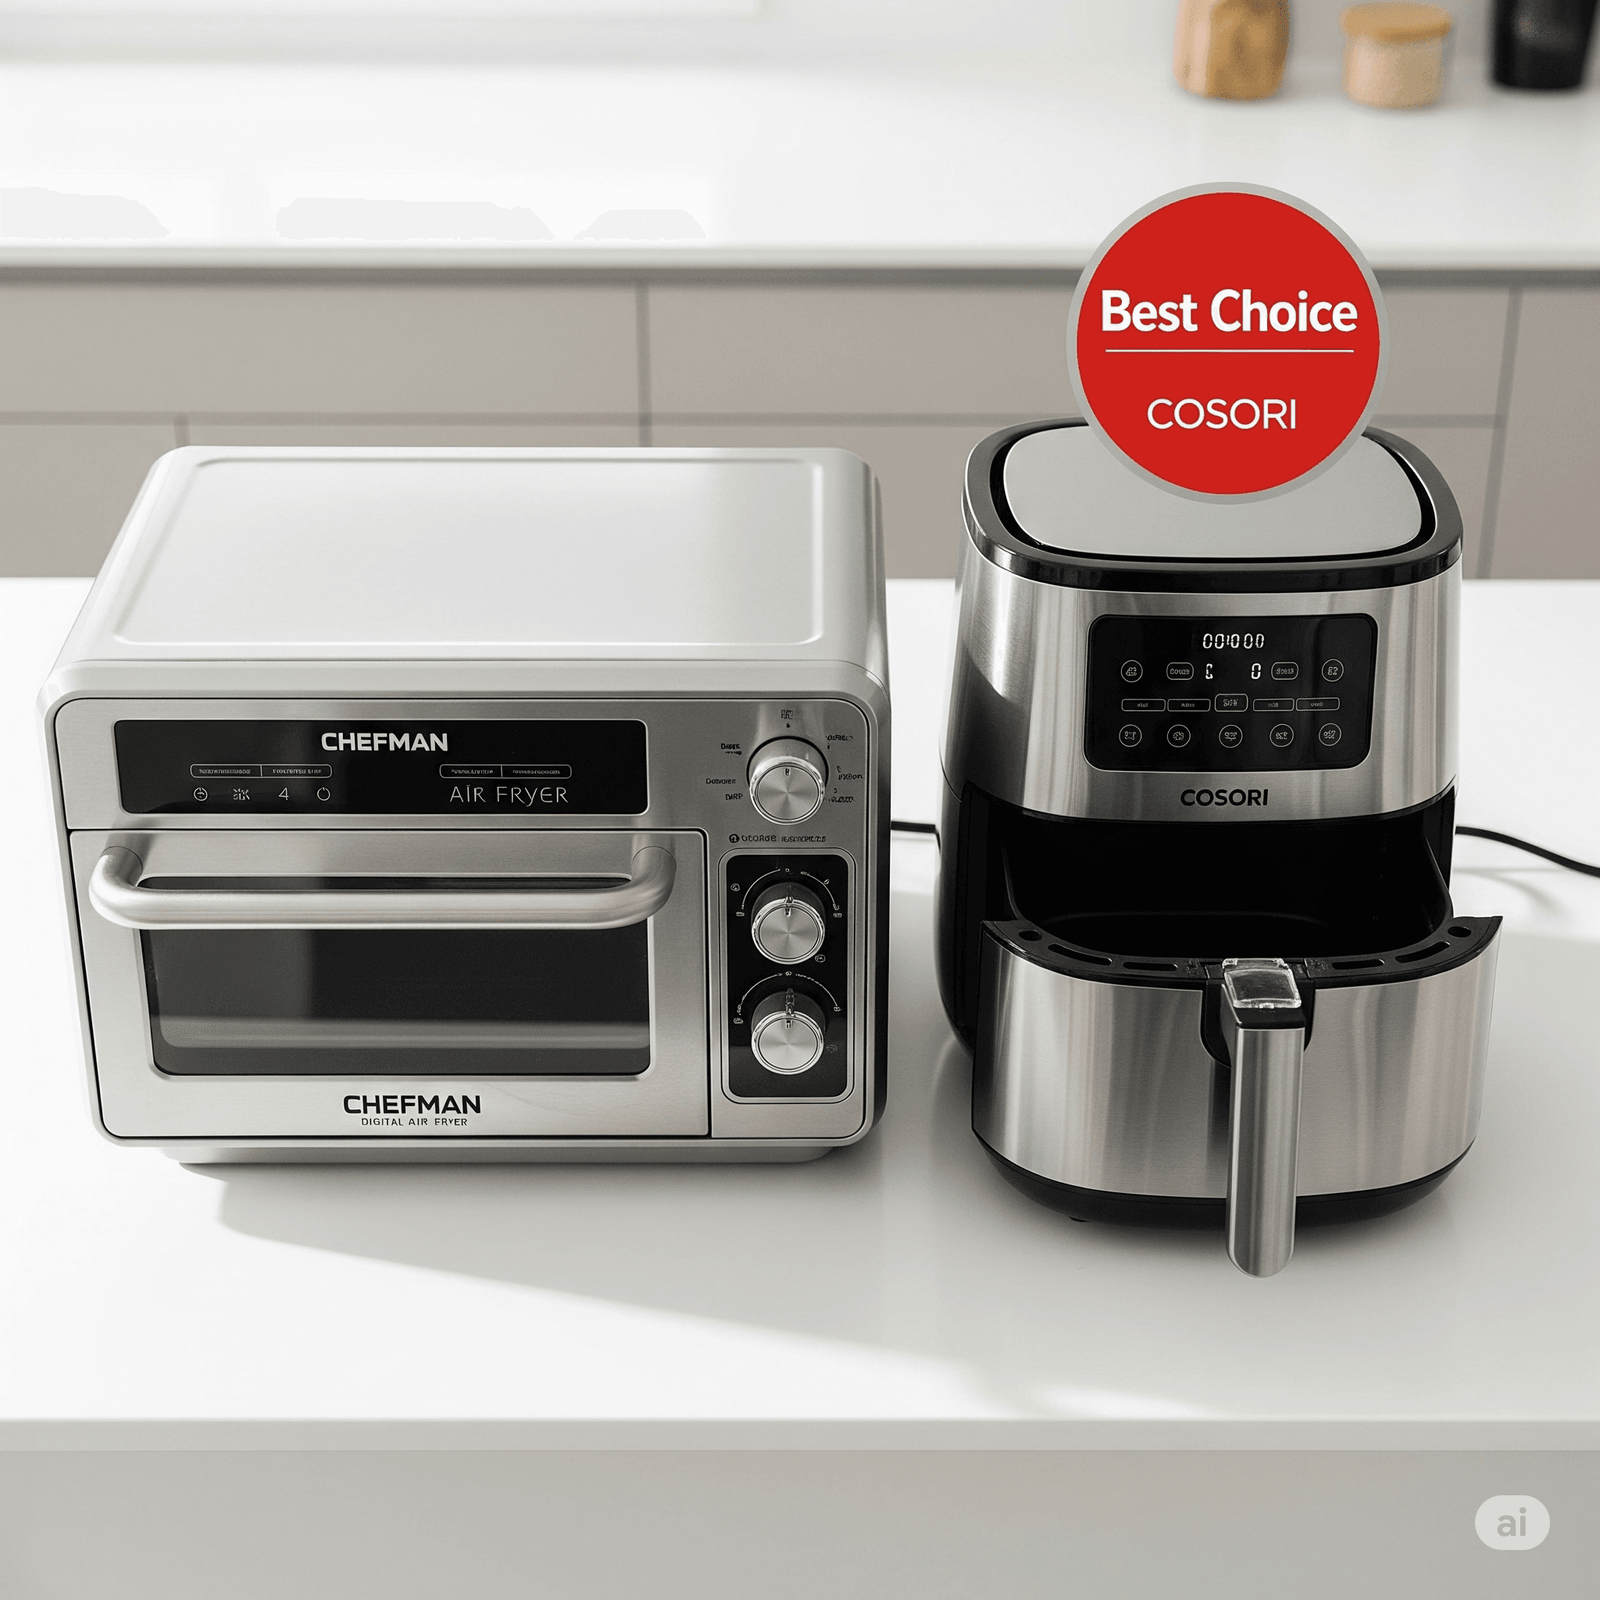
Chefman Digital Air Fryer vs Best Choice Air Fryer
A detailed comparison between two popular air fryer models to help you make an informed decision for your kitchen.
Read More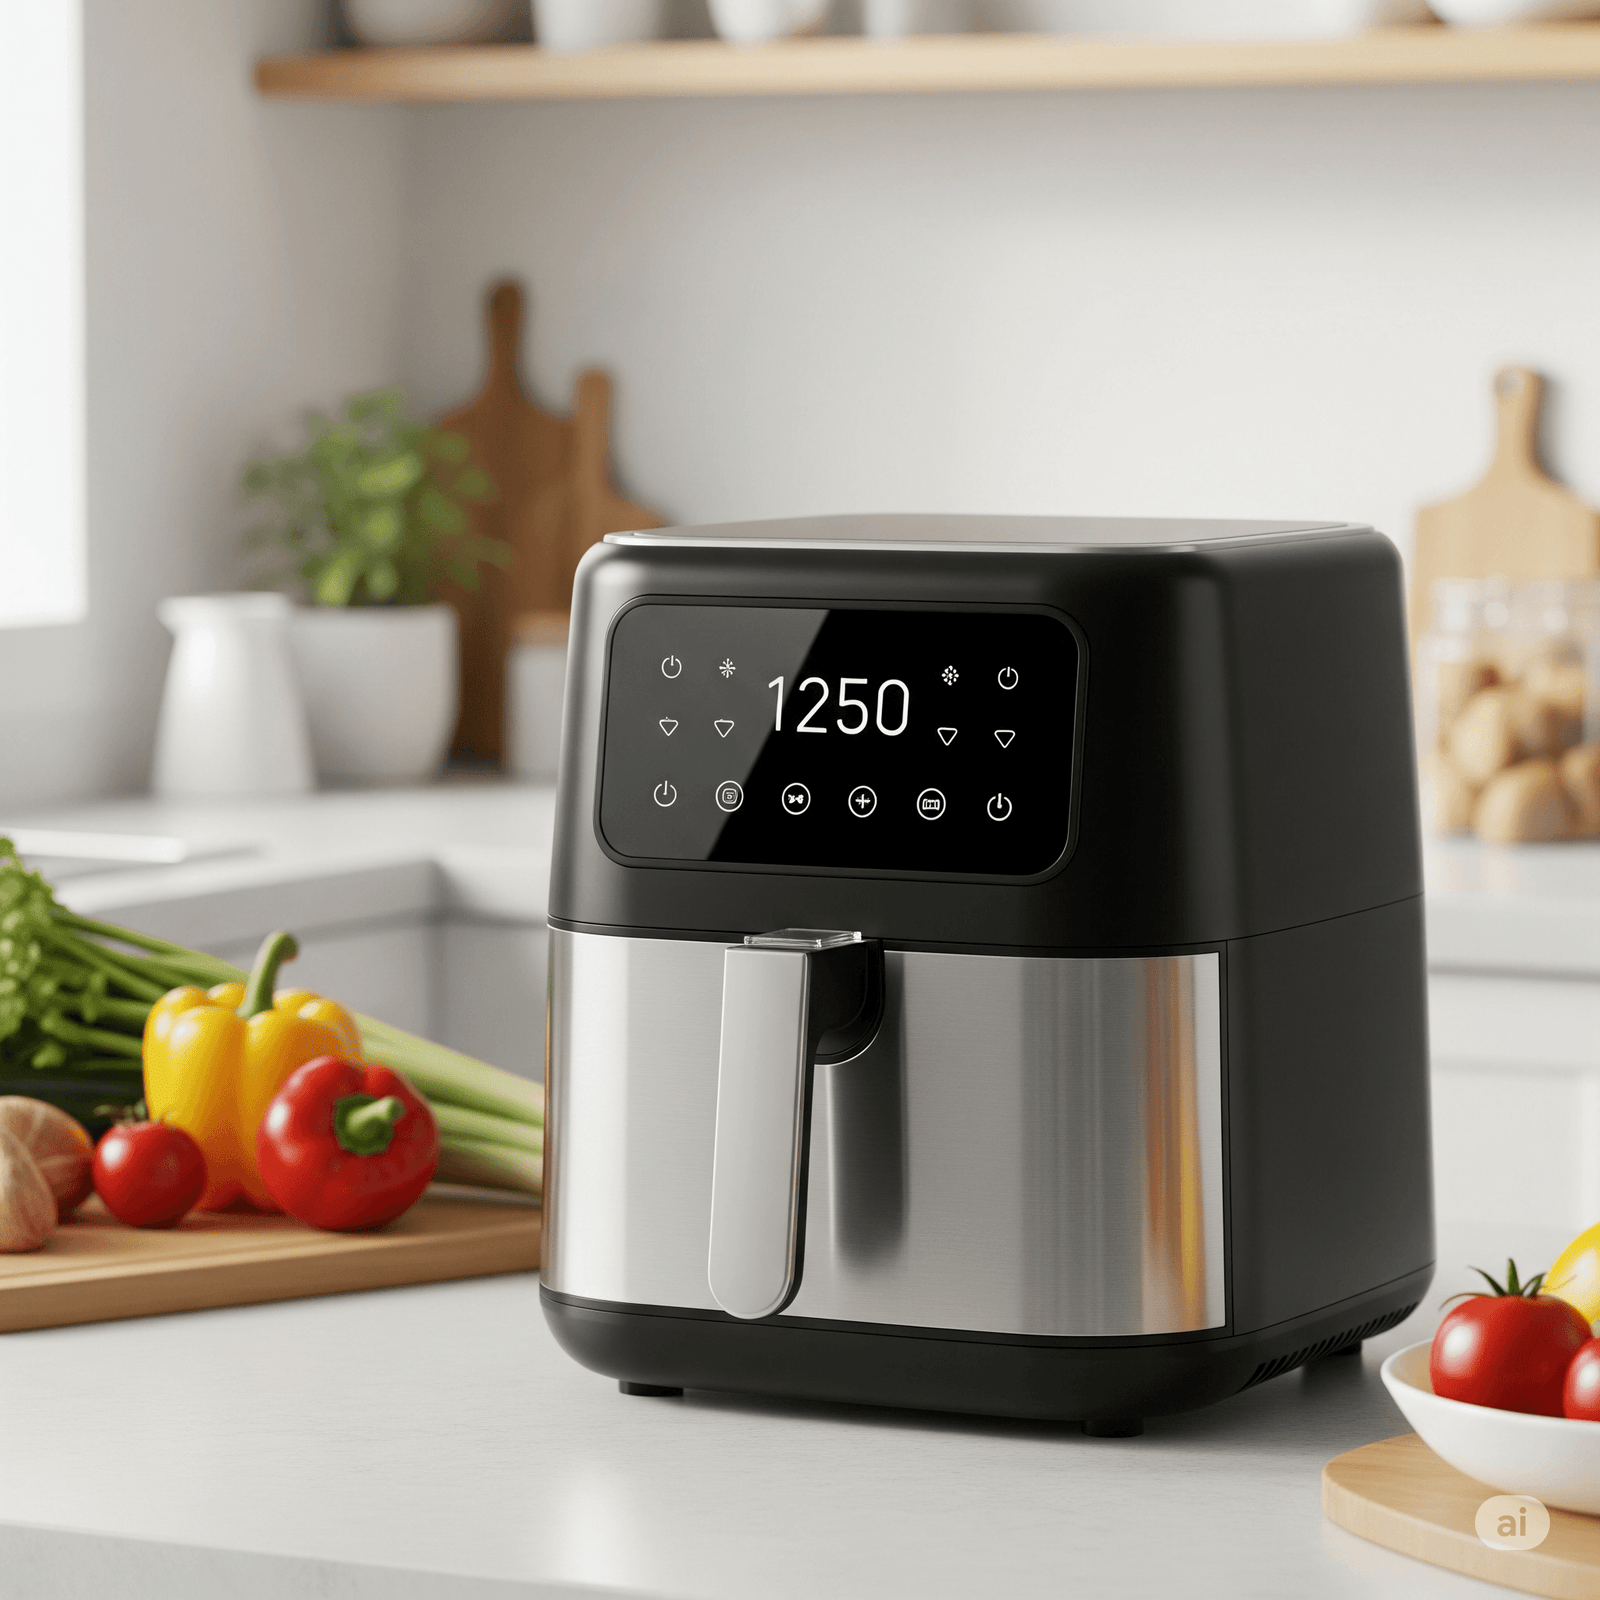
Best Small Digital Air Fryer Under $100
Discover the top small and affordable digital air fryers that offer great value without compromising on performance.
Read More
Thomson Pressure Cooker Review: An Affordable Alternative to the Ninja Foodi?
An in-depth review of the Thomson pressure cooker, comparing it to the Ninja Foodi in terms of features, performance, and price.
Read More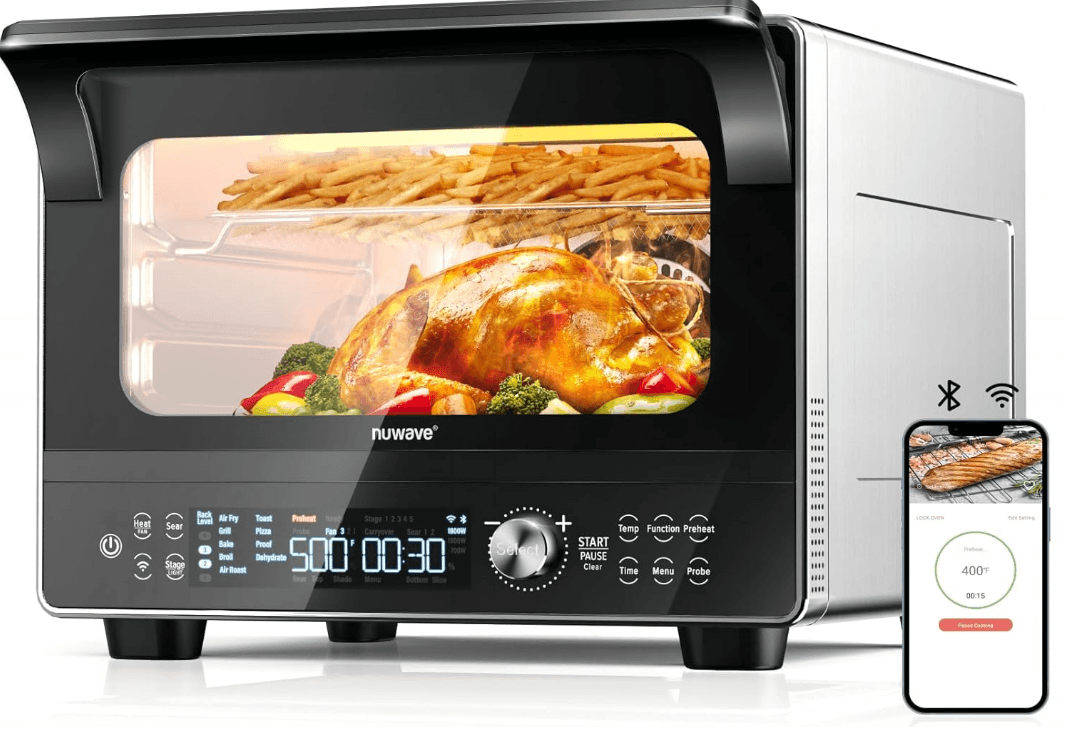
NUWAVE IQ360 Pro Smart Oven Reviews
A comprehensive review of the NUWAVE iq360 Pro Smart Oven, exploring its features, pros, and cons to see if it’s the right fit for your kitchen.
Read More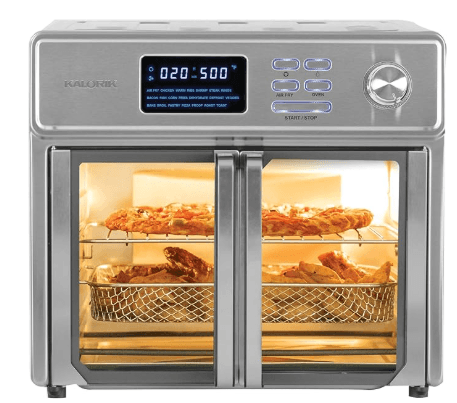
Kalorik MAXX Air Fryer Oven Reviews
Explore the features and performance of the Kalorik MAXX Air Fryer Oven in this detailed review.
Read More


