Troubleshooting Guide: Why Your Air Fryer Fan Stopped Spinning & How to Fix It
- Quick Diagnosis
- Common Causes
- Troubleshooting Steps
- Repair vs. Replace
- Best Replacements
- How Fans Work
- Motor Types
- Noise Guide
- Deep Cleaning
- Multimeter Testing
- Thermal Fuse
- Death Signs
- Overheating Fixes
- Safety Interlock
- Warranty Claims
- Brand Reliability
- DIY Tools
- vs Oven vs Toaster
- User Mistakes
- Capacitor Failure
- Maintenance Schedule
- Replacement Parts
- Energy Efficiency
- Accessories
- Smart Fryer Issues
- FAQ
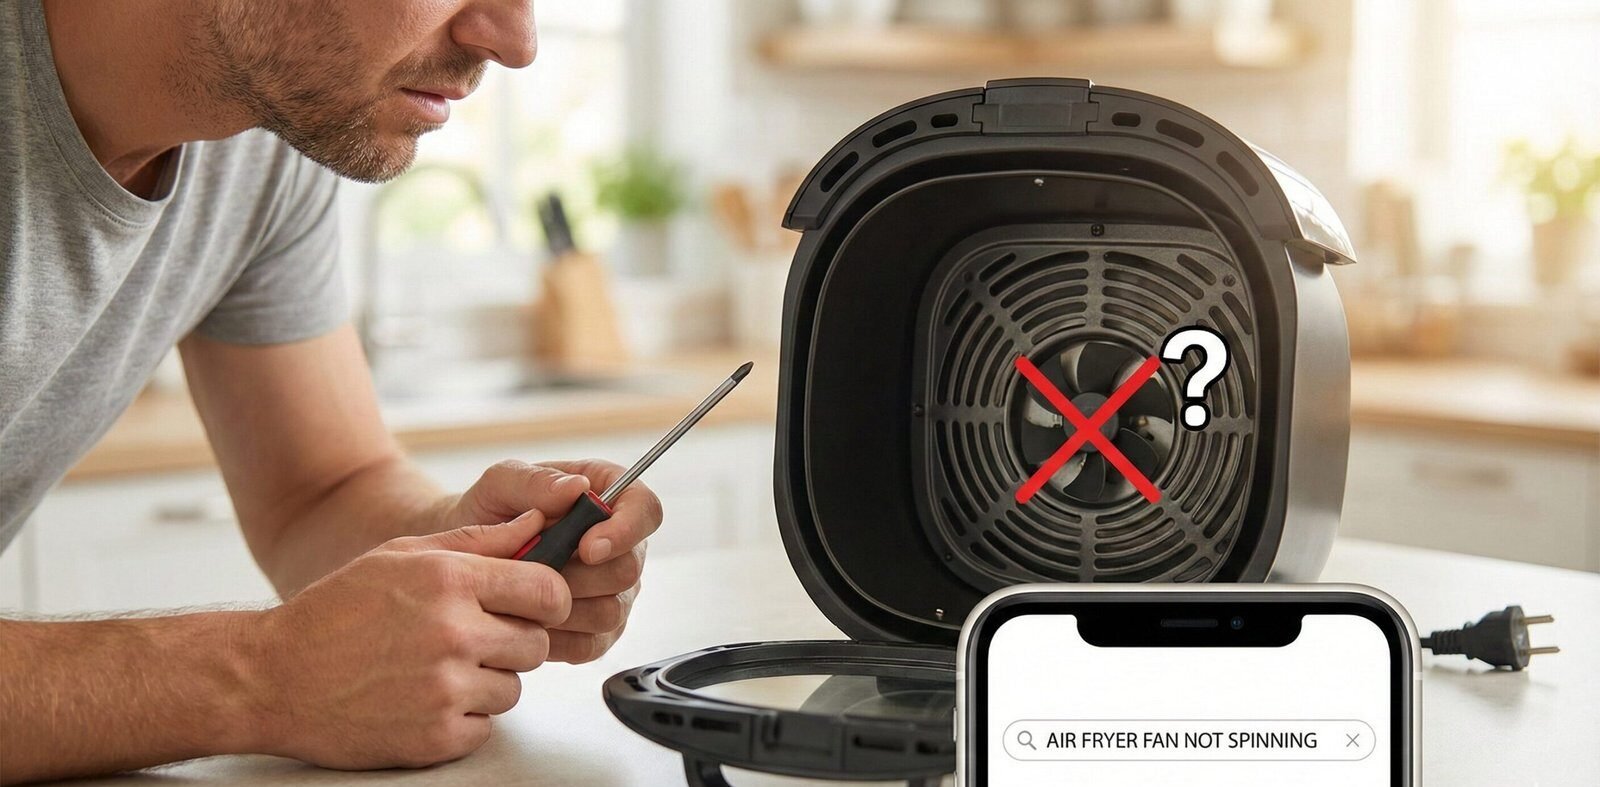
There is nothing worse than prepping a batch of wings, sliding the basket in, and hearing… silence. If your air fryer fan is not spinning, your appliance effectively becomes a small, dangerous toaster oven. The fan is the heart of an air fryer—it’s responsible for that “crispy” texture we all love.
If you’re wondering whether you can fix it with a screwdriver or if it’s time to toss it, this guide covers everything from safety switches to motor burnout.
Quick Diagnosis: Is it Dead?
Before you start unscrewing the casing, check these “stupid simple” fixes that solve 30% of cases immediately.
| Symptom | Likely Culprit | Quick Fix |
|---|---|---|
| Unit has power, lights are on, but silence. | Drawer Safety Switch | Remove and re-insert the basket firmly. Push hard. |
| Humming or buzzing sound, no spin. | Jammed Fan / Motor | Turn it upside down and shake gently; check for debris. |
| Completely dead (no lights). | Thermal Fuse | Requires internal repair or replacement. |
5 Common Reasons the Fan Stops
Air fryers are relatively simple machines. When the fan fails, it is usually one of the following:
- The Safety Interlock Switch: If the drawer isn’t clicking the microswitch, the fan won’t engage.
- Grease Build-up: Over time, sticky grease creates resistance on the fan bearings.
- Thermal Fuse Blown: A safety feature that cuts power if the unit gets too hot (often caused by #2).
- Loose Wiring: Vibrations can shake internal wires loose over time.
- Motor Burnout: The fan motor has simply reached the end of its life.

Keeping the heating element and fan clean is the #1 way to extend motor life.
Check Price on AmazonStep-by-Step Troubleshooting
If the quick fixes didn’t work, let’s dig deeper. You will need a screwdriver and good lighting.
1. The “Push” Test (Safety Switch)
Most air fryers have a small microswitch near the bottom of the main cavity. When the basket slides in, it hits this switch. If the plastic tab on your basket is chipped, or the switch is stuck, the fan won’t start.
- Test: Use a wooden chopstick (non-conductive) to manually press the switch while the unit is plugged in. If the fan starts, your basket is the problem, not the motor.
2. The Obstruction Check
Unplug the unit and wait for it to cool completely. Turn the air fryer upside down (remove the basket first). Shine a flashlight into the heating element area.
- Look for a piece of parchment paper or food wrapper that might have been sucked up into the fan.
- Tip: Never put liner paper in the fryer during pre-heating! The air blows it straight into the heating element. (Read more on safe liner usage here).
3. Spin the Fan Manually
With the unit UNPLUGGED and cool, use a long object to gently nudge the fan blades through the grate. Do they spin freely? If there is heavy resistance or a “gritty” feeling, the bearings are seized. This usually requires a motor replacement.
Repair vs. Replace Calculator
Is it worth fixing? Use this general rule of thumb:
🛠 Repair It If…
- The unit cost over $150.
- It is less than 1 year old (Warranty!).
- You are comfortable with a multimeter and soldering.
- The problem is just a stuck switch.
🗑 Replace It If…
- The unit cost under $80.
- You smell burning plastic or ozone.
- The fan motor is seized tight.
- You’ve had it for 3+ years.
If you suspect the issue is electrical overload or smoke related, check out our guide on why air fryers smoke before attempting a fix.
Top Rated Replacements (If Yours is Toast)
If your diagnosis leads to the trash can, here are the most reliable models currently on the market, categorized by user needs.
1. The Reliability King: Ninja Air Fryer
Ninja units are known for their high-velocity fans and durable motors. They rarely suffer from the “seized bearing” issue common in cheaper brands.

Ceramic coated basket, wide temperature range, and industrial-grade fan motor.
Check Price on Amazon2. The Budget Pick: Cosori Pro LE
If you need a quick replacement that doesn’t break the bank but still offers modern safety features, the Cosori is a solid choice.
| Feature | Ninja AF101 | Cosori Pro LE |
|---|---|---|
| Capacity | 4 Quart | 5 Quart |
| Fan Noise | Medium | Whisper Quiet |
| Warranty | 1 Year | 2 Years |

Elegant design, quiet operation, and massive capacity for the price.
Check Price on AmazonPrevention & Maintenance
To ensure your next air fryer fan doesn’t suffer the same fate, follow these safety protocols:
- Clearance: Always leave 5 inches of space behind the air fryer vent. If the fan can’t pull air, it strains the motor.
- Don’t Overfill: See our guide on air fryer safety tips regarding overfilling baskets, which restricts airflow.
- Regular Cleaning: Once a month, turn the unit upside down and gently brush the heating element and fan area to remove grease buildup.
How Air Fryer Fans Actually Work: The Science Behind Convection Cooking
Understanding how your air fryer’s fan operates is the first step toward diagnosing problems and extending the life of your appliance. At its core, an air fryer is a compact convection oven. The fan is not just a luxury feature—it is the defining component that separates an air fryer from a regular toaster oven.
The Convection Principle
Convection is the transfer of heat through the movement of a fluid—in this case, air. When you heat air without moving it, a thin layer of hot air forms around the food. This layer acts as insulation, slowing down the cooking process. The air fryer’s fan forces this hot air to circulate rapidly around the food, constantly stripping away that insulating layer and replacing it with fresh, hot air. This is what creates the “fried” texture without submerging food in oil.
The fan sits above or behind the heating element and blows air downward through a perforated basket. The air passes through the food, picks up moisture, and exits through vents on the sides or back of the unit. Some advanced models use a cyclonic pattern where the air spirals around the cooking chamber, ensuring even heat distribution from every angle.
Airflow Speed and Cooking Results
The speed of the fan directly impacts cooking results. Most air fryers operate at fan speeds between 1,500 and 3,000 RPM (revolutions per minute). Higher RPM means faster air circulation, which translates to crispier exteriors and more even cooking. Budget models tend to run at lower RPMs, which is why they sometimes produce unevenly cooked food with soggy spots.
The airflow velocity also affects how quickly moisture is removed from the food’s surface. This is the Maillard reaction in action—the chemical process that creates that golden-brown crust. Without adequate airflow, the Maillard reaction happens unevenly, resulting in pale, limp food that tastes steamed rather than fried.
Why Fan Failure Is Catastrophic
When the fan stops, the heating element continues to generate heat (typically 800 to 1,800 watts). Without the fan to distribute that heat, the temperature inside the cooking chamber rises rapidly and unevenly. The element itself can reach temperatures exceeding 500°F in a confined space, which can melt plastic housing, damage non-stick coatings, and even ignite grease deposits. This is why the fan failure is not just an inconvenience—it is a genuine safety hazard.
Most modern air fryers include a thermal cutoff (thermal fuse) that should activate before temperatures reach dangerous levels. However, this is a one-time safety device. Once it blows, the entire unit is dead until the fuse is replaced. Some premium models use a resettable thermal switch instead, which is more forgiving but less common in budget units.
The Role of Air Intake and Exhaust
The fan does not work in isolation. It depends on clear air intake and exhaust pathways to function properly. The intake draws cool room air into the unit, while the exhaust pushes hot, moisture-laden air out. If either pathway is blocked—by a wall behind the unit, by grease buildup in the vents, or by an overfilled basket—the fan has to work harder to maintain airflow. This extra strain accelerates motor wear and can cause the motor to overheat and shut down.
This is why the first thing any repair guide tells you is to check ventilation. A fan that appears to be “broken” may simply be struggling against a blocked airflow path. Always ensure at least 5 to 6 inches of clearance on all sides of your air fryer, and never place it inside a cabinet or enclosed shelf without adequate ventilation.
Air Fryer Fan Motor Types: AC vs DC and Why It Matters
Not all air fryer fans are created equal. The type of motor driving your fan affects its longevity, noise level, energy efficiency, and repairability. Understanding the difference between AC and DC fan motors can help you diagnose problems more accurately and make smarter purchasing decisions.
AC (Alternating Current) Motors
AC motors are the most common type found in air fryers, especially in budget and mid-range models. They are simple, durable, and inexpensive to manufacture. An AC motor uses alternating current from your wall outlet to create a rotating magnetic field, which spins the fan blades. These motors typically operate at a fixed speed—they are either on or off, with no variable speed control.
The main advantage of AC motors is their reliability. With fewer electronic components, there is less that can fail. However, they tend to be louder than DC motors because they run at a constant high speed regardless of the cooking mode. They also consume slightly more energy since they cannot adjust their power draw based on demand.
DC (Direct Current) Motors
DC motors are found in premium air fryers and offer several advantages over their AC counterparts. A DC motor converts AC power from the wall outlet to DC using an internal circuit board, then uses that DC power to drive the fan. This allows for variable speed control—the fan can slow down for gentle convection baking or speed up for high-heat air frying.
DC motors are significantly quieter than AC motors, often producing 30 to 40 percent less noise at the same airflow level. They also tend to last longer because they experience less vibration and heat generation during operation. The tradeoff is complexity: the circuit board that converts AC to DC is an additional point of failure. If your premium air fryer suddenly dies with no warning (no humming, no lights, nothing), the DC conversion board is a common culprit.
Brushed vs Brushless Motors
Within the AC and DC categories, there is another distinction: brushed and brushless motors. Brushed motors use physical carbon brushes that make contact with a spinning commutator to deliver electrical current to the rotor. Over time, these brushes wear down, creating carbon dust that can contaminate the bearings and cause the gritty, resistant feel you might notice when spinning the fan manually.
Brushless motors (BLDC) eliminate this wear point entirely. They use electronic commutation instead of physical brushes, resulting in a motor that runs cooler, quieter, and longer. Most premium air fryers from brands like Breville and high-end Ninja models use brushless DC motors. If your air fryer has lasted more than 5 years without fan issues, there is a good chance it uses a brushless motor.
| Motor Type | Typical Lifespan | Noise Level | Repairability | Common In |
|---|---|---|---|---|
| AC Brushed | 2–4 years | Loud | Easy to replace | Budget models ($30–$60) |
| AC Brushless | 4–6 years | Medium | Moderate | Mid-range ($60–$120) |
| DC Brushed | 3–5 years | Quiet | Moderate | Mid-range ($80–$150) |
| DC Brushless (BLDC) | 6–10 years | Very Quiet | Hard (requires board) | Premium ($150+) |
How to Identify Your Motor Type
Check your air fryer’s model number and look up the specifications on the manufacturer’s website. Alternatively, remove the bottom panel (with the unit unplugged and cool) and look at the motor. AC motors are typically larger, cylindrical, and have two wires. DC motors are smaller, often square or rectangular, and have a small circuit board attached. If you see a circuit board with capacitors and transistors near the motor, you have a DC motor.
Complete Air Fryer Noise Diagnostic Guide
Sound is one of the most useful diagnostic tools when troubleshooting your air fryer. Different sounds indicate different problems, and learning to identify them can save you hours of unnecessary disassembly. This guide covers every sound your air fryer can make and what each one means.
Rattling or Clattering
A rattling sound is the most common noise complaint and usually the easiest to fix. It typically indicates one of the following:
- Loose screws: The vibration from the fan can loosen screws over time, especially in units that are moved frequently. Check all visible screws on the exterior and bottom panel.
- Loose fan blade: The fan blade is pressed onto the motor shaft with a friction fit. Over time, this fit can loosen, causing the blade to wobble and rattle against the housing.
- Debris in the fan: A small bone, seed, or piece of food can get lodged in the fan area and rattle against the blades as they spin.
- Damaged basket: A warped or damaged basket can vibrate against the cooking chamber walls during operation.
Fix: Unplug the unit, let it cool, and inspect the fan area with a flashlight. Tighten any loose screws. If the fan blade is loose, it may need to be replaced (usually under $10 from the manufacturer).
Humming or Buzzing (Fan Not Spinning)
As covered in the quick diagnosis section, a humming sound without fan movement points to a seized motor or a failed capacitor. The motor is receiving power but cannot physically rotate. This is a more serious issue than rattling and usually requires motor or capacitor replacement.
High-Pitched Whine or Screeching
A high-pitched whine is almost always a bearing problem. Air fryer fan motors use small ball bearings or sleeve bearings to allow the shaft to spin freely. When these bearings lose their lubrication or become contaminated with grease and food particles, they produce a characteristic high-pitched screech.
In the early stages, you can sometimes temporarily quiet a screeching bearing by applying a small amount of food-grade silicone lubricant to the bearing area. However, this is a temporary fix. Once the bearing surface is damaged, the noise will return within days to weeks, and the motor should be replaced.
Clicking or Ticking
A rhythmic clicking sound that speeds up or slows down with the fan usually indicates a cracked or warped fan blade that is lightly contacting the housing with each revolution. Less commonly, it can indicate a problem with the motor shaft being slightly bent.
Fix: Unplug the unit and visually inspect the fan blade. If it is cracked, replace it. If the blade looks fine but the clicking persists, the motor shaft may be bent, which means the motor needs replacement.
Grinding Sound
A grinding noise is the most alarming sound your air fryer can make. It usually indicates that the bearing has completely failed and the motor shaft is grinding against the housing. Stop using the unit immediately. Continued operation with a grinding bearing can cause the motor to seize entirely, potentially tripping a circuit breaker or creating a fire risk.
Swooshing or Whooshing (Normal)
A steady whooshing sound is the sound of air being moved by the fan—this is completely normal and is actually a sign that your fan is working properly. The pitch and volume of this sound will vary based on the fan speed setting and the amount of food in the basket. A fuller basket restricts airflow, which can make the whooshing sound slightly louder as the fan works harder.
| Sound | Severity | Likely Cause | Can You Keep Using It? |
|---|---|---|---|
| Rattling/Clattering | Low | Loose screw or debris | Yes (fix soon) |
| Humming (no spin) | High | Seized motor or bad capacitor | No |
| High-pitched whine | Medium | Worn bearings | Limited use |
| Clicking/Ticking | Medium | Cracked blade or bent shaft | No |
| Grinding | Critical | Failed bearing | No — unplug immediately |
| Whooshing/Swooshing | None | Normal operation | Yes |
Deep Cleaning Your Air Fryer Fan and Heating Element
Grease buildup is the number one killer of air fryer fans. Over months of use, atomized cooking oil and fat accumulate on the fan blades, the heating element, and the interior walls of the cooking chamber. This buildup creates several problems: it unbalances the fan (causing vibration and noise), restricts airflow (causing overheating), and can eventually ignite (causing smoke or fire).
What You Will Need
- A soft-bristle brush (an old toothbrush works perfectly)
- Cotton swabs for tight spaces
- A bowl of warm water with mild dish soap
- A damp microfiber cloth
- Compressed air can (optional but helpful)
- A flashlight
- Screwdriver (if you need to remove the bottom panel)
Step-by-Step Deep Cleaning Process
Step 1: Preparation. Unplug the air fryer and let it cool completely—at least 30 minutes after last use. Remove the basket and drip tray. Place the unit upside down on a towel-covered surface.
Step 2: Access the fan. Most air fryers allow you to see the fan through the bottom grate or heating element area. If your model has a removable bottom panel, remove the screws (keep them organized) and gently lift the panel off. Take a photo of the interior before you start so you remember how everything goes back together.
Step 3: Brush the fan blades. Use the soft-bristle brush to gently remove loose grease and debris from each fan blade. Work slowly and carefully—fan blades can be fragile, especially in older units. Do not apply excessive force or bend the blades.
Step 4: Clean the heating element. Use a damp (not wet) microfiber cloth to wipe the heating element. Never submerge the element in water or spray it directly with cleaner. The element is a thin metal tube bent into a coil shape, and it can be easily damaged. For stubborn grease deposits, dip the cloth in warm soapy water, wring it out thoroughly, and gently wipe the surface.
Step 5: Clean the interior walls. Use cotton swabs dipped in warm soapy water to reach into corners and crevices where grease accumulates. Pay special attention to the area around the fan housing and the air intake/exhaust vents.
Step 6: Dry everything. Use a dry microfiber cloth to remove all moisture. Any remaining water can cause electrical problems when the unit is turned on. If possible, let the unit air dry for 30 minutes before reassembling.
Step 7: Reassemble. Replace the bottom panel and screws. Reinsert the basket and drip tray. Plug the unit in and run it empty for 5 minutes at 350°F to burn off any remaining cleaning residue. You may notice a slight smell during this burn-off—this is normal.
Preventing Future Buildup
The best way to prevent grease buildup is to clean your air fryer regularly. After every use, wipe the basket and drip tray with warm soapy water. Once a month, perform a quick visual inspection of the fan area with a flashlight. If you see any discoloration or sticky residue on the fan blades, it is time for a deep clean.
Avoid cooking extremely greasy foods (like bacon or fatty chicken thighs) without a drip tray or basket liner. The excess grease has nowhere to go except onto the fan and heating element. For tips on safe liner usage, check our guide on air fryer liners.
Electrical Testing: Using a Multimeter on Your Air Fryer
If visual inspection does not reveal the problem, it is time to use a multimeter to test the electrical components. A multimeter is an inexpensive tool (usually $15 to $30) that can measure voltage, resistance, and continuity. This section will walk you through testing the most common failure points in an air fryer’s electrical system.
What You Need
- A digital multimeter (auto-ranging is easiest for beginners)
- A Phillips head screwdriver
- Insulated gloves (recommended)
- Your air fryer’s model number (to look up wiring diagrams if available)
Testing the Power Cord
Set your multimeter to continuity mode (the setting that beeps when probes touch). Touch one probe to the prong on the plug and the other probe to the corresponding wire inside the unit where the power cord connects to the internal wiring. You should hear a beep, indicating continuity. If there is no beep on one or both prongs, the power cord is damaged and needs replacement.
Testing the Thermal Fuse
The thermal fuse is a small cylindrical component, typically white or metal, located near the heating element. Disconnect both wires from the fuse (note which wire goes where). Set your multimeter to continuity mode and touch the probes to each end of the fuse. A working fuse will show continuity (beep). No beep means the fuse is blown and must be replaced. Thermal fuses are inexpensive (under $5) and available from appliance parts suppliers.
Testing the Heating Element
Disconnect the wires from the heating element terminals. Set your multimeter to resistance (ohms) mode. Touch the probes to the two terminals of the element. A good element will show a resistance between 15 and 50 ohms, depending on the wattage. An infinite reading (OL on the display) means the element is burned out and needs replacement. A reading near zero could indicate a short circuit.
Testing the Fan Motor
Disconnect the wires from the fan motor. Check the motor’s terminals for continuity. A working motor will show some resistance (typically 10 to 100 ohms, depending on the motor type). No continuity means the motor windings are burned out. If the motor shows continuity but still does not spin when powered, the problem is likely mechanical (seized bearings) rather than electrical.
Testing the Capacitor
The start capacitor is a small cylindrical component (usually black or blue) mounted near the motor. It helps the motor start spinning. Set your multimeter to capacitance mode (if available) and touch the probes to the capacitor terminals. Compare the reading to the value printed on the capacitor label. A reading more than 20% below the rated value indicates a failing capacitor. If your multimeter does not have a capacitance mode, a visual inspection can reveal a bad capacitor—look for bulging, leaking, or a burnt smell.
Testing the Safety Microswitch
The safety microswitch is the small switch that the basket pushes when inserted. Set your multimeter to continuity mode. With the switch in its natural (unpressed) position, there should be no continuity. Press the switch button manually—the multimeter should now beep. If the switch shows continuity in both positions or no continuity in either position, it needs replacement.
Thermal Fuse Replacement: A Complete Step-by-Step Guide
The thermal fuse is the most common reason an air fryer suddenly dies with no warning. It is a one-time safety device designed to cut power if the internal temperature exceeds a safe threshold (typically around 240°F to 300°F, depending on the model). Once it blows, it cannot be reset—it must be replaced.
Why Thermal Fuses Blow
Thermal fuses blow for a reason. The most common causes are:
- Overheating due to blocked vents: If the air intake or exhaust vents are blocked by a wall, cabinet, or grease buildup, the unit cannot dissipate heat properly.
- Fan failure: If the fan stops working (the topic of this article), the heating element continues to generate heat without distribution, causing the thermal fuse to blow.
- Grease fire or flare-up: Excess grease in the drip tray can ignite, causing a momentary temperature spike.
- Faulty thermal fuse: Rarely, a thermal fuse can be defective from the factory and blow prematurely.
Finding the Right Replacement
Thermal fuses are rated by temperature and current. You must replace the fuse with one that has the same ratings. Look for a number printed on the fuse body (e.g., “240°C 10A”). Common ratings for air fryers are 242°C at 10A or 250°C at 10A. You can find replacements at electronics stores, appliance parts suppliers, or online retailers. They typically cost between $3 and $8.
Replacement Steps
- Unplug the unit and let it cool completely.
- Remove the bottom panel by unscrewing the screws (typically 4 to 8 Phillips head screws).
- Locate the thermal fuse. It is usually a small white or metal cylinder with two wire leads, mounted near the heating element or on the main power board.
- Take a photo of the wiring before disconnecting anything.
- Disconnect the wires from the old fuse. Some fuses use spade connectors (pull off); others are soldered in place.
- Remove the old fuse from its mounting clip or bracket.
- Install the new fuse in the same position, ensuring the same wire connections.
- Reassemble the unit and test.
7 Warning Signs Your Air Fryer Is About to Die
Air fryers rarely fail without warning. If you know what to look for, you can often catch problems early and either repair them or plan for a replacement before you are left without a working appliance mid-meal-prep.
1. The Fan Is Getting Louder Over Time
A gradual increase in fan noise over weeks or months usually indicates bearing wear. The bearings are slowly degrading, and the motor is working harder to spin the fan. This is a progressive problem—it will not fix itself. Plan for a motor replacement or start shopping for a new unit.
2. The Unit Shuts Off Unexpectedly
If your air fryer turns off in the middle of cooking and you have to unplug it and plug it back in to get it working again, the thermal overload protector is likely tripping. This means the unit is overheating, usually because the fan is struggling or the vents are partially blocked.
3. Uneven Cooking Results
If food that used to cook evenly now has hot spots—burned on one side, undercooked on the other—the fan may not be spinning at full speed. A partially seized bearing or a slightly unbalanced fan blade can reduce airflow enough to affect cooking quality without completely stopping the fan.
4. Burning Smell
Any burning smell from an air fryer should be taken seriously. A slight “new appliance” smell during the first few uses is normal. But a persistent burning smell during regular use usually means grease is accumulating on the heating element and slowly charring. This is a fire risk and needs immediate cleaning.
5. The Basket Is Harder to Insert or Remove
If the basket is becoming difficult to slide in and out, it may be warping from heat exposure. More concerning, the safety microswitch may be wearing out, requiring more force to engage. This can lead to intermittent fan operation—the fan starts and stops randomly during cooking.
6. Visible Damage to the Fan Blade
Inspect the fan blade periodically. If you see cracks, chips, or warping, replace the blade immediately. A damaged blade can break apart during operation, sending fragments into the heating element and causing a short circuit or fire.
7. The Exterior Gets Extremely Hot
While air fryers do get warm on the outside, the exterior should never be too hot to touch. If the casing is uncomfortably hot, it means the internal insulation is failing or the fan is not moving air efficiently enough to keep internal temperatures in check. This is both a safety hazard and a sign of impending failure.
Air Fryer Overheating: The Complete Prevention and Fix Guide
Overheating is both a symptom and a cause of fan problems. A struggling fan causes the unit to overheat, and an overheating unit damages the fan motor. Breaking this cycle is essential to keeping your air fryer running.
Common Overheating Causes
- Blocked ventilation: The most common cause. Air fryers need 5 to 6 inches of clearance on all sides, especially the back where the exhaust vents are located. Pushing the unit against a wall or into a tight cabinet space is a recipe for overheating.
- Dirty fan and heating element: Grease buildup acts as insulation, trapping heat inside the unit and forcing the fan to work harder.
- Overloading the basket: When you fill the basket beyond its capacity, airflow is restricted. The fan has to push air through a denser mass of food, which reduces circulation and causes heat to build up in pockets.
- Ambient temperature: Using an air fryer in a very hot kitchen (near a running oven or in direct sunlight) raises the baseline temperature the unit has to work against.
- Fan motor failure: A fan that is not spinning at full speed cannot move enough air to keep the unit cool.
How to Fix Overheating
Start with the simplest solutions first:
- Move the unit to a location with at least 6 inches of clearance on all sides.
- Clean the fan and heating element following the deep cleaning guide above.
- Reduce batch sizes. Cook in smaller batches to allow proper airflow.
- Clean the exhaust vents on the back of the unit with a brush or compressed air.
- Test the fan motor with a multimeter to check for electrical issues.
- Check the thermal fuse. If it has blown, replace it and investigate the root cause.
Preventing Future Overheating
Set up your air fryer in a permanent location with adequate ventilation from the start. Avoid moving it around frequently, as this increases the risk of knocking something into the vents. Clean the fan area monthly, and never cook more than the basket’s rated capacity. If you use your air fryer daily, consider investing in a model with a more powerful fan and better thermal management—premium brands like Breville and Ninja are designed for heavy use.
Understanding the Air Fryer Safety Interlock System
The safety interlock system is a simple but critical feature that prevents the fan and heating element from operating when the basket is not properly inserted. Understanding how this system works can help you diagnose one of the most common causes of “fan not spinning” complaints.
How the Interlock Works
Most air fryers use one or more microswitches located at the bottom of the cooking chamber. When you slide the basket in, a plastic tab or metal bracket on the basket pushes against the microswitch, completing the circuit and allowing the fan and heating element to turn on. When you remove the basket, the switch releases, breaking the circuit and shutting everything off.
Some models use a magnetic interlock instead of a physical switch. A magnet embedded in the basket aligns with a reed switch in the base, completing the circuit when the basket is in place. Magnetic interlocks are more durable since there are no moving parts to wear out, but they can fail if the magnet becomes dislodged or the reed switch breaks.
Common Interlock Problems
- Worn plastic tab: The plastic tab on the basket that pushes the microswitch can wear down over time, especially with frequent basket removal. When it becomes too short to fully engage the switch, the fan may not start or may start intermittently.
- Stuck microswitch: Grease and food debris can cause the microswitch to stick in the “off” position, even when the basket is inserted.
- Broken microswitch: Microswitches have a rated lifespan (typically 100,000 to 1,000,000 cycles). Heavy daily use can wear out the switch.
- Misaligned basket: A warped or bent basket may not align properly with the switch, failing to engage it fully.
Testing and Replacing the Microswitch
To test the microswitch, remove the basket and locate the switch (usually visible through the bottom of the cooking chamber). Use a multimeter in continuity mode: press the switch manually—if it beeps, the switch works. If it does not beep, or if it beeps without being pressed, the switch is faulty.
Replacement microswitches are available from appliance parts suppliers for $5 to $15. The replacement process involves removing the bottom panel, disconnecting the old switch, and connecting the new one. Take a photo of the wiring before disconnecting anything to ensure correct reassembly.
How to File an Air Fryer Warranty Claim
Before spending money on repairs, check whether your air fryer is still under warranty. Most manufacturers offer a 1-year limited warranty that covers defects in materials and workmanship, including fan motor failure. Some premium brands offer extended warranties of 2 to 5 years.
What Is Typically Covered
- Fan motor failure (the most common warranty claim)
- Heating element failure
- Control board malfunction
- Safety switch failure
- Thermal fuse blowing without user error
What Is NOT Covered
- Damage from misuse (overfilling, using in a cabinet without ventilation)
- Cosmetic damage (scratches, dents)
- Damage from power surges
- Wear and tear on baskets and non-stick coatings
- Damage from unauthorized modifications or repairs
Filing the Claim
- Find your receipt or proof of purchase. Most manufacturers require this. If you bought online, check your email for the order confirmation.
- Locate the model and serial number on the bottom or back of the unit.
- Contact the manufacturer via their website, phone, or email. Describe the problem clearly and include the model number.
- Follow their instructions. Some manufacturers will ship a replacement unit immediately. Others may ask you to ship the defective unit back (usually at their expense) before sending a replacement.
- Keep all packaging if you plan to ship the unit back. The original box with foam inserts is ideal.
For a more detailed look at air fryer safety and proper usage, see our guide on air fryer safety tips.
Air Fryer Brands Ranked by Reliability and Durability
Not all air fryer brands are created equal when it comes to fan motor quality and overall durability. Based on repair data, user reviews, and industry reports, here is how the major brands stack up.
| Brand | Reliability Rating | Avg Fan Lifespan | Warranty | Common Issues |
|---|---|---|---|---|
| Breville | Excellent | 6–8 years | 2 Years | Rare failures; mostly cosmetic |
| Ninja | Excellent | 5–7 years | 1 Year | Occasional basket coating wear |
| Cosori | Very Good | 4–6 years | 2 Years | Control board issues on some models |
| Philips | Very Good | 5–7 years | 1–2 Years | Expensive replacement parts |
| Instant Pot | Good | 3–5 years | 1 Year | Fan noise increases over time |
| Gourmia | Average | 2–4 years | 1 Year | Fan motor and thermal fuse issues |
| Hamilton Beach | Average | 2–4 years | 1 Year | Basket wear, fan noise |
| Budget Brands | Below Average | 1–3 years | 90 Days–1 Year | Motor burnout, safety switch failure |
When choosing a replacement, consider the long-term cost of ownership. A $40 air fryer that lasts 2 years costs $20 per year. A $150 Ninja that lasts 6 years costs $25 per year but provides consistently better cooking performance and fewer headaches. For most users, the mid-range to premium tier offers the best value over time.
DIY Air Fryer Repair: Essential Tools and Safety Precautions
If you have decided to repair your air fryer rather than replace it, having the right tools on hand will make the process smoother and safer. You do not need a professional workshop—most air fryer repairs can be done with a basic home toolkit plus a few specialty items.
Essential Tools
- Phillips head screwdriver set (#1 and #2): Most air fryer screws are Phillips head. Having both sizes prevents stripping the screw heads.
- Digital multimeter: Essential for testing electrical components (fuse, heating element, motor, capacitor). An auto-ranging model is easiest for beginners.
- Needle-nose pliers: Useful for disconnecting spade connectors and manipulating small components in tight spaces.
- Flashlight or headlamp: The interior of an air fryer is dark and cramped. Good lighting is essential.
- Magnifying glass or phone camera: Useful for reading small text on components (thermal fuse ratings, capacitor values, etc.).
- Isopropyl alcohol (90%+) and cotton swabs: For cleaning electrical contacts and the circuit board.
Safety Precautions
- Always unplug the unit before opening it. This sounds obvious, but it is worth repeating.
- Discharge capacitors before touching any circuit board components. Large capacitors can hold a lethal charge even with the unit unplugged.
- Work on a non-conductive surface (wooden table, rubber mat). Do not work on a metal surface.
- Take photos at every step. When reassembling, photos are your roadmap.
- Keep screws organized. Use a magnetic tray or small containers to keep track of which screws go where.
- Wear insulated gloves when testing live circuits (only if you are testing with the unit plugged in for diagnostic purposes).
Air Fryer vs Conventional Oven vs Toaster Oven: Which Fan System Wins?
Understanding how your air fryer’s fan system compares to other kitchen appliances puts the repair-versus-replace decision in perspective. Each appliance uses a different approach to circulating heat, and each has its own failure modes and maintenance requirements.
| Feature | Air Fryer | Convection Oven | Toaster Oven |
|---|---|---|---|
| Fan Type | High-speed centrifugal | Low-speed axial | None or basic axial |
| Airflow Speed | 1,500–3,000 RPM | 500–1,000 RPM | N/A or very low |
| Preheat Time | 2–3 minutes | 10–15 minutes | 5–10 minutes |
| Fan Failure Risk | Medium (high-speed wear) | Low (slow speed = less wear) | Very Low (no fan to fail) |
| Energy Use | 1,000–1,800W | 2,000–5,000W | 1,200–1,800W |
| Cooking Speed | 25% faster than oven | Standard | Standard to slightly faster |
| Crispiness | Excellent | Good with convection | Moderate |
The air fryer’s high-speed fan is both its greatest strength and its greatest vulnerability. The faster a motor spins, the more wear it experiences on its bearings. This is why air fryer fans tend to fail more often than the fans in conventional convection ovens, which run at much lower speeds. However, the tradeoff is worth it for most users—the speed and efficiency of air frying cannot be matched by a conventional oven.
If your air fryer fan has failed and the unit is out of warranty, consider whether a countertop convection oven might be a better long-term investment. Models from Breville and Cuisinart offer convection cooking with more durable fan systems designed for daily heavy use.
10 User Mistakes That Destroy Air Fryer Fans
Many air fryer fan failures are caused by user habits rather than manufacturing defects. Avoiding these common mistakes can significantly extend the life of your fan motor and the unit as a whole.
- Overfilling the basket. This is the single most damaging habit. When the basket is packed too full, the fan has to work much harder to push air through the dense mass of food. This extra strain heats the motor beyond its designed operating temperature, accelerating bearing wear and potentially burning out the motor windings. Always leave at least 1 inch of space between food items and never fill above the max line.
- Using parchment paper during preheat. Parchment paper or liner paper placed in the basket before the fan reaches full speed can be blown into the heating element by the initial burst of airflow. This can block the fan, cause a grease fire, or create a coating on the element that reduces heating efficiency. Always preheat empty, then add food and liner together.
- Ignoring the exhaust vents. Pushing the air fryer against a wall or into a cabinet without leaving adequate clearance behind the exhaust vents is a recipe for overheating. The fan cannot push hot air out if there is nowhere for it to go. This causes the motor to work harder and the internal temperature to rise, which can blow the thermal fuse.
- Cooking extremely wet foods without draining. Foods with high water content (like frozen vegetables or marinated meats) release steam during cooking. Excess moisture condenses on the fan blades and heating element, accelerating rust and grease buildup. Pat foods dry before cooking when possible.
- Never cleaning the fan area. Most people clean the basket and drip tray but never inspect the fan or heating element. Over months of use, grease accumulates on the fan blades, unbalancing them and creating vibration that damages the bearings.
- Moving the unit while it is running. Picking up or sliding an air fryer while the fan is spinning can damage the motor bearings. The sudden movement can cause the spinning shaft to shift laterally, putting uneven pressure on the bearings.
- Using the wrong voltage. In countries with 220–240V power, using a 110V air fryer (or vice versa) with a voltage converter can cause the fan motor to run at the wrong speed, leading to overheating and premature failure. Always use the correct voltage model for your region.
- Cooking without the basket. Some users remove the basket to get more cooking space. This removes the safety interlock engagement and can cause the heating element to overheat without the airflow path designed for the basket configuration.
- Storing the unit with the basket inserted. Storing the basket inside the unit for extended periods can cause the safety microswitch to remain in the engaged position, potentially weakening the switch spring over time. Store the basket separately.
- Ignoring unusual sounds. If your air fryer starts making a new noise—a rattle, a whine, a click—do not ignore it. These sounds are early warning signs of mechanical problems that are much easier (and cheaper) to fix early than after a complete failure.
Air Fryer Capacitor Failure: Symptoms, Diagnosis, and Fix
The start capacitor is a small but critical component that helps the fan motor start spinning. When it fails, the motor may hum but not start, or it may start slowly and struggle to reach full speed. Capacitor failure is the second most common cause of fan problems after the safety switch.
What the Capacitor Does
The start capacitor stores electrical energy and releases it in a brief pulse to help the motor overcome its initial inertia. Without this pulse, an AC motor may not have enough torque to start spinning, especially if there is any resistance from grease buildup or worn bearings. The capacitor is typically a small cylindrical component mounted near the motor, rated in microfarads (μF).
Symptoms of a Bad Capacitor
- Humming without spinning: The motor receives power and hums, but the fan does not start. This is the classic capacitor failure symptom.
- Slow start: The fan takes several seconds to reach full speed instead of starting immediately.
- Intermittent operation: The fan sometimes starts and sometimes does not, seemingly at random.
- Bulging or leaking capacitor: A visual inspection may reveal a capacitor that is physically swollen, leaking fluid, or has a burnt smell.
How to Test and Replace
Set your multimeter to capacitance mode. Disconnect the capacitor from the circuit (discharge it first by shorting the terminals with an insulated screwdriver). Touch the probes to the capacitor terminals and compare the reading to the value printed on the label. A reading more than 20% below the rated value means the capacitor needs replacement.
Replacement capacitors are available from electronics suppliers for $5 to $15. Match the capacitance value (in μF) and voltage rating exactly. The replacement process is straightforward: disconnect the old capacitor’s wires, connect the new one in the same configuration, and secure it in the mounting clip.
The Complete Air Fryer Maintenance Schedule
Following a regular maintenance schedule is the best way to prevent fan problems and extend the life of your air fryer. Here is a comprehensive schedule that covers everything from daily wipe-downs to annual deep maintenance.
After Every Use
- Remove the basket and drip tray
- Wash the basket and tray with warm, soapy water
- Wipe the interior walls with a damp cloth
- Check for any food debris in the cooking chamber
Every 5–10 Uses
- Clean the exterior with a damp cloth
- Wipe the control panel with a slightly damp microfiber cloth
- Check the air intake and exhaust vents for blockages
- Inspect the basket for warping or damage to the non-stick coating
Monthly
- Turn the unit upside down and inspect the fan area with a flashlight
- Brush away any grease buildup on the fan blades
- Clean the heating element with a damp cloth
- Check all visible screws for looseness
- Test the safety microswitch for proper operation
Every 3–6 Months
- Perform a full deep clean (see the deep cleaning section above)
- Check the power cord for damage or fraying
- Verify that the unit is still heating to the correct temperature (use an oven thermometer)
- Listen for any changes in fan noise during operation
Annually
- Remove the bottom panel and inspect all internal components
- Check wiring connections for looseness
- Inspect the capacitor for bulging or leaking
- Check the thermal fuse for signs of discoloration
- Lubricate the fan motor bearings if accessible (use food-grade silicone lubricant only)
Air Fryer Replacement Parts: Where to Find Them
When a component fails, knowing where to find replacement parts can save you the cost of an entirely new unit. Here is a guide to sourcing parts for the most common air fryer repairs.
OEM (Original Equipment Manufacturer) Parts
The most reliable source for replacement parts is the manufacturer itself. Most major brands sell replacement parts through their websites or authorized service centers. Benefits of OEM parts include guaranteed compatibility and maintaining your warranty (if applicable). However, OEM parts tend to be more expensive and may have longer shipping times.
Third-Party Replacement Parts
Generic replacement parts are available from electronics suppliers, appliance parts websites, and online marketplaces. Thermal fuses, capacitors, and microswitches are standardized components that are often interchangeable between brands. The key is to match the specifications (temperature rating, capacitance value, switch type) rather than the brand name.
Common Replacement Parts and Approximate Costs
| Part | OEM Cost | Third-Party Cost | Difficulty to Replace |
|---|---|---|---|
| Thermal Fuse | $8–$15 | $3–$8 | Easy |
| Start Capacitor | $10–$20 | $5–$12 | Easy |
| Safety Microswitch | $10–$25 | $5–$15 | Moderate |
| Fan Blade | $10–$20 | $5–$15 | Easy |
| Fan Motor (AC) | $20–$50 | $15–$35 | Moderate |
| Fan Motor (DC/BLDC) | $40–$100 | $30–$70 | Hard |
| Heating Element | $20–$60 | $15–$40 | Moderate |
| Control Board | $40–$120 | Rarely available | Hard |
| Basket | $15–$40 | $10–$30 | N/A (drop-in) |
Energy Efficiency and Environmental Impact of Air Fryers
Air fryers are often marketed as energy-efficient alternatives to conventional ovens, and for good reason. Understanding the energy implications of your air fryer can also help you understand why fan failure is such a critical issue.
Energy Consumption Comparison
A typical air fryer consumes between 1,000 and 1,800 watts of electricity during operation. A conventional full-size oven uses 2,000 to 5,000 watts. However, the key difference is cooking time: an air fryer typically cooks 25% faster than a conventional oven due to the concentrated hot air circulation. This means the total energy consumed per meal is often 50% less with an air fryer.
For example, cooking a batch of french fries in an air fryer might use 1,200 watts for 15 minutes (0.3 kWh), while the same batch in a conventional oven might use 2,500 watts for 25 minutes (1.04 kWh). Over the course of a year, this adds up to significant energy savings.
Why a Malfunctioning Fan Increases Energy Use
When the fan is not working properly, the heating element runs longer to compensate for poor heat distribution. Instead of cooking for 15 minutes, you might need 25 minutes or more. This not only wastes energy but also increases wear on the heating element, which has a finite number of heating cycles before it degrades.
Environmental Considerations
Repairing rather than replacing your air fryer is the most environmentally friendly choice. Manufacturing a new air fryer requires raw materials, energy, and generates shipping emissions. A repaired unit that lasts another 2 to 3 years avoids all of that. When replacement is unavoidable, consider recycling the old unit through your local electronics recycling program rather than sending it to a landfill.
Air Fryer Accessories That Protect and Extend Fan Life
The right accessories can reduce strain on your air fryer’s fan and heating element, extending their useful life. Here are the most impactful accessories for fan longevity.
Silicone Liners and Mats
Silicone liners sit inside the basket and catch drips and crumbs before they fall through to the heating element and fan area. By reducing the amount of grease that reaches the fan blades, silicone liners significantly reduce the grease buildup that causes fan imbalance and bearing wear. They are also reusable, making them more environmentally friendly than disposable parchment paper liners.
Wire Racks and Elevators
Wire racks that elevate food above the basket bottom improve airflow around the food, reducing the time the fan needs to run at high speed. Better airflow means faster cooking, less fan strain, and more even results. Look for racks that are specifically designed for your air fryer model to ensure they do not interfere with the basket’s engagement with the safety switch.
Baking Cups and Dividers
Silicone baking cups and basket dividers help organize food and prevent it from shifting during cooking. When food shifts and blocks the air circulation paths, the fan has to work harder. Keeping food organized and properly spaced ensures consistent airflow.
Replacement Basket with Improved Ventilation
Some aftermarket baskets feature improved ventilation holes that allow better airflow through the food. This can reduce cooking time and fan strain. When choosing a replacement basket, ensure it is compatible with your model’s safety interlock system—the basket tab must properly engage the microswitch.
Smart Air Fryer Connectivity and Software Issues
Modern smart air fryers with WiFi connectivity and companion apps introduce a new category of problems that can affect fan operation. While these issues are less common than mechanical failures, they can be confusing to diagnose.
WiFi Connection Problems
Some smart air fryers will not operate their fan or heating element if they cannot connect to WiFi. This is a safety feature in some models—the app must be active to start a cooking cycle. If your WiFi is down or the app is not connecting, the fan will not start. Check the manufacturer’s documentation to determine whether your model requires WiFi for basic operation.
Firmware Updates
Like any smart device, air fryers occasionally receive firmware updates that can affect performance. A buggy update can cause the fan to run at incorrect speeds, the temperature to be miscalibrated, or the unit to fail to start entirely. If you experience sudden fan issues after a firmware update, check the manufacturer’s support page for known issues and rollback instructions.
App-Controlled Fan Speed
Some premium smart air fryers allow you to adjust fan speed through the app. If the app is not sending the correct signal to the control board, the fan may run at the wrong speed or not at all. Try resetting the unit to factory defaults and re-pairing it with the app before assuming a mechanical failure.
Frequently Asked Questions
Why is my air fryer making a humming noise but the fan isn’t spinning?
A humming noise without fan movement typically indicates a seized motor bearing or a capacitor failure. The motor is receiving power but cannot physically rotate due to an obstruction or mechanical failure. Try spinning the fan manually (with the unit unplugged) to check for resistance. If it does not spin freely, the motor or capacitor likely needs replacement.
Can I use my air fryer if the fan is not working?
No. You should strictly avoid using an air fryer without a working fan. The fan circulates heat; without it, the heating element will overheat rapidly, potentially melting plastic components or causing a fire hazard. The thermal fuse may blow to protect the unit, but relying on this safety device is not recommended.
Is it worth repairing an air fryer fan?
It depends on the cost of the unit. For budget models under $80, repair costs often exceed the value of a replacement. For high-end models, replacing a thermal fuse or motor might be cost-effective if you are DIY-inclined. Consider the cost of parts plus your time when making this decision.
How do I check if the safety switch is broken?
Locate the small tab or button that the basket pushes when inserted. Press it manually with a non-conductive tool while the unit is plugged in (be careful). If the unit turns on, the switch works, but your basket might not be engaging it properly. You can also test the switch with a multimeter in continuity mode.
Why is my air fryer fan making a rattling noise?
A rattling noise usually indicates a loose screw inside the housing, a piece of debris trapped near the fan blades, or a cracked fan blade. Turn off and unplug the unit, then inspect the fan area with a flashlight. Tighten any loose screws and remove any debris you find.
How often should I clean my air fryer fan?
You should perform a light cleaning of the fan area after every 10 uses and a deep cleaning once a month. Grease buildup on fan blades creates resistance that strains the motor and reduces airflow efficiency. If you cook greasy foods frequently, increase your cleaning frequency.
Can a power surge damage my air fryer fan?
Yes. A power surge can damage the fan motor’s capacitor or burn out the motor windings. Using a surge protector is recommended, especially in areas prone to electrical storms or power fluctuations. Surge damage is typically not covered under warranty.
What does it mean when my air fryer smells like burning plastic?
A burning plastic smell usually means the fan has stopped working and the heating element is overheating nearby plastic components. Unplug the unit immediately and do not use it until the fan is repaired or replaced. This is a serious safety hazard that should not be ignored.
How do I know if my air fryer’s thermal fuse is blown?
Use a multimeter set to continuity mode. Disconnect the thermal fuse and touch the probes to each end. If there is no continuity (no beep), the fuse is blown and needs replacement. Thermal fuses are inexpensive and relatively easy to replace, but you must identify why the fuse blew before installing a new one.
Can I replace the fan motor myself?
Yes, if you are comfortable with basic electronics repair. You will need a screwdriver, a replacement motor specific to your model, and optionally a multimeter. Always unplug the unit and discharge any capacitors before starting. Take photos during disassembly to help with reassembly.
Why does my air fryer stop working after 10 minutes?
This is often caused by the thermal overload protector shutting down the unit due to overheating. Check for blocked vents, a dirty fan, or a failing thermal fuse. It could also indicate a failing motor that overheats under sustained load. Ensure the unit has adequate clearance and is not overloaded with food.
Is it normal for my air fryer fan to be loud?
A moderate whooshing sound is normal and indicates the fan is circulating air properly. However, loud rattling, grinding, or high-pitched whining is abnormal and usually signals a mechanical issue that should be addressed. Premium models with brushless DC motors are significantly quieter than budget models with brushed AC motors.
How long do air fryer fans typically last?
With proper maintenance, an air fryer fan motor typically lasts 3 to 5 years in budget models and 5 to 8 years in premium units. Regular cleaning and avoiding overloading the basket are the best ways to extend fan life. Units with brushless DC motors tend to last significantly longer than those with brushed AC motors.
Why does my air fryer fan spin but not heat up?
If the fan works but there is no heat, the issue is with the heating element, the thermostat, or the control board. Check if the heating element has visible damage or use a multimeter to test for continuity across the element terminals. An infinite resistance reading means the element is burned out and needs replacement.
What is the average lifespan of an air fryer?
The average air fryer lasts between 3 and 5 years with regular use. Premium brands like Ninja and Breville can last 5 to 7 years. Lifespan depends heavily on usage frequency, cleaning habits, and whether the unit is overfilled regularly. Units used daily in a commercial setting may fail sooner due to the increased duty cycle.
Can I use my air fryer during a power outage with a generator?
You can, but ensure your generator provides clean, stable power. Air fryers draw 1,000 to 1,800 watts, so your generator must handle that load. A modified sine wave inverter may damage the fan motor over time. Pure sine wave generators or inverters are recommended for sensitive electronics like air fryer control boards.
Is your kitchen fully equipped? Check out our list of must-have kitchen appliances to complement your new air fryer.


