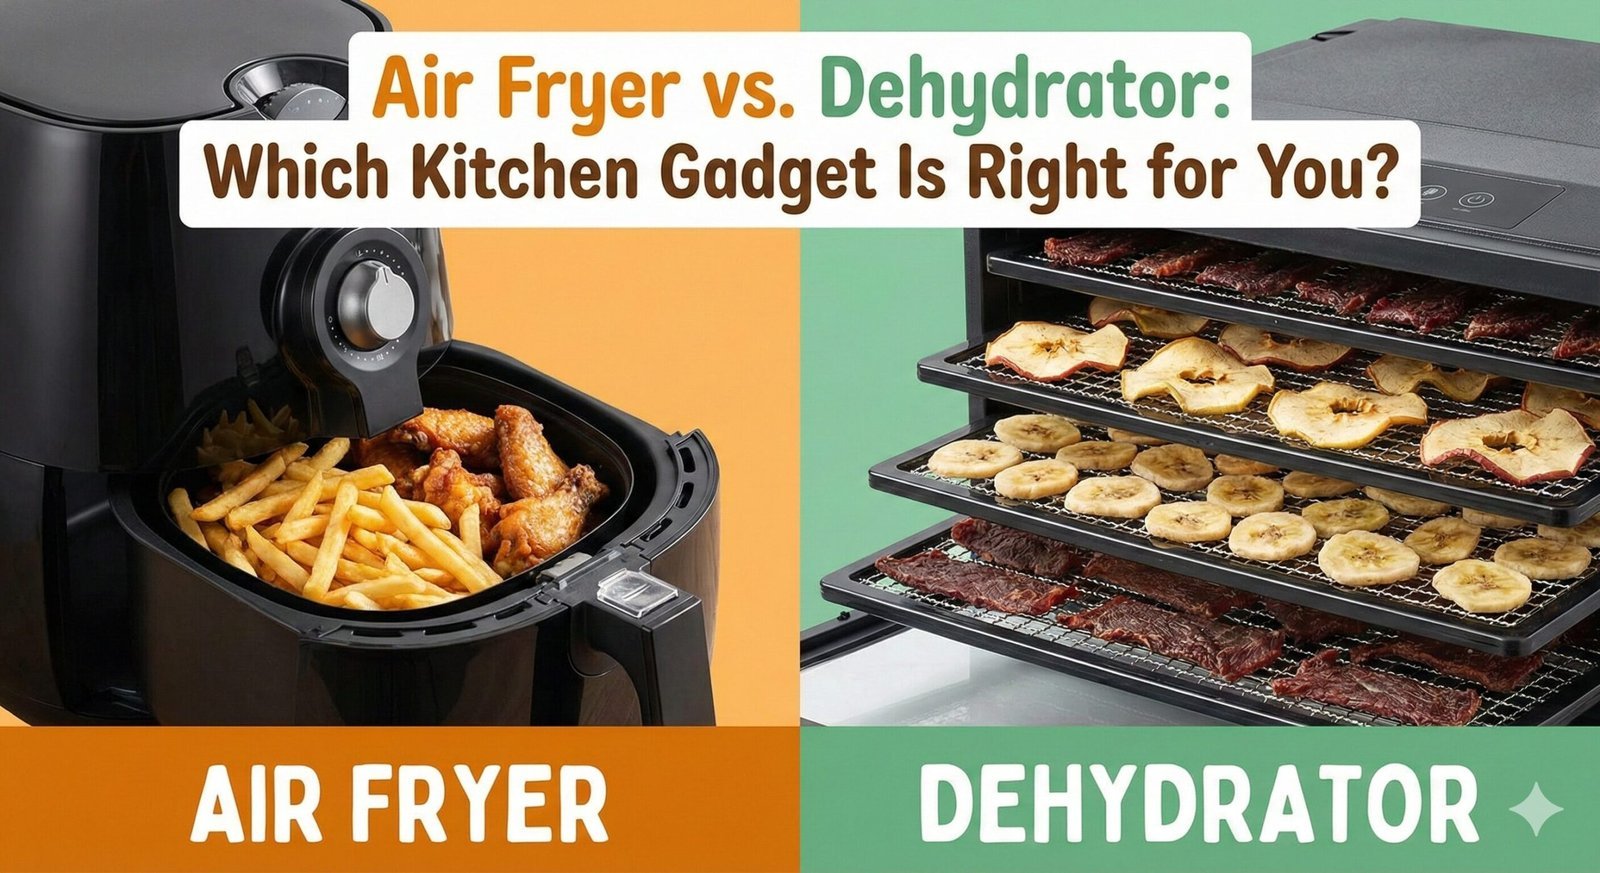
Air Fryer vs. Dehydrator: Do You Really Need Both?
The rise of homemade jerky, dried fruit chips, and preserved herbs has brought a new appliance battle to the kitchen counter: the Air Fryer vs. the Food Dehydrator.
Traditionally, if you wanted to dry food, you bought a dehydrator. It was a bulky, specialized machine with one job. But today, modern air fryers claim to do it all. They roast, they bake, they crisp, and now, many come with a “Dehydrate” button.
This leaves many home cooks wondering: Can I just use my air fryer to make beef jerky? Or do I really need to invest in a separate dehydrator? If you are exploring what you can cook in an air fryer, you might be surprised to find that dried apple chips and mango slices are on the menu—but the result might not be what you expect.
How Air Fryers Work (For Dehydrating)
An air fryer is essentially a high-intensity convection oven. It uses a heating element and a powerful fan to rush hot air around the food. Its primary goal is to cook food fast and create a crispy exterior.
When you switch an air fryer to “Dehydrate Mode,” the machine lowers the fan speed and drops the temperature significantly (usually between 105°F and 130°F). The goal is to remove moisture slowly without cooking the food. However, because air fryers are designed for high heat, maintaining these low temperatures for hours can sometimes be a struggle for cheaper models.
Pros for Dehydrating
- Speed: Air fryers tend to dehydrate faster than dedicated units because the fans are more powerful.
- Multifunctionality: You don’t need to store a “one-trick pony” appliance.
- Convenience: Great for very small batches (e.g., drying leftover herbs).
Cons for Dehydrating
- Tiny Capacity: You can only fit a single layer of apple slices in the basket. You can’t stack food.
- Flying Food: The powerful fan can sometimes blow lightweight herbs (like basil or oregano) around the basket.

This model is famous for its effective “Dehydrate” preset. The Ninja AF101 offers precise low-temp control, making it one of the few air fryers that can actually replace a dehydrator for small batches.
Check Price on AmazonHow Food Dehydrators Work
A dedicated food dehydrator is designed for “low and slow.” It uses a very low-wattage heating element and a fan that usually blows horizontally across multiple stacked trays (in shelf-style models) or vertically (in stackable round models).
The airflow is gentle and consistent, designed to pull moisture out of the center of the food without case-hardening the outside.
Pros of Dehydrators
- Massive Capacity: Even a small unit usually has 5+ trays. You can dry 5 pounds of jerky at once.
- Precision: They can hold very specific low temperatures (like 95°F for raw food diets) indefinitely.
- Even Drying: Horizontal airflow models dry everything evenly without needing to rotate trays.
Cons of Dehydrators
- Space Hog: They are bulky and hard to store.
- Single Use: They only do one thing. You can’t roast a chicken in them.
- Time: It can take 12-24 hours to dry fruit that an air fryer might finish in 4 hours (though with better quality).
Head-to-Head Comparison
Understanding the mechanism helps clarify the difference. Much like the comparison between an air fryer vs convection oven, it is all about how the air moves and how much space you have.
| Feature | Air Fryer | Food Dehydrator |
|---|---|---|
| Temp Range | 105°F – 400°F (Varies) | 95°F – 165°F |
| Capacity | Small (1-2 layers max) | Large (5-10 stackable trays) |
| Airflow | High Velocity (Turbulent) | Low Velocity (Consistent) |
| Best For | Quick snacks, cooking meals | Bulk preserving, gardening harvest |
| Noise | Loud Fan | Quiet Hum |
The Capacity & Workflow Issue
This is the deciding factor for 90% of buyers.
Scenario A: The Air Fryer User
You have two apples that are about to go bad. You slice them up, toss them in the air fryer basket, and in 2 hours you have a bowl of apple chips for movie night. This is where the air fryer shines.
Scenario B: The Dehydrator User
You bought 10 lbs of beef on sale, or your garden just produced 50 tomatoes at once. You need to preserve this food for the winter. An air fryer is useless here—you would have to run 15 separate batches over three days. A dehydrator handles this in one go.

If you are serious about jerky or preserving garden harvests, this stainless steel beauty is quiet, spacious, and built to last.
Check Price on AmazonDoes “Dehydrate Mode” Actually Work?
Yes, but with caveats. Many entry-level air fryers have a minimum temperature of 150°F or 160°F. This is actually too hot for many dehydrating tasks.
- Herbs: Need 95°F – 105°F. Higher heat destroys the essential oils and flavor.
- Fruits: Need 135°F.
- Meats (Jerky): Need 160°F for safety.
If your air fryer cannot go below 150°F, you will end up with “cooked” dried fruit rather than “dehydrated” fruit. The texture will be brittle rather than leathery. However, one of the major benefits of using an air fryer is that if you have a high-end model, it likely has the sensor technology to manage these lower temps effectively.
The Science of Dehydration: Why Temperature Matters
Understanding the science behind food dehydration helps you make informed decisions about which appliance to use. Dehydration is not simply “drying food”—it is a carefully controlled process of removing moisture while preserving nutrients, flavor, and texture.
How Moisture Removal Works
Every food contains water held within its cellular structure. When you apply gentle heat, the water molecules gain energy and begin to evaporate from the surface. As surface moisture decreases, water from deeper within the food migrates outward through capillary action. This is why dehydration takes time—it is a race between surface evaporation and internal moisture migration.
If you heat too fast (as an air fryer’s powerful fan can cause), the surface dries before the interior moisture can migrate outward. This creates a phenomenon called case hardening—a hard, dry shell that traps moisture inside. The food looks dry on the outside but is wet and potentially dangerous in the center. This is the single biggest risk when using an air fryer for dehydration.
The Role of Airflow
Airflow serves two purposes in dehydration: it carries away the moisture that evaporates from the food surface, and it maintains uniform temperature around each piece. In a dehydrator, the airflow is deliberately slow and horizontal, ensuring that moisture is carried away without drying the surface too quickly.
In an air fryer, the airflow is turbulent and high-velocity. While this is excellent for creating crispy textures during cooking, it can cause uneven drying during dehydration. The top of the basket may dry faster than the bottom, and lightweight items like herb leaves can be blown around, causing uneven results.
Enzyme Activity and Temperature
Raw foods contain enzymes that cause browning, flavor changes, and nutrient degradation. In traditional dehydration, foods are often blanched (briefly heated to 170°F or higher) before drying to deactivate these enzymes. This is one reason why a dehydrator’s ability to reach exactly 160°F for meat safety is so important—the temperature must be precise to kill bacteria while preserving the food’s quality.
Air fryers can certainly reach these temperatures, but their温度 control at the low end (below 130°F) is often less precise than a dedicated dehydrator. For tasks that require precise low temperatures—such as making raw food crackers at 115°F—a dehydrator is the clear winner.
Humidity and Drying Rate
The humidity inside the drying chamber affects how quickly moisture leaves the food. A dehydrator with the door slightly ajar or with adjustable vents allows you to control humidity levels. Air fryers, by contrast, are sealed units with limited humidity control. This can cause problems when drying very moist foods like watermelon or tomatoes, as the high humidity inside the sealed basket slows the drying process.
Pro Tip: If using an air fryer for dehydration, crack the basket open slightly (if your model allows) to improve airflow and reduce humidity buildup. Never leave it unattended in this configuration.
Complete Temperature & Time Guide
One of the most common questions is “what temperature should I set?” The answer depends entirely on what you are dehydrating. Here is a comprehensive guide covering the most popular items.
| Food Item | Temperature | Air Fryer Time | Dehydrator Time | Notes |
|---|---|---|---|---|
| Beef Jerky | 160°F (71°C) | 2-4 hours | 4-8 hours | Marinate 4-24 hours first. Slice against the grain. |
| Chicken Jerky | 165°F (74°C) | 2-3 hours | 4-6 hours | Must reach 165°F internal for safety. Use only lean breast meat. |
| Turkey Jerky | 165°F (74°C) | 2-3 hours | 4-6 hours | Similar to chicken. Avoid dark meat for best results. |
| Apple Chips | 135°F (57°C) | 1.5-3 hours | 6-12 hours | Soak in lemon water to prevent browning. Slice 1/8″ thick. |
| Banana Chips | 135°F (57°C) | 2-4 hours | 8-12 hours | Dip in lemon juice. Slice 1/4″ thick for chip texture. |
| Mango Slices | 135°F (57°C) | 2-4 hours | 8-16 hours | Peel and remove pit. Cut into thin strips. |
| Strawberries | 135°F (57°C) | 2-3 hours | 6-10 hours | Hull and slice 1/4″ thick. Best when fresh and firm. |
| Blueberries | 135°F (57°C) | 2-4 hours | 8-12 hours | Score each berry with a needle for faster drying. |
| Kale Chips | 125°F (52°C) | 1-2 hours | 2-4 hours | Remove stems. Massage with oil and salt before drying. |
| Tomato Chips | 135°F (57°C) | 3-5 hours | 8-14 hours | Slice 1/4″ thick. Roma tomatoes work best. |
| Zucchini Chips | 135°F (57°C) | 2-4 hours | 6-10 hours | Slice 1/8″ thick. Salt and let drain 30 min first. |
| Sweet Potato Chews | 135°F (57°C) | 3-5 hours | 8-12 hours | Great for dog treats! Slice into strips or rounds. |
| Basil | 95-105°F (35-40°C) | 1-2 hours | 2-4 hours | Keep whole leaves. Do not exceed 110°F or oils evaporate. |
| Rosemary | 95-105°F (35-40°C) | 1-2 hours | 2-4 hours | Keep on stem. Very hardy herb that dries well. |
| Mint | 95-105°F (35-40°C) | 1-2 hours | 2-4 hours | Remove from stem. Excellent for tea blends. |
| Parsley | 95-105°F (35-40°C) | 1-2 hours | 2-4 hours | Delicate. Bundle stems together for easier handling. |
| Mushrooms | 125°F (52°C) | 2-4 hours | 6-10 hours | Slice 1/4″ thick. Great for soup stocks and camping meals. |
| Onions | 125°F (52°C) | 3-5 hours | 8-12 hours | Dice or slice. Excellent for camping and emergency food storage. |
| Peppers (Bell & Chili) | 125°F (52°C) | 3-5 hours | 8-12 hours | Wear gloves when handling hot peppers. Remove seeds for milder flavor. |
| Yogurt | 115°F (46°C) | 4-6 hours | 8-12 hours | Spread thin on parchment. Creates fruit leather-style snacks. |
Important: Times are approximate and vary based on food thickness, moisture content, humidity, and appliance wattage. Always check food periodically and adjust time as needed. When in doubt, it is better to under-dry than over-dry—you can always put food back in for more time.
Making Jerky: Air Fryer vs. Dehydrator
Beef jerky is one of the most popular reasons people consider either appliance. The process is identical up to the drying stage: you marinate thin strips of lean meat, then slowly remove moisture until the jerky bends without breaking. Here is how each appliance handles this process.
Air Fryer Jerky Method
The air fryer makes surprisingly good jerky, especially for first-timers. The key advantages are speed and temperature accuracy for the 160°F safety threshold.
Step 1: Choose Your Meat
Use lean cuts only. Top round, bottom round, eye of round, or London broil are ideal. Fat does not dehydrate well and will go rancid quickly. Trim all visible fat before slicing.
Step 2: Partially Freeze for Easy Slicing
Freeze the meat for 1-2 hours until firm but not solid. This makes it much easier to slice consistent 1/8″ strips. Slice against the grain for tender jerky, with the grain for chewier jerky.
Step 3: Marinate (4-24 Hours)
The marinade does double duty: it adds flavor and the salt helps draw out moisture during drying. A basic marinade includes soy sauce, Worcestershire sauce, garlic powder, onion powder, black pepper, and smoked paprika. For spicy jerky, add cayenne or red pepper flakes.
Step 4: Arrange in Basket
Lay strips in a single layer in the air fryer basket. Do not overlap—the air must circulate around each piece. You will likely need to do 2-3 batches for a pound of meat.
Step 5: Dehydrate
Set temperature to 160°F. Check after 2 hours. The jerky is done when it bends and cracks but does not break apart. Total time is usually 2-4 hours depending on slice thickness and your specific model.
Dehydrator Jerky Method
The dehydrator is the traditional choice for serious jerky makers, and for good reason. The capacity advantage is enormous—you can dry 2-3 pounds of meat at once on multiple trays.
The process is identical to the air fryer method through step 3. For step 4, you arrange the strips on dehydrator trays, leaving space between each piece. For step 5, set the dehydrator to 160°F and dry for 4-8 hours.
The dehydrator’s advantage is consistency. Because the airflow is gentle and even, every piece of jerky dries at the same rate. There are no hot spots or cold spots, and you do not need to rotate trays (on horizontal airflow models). The dehydrator also handles the overnight drying cycle much better than an air fryer, which may cycle its heating element on and off at low temperatures.
Jerky Texture Comparison
Air fryer jerky tends to have a slightly crispier exterior because of the turbulent airflow. Some people prefer this texture—it is almost like a cross between traditional jerky and a beef chip. Dehydrator jerky is more uniformly leathery and chewy, which is the classic jerky texture most people expect.
Both methods produce safe, delicious jerky when done correctly. The choice comes down to batch size and whether you prefer crispy or chewy results.
Storage Tip: Store jerky in airtight containers at room temperature for up to 1 week, in the refrigerator for up to 2 weeks, or in the freezer for up to 6 months. Add a small piece of paper towel to absorb any residual moisture.
Dehydrating Fruits: A Complete Guide
Dried fruit is one of the healthiest snacks you can make at home. Unlike store-bought versions, homemade dried fruit contains no added sugars, sulfites, or preservatives. Both air fryers and dehydrators can produce excellent results, but the approach differs.
Preparing Fruit for Dehydration
The preparation stage is critical for good results. Here are the essential steps for most fruits:
- Wash thoroughly: Even organic fruit should be washed to remove dirt and bacteria.
- Peel if desired: Apples and pears benefit from peeling, while berries and stone fruits are fine with skin on.
- Slice uniformly: Consistent thickness ensures even drying. Use a mandoline for best results.
- Treat to prevent browning: Soak apple, pear, and banana slices in a mixture of 1 tablespoon lemon juice per cup of water for 5 minutes.
- Blot dry: Pat fruit dry with paper towels before placing in the dehydrator or air fryer.
Best Fruits for Dehydrating
Apples: The classic dried fruit snack. Slice into rings or chips. Use firm varieties like Honeycrisp or Granny Smith for best results. Air fryers excel here because apple chips are a small-batch treat. The Ninja AF101’s dehydrate preset handles apple chips beautifully.
Mango: Fresh mango slices become intensely sweet and chewy when dried. Choose ripe but firm mangoes. Peel, remove the pit, and cut into thin strips. Mango is one of the few fruits where the dehydrator’s larger capacity really pays off—one mango fills an air fryer basket but barely covers one dehydrator tray.
Bananas: Banana chips are a crowd favorite. Slice into 1/4″ rounds for a crunchy chip, or 1/8″ for a chewy snack. Bananas brown quickly, so work fast and use the lemon juice treatment.
Strawberries: Hull and slice into 1/4″ pieces. Strawberries shrink dramatically during drying, so expect about 80% volume reduction. The concentrated flavor is incredible.
Peaches and Nectarines: Slice in half, remove the pit, then cut into wedges. These fruits have high sugar content, which can cause sticking. Lightly oil the dehydrator trays or use non-stick sheets.
Pineapple: Fresh pineapple becomes candy-like when dried. Cut into rings or chunks. The high acidity means it dries slightly faster than other fruits.
Grapes (Raisins): Yes, you can make your own raisins! Use seedless grapes and prick each one with a needle to speed drying. The process takes 24-48 hours in a dehydrator, making this a task that only makes sense with a dedicated unit.
Fruit Leather (Roll-Ups)
Fruit leather is pureed fruit dried into a flexible sheet. This is one area where the dehydrator has a clear advantage. Most dehydrators come with special fruit leather trays (solid sheets that prevent the puree from dripping through the mesh). Air fryers typically do not have equivalent accessories, making fruit leather difficult but not impossible to make.
To make fruit leather in a dehydrator: blend your fruit of choice into a smooth puree, spread it evenly on the fruit leather sheet (about 1/8″ thick), and dehydrate at 135°F for 6-8 hours. The leather is done when it is no longer sticky to the touch. Roll in parchment paper and cut into strips.
Dehydrating Vegetables: From Garden to Pantry
Vegetable dehydration is where the dehydrator truly shines. Gardeners and bulk shoppers rely on dehydration to preserve seasonal abundance for year-round use. While an air fryer can handle small quantities, the dehydrator’s capacity and consistency make it the tool of choice for serious preservation.
Tomatoes
Dried tomatoes are a kitchen staple—concentrated bursts of umami flavor that elevate pasta, salads, and bread. Roma (plum) tomatoes are ideal because of their lower moisture content and meaty texture. Slice in half, remove seeds, and place cut-side up on dehydrator trays. At 135°F, they take 8-14 hours depending on thickness. The result should be leathery and pliable, not brittle.
For an air fryer, you can only dry 4-6 tomato halves at a time. This makes it impractical for preserving a garden harvest. However, for a quick batch to toss into tonight’s pasta, the air fryer finishes the job in 3-5 hours.
Peppers
Dried peppers are incredibly versatile—they can be ground into powder, rehydrated for cooking, or eaten as crunchy snacks. Bell peppers, jalapeños, habaneros, and even mild Anaheim peppers all dehydrate well.
Safety Warning: When drying hot peppers, wear gloves and work in a well-ventilated area. The capsaicin in hot peppers becomes concentrated during dehydration, and the fumes can irritate your eyes and respiratory system. Never touch your face while handling dried hot peppers.
For pepper powder: dry at 135°F until completely brittle (12-24 hours), then grind in a spice grinder or blender. Store in airtight jars away from light. Homemade pepper powder is exponentially more flavorful than store-bought versions.
Onions
Dried onions are a game-changer for camping, emergency preparedness, and everyday cooking. Dice onions into uniform pieces and dehydrate at 125°F for 8-12 hours. The result is lightweight, shelf-stable onion that rehydrates in minutes.
Air fryers struggle with onions because the pieces are small and the powerful fan can scatter them. Use a mesh insert or parchment paper to keep them contained.
Mushrooms
Dried mushrooms have an intense, concentrated flavor that is far more complex than fresh. Slice mushrooms 1/4″ thick and dehydrate at 125°F for 6-10 hours. Wild mushrooms like chanterelles, porcini, and morels are particularly rewarding to dry.
The air fryer actually does a decent job with small batches of mushrooms. The faster drying time means less time for oxidation, which can help preserve lighter-colored mushrooms.
Herbs (Expanded Section)
Drying herbs at home is far superior to buying dried herbs at the store. Freshly dried herbs retain more essential oils and flavor. Both basil and rosemary, for example, maintain their aromatic compounds far better when dried at low temperatures (95-105°F) than when purchased pre-ground.
The challenge with herb dehydration in an air fryer is the fan. Lightweight leaves like basil, cilantro, and parsley can be blown around the basket, resulting in uneven drying and crumbled leaves. If you must use an air fryer, lay a piece of parchment paper on top of the herbs to weigh them down.
Dehydrators handle herbs beautifully. Bundle stems together, hang them from the trays or lay them flat, and let the gentle airflow do its work. The low temperature range of most dehydrators (down to 95°F) is perfect for preserving essential oils.
Preserving Herbs: The Complete Guide
Fresh herbs from the garden or farmers market are a joy—until they wilt in the refrigerator. Dehydrating extends their shelf life from days to months, and the process is simple once you understand the basics.
Which Herbs Dry Best?
High Oil Herbs (Best for Drying): Rosemary, thyme, oregano, sage, lavender, and mint. These herbs have robust essential oil content that survives the drying process beautifully. They retain 80-90% of their flavor when dried properly.
Medium Oil Herbs (Good Results): Dill, marjoram, tarragon, and lemon balm. These herbs lose some potency during drying but are still far superior to store-bought dried versions.
Low Oil Herbs (Challenging): Basil, cilantro, parsley, chives, and tarragon. These herbs lose significant flavor during traditional drying. For basil, consider making pesto or freezing in olive oil instead. However, if you do dry basil, the low temperature of a dehydrator (95-105°F) preserves more flavor than an air fryer.
Harvesting for Drying
Harvest herbs in the morning after the dew has dried but before the sun becomes intense. This is when essential oil content is highest. Cut stems just before the plant flowers for maximum flavor. Avoid harvesting after rain, as excess moisture extends drying time.
Dehydration Methods for Herbs
Whole Leaf Method: Best for large-leaf herbs like basil and sage. Remove leaves from stems and spread in a single layer on dehydrator trays. Dry at 95-105°F for 2-4 hours until leaves crumble easily.
Bundle Method: Best for woody-stemmed herbs like rosemary, thyme, and oregano. Bundle 4-6 stems together with twine and hang upside down in a dehydrator or air fryer basket. This method takes longer (4-8 hours) but preserves the most essential oils.
Screen Method: Best for delicate herbs like cilantro and parsley. Place herbs on mesh dehydrator screens, which allow air circulation from both sides. This produces the most evenly dried herbs.
Storing Dried Herbs
Properly stored dried herbs retain their flavor for 1-3 years. Store in airtight glass jars away from heat and light. Label with the herb name and date. Crush leaves only when ready to use—whole dried leaves retain flavor longer than ground.
A useful test: if you crumble a dried leaf between your fingers and can clearly smell the herb’s characteristic aroma, it is still good. If the scent is faint or musty, it is time to replace it.
Homemade Snack Recipes for Both Appliances
Here are five tried-and-true recipes that work in both air fryers and dehydrators. Each recipe includes instructions for both appliances.
1. Classic Beef Jerky
Ingredients: 2 lbs top round beef, 1/2 cup soy sauce, 2 tbsp Worcestershire sauce, 1 tbsp garlic powder, 1 tbsp onion powder, 1 tsp black pepper, 1 tsp smoked paprika, 1/2 tsp cayenne (optional)
Preparation: Freeze beef 2 hours, slice 1/8″ thick against the grain. Mix marinade ingredients, add beef, refrigerate 8-24 hours. Pat dry before dehydrating.
Air Fryer: 160°F, single layer in basket, 2-4 hours. Check at 2 hours.
Dehydrator: 160°F, spread on trays, 4-8 hours. No rotation needed.
2. Cinnamon Apple Chips
Ingredients: 4 large apples (Honeycrisp or Granny Smith), 1 tbsp lemon juice, 1 tsp cinnamon, 1 tbsp honey (optional)
Preparation: Core and slice apples into 1/8″ rings. Soak in lemon water 5 minutes. Pat dry, sprinkle with cinnamon and optional honey.
Air Fryer: 135°F, single layer, 1.5-3 hours. Flip halfway.
Dehydrator: 135°F, arranged on trays, 6-12 hours. No flipping needed.
3. Sweet Potato Dog Treats
Ingredients: 2 large sweet potatoes, water for soaking
Preparation: Scrub sweet potatoes (do not peel). Slice into 1/4″ rounds or strips. Soak in water 1 hour to remove excess starch.
Air Fryer: 135°F, single layer, 3-5 hours until hard and chewy.
Dehydrator: 135°F, arranged on trays, 8-12 hours until hard.
4. Garden Herb Blend
Ingredients: 1 cup fresh basil, 1/2 cup fresh oregano, 1/4 cup fresh thyme, 1/4 cup fresh rosemary
Preparation: Wash and dry herbs thoroughly. Strip leaves from stems (except rosemary and thyme, keep on stems).
Air Fryer: 95-105°F, 1-2 hours. Cover with parchment to prevent blowing.
Dehydrator: 95-105°F, 2-4 hours on mesh screens.
5. Tropical Mango Fruit Leather
Ingredients: 4 ripe mangoes, 2 tbsp lime juice, 1 tbsp honey (optional)
Preparation: Peel and pit mangoes. Blend with lime juice and honey until smooth. Strain to remove any fibrous bits.
Air Fryer: Spread thin on parchment-lined basket. 135°F, 3-5 hours. Check frequently.
Dehydrator: Spread on fruit leather sheet, 135°F, 6-8 hours until not sticky.
Storage & Shelf Life: Keeping Your Dried Foods Fresh
Making dried food is only half the battle—storing it properly is equally important. Poor storage can turn weeks of work into moldy, stale, or rancid food in days.
The Golden Rules of Storage
- Complete Drying: Food must be fully dried before storage. Any residual moisture will cause mold. The “bend test” applies: if the food bends without cracking, it likely still contains too much moisture.
- Cool Before Storing: Allow dried food to cool to room temperature before sealing. Sealing warm food creates condensation inside the container.
- Airtight Containers: Glass mason jars with new lids, vacuum-sealed bags, or resealable Mylar bags are all excellent choices. Avoid plastic bags that allow air exchange.
- Cool, Dark Location: Store in a pantry, cupboard, or basement away from direct sunlight and heat sources. Light and heat degrade both flavor and nutritional value.
Shelf Life by Food Type
| Food Type | Pantry | Refrigerator | Freezer |
|---|---|---|---|
| Beef Jerky | 1-2 months | 3-6 months | 6-12 months |
| Dried Fruit | 1-2 months | 6-12 months | 12+ months |
| Dried Vegetables | 1-3 months | 6-12 months | 12+ months |
| Dried Herbs | 1-3 years | N/A | 3+ years |
| Trail Mix Components | 2-3 months | 6 months | 12 months |
Signs of Spoilage
Always inspect dried food before eating. Discard anything that shows these signs:
- Mold: Any visible mold means the entire batch is contaminated. Discard everything.
- Off Smells: Rancid, sour, or musty odors indicate spoilage. Trust your nose.
- Sticky Texture: If dried food becomes sticky or tacky, it has absorbed moisture and may be developing bacteria.
- Insect Activity: Small holes, webbing, or tiny bugs indicate pantry moth infestation. Discard affected items and clean storage containers thoroughly.
Oxygen Absorbers and Desiccants
For long-term storage (6+ months), consider adding food-grade oxygen absorbers to your storage containers. These small packets remove oxygen from sealed containers, preventing oxidation and extending shelf life significantly. They are inexpensive and widely available online.
For jerky and other meat products, vacuum sealing with oxygen absorbers is the gold standard. This combination can extend jerky’s shelf life to 6+ months at room temperature.
Safety Considerations You Cannot Ignore
Food dehydration is generally safe, but there are important safety considerations that every home preserver must understand. Improperly dried food can harbor dangerous bacteria, and the consequences can be severe.
Meat Safety
Meat is the highest-risk food for dehydration. The USDA recommends the following for jerky safety:
- Pre-treat meat: Marinate in the refrigerator for 4-24 hours. The acid in marinades (vinegar, citrus juice) helps kill surface bacteria.
- Heat to 160°F (71°C): Before dehydrating, heat meat to 160°F for at least 5 minutes. Some experts recommend this pre-heat step for all jerky, not just poultry.
- Dehydrate at 160°F or higher: This temperature kills most harmful bacteria including E. coli and Salmonella.
- Post-treat (optional): After drying, some people briefly heat jerky in a 275°F oven for 10 minutes as an extra safety measure.
- Store properly: Refrigerate or freeze jerky if you are not consuming it within 1-2 weeks.
Fruit and Vegetable Safety
Fruits and vegetables are lower risk than meat, but still require attention:
- Wash thoroughly: Dirt and bacteria on the surface can survive the dehydration process.
- Blanch when appropriate: Blanching vegetables before drying deactivates enzymes that cause flavor and color degradation. Steam blanching is preferred over water blanching for most vegetables.
- Prevent cross-contamination: Never use the same cutting board or trays for raw meat and produce without washing in between.
Appliance Safety
Both air fryers and dehydrators are electrical appliances that generate heat. Follow these general safety rules:
- Never leave unattended for extended periods: While dehydration is a “set it and forget it” process, check on your appliance every few hours.
- Keep away from flammable materials: Place on a heat-resistant surface away from curtains, paper towels, and other combustibles.
- Ensure adequate ventilation: Both appliances release warm, moist air. Do not place them in enclosed cabinets while running.
- Clean regularly: Grease buildup and food debris can create fire hazards. Clean your appliance after each use.
- Use the right extension cord: If you must use an extension cord, ensure it is rated for the appliance’s wattage and is in good condition.
Critical Reminder: Dehydrated food is not sterile. It requires proper handling and storage to remain safe. Always follow tested recipes from reliable sources (USDA, National Center for Home Food Preservation) when preserving food, especially meat and poultry.
Cleaning & Maintenance: Making Your Appliance Last
Proper maintenance extends the life of your appliance and ensures consistent results. Here is how to care for both air fryers and dehydrators.
Air Fryer Maintenance
After Every Use: Remove the basket and tray, wash with warm soapy water, and dry thoroughly. Most baskets are dishwasher-safe, but hand washing preserves the non-stick coating longer.
Deep Cleaning (Weekly): Wipe the interior with a damp cloth. For stubborn grease, create a paste of baking soda and water, apply to affected areas, let sit 10 minutes, then wipe clean. Never use abrasive cleaners or steel wool on non-stick surfaces.
Heating Element: Unplug and cool completely. Turn upside down and shake out any loose debris. Wipe with a damp cloth. Never submerge the main unit in water.
Dehydrate Mode Specific: After dehydrating sticky foods (like fruit leather or honey-marinated jerky), clean the basket immediately. Dried sugar is much harder to remove than fresh sugar.
Dehydrator Maintenance
After Every Use: Wash trays with warm soapy water. Most trays are dishwasher-safe. For sticky residues, soak in warm water for 15 minutes before washing.
Tray Conditioning: New dehydrator trays may have a manufacturing residue. Wash with vinegar water (1 part vinegar to 2 parts water) before first use.
Base Unit: Wipe the base (heating element and fan area) with a damp cloth. Never submerge in water. Some models have a removable drip tray—wash this after every use.
Screen Care: Mesh screens and fruit leather sheets require gentle handling. Do not scrub aggressively, as this can damage the mesh. Soak in warm soapy water and gently brush clean.
Storage of the Appliance
When not in use, store your dehydrator or air fryer in a dry location. If storing for extended periods, leave the door or basket slightly ajar to prevent moisture buildup and odors. Wrap the power cord loosely (do not coil tightly) to prevent internal wire damage.
Cost & Energy Efficiency: The Real Numbers
Beyond the purchase price, the ongoing cost of running your appliance matters—especially for dehydration, which involves long run times.
Electricity Consumption
| Appliance | Typical Wattage | Drying Time (Fruit) | Energy Used | Cost Per Batch* |
|---|---|---|---|---|
| Air Fryer (Small) | 1,000-1,200W | 2-4 hours | 2-4.8 kWh | $0.24 – $0.58 |
| Air Fryer (Large) | 1,500-1,800W | 2-4 hours | 3-7.2 kWh | $0.36 – $0.86 |
| Dehydrator (Basic) | 300-600W | 8-12 hours | 2.4-7.2 kWh | $0.29 – $0.86 |
| Dehydrator (Premium) | 600-1,000W | 6-10 hours | 3.6-10 kWh | $0.43 – $1.20 |
*Based on average US electricity rate of $0.12/kWh
The numbers reveal an interesting truth: for equivalent batches, the total energy cost is surprisingly similar. The air fryer uses more power but runs for less time, while the dehydrator uses less power but runs much longer. The total kilowatt-hours consumed end up in a comparable range.
Cost Per Serving
When you factor in the cost of raw ingredients, homemade dehydrated food is dramatically cheaper than store-bought:
- Beef Jerky: $4-6/lb homemade vs. $15-30/lb store-bought. You save $10-24 per pound.
- Dried Apple Chips: $2-3/batch (4 apples) vs. $4-6 for a small bag at the store.
- Dried Herbs: Pennies per jar from garden herbs vs. $3-8 for small containers at the grocery store.
- Fruit Leather: $3-4 per batch vs. $5-8 for a box of store-bought fruit snacks.
For families that consume jerky regularly, a dehydrator can pay for itself within a few months. The math is compelling: if your family eats 2 lbs of jerky per week, making it at home saves approximately $20-48 per week, or $1,000-2,500 per year.
Appliance Lifespan and Value
A quality dehydrator can last 10-15 years with proper care. Air fryers typically have a shorter lifespan of 3-5 years due to their more complex heating elements and fans. When calculating long-term value, consider that you may replace an air fryer 2-3 times during the lifespan of a single dehydrator.
Budget vs. Premium: What You Get at Every Price Point
The price range for both air fryers and dehydrators is enormous—from $30 to $500+. Understanding what you get at each price point helps you make an informed decision.
Air Fryers: Price Tiers
Budget ($30-60): Basic basket-style air fryers with minimal temperature control. Usually have a minimum temperature of 170-180°F, making them poor choices for dehydrating. Good for basic air frying tasks.
Mid-Range ($60-150): Better temperature control (down to 120-130°F), larger baskets, and often include a “Dehydrate” preset. The Ninja AF101 falls in this range and is one of the best values for dehydrating capability.
Premium ($150-400): Oven-style air fryers with multiple racks, precise temperature control down to 95-105°F, and advanced features like dehydrator-specific fan speeds. These can genuinely replace a dehydrator for small to medium batches.
Dehydrators: Price Tiers
Budget ($40-80): Stackable round models with basic temperature control. Usually have 4-5 trays and a vertical airflow design. Functional but may require tray rotation for even drying. Good for occasional use.
Mid-Range ($80-200): Shelf-style models with horizontal airflow, 5-9 trays, and precise digital temperature control. These are the sweet spot for most home dehydrators. The COSORI Food Dehydrator is an excellent example in this range.
Premium ($200-500): Large-capacity stainless steel models with 10+ trays, commercial-grade fans, and advanced features like programmable timers, automatic shutoff, and whisper-quiet operation. These are for serious preservers and small-scale commercial operations.
Which Should You Buy?
If you are buying your first air fryer and want to occasionally dehydrate small batches, get a mid-range model ($60-150) with a dehydrate preset. The Ninja AF101 is an excellent choice for this use case.
If you are serious about dehydrating—if you garden, hunt, make jerky regularly, or want to preserve large quantities of food—a dedicated dehydrator in the mid-range ($80-200) is the better investment. It will produce superior results and last much longer.
The ideal setup for many households is both: an air fryer for everyday cooking and quick dehydration tasks, and a dehydrator for bulk preservation and precision work.
Raw Food Diets & Special Dietary Needs
Dehydration plays a central role in raw food diets, where food is never heated above 115-118°F (46-48°C) to preserve enzymes and nutrients. This is one of the clearest use cases where a dedicated dehydrator is essential.
Why Air Fryers Fail at Raw Food
Most air fryers cannot maintain temperatures below 120-130°F, and many cannot go below 150°F. For raw food preparation, this is simply too hot. The enzymes that raw food practitioners want to preserve begin to denature at temperatures above 118°F.
Even air fryers that claim to reach 105°F may not maintain that temperature consistently. The heating elements are designed for high heat, and the control systems may not be precise enough at the low end to stay within the narrow raw food temperature window.
Raw Food Dehydrator Requirements
For raw food preparation, look for a dehydrator with these features:
- Temperature range down to 95°F: This is the standard for raw food dehydration.
- Precise temperature control: Digital thermostats are preferred over analog dials.
- Horizontal airflow: Ensures even drying without tray rotation, which is important for long dehydration times (24-48 hours).
- Large capacity: Raw food recipes often involve large quantities of sprouted grains, soaked nuts, and pureed vegetables.
Popular Raw Food Dehydration Recipes
Flax Crackers: Blend soaked flax seeds with vegetables, herbs, and spices. Spread on a non-stick sheet and dehydrate at 115°F for 12-18 hours. The result is a crispy, flavorful cracker that is completely raw.
Nut-Based Cheese: Blend soaked cashews with cultures and seasonings. Spread on a dehydrator tray and dry at 115°F for 8-12 hours. The result is a firm, sliceable “cheese” that is entirely plant-based.
Vegetable Chips: Thinly slice beets, sweet potatoes, or parsnips. Dehydrate at 115°F for 12-24 hours. These take much longer than the same chips at higher temperatures, but they retain their raw status.
Onion Bread: Blend soaked sunflower seeds with diced onions and seasonings. Spread on a dehydrator tray and dry at 115°F for 8-12 hours. The result is a bread-like cracker that is a staple of the raw food diet.
Other Special Diets
GAPS/Paleo: Dehydrated bone broth chips, fruit leather without added sugar, and homemade jerky are all popular in these diets. A dehydrator is the tool of choice.
Dehydrated Meal Prep: Hikers, campers, and backpackers use dehydrators to create lightweight, shelf-stable meals. Dehydrated chili, pasta sauce, and stroganoff can be rehydrated with boiling water on the trail.
Pet Treats: Making dehydrated sweet potato chews, chicken jerky, and fish treats for pets is a popular use for dehydrators. Homemade pet treats avoid the preservatives and questionable ingredients found in many commercial products.
Troubleshooting Common Issues
Even experienced users encounter problems. Here are the most common issues and their solutions.
Food is Taking Too Long to Dry
Cause: Slices are too thick, trays are overloaded, or the appliance is not maintaining proper temperature.
Solution: Check slice thickness with a ruler—most foods should be 1/8″ to 1/4″ thick. Ensure trays are not overcrowded; air must circulate around each piece. Use an oven thermometer to verify your appliance’s actual temperature.
Food is Unevenly Dried
Cause: Inconsistent slice thickness, overloaded trays, or poor airflow design.
Solution: Use a mandoline for uniform slicing. Rotate trays halfway through drying (top to bottom) if you have a vertical airflow dehydrator. For air fryers, shake the basket or rearrange pieces periodically.
Food is Too Hard or Brittle
Cause: Over-dried. This is common when drying times are estimated rather than checked.
Solution: Check food earlier than the recipe suggests. The “bend test” is more reliable than time estimates. For fruit, you want leathery and pliable, not crunchy. For jerky, it should bend and crack but not break apart.
Food is Sticky After Drying
Cause: Under-dried. High-sugar foods like mango, pineapple, and figs are particularly prone to this.
Solution: Return to the dehydrator for another 1-2 hours. High-sugar fruits may need to dry at a slightly higher temperature (145°F) to fully remove moisture.
Food Stuck to Trays
Cause: High sugar content, no non-stick preparation, or insufficient drying time.
Solution: Use non-stick dehydrator sheets or lightly oil trays before use. Allow food to dry slightly before removing from the dehydrator—it releases more easily when fully dry.
Herbs Lost Their Color
Cause: Temperature too high or drying took too long.
Solution: Dry herbs at the lowest possible temperature (95-105°F) and check frequently. Herbs are done when they crumble easily—this can take as little as 2-3 hours.
Jerky Tastes Smoky When Not Intended
Cause: Some air fryers have residual smoke flavor from previous cooking sessions.
Solution: Clean your air fryer thoroughly before dehydrating jerky. Run a cleaning cycle with vinegar water (1 cup vinegar in the water reservoir, if applicable) to remove residual odors.
Dehydrator Makes Excessive Noise
Cause: Worn fan bearings, loose parts, or food debris in the fan.
Solution: Unplug and inspect the fan area for debris. Tighten any loose screws. If the noise persists, the fan motor may need replacement—contact the manufacturer.
Expert Tips & Techniques
These tips come from years of experience and will help you get the best results from either appliance.
Preparation Tips
- Invest in a mandoline: Consistent slice thickness is the single most important factor for even drying. A $15 mandoline pays for itself quickly.
- Use a kitchen scale: Weigh your food before and after drying. This tells you exactly how much moisture has been removed. Most foods should lose 75-90% of their weight.
- Pre-freeze for faster drying: For fruits and vegetables, spreading slices on a baking sheet and freezing for 2 hours before dehydrating ruptures cell walls and speeds moisture removal by 20-30%.
- Soak in salt water: For vegetables like zucchini and eggplant, soaking in salt water for 30 minutes draws out excess moisture and reduces drying time.
Drying Tips
- Start with a clean appliance: Residual odors and grease from previous cooking sessions can transfer to delicate foods like herbs and fruits.
- Don’t peek too often: Every time you open the dehydrator or remove the air fryer basket, you lose heat and extend drying time. Check once every 2-3 hours maximum.
- Use the right temperature for the food, not the clock: Recipes provide time estimates, but actual drying time varies with humidity, slice thickness, and appliance. Trust the texture, not the timer.
- Rotate strategically: For air fryers, shake or rearrange pieces every hour. For vertical airflow dehydrators, rotate trays top-to-bottom every 4-6 hours. Horizontal airflow dehydrators rarely need rotation.
Storage Tips
- Vacuum seal for jerky: The combination of vacuum sealing and oxygen absorbers extends jerky shelf life to 6+ months at room temperature.
- Use glass jars for herbs: Glass does not absorb odors or leach chemicals. Mason jars with new lids are ideal.
- Label everything: Include the food name, date dried, and any seasonings used. Dried food looks similar after months in storage.
- Condition before long-term storage: Place dried fruit in a sealed jar for 1 week. If condensation appears, the fruit needs more drying time.
Advanced Techniques
- Layer flavors: Brush jerky with additional marinade halfway through drying for more intense flavor.
- Use trays for multiple items: In a dehydrator, you can dry different foods simultaneously as long as they require similar temperatures. Herbs and fruits can share trays; keep onions and peppers on separate trays to prevent flavor transfer.
- Create custom spice blends: Dry your own peppers, garlic, and herbs, then grind into custom seasoning blends. The freshness is incomparable to store-bought spices.
- Make powdered supplements: Dry kale, spinach, or spirulina-mixed fruits into powders that can be added to smoothies. The low heat of a dehydrator preserves nutrients better than commercial processing.
Eco-Friendly & Sustainability Considerations
Dehydrating food at home has significant environmental benefits that are worth considering.
Reducing Food Waste
According to the USDA, 30-40% of the food supply in the United States is wasted. Dehydration is one of the most effective ways to extend the life of perishable food. That bag of apples about to go soft? Dehydrate them into chips that last months. The herbs wilting in the refrigerator? Dry them for year-round use. The garden tomato glut? Turn them into sun-dried tomatoes that last all winter.
By dehydrating food that would otherwise be wasted, you are reducing methane emissions from landfills, saving the water and energy used to produce that food, and getting more value from your grocery budget.
Energy Efficiency Comparison
Dehydrating food uses significantly less energy than canning (which requires boiling water baths) or freezing (which requires constant electricity). A dehydrator uses electricity only during the drying process—once the food is dried, it requires no energy to store at room temperature.
Compare this to a freezer, which uses 100-400 kWh per year to maintain temperature. Over the 10-15 year lifespan of a dehydrator, the energy savings from drying rather than freezing can be substantial.
Packaging Reduction
When you make your own dried food, you eliminate the plastic packaging, labels, and preservatives that come with store-bought versions. Store-bought beef jerky, for example, comes in single-serving plastic pouches that are difficult to recycle. Homemade jerky stored in glass mason jars produces zero waste.
Choosing Sustainable Appliances
When purchasing a dehydrator or air fryer, consider these sustainability factors:
- Durability: A stainless steel dehydrator that lasts 15 years is more sustainable than a plastic model that lasts 5 years.
- Repairability: Choose brands that offer replacement parts and repair services rather than “disposable” appliances.
- Energy rating: Look for energy-efficient models. Some dehydrators use as little as 300 watts—less than a light bulb.
- Local production: When possible, choose appliances manufactured closer to reduce shipping emissions.
The Bigger Picture
Dehydrating food connects you to one of humanity’s oldest preservation techniques. Before refrigeration, drying was the primary method of food preservation used by cultures around the world. By dehydrating food at home, you are participating in a tradition that spans thousands of years—and doing your part to reduce the environmental impact of the modern food system.
Final Verdict
Stick with your Air Fryer If:
- You only want to make dried snacks (apple chips, kale chips) occasionally.
- You have a small kitchen and absolutely no storage space.
- You are okay with doing small batches (enough for 1-2 people).
- You want one appliance that does everything, even if it does nothing perfectly.
- You eat jerky once in a while and are happy with crispy-textured results.
- You primarily cook with your air fryer and want to add dehydration as a bonus feature.
Buy a Dedicated Dehydrator If:
- You make beef jerky regularly (it is much cheaper to make than buy).
- You are a gardener who needs to preserve herbs, tomatoes, and peppers.
- You follow a raw food diet and require precise temperature control below 115°F.
- You want to make fruit leather, dried fruit in bulk, or dehydrated meal prep.
- You hunt, fish, or buy meat in bulk and need to preserve large quantities.
- You want consistent, even results without babysitting the appliance.
- You value long-term durability over multifunctionality.
The Best of Both Worlds
For many households, the answer is not “either/or” but “both.” An air fryer handles everyday cooking and small dehydration tasks, while a dedicated dehydrator excels at bulk preservation and precision work. Together, they cover virtually every food preservation need.
If you must choose one, consider your primary use case: if you cook more than you preserve, start with an air fryer. If you preserve more than you cook, start with a dehydrator. You can always add the second appliance later as your needs evolve.
Frequently Asked Questions
It is difficult. Most standard air fryers have a minimum temperature of 170°F-180°F, which is too hot for dehydrating. It will cook the food rather than dry it. Check your manual to see how low the temperature dial goes.
Air fryers use higher wattage than dehydrators, but they run for shorter periods. However, efficient dedicated dehydrators are generally cheaper to run for long 12-hour cycles because they use very low wattage (often 300W-600W).
You likely overcrowded the basket. In an air fryer, air must circulate around every single slice. If they overlap, the moisture gets trapped. You must do a single layer at a time.
Yes, as long as the temperature reaches 160°F (71°C) to kill bacteria. Since most air fryers easily reach this temperature, they are actually quite good for making jerky, provided you slice the meat thinly.
Properly dried and stored jerky lasts 1-2 months at room temperature in an airtight container, 3-6 months in the refrigerator, and up to 12 months in the freezer. Vacuum sealing with oxygen absorbers extends shelf life significantly.
Yes, as long as they require similar temperatures and drying times. For example, you can dry different fruits together, or different herbs together. However, avoid drying onions and peppers on the same tray as other foods, as their strong flavors can transfer. Always keep meats on separate trays from produce.
Blanching is recommended for most vegetables to deactivate enzymes that cause flavor and color degradation. Steam blanching for 3-5 minutes is preferred. However, herbs, peppers, and onions can be dried without blanching. Fruits also typically do not require blanching, though a lemon juice dip prevents browning.
The ideal temperature for most herbs is 95-105°F (35-40°C). This low temperature preserves the essential oils that give herbs their flavor and aroma. Higher temperatures cause these volatile oils to evaporate, resulting in less flavorful dried herbs. This is one area where a dehydrator with precise low-temperature control significantly outperforms most air fryers.
Both air fryers and dehydrators can run overnight, but there are important considerations. Ensure the appliance has an automatic shutoff timer. Place the appliance on a heat-resistant surface away from flammable materials. Do not leave an air fryer unattended for more than 6-8 hours, as its cycling behavior at low temperatures can vary. Dehydrators are generally safer for overnight use due to their lower wattage and more consistent operation.
Use the “bend test” rather than relying on time estimates. For jerky, it should bend and crack but not break apart. For fruits, it should be leathery and pliable. For vegetables, it should be hard and brittle. For herbs, leaves should crumble easily when pressed between your fingers. If food is sticky, soft, or pliable when it should be brittle, it needs more time.
Yes, parchment paper is safe to use in air fryers at dehydrating temperatures (below 160°F). It is useful for preventing small items from falling through the basket and for keeping sticky foods from adhering to the surface. However, ensure the parchment does not block airflow—cut it to fit the basket without covering the air vents.
In an air fryer, you can typically dry 1-2 cups of sliced fruit or 4-6 strips of jerky per batch. In a dehydrator, a standard 5-tray model can handle 2-3 pounds of meat or 8-10 cups of sliced fruit at once. Premium dehydrators with 10+ trays can handle even larger quantities. The key is not to overcrowd—air must circulate around each piece for even drying.
Absolutely. Most dehydrated foods can be rehydrated by soaking in water, broth, or other liquids. Fruits typically need 1-2 hours of soaking. Vegetables need 30-60 minutes. Jerky can be eaten dry or rehydrated in soups and stews. Dried herbs can be added directly to recipes without rehydrating—they release their flavor as they cook.
It depends on your needs. If you only dehydrate occasionally and in small batches, your air fryer is probably sufficient. But if you garden, hunt, make jerky regularly, follow a raw food diet, or want to preserve large quantities of food, a dedicated dehydrator is a worthwhile investment. The capacity, consistency, and precision advantages are significant for serious preservation work.
For beginners, a mid-range shelf-style dehydrator with horizontal airflow and digital temperature control is ideal. The COSORI Food Dehydrator is an excellent choice—it offers precise temperature control, multiple trays, quiet operation, and comes with detailed instructions. Avoid the cheapest stackable round models, as they often have inconsistent airflow and limited temperature control.
Air fryer ovens (like the Ninja Foodi or Cuisinart Toaster Oven Air Fryer) are actually better for dehydration than basket-style air fryers. They have multiple racks that allow you to dry more food at once, and their temperature control is often more precise at the low end. If you have an air fryer oven, you have a viable small-batch dehydrator.
Pungent foods like onions, garlic, and peppers can fill your kitchen with strong odors during dehydration. Place your dehydrator in a well-ventilated area, near an open window or under a range hood. You can also use an activated carbon filter near the appliance to absorb odors. Avoid drying strong-smelling and mild-flavored foods in the same session.
It is possible but not ideal. Air fryers do not typically come with fruit leather trays, so you would need to line the basket with parchment paper and spread the puree very thinly. The limited capacity means you can only make small amounts at a time. A dedicated dehydrator with fruit leather sheets is much better suited for this task.
Case hardening occurs when the surface of food dries too quickly, forming a hard shell that traps moisture inside. This is more common in air fryers due to their powerful fans. To prevent it: use lower temperatures, ensure proper airflow without excessive fan speed, and slice food uniformly thin. If you notice the outside is hard but the inside feels soft or cool, reduce the temperature and extend drying time.
Yes. Many people dehydrate cooked foods like chili, pasta sauce, soup, and rice for lightweight camping meals or emergency food storage. Spread cooked food in a thin layer on dehydrator trays (parchment paper helps) and dry at 135°F for 8-12 hours. The dried food can be rehydrated with hot water for a quick meal. This is not recommended in air fryers due to the messy process of spreading liquid food in a basket.
Soak trays in hot, soapy water for 15-30 minutes. For stubborn sticky residue (common after drying fruit leather or honey-glazed jerky), make a paste of baking soda and water, apply to the sticky areas, let sit for 10 minutes, then scrub gently with a soft brush. Avoid using abrasive pads on non-stick trays. For mesh screens, soak and gently brush rather than scrubbing aggressively.


