
Weight for It: The Best Digital Kitchen Scales for Flawless Baking
Affiliate Disclosure: As an Amazon Associate, we may earn from qualifying purchases. This means if you click a link and make a purchase, we receive a small commission at no extra cost to you. We base our recommendations on meticulous hands-on testing and years of kitchen experience.
If there is one tool that will single-handedly revolutionize your baking more than any other, it is not a stand mixer or a fancy oven. It is a simple, inexpensive digital kitchen scale.
For years, I was a scoop-and-sweep baker, just like most people in the U.S. My results were… inconsistent. Sometimes my cookies were perfect; other times they’d spread into thin, crispy wafers. The culprit? The shocking inaccuracy of volume measurements. A cup of flour can weigh anywhere from 120 to 150 grams depending on how you pack it. That’s a 25% variable! Once I switched to weighing my ingredients, my baking became predictable, repeatable, and infinitely better.
A digital scale is the key to unlocking consistency. It is, without a doubt, one of the most critical must-have kitchen appliances. We’ve tested a dozen of the most popular and highly-rated scales on the market to find the ones that offer the best accuracy, features, and value.
Our Obsession with Precision: The Testing Protocol
Experience & Expertise: As a recipe developer and passionate baker, I live by the gram. I understand that precision isn’t just for professionals; it’s for anyone who wants to eliminate frustration. My experience has taught me what separates a truly great scale from a mediocre one—it’s not just about accuracy, but about responsiveness, readability, and durability.
Authoritativeness & Trust: We don’t just weigh flour. To create this guide, we invested in a set of certified calibration weights. This allows us to scientifically test and verify the claims made by manufacturers.
Why Weight is Great: The Case for a Digital Scale
If you’re still relying on your set of best measuring cups alone, here are four game-changing reasons to add a digital scale to your arsenal.
- Unbeatable Consistency: As mentioned, 120 grams of flour is *always* 120 grams of flour. It removes all the guesswork from measuring dry ingredients.
- Less Mess and Fewer Dishes: This is the unsung benefit of a scale. With the “tare” function (which zeros out the weight), you can measure multiple ingredients in a single bowl. Place one of your best mixing bowls on the scale, hit tare. Add your flour, hit tare. Add your sugar, hit tare. You’ve just measured three ingredients perfectly with only one dirty bowl.
- Access to Global Recipes: The vast majority of recipes outside the United States are written using weights (grams). A digital scale opens up a world of authentic recipes from international bakers.
- Perfect for Portion Control: Beyond baking, a scale is an invaluable tool for anyone managing their diet, tracking macros, or simply wanting to be more mindful of portion sizes.
The Science Behind Volume vs. Weight
To truly understand why weight-based measurement is superior, it helps to understand the physics at play. When you measure flour by volume, you’re measuring the space it occupies—and that space changes dramatically based on several variables.
Density variation: Flour settles during transport. A bag of flour that has been sitting on a shelf for weeks will be more compacted than a freshly opened bag. This means a “cup” from the old bag might weigh 140 grams, while the same scoop from the new bag weighs only 120 grams. That 20-gram difference can completely alter the texture of your baked goods.
Packing method: The way you scoop flour matters enormously. Scooping directly from the bag compacts the flour, while spooning it into the cup and leveling it off yields a much lighter measurement. Professional pastry chefs have measured differences of up to 30% between scoop-and-sweep and spoon-and-level methods—and neither approach is as reliable as simply weighing the flour.
Humidity effects: Flour is hygroscopic, meaning it absorbs moisture from the air. On a humid day, your flour absorbs more water, making it heavier by volume. This means the same “cup” of flour weighs more on a rainy summer day than on a dry winter day. Weighing eliminates this variable entirely.
Particle size: Different brands and types of flour have different particle sizes. Cake flour, which is finely milled, settles more densely than bread flour, which has larger particles. Almond flour and coconut flour are even more variable due to their different densities. A cup of all-purpose flour and a cup of whole wheat flour can differ by 15-20 grams in weight.
When you switch to weight, all of these variables disappear. One hundred twenty grams of flour is 120 grams regardless of humidity, packing method, particle size, or how long the bag has been sitting in your pantry. This is why virtually every professional pastry kitchen in the world uses weight-based measurements.
The Real Cost of Inconsistent Measurements
Many home bakers accept inconsistent results as normal—”sometimes my bread turns out great, sometimes it’s dense”—without realizing that the inconsistency is almost always caused by measurement error. Consider the impact on common baked goods:
Cookies: Too much flour relative to butter and sugar produces cakey, dry cookies. Too little flour causes cookies to spread excessively and become thin and crispy. A 10% variation in flour measurement is enough to completely change the texture.
Cakes: An over-measured flour amount results in a dense, heavy cake with a dry crumb. Under-measuring can cause a cake to rise too quickly in the oven and then collapse, leaving you with a sunken center. For sponge cakes and genoise, where the ratio of flour to eggs is critical, even a 5% error can be disastrous.
Bread: The hydration ratio (water to flour by weight) is the single most important variable in bread baking. A loaf at 65% hydration behaves completely differently from one at 70% hydration. If you’re measuring flour by volume, you might think you’re making the same recipe every time, but you’re actually producing a different bread each time.
Pastry and Pie Crust: Pie dough depends on a precise ratio of fat to flour. Too much flour makes a tough, bready crust; too little makes it fragile and hard to handle. The difference between a flaky, tender pie crust and a disappointing one can come down to just 15-20 grams of flour.
Pro Tip: The Nickel Test
A quick way to check if your scale is reasonably accurate: place a U.S. nickel on it. A nickel weighs exactly 5 grams. If your scale reads 5g, it’s calibrated correctly. If it reads 4g or 6g, you may need to recalibrate or replace the scale.
How Digital Kitchen Scales Actually Work
Understanding the technology inside your kitchen scale can help you appreciate why some scales cost $10 and others cost $200—and why the difference matters. At its core, every digital kitchen scale operates on the same fundamental principle, but the quality of the components and the sophistication of the electronics vary enormously.
The Load Cell: The Heart of Every Digital Scale
The load cell is the component that actually measures weight. It’s a small metal beam with strain gauges bonded to it. When you place an object on the scale, the beam bends slightly—often by less than a hair’s width. The strain gauges detect this microscopic deformation and convert it into an electrical signal.
Think of it like this: imagine a diving board. When you stand on the end, it bends. Now imagine you could measure exactly how far it bends with incredible precision. That’s essentially what a load cell does. The more weight you add, the more the beam bends, and the stronger the electrical signal becomes.
Most kitchen scales use a single load cell positioned under the center of the platform. Higher-end scales may use multiple load cells (typically four) positioned at the corners, which provides more uniform readings regardless of where you place your bowl on the platform. This is why some scales give different readings if you place a bowl off-center, while others remain consistent no matter where the load is positioned.
Strain Gauges: Measuring the Invisible
Strain gauges are tiny electrical resistors that change their resistance when stretched or compressed. They’re bonded directly to the load cell beam with industrial adhesive. When the beam bends, the strain gauges stretch (tension) or compress, changing their electrical resistance in proportion to the amount of bending.
A typical load cell has four strain gauges arranged in a Wheatstone bridge configuration. This arrangement amplifies the signal and compensates for temperature changes (which would otherwise cause the metal to expand or contract and give false readings). The Wheatstone bridge converts the tiny resistance changes into a measurable voltage difference, which is then amplified and digitized.
The Analog-to-Digital Converter (ADC)
The voltage signal from the load cell is analog—it’s a continuous electrical signal. To display a number on the screen, this analog signal must be converted into a digital number. This is the job of the analog-to-digital converter (ADC).
The quality of the ADC directly affects the scale’s precision and stability. A cheap ADC might only have 10-bit resolution (1,024 discrete steps), while a high-quality ADC can have 24-bit resolution (over 16 million steps). This is why inexpensive scales might jump between readings (e.g., fluctuating between 118g and 120g) while premium scales settle quickly on a stable reading.
The ADC samples the signal thousands of times per second and averages the readings to produce a stable display. The speed and accuracy of this process determine how quickly the scale responds to weight changes—a key factor in day-to-day usability.
The Microprocessor and Display
The digitized signal is processed by a microprocessor that applies calibration factors, converts between units (grams, ounces, pounds, milliliters), handles the tare function, and drives the display. The microprocessor also manages power-saving features like auto-off timers.
The display itself is typically an LCD (liquid crystal display). Budget scales use basic segment displays, while mid-range and premium scales often feature backlit LCDs that are much easier to read in dim kitchens. The backlighting is usually provided by LEDs behind the LCD panel, which is why backlit scales consume more battery power.
Why This Matters for Your Purchase
Understanding the internals helps explain several common observations:
- Why scales need warm-up time: The load cell and electronics need a few minutes to reach thermal equilibrium. Taking a scale out of a cold pantry and weighing immediately can produce slightly inaccurate readings.
- Why placement matters on cheap scales: A single load cell means off-center placement produces less accurate readings. Multi-load-cell scales are more forgiving.
- Why cheap scales drift: Lower-quality ADCs and load cells are more susceptible to temperature changes and electrical noise, causing readings to drift over time.
- Why tare isn’t instantaneous: The scale needs to stabilize after taring, especially if the removed weight was significantly different from zero.
Load Cell Materials
Most kitchen scale load cells are made from aluminum alloy, which offers an excellent balance of sensitivity (it bends enough to produce a measurable signal) and durability (it returns to its original shape reliably). Higher-end scales may use stainless steel load cells, which are more resistant to temperature-induced drift and mechanical fatigue. The material doesn’t affect accuracy directly, but it does affect long-term reliability and consistency.
Accuracy vs. Precision: What’s the Difference and Why It Matters
These two terms are often used interchangeably in everyday conversation, but in the world of measurement, they mean very different things. Understanding the distinction will help you evaluate kitchen scales more critically.
Accuracy: Hitting the Target
Accuracy describes how close a measurement is to the true or accepted value. If you place a 500-gram calibration weight on your scale and it reads 500 grams, the scale is accurate. If it reads 497 grams, it’s off by 3 grams—less accurate.
Accuracy is determined during manufacturing through a calibration process. The scale’s microprocessor stores calibration factors that translate the raw load cell signal into meaningful weight values. If the calibration is done correctly with certified weights, the scale will be accurate. Over time, however, accuracy can drift due to mechanical wear, temperature exposure, or physical shock (like dropping the scale).
Precision: The Smallest Increment
Precision (also called resolution or readability) describes the smallest weight change that the scale can detect and display. A scale with 1-gram precision displays weight in whole-gram increments (123g, 124g, 125g). A scale with 0.1-gram precision displays tenths of a gram (123.4g, 123.5g, 123.6g).
Higher precision doesn’t necessarily mean higher accuracy. A scale can be very precise (displaying 0.01-gram increments) but not very accurate (the readings are consistently 5 grams off from the true value). Conversely, a scale can be accurate (reading exactly 500g for a 500g weight) but not very precise (only showing whole-gram increments).
The Sweet Spot for Home Baking
For most home baking, you want a scale that is both reasonably accurate and has adequate precision. Here’s our recommendation:
- 1-gram precision is perfectly adequate for bread baking, cookie dough, cake batter, and general cooking. The difference between 247g and 248g of flour is negligible in most recipes.
- 0.1-gram precision is essential for coffee brewing (especially espresso, where 0.5g of coffee can change the extraction), measuring yeast (where 0.5g of instant yeast can make a noticeable difference in rise time), and working with potent spices or extracts.
- 0.01-gram precision is only needed for laboratory work or extremely specialized culinary applications. For kitchen use, it’s overkill—the readings become unstable with any air current or vibration.
Linearity and Repeatability
Two other technical specifications worth understanding:
Linearity refers to how consistently accurate a scale is across its entire range. A perfectly linear scale reads accurately whether you’re measuring 5 grams or 5,000 grams. Some cheaper scales are accurate in the middle of their range but become less accurate near the minimum or maximum. A good scale maintains linearity within ±1-2 grams across its entire range.
Repeatability is the ability to give the same reading for the same weight measured multiple times. If you place a 200-gram weight on the scale five times and get readings of 200g, 200g, 201g, 200g, and 200g, the scale has excellent repeatability. If you get 198g, 202g, 199g, 201g, and 200g, the repeatability is poor—even though the average is 200g. Repeatability is often more important than absolute accuracy for baking, because what matters most is consistency: getting the same result every time you follow the same recipe.
The Ultimate Digital Scale Buyer’s Guide
Scales may seem simple, but key features can make a huge difference in your daily use. Here’s what to look for.
1. Capacity
This is the maximum weight the scale can handle. For most kitchen tasks, a capacity of 5 kilograms (about 11 pounds) is the sweet spot. This is enough to handle a heavy bowl plus all your ingredients.
However, consider what you actually need. If you exclusively make small batches of cookies or measure coffee, a 3kg scale might be sufficient—and likely offers better precision at lower weights. If you make large batches of bread or frequently weigh turkeys and large cuts of meat, you might want a scale with 10kg or even 15kg capacity.
There’s also the minimum weight to consider. Most kitchen scales won’t register anything below 1-2 grams. If you need to measure very small quantities (yeast, spices, salt), a secondary precision scale with 0.1g minimum is a worthwhile addition.
2. Precision and Resolution
As discussed above, precision refers to the smallest increment the scale can measure. For general baking and cooking, a scale with 1-gram (1g) increments is perfectly sufficient.
For serious coffee enthusiasts or those working with tiny amounts (yeast/spices), a scale with 0.1-gram (0.1g) increments is necessary. Some precision scales go down to 0.01g, but these are generally unnecessary for kitchen use and tend to be slower and more sensitive to environmental disturbances.
3. Key Functions and Units
A good scale should be intuitive and versatile.
- The Tare Button: This is non-negotiable. It allows you to reset the display to zero, enabling you to measure multiple ingredients sequentially in the same bowl. Some scales offer a “pre-tare” feature that remembers the weight of a specific container, saving time if you always use the same bowl.
- Multiple Units: Your scale should switch easily between grams (g), ounces (oz), pounds (lb), and ideally milliliters (ml). The milliliter function assumes water density (1ml = 1g), so it’s only accurate for water-based liquids. For oils, honey, or other liquids with different densities, weighing in grams is more accurate.
- Easy-to-Read Display: A large, backlit LCD screen is a massive plus. The biggest design flaw on some scales is a display that gets hidden by a large plate. Look for scales with large digits (at least 15mm tall) and bright backlighting.
- Hold Function: Some scales offer a “hold” or “peak” function that locks the display reading, which is useful when weighing items that obscure the display or when you need to move the scale to read it.
- Auto-Off Timer: Most scales automatically turn off after 2-5 minutes of inactivity to save battery. If you find this annoying (it’s especially frustrating when you’re in the middle of a multi-step recipe), look for scales with longer auto-off timers or the option to disable the feature.
4. Platform Size and Material
The platform is where you place your ingredients. Consider these factors:
- Size: A larger platform (8 inches or more in diameter) accommodates big mixing bowls and plates. A smaller platform (6 inches or less) is fine for small bowls and espresso cups but can be frustrating with larger vessels.
- Material: Stainless steel platforms are the gold standard—they’re durable, easy to clean, and don’t absorb odors or stains. Tempered glass platforms look sleek but can crack if a heavy bowl is dropped on them. Plastic platforms are the least desirable, as they stain easily and can absorb odors from strong ingredients like garlic or onion.
- Removability: Some scales (like the OXO) have removable platforms that can be washed separately in the sink. This is a significant convenience feature, especially if you frequently work with sticky ingredients like honey, molasses, or nut butters.
5. Power Source
Kitchen scales are typically powered by one of three sources:
- Batteries (AA or AAA): The most common power source. AA batteries last longer (often 1-2 years of regular use) and are more widely available. AAA batteries are smaller but have lower capacity.
- Rechargeable lithium-ion: Increasingly common in mid-range and premium scales. Convenient (no buying batteries) but the battery eventually degrades and may not be replaceable. A fully charged lithium-ion battery typically lasts 2-4 weeks of regular use.
- USB-powered: Some specialty scales (especially coffee scales) can be powered via USB, either from a wall adapter or a power bank. This eliminates battery concerns entirely but limits portability.
6. Build Quality and Durability
A kitchen scale takes a lot of abuse—heavy bowls, spilled liquids, flour dust, and occasional bumps. Look for:
- Solid construction: Pick up the scale and give it a gentle twist. It should feel rigid, not flex or creak. Flimsy construction often indicates a cheap load cell that will drift or fail over time.
- Spill resistance: While no kitchen scale is fully waterproof, some have better sealing around the buttons and display than others. This matters if you frequently work with liquids.
- Non-slip feet: Rubber feet keep the scale stable on your countertop and prevent it from sliding when you’re adding ingredients.
- Overload protection: Most scales have an internal mechanism that prevents damage from exceeding the maximum capacity. However, repeatedly overloading a scale can still cause permanent damage to the load cell.
7. Size and Storage
Consider where you’ll store the scale when it’s not in use. If counter space is at a premium, a slim, lightweight scale that can slide into a drawer is ideal. Some scales have folding designs or ultra-thin profiles specifically for this purpose. If you have a dedicated baking station, a larger, heavier scale that stays on the counter might be more practical.
What You Get at Every Price Point
Digital kitchen scales range from under $10 to over $200. Here’s what you can realistically expect at each tier.
Under $15: The Budget Tier
At this price, you’re getting a basic digital scale with 1-gram precision and a capacity of around 5kg. Features typically include a stainless steel or plastic platform, a backlit LCD display, tare function, and multiple unit options. Build quality is acceptable but not exceptional—these scales may feel lightweight and the buttons can be mushy. Battery life is usually decent (AAA batteries). The Etekcity scale we review below is a standout in this category.
What you get: Functional, accurate enough for most baking, easy to replace if it breaks.
What you miss: Premium build quality, fast response time, high precision (0.1g), large platform.
$15–$35: The Sweet Spot
This is where you find the best value. Scales in this range offer solid accuracy, responsive load cells, better build quality, and more thoughtful design. The Escali Primo (our top pick) lives here. You’ll find stainless steel platforms, clear backlit displays, reliable tare functions, and sometimes removable platforms for easy cleaning.
What you get: Excellent accuracy and durability, intuitive operation, years of reliable service.
What you miss: Pull-out displays, Bluetooth connectivity, high-precision measurements.
$35–$75: The Premium Tier
Premium scales add design innovations and specialized features. The OXO Good Grips scale with its pull-out display lives in this range. You might also find scales with multiple load cells (for more uniform readings), larger platforms, rechargeable batteries, and more refined aesthetics. Some coffee-specific scales with 0.1g precision and built-in timers fall in this range.
What you get: Superior design, better displays, specialized features, premium materials.
What you miss: For kitchen use, honestly not much. The improvements are real but incremental.
$75–$200+: The Specialty Tier
At this price, you’re entering the realm of smart scales with app connectivity, commercial-grade precision, or extremely specialized tools. Smart scales that track nutritional data, sync with fitness apps, or offer guided recipes live here. Professional-grade scales with NIST-traceable calibration certificates also fall in this range.
What you get: Smart features, commercial precision, premium build quality, specialized functionality.
What you miss: Value for money if you’re a casual home baker. Many features in this range are unnecessary for everyday kitchen use.
Our Recommendation
For 90% of home bakers and cooks, the $15–$35 range offers the best balance of accuracy, features, and value. The Escali Primo at around $25-30 is our top pick for a reason—it delivers professional-level accuracy at a price that’s accessible to everyone. Spend more only if you have a specific need (pull-out display, 0.1g precision, smart features).
Our Top Picks: The Best Digital Kitchen Scales
We weighed, tared, and tested exhaustively. These are the scales that made the cut.
Escali Primo P115C Precision Kitchen Food Scale
The Gold Standard for Accuracy, Durability, and Simplicity

The Escali Primo is a legend in the culinary world, and our tests confirmed why. It’s not the flashiest scale, but it is exceptionally accurate, incredibly responsive, and ridiculously durable. Its two-button operation (one for on/off/tare, one for units) is brilliantly simple. The display registers weight changes instantly, with no lag, which makes hitting a precise measurement a breeze.
In our calibration weight tests, the Escali Primo was accurate to within ±1 gram across its entire range—from 5 grams all the way up to its 5kg maximum. That’s exceptional performance at any price point, let alone under $30. We tested it with 1g, 5g, 10g, 50g, 100g, and 500g calibration weights, and it nailed every single one.
The responsiveness is where the Escali truly shines. When you’re adding flour teaspoon by teaspoon to hit a target weight, you need the display to update immediately. The Escali’s display responds in under half a second—fast enough that you can pour confidently without overshooting. Cheaper scales often have a 1-2 second lag, which means you’ve already added too much flour by the time the display catches up.
What We Love
- Exceptional accuracy and responsiveness
- Simple, intuitive two-button design
- Durable, spill-proof construction
- Excellent battery life (AA batteries)
- Consistent readings across the full range
- Wide platform accommodates most bowls
What We Don’t
- Display is not backlit
- Plastic body feels less premium than steel models
- No pull-out display for large bowls
Best for: Anyone who values accuracy and reliability above all else. It’s the perfect first scale and a lifetime kitchen companion.
Check Price on AmazonEtekcity Food Kitchen Scale
Incredible Performance and Features for Under $15

It’s hard to believe that a scale this affordable can be this good. The Etekcity Food Scale is an Amazon bestseller, offering features found in scales twice its price, including a sleek stainless steel platform and a crisp, bright blue backlit LCD display. It has a 5kg/11lb capacity and measures in 1g increments.
In our testing, the Etekcity performed admirably. It was accurate to within ±1-2 grams across most of its range, which is perfectly acceptable for home baking. The backlit display is a standout feature at this price—it’s bright, large, and easy to read even in dim kitchens. The stainless steel platform wipes clean effortlessly.
The tare function works well, and the unit conversion between grams, ounces, pounds, and fluid ounces is intuitive. The scale powers on quickly and the display stabilizes within 2-3 seconds. For the price, the Etekcity is genuinely impressive and would serve most home bakers well for years.
What We Love
- Unbeatable price point
- Bright, backlit LCD display
- Sleek stainless steel finish
- Accurate and easy to use
- Good range of unit conversions
What We Don’t
- Display can be blocked by very large bowls
- Auto-off is a bit quick at 2 minutes
- Slightly slower response than premium models
OXO Good Grips 11 lb Stainless Steel Scale
The Smartest Design for Serious Bakers
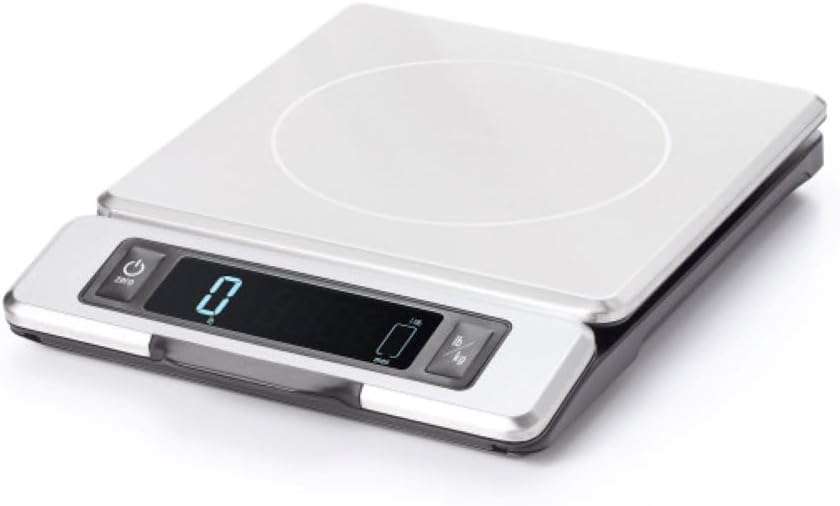
OXO is renowned for its thoughtful design, and this scale is a masterpiece of user-centric engineering. It solves the single biggest problem with most kitchen scales: display visibility. The entire display unit pulls away from the base, so you can place a massive mixing bowl or a large platter on top and still read the weight perfectly. It’s a game-changing feature for big-batch baking.
In our “Big Bowl” Visibility Test, the OXO was the only scale where the display remained completely unobstructed, even with our largest 8-quart mixing bowl on the platform. Every other scale we tested had some degree of display occlusion with large bowls. For anyone who regularly bakes in large batches—holiday cookies, party cakes, bread dough—this feature alone justifies the premium price.
The removable stainless steel platform is another brilliant touch. It lifts off easily for cleaning in the sink, which is invaluable when you’ve been working with sticky ingredients. The platform is also impressively large, providing a stable base for even the bulkiest bowls.
What We Love
- Genius pull-out display for ultimate visibility
- Large, removable stainless steel platform
- Bright, clear backlit display
- Very accurate and stable
- Excellent for large bowls and platters
What We Don’t
- Premium price point
- Larger footprint than other models
- Heavier than compact scales
Greater Goods Digital Pocket Scale – 0.1g Precision
Precision Where It Counts for Coffee, Yeast, and Spices

While a 1g-increment scale is fine for flour, it’s not precise enough for espresso shots, pour-over coffee, or instant yeast. For that, you need a scale with 0.1g precision. This pocket scale from Greater Goods is fantastic. It has a maximum capacity of 750g, which is plenty for coffee brewing or measuring out spices and leaveners.
In our precision tests, the Greater Goods scale was accurate to within ±0.1g for weights under 100g—remarkable performance for its price. The display is clear and updates quickly, and the included protective cover doubles as a weighing tray. The compact size means it takes up virtually no counter space and can be tucked into a coffee bar setup or spice drawer.
We particularly appreciated the scale’s stability. Even with slight air currents from an open window, the readings remained steady—something cheaper precision scales often struggle with. The tare function is responsive and the unit conversions are straightforward.
What We Love
- High precision 0.1g increments
- Compact size is perfect for coffee bars
- Includes a protective cover/tray
- Affordable price for a precision instrument
- Stable readings even with air currents
What We Don’t
- Low maximum capacity (750g)
- Too small to be a primary kitchen scale
- Not ideal for measuring large batches
Best for: Coffee enthusiasts, bakers who need precision for yeast and spices, and anyone who wants a secondary scale for small measurements. Pairing this with one of the best sifters for baking ensures your dry ingredients are perfectly prepped.
Check Price on AmazonBaking with a Digital Scale: A Complete Guide
Switching from volume to weight measurements is one of the most impactful changes you can make in your kitchen. But knowing that weighing is better and knowing how to do it effectively are two different things. This section covers everything you need to know about using a digital scale in your baking routine.
Setting Up Your Weighing Station
Before you start weighing, set up your workspace for efficiency. Place your scale on a flat, stable surface—a granite countertop is ideal because it’s level and vibration-resistant. Avoid placing the scale near the edge of the counter where it might be bumped, or on a wobbly table that could introduce vibrations.
Keep your most-used mixing bowls within arm’s reach. Having to hunt for a bowl mid-weighing disrupts your flow and can lead to errors. Many bakers find it helpful to have a dedicated “weighing station” with the scale, bowls, and ingredient containers all organized together.
Room temperature matters more than you might think. If your scale has been stored in a cold garage or pantry, let it acclimate to room temperature for at least 15-20 minutes before weighing. Temperature differences between the scale and the room can cause temporary drift in readings as the load cell adjusts.
The Tare Method: Weighing Multiple Ingredients
The tare function is the secret weapon of weight-based baking. Here’s the most efficient workflow:
1 Place your mixing bowl on the scale. Wait for the reading to stabilize.
2 Press the tare button. The display should read 0g. The scale now ignores the weight of the bowl.
3 Add your first ingredient (e.g., flour) until you reach the desired weight. Pour slowly near the end to avoid overshooting.
4 Press tare again. The display returns to 0g, now ignoring both the bowl and the flour.
5 Add your next ingredient (e.g., sugar). Repeat until all ingredients are weighed.
This method means you only dirty one bowl, and every ingredient is measured with perfect accuracy. It’s faster than measuring cups, too—once you get used to the workflow, you’ll find that weighing ingredients is actually quicker than the traditional scoop-and-sweep method.
Common Pitfall: The Running Total
One mistake beginners make is forgetting to tare between ingredients. If you add 200g of flour, then add sugar without taring, the scale shows the combined weight of both. You’ll need to do mental math (200g flour + 150g sugar = 350g total, so I need to add sugar until it reads 350g).养成习惯每次加完食材后都按一次tare键。
Weighing Specific Ingredients: Tips and Tricks
Different ingredients require slightly different approaches for the most accurate results:
Flour: Spoon the flour into the bowl rather than scooping it with the measuring cup. This prevents packing and gives you a more consistent weight. For the most precise results, sift the flour first, then spoon it into the bowl. Sifting aerates the flour and removes clumps, resulting in a lighter, more consistent measurement.
Brown sugar: Brown sugar should be packed firmly when measuring by volume, but when weighing, just spoon it into the bowl and level it off. The weight is what matters, not the packing density.
Liquids: Place the bowl on the scale, tare, then pour the liquid directly into the bowl. For water, milk, and other water-based liquids, 1 milliliter equals 1 gram, so you can use either unit. For oils, honey, maple syrup, and other viscous liquids, always weigh in grams—never rely on the milliliter conversion, as these liquids have different densities than water.
Butter: Most butter packages have weight markings, but these are often inaccurate. For the most precise results, place a small bowl on the scale, tare, and cut butter into it until you reach the desired weight. For softened butter, you can place the stick directly on the scale (on a piece of parchment paper for cleanliness) and slice off pieces until you hit the target.
Eggs: While most recipes call for “large eggs” by count, weighing eggs gives you more precision, especially for delicate recipes like sponge cakes where the ratio of egg to flour is critical. A large egg typically weighs about 50g (without shell), but there’s natural variation. For precision baking, crack eggs into a bowl on the scale and adjust by adding or removing small amounts of white.
Salt: Salt is where precision matters most, because even small variations can dramatically affect flavor and chemistry. A teaspoon of table salt weighs about 6 grams, but a teaspoon of kosher salt weighs only about 3 grams—and the exact weight varies by brand. Weighing salt eliminates this confusion entirely.
Yeast: Both active dry and instant yeast benefit from weighing. A teaspoon of instant yeast weighs about 3 grams, but the difference between 3g and 4g of yeast can noticeably affect rise time and flavor. For bread baking, where yeast quantity directly impacts fermentation, weighing is strongly recommended.
Converting Your Favorite Recipes
One of the most common questions from new scale users is: “How do I convert my existing recipes?” Here’s a systematic approach:
- Start with the ingredients that matter most: Flour, sugar, and butter are the big three. Converting these to weight will give you the biggest improvement in consistency.
- Use reliable conversion charts as a starting point: One cup of all-purpose flour ≈ 120-125g. One cup of granulated sugar ≈ 200g. One cup of brown sugar (packed) ≈ 220g. One stick of butter ≈ 113g.
- Weigh your “standard” measurements: Scoop one cup of flour the way you normally would, weigh it, and write down the weight. Use this as your personal reference for future conversions.
- Small ingredients can stay as volume: Vanilla extract, baking soda, baking powder, and spices are used in such small quantities that the precision of a teaspoon measurement is adequate. No need to weigh ½ teaspoon of baking soda.
- Liquids are straightforward: Water, milk, and other water-based liquids convert directly (1ml = 1g). For other liquids, look up the specific density or simply weigh them.
Common Ingredient Weights (by Volume)
Use these as starting points, but remember that your personal measuring style may produce slightly different weights. The beauty of a scale is that once you determine YOUR weight for a given volume, you can replicate it perfectly every time.
- All-purpose flour: 1 cup = 120-125g
- Bread flour: 1 cup = 127-130g
- Cake flour: 1 cup = 100-115g
- Whole wheat flour: 1 cup = 120-130g
- Granulated sugar: 1 cup = 200g
- Brown sugar (packed): 1 cup = 220g
- Powdered sugar: 1 cup = 120g
- Butter: 1 cup = 227g
- Milk: 1 cup = 244g
- Water: 1 cup = 237g
- Honey: 1 cup = 340g
- Cocoa powder: 1 cup = 85-90g
- Rolled oats: 1 cup = 90g
- Chopped nuts: 1 cup = 120-130g
Coffee and Specialty Scales: Why 0.1g Precision Matters
Coffee brewing—especially espresso and pour-over—has elevated the humble kitchen scale to an essential piece of specialty coffee equipment. The difference between a good cup and a great cup of coffee often comes down to fractions of a gram.
Why Coffee Demands Higher Precision
In coffee brewing, the ratio of coffee to water is the single most important variable affecting flavor. Specialty coffee professionals typically aim for a ratio between 1:15 and 1:17 (1 gram of coffee per 15-17 grams of water). At these ratios, a difference of just 1-2 grams of coffee can shift the flavor profile from balanced to over-extracted (bitter) or under-extracted (sour).
For espresso, the precision requirements are even more stringent. A typical espresso dose is 18-20 grams of ground coffee, producing 36-40 grams of liquid espresso in 25-30 seconds. The margin for error is razor-thin: 0.5 grams too much coffee and the shot runs slow and bitter; 0.5 grams too little and it runs fast and sour. A 1-gram scale simply can’t provide the resolution needed for this level of precision.
Pour-over coffee, while more forgiving than espresso, still benefits from 0.1g precision. The bloom phase (the initial pour that saturates the grounds) typically uses twice the weight of the coffee dose. If you’re using 15g of coffee, you’d bloom with 30g of water. Being able to measure this precisely ensures a consistent bloom every time.
Features to Look for in a Coffee Scale
Beyond 0.1g precision, coffee scales often include features specifically designed for brewing:
- Built-in timer: Essential for espresso (timing the shot) and pour-over (tracking total brew time). Having the timer integrated with the scale means you can watch weight and time simultaneously.
- Tare speed: Coffee scales need fast tare response because you’re often taring the portafilter or carafe before adding coffee.
- Heat resistance: Espresso machines generate significant heat, and pour-over involves hot water. A coffee scale should withstand temperatures up to at least 150°F (65°C) without affecting readings.
- Water resistance: Spills are inevitable in coffee preparation. An IPX4 or higher water resistance rating is ideal.
- Auto-off prevention: Many coffee processes take longer than the typical 2-3 minute auto-off window. Look for scales with longer auto-off timers or the ability to disable auto-off entirely.
The Greater Goods Scale for Coffee
The Greater Goods Digital Pocket Scale we reviewed above excels for coffee use. Its 0.1g precision, compact size, and stable readings make it ideal for both espresso and pour-over. The included protective cover doubles as a weighing tray, which is handy for weighing beans directly.
For more advanced coffee enthusiasts who want a dedicated coffee scale with timer integration, there are purpose-built options on the market. However, for most home coffee setups, the Greater Goods provides all the precision you need at a fraction of the price of dedicated coffee scales.
Beyond Coffee: Other Specialty Uses for Precision Scales
The same 0.1g precision that benefits coffee brewing is valuable for several other kitchen tasks:
- Yeast measurement: Instant yeast is incredibly potent—just 1/4 teaspoon can leaven a loaf of bread. The difference between 2g and 3g of yeast can change rise time by 30 minutes or more. A precision scale ensures you’re using exactly the right amount.
- Spice blending: When creating custom spice blends, the ratio of ingredients matters enormously. A spice blend that’s slightly too heavy on cayenne pepper can ruin a dish. Precision scales allow you to create consistent blends every time.
- Salt measurement: As mentioned earlier, different types of salt have vastly different densities. A precision scale eliminates the guesswork.
- Extract and flavoring measurement: Pure vanilla extract, almond extract, and other flavorings are potent. The difference between 2ml and 3ml can be noticeable. A precision scale gives you exact control.
- Sourdough starter: Maintaining a sourdough starter requires precise feeding ratios. A precision scale ensures you’re feeding your starter the exact amount of flour and water it needs.
Smart and Connected Kitchen Scales
The kitchen scale has evolved beyond simple weight display. Smart scales with Bluetooth connectivity, companion apps, and nutritional tracking features represent the cutting edge of kitchen measurement technology. But are they worth the premium?
What Smart Scales Offer
Smart kitchen scales typically connect to a smartphone app via Bluetooth and offer features like:
- Nutritional analysis: The app recognizes common foods and displays calories, macros (protein, carbs, fat), and micronutrients in real-time as you weigh.
- Recipe integration: Some apps include recipe databases where you can follow along step-by-step, with the app telling you how much of each ingredient to add.
- Progress tracking: For users focused on nutrition, the app can log daily intake and track progress toward dietary goals.
- Guided cooking: Advanced apps can guide you through recipes with step-by-step instructions, automatically taring between ingredients and timing each step.
- Community features: Some platforms allow you to share recipes, compare nutrition data, and connect with other users.
Are Smart Scales Worth It?
For most home bakers, the answer is: probably not. The core function of a kitchen scale—accurately measuring weight—is the same whether it’s connected to an app or not. A $25 Escali Primo measures flour just as accurately as a $150 smart scale.
However, smart scales can be genuinely valuable for specific use cases:
- Macro tracking: If you’re meticulously tracking protein, carb, and fat intake, the automatic nutritional analysis saves significant time compared to manual logging.
- Learning to cook: Beginner cooks who are still building recipe knowledge may appreciate the guided cooking features.
- Dietary management: People managing diabetes, food allergies, or other dietary conditions may find the nutritional tracking features helpful.
The main drawbacks of smart scales are higher cost, dependency on an app (which may eventually lose support), and the need to keep the scale charged (most use rechargeable batteries). If the app is discontinued or your phone dies, you’re left with an expensive regular scale.
Our Recommendation
If you’re interested in smart features, consider buying a regular high-quality scale (like the Escali Primo) and using a free nutrition tracking app separately. This gives you the flexibility to use any app you prefer and eliminates the risk of being locked into a specific ecosystem. Save the smart scale premium for when a specific feature genuinely solves a problem you have.
Common Kitchen Scale Mistakes (And How to Avoid Them)
Even experienced bakers make mistakes with their scales. Here are the most common pitfalls we’ve observed, along with practical solutions.
Mistake #1: Not Letting the Scale Stabilize
When you first turn on a scale or move it to a different location, the load cell needs a moment to settle. Many people start weighing immediately, which can lead to readings that are off by a gram or two. Always wait 2-3 seconds after turning on the scale before adding ingredients, and let the display stabilize after each addition before recording the weight.
Temperature changes are a particular culprit. If your scale was stored in a cold garage and you bring it into a warm kitchen, give it 15-20 minutes to acclimate. The metal load cell expands slightly as it warms, which can cause readings to drift during the first few minutes of use.
Mistake #2: Weighing on an Uneven Surface
Digital scales are designed to measure vertical force (gravity). If the surface is tilted, the scale measures only the vertical component of the weight, which is slightly less than the true weight. A 5-degree tilt can introduce an error of about 0.4%—not huge, but enough to matter for precision baking.
Always place your scale on a flat, level surface. If your countertops aren’t perfectly level (most aren’t), check with a small bubble level. Granite and quartz countertops are typically the most level surfaces in a kitchen.
Mistake #3: Ignoring the Minimum Weight
Every scale has a minimum weight threshold below which readings become unreliable. For most kitchen scales, this is around 1-3 grams. If you’re trying to measure a pinch of salt (about 0.3g) or a few drops of extract, the scale may not register anything or may give erratic readings.
For very small measurements, either use a precision scale with 0.1g increments, or use the volume measurement for tiny quantities. A pinch of salt, a splash of vanilla, and a dash of cinnamon are perfectly fine measured by volume.
Mistake #4: Placing Heavy Items on the Platform Too Quickly
While scales are designed to handle their maximum capacity, slamming a heavy bowl onto the platform can cause a momentary spike that might trigger overload protection or, in extreme cases, damage the load cell. Place items on the scale gently, especially if they’re close to the maximum capacity.
Mistake #5: Forgetting to Tare
This is the most common beginner mistake. You place a bowl on the scale, add flour, and then—without taring—add sugar. Now you’re trying to do mental math to figure out how much sugar you’ve added.养成习惯每次加完食材后都按一次tare键。Make it a habit: place, tare, weigh, tare, weigh, tare, weigh.
Mistake #6: Using the Scale Near Heat Sources
Placing a scale next to a hot stove, under a heat lamp, or in direct sunlight can affect readings. Heat causes the metal load cell to expand, which can introduce drift. Additionally, convective air currents from heat sources can create upward forces on the platform, causing readings to fluctuate.
Keep your scale at least 12 inches from active heat sources, and avoid using it in direct sunlight. If you must weigh near the stove, let the scale acclimate for a few minutes and take readings quickly.
Mistake #7: Not Cleaning the Scale Regularly
Flour dust, sugar crystals, and food residue can accumulate on the platform and around the buttons, potentially affecting readings and hygiene. Wipe down your scale after every use with a slightly damp cloth. For stubborn residue, use a soft brush (like a pastry brush) to dislodge dried food from crevices.
Mistake #8: Relying on the Scale’s “Milliliter” Function for All Liquids
The milliliter function on most kitchen scales assumes the density of water (1ml = 1g). This works for water, milk, and other water-based liquids. But it’s inaccurate for oils (which are less dense than water), honey (which is more dense), and syrups. Always weigh viscous liquids in grams for accuracy.
Mistake #9: Not Checking Battery Levels
Low batteries can cause erratic readings, slow response times, and even inaccurate measurements. If your scale starts behaving strangely—fluctuating readings, slow stabilization, or values that seem off—check the battery first. Many scales have a low-battery indicator, but some don’t, so it’s worth replacing batteries proactively every 12-18 months.
Mistake #10: Dropping or Banging the Scale
Digital scales are precision instruments, and physical shock can knock the load cell out of calibration. If you drop your scale, test it immediately with a known weight (like a nickel for 5g) to check if it’s still accurate. If it’s off, you may need to recalibrate it using the manufacturer’s procedure, or it may need to be replaced.
When to Replace, Not Recalibrate
If your scale has been dropped, exposed to water, or is more than 5 years old and consistently off by more than 2-3 grams, it’s often more cost-effective to replace it than to try to recalibrate. Calibration can fix minor drift, but it can’t repair physical damage to the load cell or aging electronics.
How We Tested: The Pursuit of Perfect Measurements
Our testing process was designed to be rigorous, objective, and reflective of real-world kitchen use.
- The Calibration Weight Test: This was the cornerstone of our evaluation. We used a certified set of calibration weights (1g, 5g, 10g, 50g, 100g, 500g) to test accuracy at multiple points across each scale’s range. Each weight was tested five times, and we recorded the average deviation from the true value. A scale that consistently read within ±1g across all test points earned top marks.
- The Tare Responsiveness Test: We placed a bowl on the scale, tared it, added a small amount of an ingredient (like a pinch of salt), and noted how quickly the scale registered the change. We also tested the tare function with progressively heavier items to see if the scale maintained accuracy after multiple tare operations.
- The “Big Bowl” Visibility Test: We placed a large, opaque 8-quart mixing bowl on each scale to see if the display was still readable. This is a critical real-world test, since many bakers use large bowls for mixing dough and batter.
- The Durability and Cleaning Test: We evaluated the build quality of each scale, noting any flex or creaking. We then smudged the platforms with a bit of butter and flour and cleaned them, noting how easily each platform returned to a pristine state.
- The Repeatability Test: We weighed the same 500g calibration weight ten times on each scale, recording every reading. Scales with tight repeatability (all readings within ±1g of each other) scored higher than those with wider variation.
- The Battery Life Test: We installed fresh batteries in each scale and used them for daily baking over a four-week period, noting when the low-battery indicator appeared and when the scale stopped functioning.
- The Real-World Bake Test: Finally, we used each scale to bake a batch of chocolate chip cookies, a loaf of sourdough bread, and a layer cake. We evaluated the overall experience—ease of use, display readability, tare speed, and the quality of the final baked goods.
At a Glance: Comparison of Top Digital Kitchen Scales
| Product | Max Capacity | Precision | Key Feature | Power | Platform | Backlit Display |
|---|---|---|---|---|---|---|
| Escali Primo | 11 lb / 5 kg | 1 g | Extreme accuracy & durability | 2 AA Batteries | Plastic | No |
| Etekcity Scale | 11 lb / 5 kg | 1 g | Low price & backlit display | 2 AAA Batteries | Stainless Steel | Yes |
| OXO Pull-Out | 11 lb / 5 kg | 1 g | Pull-out display for visibility | 4 AAA Batteries | Stainless Steel (removable) | Yes |
| Greater Goods | 750 g | 0.1 g | High precision for small amounts | 2 AAA Batteries | Stainless Steel | Yes |
Detailed Feature Comparison
| Feature | Escali Primo | Etekcity | OXO Good Grips | Greater Goods |
|---|---|---|---|---|
| Price Range | $25–30 | $10–15 | $40–55 | $12–18 |
| Response Time | Under 0.5s | 1–2s | Under 0.5s | Under 1s |
| Auto-Off Timer | 4 minutes | 2 minutes | 10 minutes | 3 minutes |
| Removable Platform | No | No | Yes | No |
| Pull-Out Display | No | No | Yes | No |
| Units | g, oz, lb, fl oz | g, oz, lb, ml | g, oz, lb, ml | g, oz, ct, gn |
| Weight | 12 oz | 9.5 oz | 1.2 lb | 4 oz |
| Ideal For | All-around baking | Budget-conscious bakers | Large batch baking | Coffee & precision |
Maintenance and Care: Making Your Scale Last
A well-maintained digital kitchen scale can last a decade or more. Here’s how to keep yours in peak condition.
Daily Care
After each use, wipe the platform with a soft, slightly damp cloth. For stainless steel platforms, you can use a mild dish soap solution. For plastic platforms, avoid abrasive cleaners that can scratch the surface. Never spray cleaning solution directly onto the scale—always apply it to the cloth first to prevent liquid from seeping into the electronics.
If flour or sugar has caked onto the platform, let the damp cloth sit on the residue for 30 seconds to soften it before wiping. For stubborn residue around buttons or in crevices, use a soft-bristled brush (an old toothbrush works well) to dislodge it.
Monthly Maintenance
Once a month, give your scale a more thorough cleaning:
- Turn off the scale and remove the batteries.
- Wipe down the entire exterior, including the bottom and sides.
- Clean around the buttons with a cotton swab slightly dampened with rubbing alcohol.
- If the platform is removable (like the OXO), remove it and wash it in the sink with warm soapy water. Dry thoroughly before reattaching.
- Check the rubber feet for debris. Clean them with a damp cloth to ensure they grip the countertop properly.
- Reinstall the batteries and test with a known weight to confirm accuracy.
Storage
Store your scale in a dry, temperature-stable location. Avoid storing it in a garage, near the stove, or in a cabinet above the dishwasher where heat and humidity fluctuations are common. A kitchen drawer or a shelf in a pantry is ideal.
If you’re storing the scale for an extended period (more than a month), remove the batteries to prevent corrosion. Even alkaline batteries can leak over time, and battery acid can damage the scale’s electronics.
Recalibration
Most home kitchen scales don’t need regular recalibration—they come factory-calibrated and maintain accuracy for years. However, you may need to recalibrate if:
- The scale has been dropped or subjected to physical shock
- Readings consistently deviate by more than 2-3 grams from known weights
- The scale has been stored in extreme temperatures for an extended period
Recalibration procedures vary by manufacturer. Typically, you’ll need a known reference weight (a calibration weight or a U.S. nickel for 5g) and a specific button combination to enter calibration mode. Check your scale’s manual for the exact procedure.
If your scale doesn’t have a user-accessible calibration function, it may need to be returned to the manufacturer for professional calibration. In most cases, it’s more cost-effective to simply replace the scale.
The Battery Corrosion Test
Every time you replace batteries, check the battery compartment for any signs of corrosion (white or greenish residue on the contacts). If you find corrosion, clean it with a cotton swab dipped in white vinegar, then wipe with a clean damp cloth. Corroded contacts can cause erratic readings or prevent the scale from turning on.
Troubleshooting Common Scale Problems
Before assuming your scale is broken, try these common fixes:
Problem: Scale Won’t Turn On
Solutions: Replace the batteries (even if they seem fine—low batteries are the #1 cause). Check that the battery contacts aren’t corroded. Make sure the batteries are inserted with the correct polarity. If the scale still won’t turn on, there may be a hardware failure.
Problem: Readings Fluctuate or Won’t Stabilize
Solutions: Move the scale to a more stable surface. Check for vibrations from nearby appliances (dishwasher, washing machine). Ensure the scale isn’t near a heat source or in a draft. Remove any debris from under the scale that might prevent it from sitting flat. If the scale is near a window, close it—air currents can cause fluctuations on sensitive scales.
Problem: Scale Reads Incorrectly
Solutions: First, verify with a known weight. A U.S. nickel should read 5g. If it doesn’t, try recalibrating (check the manual for your model’s calibration procedure). If recalibration doesn’t help, the load cell may be damaged. Also check that you’re using the correct units—accidentally switching from grams to ounces is a common source of confusion.
Problem: Display Is Hard to Read
Solutions: If the display isn’t backlit, try using the scale under better lighting. If the display is dim even with backlighting, the batteries may be low. For scales with pull-out displays (like the OXO), make sure the display unit is fully extended and the connection cable isn’t kinked.
Problem: Scale Turns Off Unexpectedly
Solutions: Most scales have an auto-off timer (typically 2-5 minutes). If the scale turns off mid-use, you’re probably taking too long between additions. Press a button periodically to reset the timer. Some scales allow you to extend or disable the auto-off timer—check your manual. If the scale turns off immediately after turning on, the batteries are likely dead or the battery contacts are corroded.
Problem: Tare Button Isn’t Working
Solutions: Make sure the scale has fully stabilized before pressing tare. If the reading is still changing when you press tare, the scale may ignore the input. If the tare button is physically stuck, clean around it with a cotton swab. In rare cases, a software glitch can cause the tare function to malfunction—turning the scale off and on again usually resolves this.
Problem: “Err” or “O-Ld” Message on Display
Solutions: “Err” typically means the weight exceeds the scale’s maximum capacity. Remove some of the weight and try again. “O-Ld” (overload) is similar—remove the item immediately to avoid damaging the load cell. If you get an error message with nothing on the scale, the load cell may be damaged or the scale may need recalibration.
Food Safety and Kitchen Scale Hygiene
Kitchen scales come into direct contact with food, so proper hygiene is essential. Here’s how to keep your scale—and your food—safe.
Cross-Contamination Prevention
When weighing raw meat, poultry, or seafood, always place a barrier between the food and the scale platform. Use a bowl, plate, or piece of parchment paper. Never place raw proteins directly on the scale, as this can contaminate the surface and spread bacteria to subsequent foods.
If you’ve weighed raw meat on a removable platform, wash it immediately with hot soapy water in the sink. For non-removable platforms, wipe with a food-safe disinfectant wipe or a cloth dampened with a diluted bleach solution (1 tablespoon bleach per gallon of water).
When to Clean Between Weighings
You don’t need to clean the scale between every ingredient in a recipe—especially if all ingredients are going into the same bowl. However, you should clean between:
- Raw proteins and ready-to-eat foods
- Allergenic ingredients (nuts, dairy, gluten) and non-allergenic foods
- Strongly flavored ingredients (garlic, onion, chili) and mild ingredients
- Any time there’s visible residue on the platform
Sanitizing Your Scale
For a deeper clean, periodically sanitize your scale:
- Remove batteries.
- Wipe the platform with a food-safe sanitizing solution or a 70% isopropyl alcohol wipe.
- Allow the surface to air dry completely before reinserting batteries.
- Do not use harsh chemicals like bleach at full concentration, as they can damage stainless steel and plastic surfaces.
Scale Placement for Food Safety
Keep your scale away from raw food preparation areas to prevent contamination. If you’re weighing ingredients for a salad after handling raw chicken, make sure the scale platform is clean and the scale is positioned away from any raw meat residues on the counter.
Nutrition Tracking and Dietary Management
A digital kitchen scale is one of the most powerful tools for managing your diet, whether you’re tracking macros, managing a medical condition, or simply trying to eat more mindfully.
Why Weighing Food Improves Accuracy
Studies consistently show that people underestimate portion sizes by 20-50% when using visual estimation or measuring cups. A “serving” of pasta that looks normal in a bowl might actually be two or three servings by weight. A handful of nuts that seems like a reasonable snack might be 300+ calories.
Weighing food removes the guesswork. If the nutrition label says a serving is 28g (1 oz), you can weigh out exactly 28g instead of guessing what that looks like. This precision is especially valuable for:
- Calorie counting: Accurate weight measurements lead to accurate calorie calculations.
- Macronutrient tracking: Getting the right ratio of protein, carbs, and fat requires precise measurements.
- Diabetic meal planning: Consistent carbohydrate intake is crucial for blood sugar management.
- Medical diets: People with phenylketonuria (PKU), celiac disease, or other conditions requiring strict dietary control benefit from precise measurements.
- Weight management: Whether losing or gaining weight, precise portion control helps you hit your targets consistently.
Practical Tips for Diet Tracking
- Weigh everything: Even small additions like cooking oil, butter for the pan, and condiments contribute calories. Weigh them all for accurate tracking.
- Use the tare function: Place your plate or bowl on the scale, tare, then add food. This gives you the weight of just the food, not the container.
- Weigh before cooking: Raw weights are more consistent than cooked weights (cooking changes water content). Use raw weights and look up nutrition data for raw foods.
- Log immediately: Record the weight right away rather than trying to remember later. A simple notepad next to the scale works, or use a nutrition tracking app.
- Be consistent: Always weigh at the same stage of preparation (before cooking, after draining, etc.) for consistent data.
Commercial and Professional Kitchen Scales
While this guide focuses on home kitchen scales, it’s worth understanding how commercial and professional scales differ—and whether any of those features might benefit a serious home cook.
Home vs. Commercial: What’s Different?
Commercial kitchen scales are designed for high-volume, heavy-use environments. Key differences include:
- Higher capacity: Commercial scales typically handle 15-30 kg (33-66 lbs) or more, compared to the 5 kg standard for home scales.
- Greater durability: Built to withstand constant use, spills, and the rigors of a commercial kitchen. Metal construction, sealed electronics, and heavy-duty load cells are standard.
- NIST-traceable calibration: Many commercial scales come with calibration certificates traceable to national standards, which may be required for commercial food preparation.
- Legal-for-trade certification: If you’re selling food by weight, you need a scale that’s certified for commercial trade in your jurisdiction.
- Larger platforms: Designed to accommodate large commercial mixing bowls and full-size sheet pans.
- AC power option: Many commercial scales can run on AC power, eliminating battery concerns in a high-use environment.
Do You Need a Commercial Scale at Home?
For most home cooks, a commercial scale is overkill. The higher capacity, durability, and certification features add cost without providing meaningful benefits for occasional home use. However, if you:
- Frequently bake in very large batches (10+ loaves of bread, 100+ cookies)
- Run a home-based food business (cottage food, farmers market)
- Need certified accuracy for dietary medical requirements
…then a commercial-grade scale might be worth the investment. Brands like My Weigh, Ohaus, and Taylor Pro offer commercial-quality scales at prices ranging from $50 to $200.
Environmental Factors That Affect Scale Accuracy
Your kitchen environment can subtly affect your scale’s performance. Understanding these factors helps you get the most accurate readings possible.
Temperature
Digital scales are sensitive to temperature changes. The metal load cell expands and contracts with temperature, which can cause readings to drift. Most scales compensate for this automatically, but extreme or rapid temperature changes can overwhelm the compensation mechanism.
- Acclimation: If your scale has been in a cold or hot environment, let it sit at room temperature for 15-20 minutes before weighing.
- Avoid heat sources: Don’t use the scale next to a hot stove, oven, or under a heat lamp.
- Consistent environment: For the most consistent results, use the scale in the same location each time.
Humidity
High humidity doesn’t directly affect the scale’s electronics (assuming it’s not so humid that condensation forms on the scale), but it can affect the ingredients you’re weighing. Flour absorbs moisture from humid air, making it heavier by volume. Sugar can become sticky and clump. Weighing by weight rather than volume eliminates the humidity variable for the scale itself, but you should still store ingredients in airtight containers to maintain consistent moisture content.
Vibration
Vibrations from nearby appliances, foot traffic, or even heavy vehicles passing outside can cause scale readings to fluctuate. If you’re getting unstable readings, try:
- Moving the scale to a more isolated location
- Placing a vibration-dampening mat (like a thick mouse pad) under the scale
- Weighing during quieter times of day
- Ensuring the scale is on a solid, stable surface (not a wobbly table or a floating shelf)
Air Currents
Sensitive scales (especially those with 0.1g precision) can be affected by air currents from open windows, ceiling fans, or air conditioning vents. If your precision scale readings are fluctuating, try closing windows and turning off fans temporarily. Some precision scales come with a draft shield—a small enclosure that blocks air currents from reaching the platform.
Altitude
Altitude doesn’t directly affect weight measurements (weight is a measure of gravitational force, which doesn’t change significantly at different altitudes on Earth). However, altitude does affect boiling points, air pressure, and the behavior of leavening agents—so while your scale readings are accurate, your recipes may behave differently at high altitude.
The Ideal Weighing Environment
For maximum accuracy and consistency: use your scale on a flat, stable surface at room temperature (65-75°F / 18-24°C), away from heat sources, air currents, and vibrations. Let the scale acclimate for 15-20 minutes if it’s been in a different temperature environment. Avoid weighing in direct sunlight or under strong overhead lights.
International Measurement Standards and Conversions
As baking becomes increasingly global—thanks to the internet and social media—understanding international measurement standards is more important than ever.
Metric vs. Imperial: The Global Divide
The United States is one of only three countries that haven’t officially adopted the metric system (alongside Liberia and Myanmar). This means American recipes use cups, tablespoons, and ounces, while the rest of the world uses grams, milliliters, and liters.
For baking, the metric system is objectively superior because it’s based on weight rather than volume. A gram is a gram everywhere in the world; a “cup” varies between countries and even between brands of measuring cups. The metric system eliminates this confusion entirely.
Common International Conversions
| Ingredient | 1 Cup (US) | 1 Cup (UK/AU) | 100g |
|---|---|---|---|
| All-purpose flour | 120g | 150g | ~0.83 cups (US) |
| Granulated sugar | 200g | 250g | 0.5 cups |
| Butter | 227g | 250g | ~0.44 cups (US) |
| Milk | 244g | 284g | ~0.41 cups (US) |
| Honey | 340g | 400g | ~0.29 cups (US) |
Notice the significant differences between US and UK/AU cup measurements. This is why weighing in grams is the only reliable way to reproduce international recipes accurately.
Reading International Recipes
When following a recipe from another country, look for these common terms:
- “g” or “grams”: Weight measurement. Your scale handles this directly.
- “ml” or “milliliters”: Volume measurement for liquids. 1ml of water = 1g, so you can weigh water-based liquids in grams.
- “kg” or “kilograms”: 1 kg = 1,000 grams. Most kitchen scales handle this within their 5kg capacity.
- “L” or “liters”: 1 L = 1,000ml. For large liquid measurements, you’ll need a liquid measuring cup in addition to your scale.
- “tsp” and “tbsp”: Teaspoons and tablespoons. These are volume measurements, but for small quantities, they’re usually precise enough. Note that a US tablespoon (15ml) is slightly different from a UK tablespoon (17.7ml in some measurements).
Recipe Conversion Best Practices
When converting a recipe from volume to weight:
- Convert the main ingredients first: Flour, sugar, butter, and liquids are the most important to convert. Small ingredients (spices, leaveners) can stay as volume.
- Use weight-based recipes when possible: Many international recipes already include weight measurements. Seek these out when searching for recipes.
- Create your own conversion database: Weigh your standard measurements (your scoop of flour, your pour of milk) and keep a reference chart in your kitchen.
- Don’t mix systems: If a recipe is in grams, convert ALL ingredients to grams. Mixing cups and grams in the same recipe can lead to errors.
Accessibility and Inclusive Kitchen Scale Design
Kitchen scales should be usable by everyone, regardless of physical ability. Here’s what to look for if you have specific accessibility needs.
For Users with Limited Vision
Backlit displays with large, high-contrast digits are essential. Look for scales with:
- Large display digits: At least 15mm (0.6 inches) tall, preferably larger.
- High contrast: Dark digits on a light background (or vice versa) for maximum readability.
- Bright backlighting: Essential for use in dim kitchens or for users with low vision.
- Audio feedback: Some scales beep when the reading stabilizes, which helps visually impaired users know when to record the weight.
For Users with Limited Mobility
If you have arthritis, limited hand strength, or difficulty with fine motor control:
- Large, easy-to-press buttons: Avoid scales with tiny, recessed buttons that require precise finger placement.
- Touch-sensitive buttons: These require less force than mechanical buttons and are easier to operate with limited hand strength.
- Stable base: A scale with non-slip feet that doesn’t slide when you press buttons is easier to use with one hand.
- Auto-tare: Some scales automatically tare when items are placed on the platform, eliminating the need to press a button.
For Users with Cognitive Considerations
Simplicity is key. Look for scales with:
- Minimal buttons: Two or three buttons (on/off/tare, units) are easier to manage than scales with many buttons and complex menus.
- Clear display: A single, large display showing one measurement at a time is less confusing than displays with multiple readouts.
- Consistent interface: The same button always does the same thing—no hidden functions or mode switching.
Universal Design Pick
The OXO Good Grips scale scores highest for accessibility. Its large pull-out display with bright backlighting is easy to read from any angle, the buttons are large and clearly labeled, and the overall design prioritizes ease of use. If accessibility is a primary concern, the OXO is our top recommendation.
Accessories and Add-Ons for Your Kitchen Scale
While a kitchen scale works perfectly well on its own, a few accessories can enhance your weighing experience.
Calibration Weights
A set of certified calibration weights is a worthwhile investment for any serious baker. A basic set (10g, 20g, 50g, 100g, 200g, 500g) costs $15-30 and allows you to verify your scale’s accuracy at any time. Look for weights with NIST (National Institute of Standards and Technology) certification for the highest accuracy.
Use calibration weights to:
- Check accuracy after purchasing a new scale
- Verify accuracy after the scale has been dropped or mishandled
- Periodically confirm accuracy as part of regular maintenance
- Compare accuracy between multiple scales
Weighing Bowls and Containers
While any bowl works, purpose-made weighing bowls offer some advantages:
- Lightweight: A lighter bowl means more of the scale’s capacity is available for ingredients.
- Pour spout: Makes it easy to transfer weighed ingredients without spilling.
- Stackable: Nested storage saves drawer space.
- Clear/translucent: Allows you to see the contents from the side, which is helpful when the scale display is behind the bowl.
Scale Mats and Pads
A silicone mat or thick pad placed under the scale can serve multiple purposes:
- Vibration dampening: Reduces the effect of vibrations from nearby appliances.
- Surface protection: Prevents scratches on delicate countertops.
- Non-slip: Adds extra grip to prevent the scale from sliding.
- Cleanup: Catches spills and flour dust, making cleanup easier.
Digital Scale Covers
Some manufacturers offer protective covers for their scales. These are useful if:
- You store the scale in a drawer with other utensils
- You transport the scale (e.g., to a cooking class or vacation rental)
- You want to protect the platform from dust and scratches
Precision Tweezers and Scoops
For the ultimate in precision, especially when measuring tiny amounts of spices, yeast, or extracts:
- Precision tweezers: Allow you to add individual grains of salt, spice, or leavener to hit an exact weight.
- Small scoops and spoons: Mini measuring spoons (1/8 tsp, 1/16 tsp) are useful for very small quantities.
- Pipettes or droppers: For liquid extracts and flavorings, a dropper gives you drop-by-drop control.
Frequently Asked Questions (FAQ)
Do I need to calibrate my new kitchen scale?
For most home kitchen scales, the answer is no. They come pre-calibrated from the factory. Professional scales require regular calibration, but for a home unit, it’s generally not necessary. You can easily check its accuracy by placing a U.S. nickel on it; it should weigh exactly 5 grams.
Is a rechargeable scale better than a battery-powered one?
It’s a matter of preference. Rechargeable scales are convenient and eco-friendly, but lithium-ion batteries eventually degrade. Battery-powered scales (AA/AAA) often have incredibly long lifespans (years in some cases) and are easy to swap out instantly.
What’s the best way to clean my kitchen scale?
Never submerge your kitchen scale in water. The best way to clean it is to wipe the surface with a soft, damp cloth. If your scale has a removable stainless steel platform, you can wash that specific part in the sink. For sticky residues, let a damp cloth sit on the spot for 30 seconds before wiping.
My recipe uses cups, how can I convert it to grams?
This is a common challenge! While you can find online conversion charts, the most accurate way is to create your own reference. Measure your “1 cup of flour” into a bowl on the scale once, write down the weight, and use that weight for future consistency. Common reference points: 1 cup all-purpose flour ≈ 120g, 1 cup granulated sugar ≈ 200g, 1 cup butter ≈ 227g.
Can I use my kitchen scale to weigh liquids?
Yes! The easiest way is to place your bowl on the scale, tare it, then pour the liquid in until you reach the desired weight. For water-based liquids (water, milk), 1 milliliter equals 1 gram, so the conversion is direct. For oils, honey, and syrups, always weigh in grams rather than relying on volume-to-weight conversions, as these liquids have different densities than water.
Why does my scale give different readings each time I weigh the same item?
Small variations (±1g) are normal and can be caused by air currents, vibrations, or temperature fluctuations. If the variations are larger (±3g or more), try moving the scale to a more stable surface, closing windows, and turning off fans. If the problem persists, the scale may need recalibration or may have a damaged load cell.
How long do kitchen scales typically last?
A well-maintained digital kitchen scale can last 5-10 years or more. Budget scales may last 3-5 years, while premium scales like the Escali Primo can last a decade or more with proper care. The most common failure point is the load cell, which can drift over time or fail after physical shock. Battery corrosion is another common cause of premature failure.
Should I buy a scale with a glass or stainless steel platform?
Stainless steel is generally the better choice for kitchen use. It’s more durable, doesn’t crack if dropped, and cleans easily. Tempered glass looks sleek and modern but can crack under heavy impact and shows fingerprints more easily. Plastic platforms are the least desirable, as they stain and absorb odors. If you have a choice, go with stainless steel.
Can a kitchen scale measure in fractions of an ounce?
Most kitchen scales that measure in ounces display to one decimal place (e.g., 4.5 oz). If you need more precision in ounces, look for a scale with higher resolution. However, for baking purposes, grams are almost always the better choice—they’re more precise and the math is simpler.
What’s the difference between a kitchen scale and a food scale?
Nothing—they’re the same thing. “Kitchen scale” and “food scale” are used interchangeably to describe a digital scale designed for measuring ingredients in the kitchen. Both terms refer to scales with tare functions, multiple unit options, and capacities suitable for cooking and baking.
Is it worth buying an expensive kitchen scale?
For most home bakers, a mid-range scale ($15-35) offers the best value. The Escali Primo at around $25-30 delivers professional-level accuracy at an accessible price. Expensive scales ($75+) typically add features like Bluetooth connectivity, smart app integration, or commercial-grade certification that most home users don’t need. Spend more only if you have a specific need that a mid-range scale can’t meet.
How do I know if my scale is accurate?
The simplest test is the nickel test: a U.S. nickel should weigh exactly 5 grams. For more thorough testing, purchase a set of calibration weights and test your scale at multiple points across its range. If your scale is consistently off by more than 2-3 grams, it may need recalibration or replacement.
Can I use my phone as a kitchen scale?
There are apps that claim to use your phone’s internal sensors as a scale, but they’re not accurate enough for kitchen use. Phone sensors aren’t designed for precise weight measurement. A dedicated kitchen scale, even a budget one, will always be more accurate and reliable than a phone app. The only exception is if your phone has a built-in pressure-sensitive screen (like some Samsung Galaxy models), which can provide rough estimates but still isn’t as accurate as a proper scale.
What is the tare function and why is it important?
The tare function resets the scale’s display to zero, ignoring the weight of whatever is currently on the platform. This allows you to place a bowl on the scale, tare it, then add ingredients and see only the weight of the ingredient—not the bowl. It’s essential for measuring multiple ingredients in the same container and is the single most useful feature on a kitchen scale.
Should I weigh ingredients before or after cooking?
For nutritional tracking and recipe consistency, weigh before cooking. Raw weights are more consistent and match the nutrition data on food labels (which is almost always for raw/uncooked food). Cooking changes the water content of food—a steak loses moisture when cooked, pasta absorbs water—making cooked weights unreliable for tracking. For recipe purposes, always follow the recipe’s instructions, but if it doesn’t specify, assume raw weights.
Can kitchen scales go in the dishwasher?
Never put a digital kitchen scale in the dishwasher. The heat, water pressure, and detergent will damage the electronics, load cell, and display. Only removable parts (like the OXO’s stainless steel platform) should be washed in the sink. For the scale body, always wipe with a damp cloth.
How do I store my kitchen scale?
Store your scale in a dry, temperature-stable location like a kitchen drawer or pantry shelf. Avoid garages, areas near the stove, or cabinets above the dishwasher where heat and humidity fluctuate. If storing for more than a month, remove the batteries to prevent corrosion. A protective cover or a clean towel wrapped around the scale can prevent scratches during storage.
Why does my scale turn off while I’m using it?
Kitchen scales have an auto-off timer (typically 2-5 minutes) to conserve battery. If the scale turns off mid-use, you need to interact with it more frequently to reset the timer—press the tare button or add a small weight periodically. Some scales allow you to extend or disable the auto-off timer; check your manual. If the scale turns off immediately after powering on, the batteries are likely dead.
What’s the best kitchen scale for baking bread?
For bread baking, the most important features are accuracy, capacity (you’ll be weighing large amounts of flour), and a responsive tare function. The Escali Primo is our top pick for bread baking—it’s accurate, durable, and handles up to 5kg, which is enough for most bread recipes. If you make very large batches, the OXO Good Grips with its pull-out display is ideal for weighing into large mixing bowls.
Are digital scales more accurate than mechanical scales?
Yes, digital scales are generally more accurate and precise than mechanical scales. Mechanical scales rely on springs, which can lose tension over time and are sensitive to temperature. Digital scales use electronic load cells that maintain accuracy longer and offer higher precision (1g or 0.1g vs. 5-10g for mechanical scales). Digital scales also offer the tare function, multiple unit options, and easier readability—all advantages over mechanical scales.
The Final Weigh-In
Bread Baking: The Hydration Revolution
Bread baking is where a kitchen scale truly proves its worth. The concept of “hydration”—the ratio of water to flour by weight—is the single most important variable in bread baking, and it’s a concept that only makes sense when you’re measuring by weight.
Hydration is expressed as a percentage: a dough at 65% hydration contains 650 grams of water for every 1,000 grams of flour. This simple number tells you almost everything you need to know about how the dough will behave. A 60% hydration dough is stiff and easy to shape—perfect for bagels and pretzels. A 70% hydration dough is slack and sticky—ideal for ciabatta and focaccia. A 65% hydration dough is the sweet spot for sandwich bread and pizza dough.
Without a scale, you’re guessing at hydration. A “cup of water” can vary from 220g to 250g depending on how you measure it, and a “cup of flour” can range from 120g to 150g. That means your “65% hydration” dough might actually be anywhere from 55% to 75%—a massive range that completely changes the bread’s character.
With a scale, hydration is exact. If you want 65% hydration, you weigh 650g of water and 1,000g of flour. Every time. The result is consistent dough that behaves predictably, ferments on schedule, and produces bread with the texture you intended.
Hydration Guide for Common Breads
- 55-60%: Bagels, pretzels, pasta dough—stiff, easy to handle
- 62-65%: Sandwich bread, pizza dough, dinner rolls—the versatile middle ground
- 67-70%: French bread, Italian bread—open crumb, chewy texture
- 72-80%: Ciabatta, focaccia, high-hydration artisan breads—very wet, open crumb, crispy crust
- 80%+: Pan de cristal, some extreme artisan breads—requires advanced handling techniques
Sourdough Baking: Precision Fermentation
Sourdough baking takes the case for weighing to an even higher level. A sourdough starter is a living ecosystem of wild yeast and bacteria, and maintaining it requires precise feeding ratios. The standard feeding ratio is 1:1:1 (equal weights of starter, flour, and water), but many bakers use 1:5:5 or 1:10:10 ratios for different effects.
When you feed your starter by volume, you’re introducing inconsistency. A “cup” of starter might weigh 200g one day and 250g the next, depending on how active it is and how much liquid has evaporated. This changes the feeding ratio, which changes the fermentation rate, which changes how your bread turns out.
With a scale, sourdough maintenance becomes precise and repeatable. You always know exactly how much starter you have, exactly how much flour and water you’re adding, and exactly what ratio you’re using. This precision is what separates erratic sourdough results from reliable ones.
The same applies to bulk fermentation timing. While you can’t weigh fermentation directly, starting with precisely measured ingredients means your fermentation times become more predictable. A dough at exactly 65% hydration, made with exactly 5g of salt, fermented at room temperature, will behave consistently—allowing you to develop reliable timing intuition over time.
Pastry and Cake: Where Grams Make the Difference
Pastry and cake baking demand even more precision than bread. The margin for error is smaller, and the chemical reactions are more sensitive to ingredient ratios.
Pie Crust: The ideal pie crust depends on a precise ratio of fat to flour. The classic ratio is 3:2:1 (flour:fat:water by weight). For a single crust, that’s 150g flour, 100g butter, and 50g ice water. Too much flour makes a tough, bready crust. Too little flour makes it fragile and crumbly. Too much water makes it tough (gluten development). Too little water makes it dry and cracky. Weighing each component ensures the perfect balance.
Layer Cakes: The classic pound cake ratio (equal weights of butter, sugar, eggs, and flour) is the foundation of countless cake recipes. Even slight deviations can affect the cake’s rise, crumb, and moisture. An extra 20g of flour can make a cake dense; 20g less can cause it to collapse. For sponge cakes and génoise, where air whipped into eggs provides the leavening, the ratio of egg to flour is critical—weighing ensures consistency.
Buttercream and Frosting: The ratio of butter to powdered sugar to liquid determines whether your buttercream is silky smooth or grainy and stiff. For Swiss meringue buttercream, the ratio of egg whites to sugar to butter must be precise for the emulsion to form correctly. Weighing eliminates the guesswork.
Choux Pastry: Choux (used for éclairs, cream puffs, and gougères) depends on a precise ratio of water, butter, flour, and eggs. The eggs, in particular, must be weighed because the amount of moisture in eggs varies significantly by size. Many professional pastry chefs weigh their eggs (cracking them into a bowl on the scale) rather than counting them, to ensure consistency.
Cookie Science: Why Weight Matters for Texture
Cookies are perhaps the baked good most affected by measurement variation. The texture of a cookie—chewy vs. crispy, cakey vs. fudgy—is determined by the ratio of flour to fat to sugar to liquid. Small changes in any of these ratios produce noticeably different results.
Flour ratio: More flour relative to butter and sugar produces a thicker, cakier cookie. Less flour produces a thinner, crispier cookie that spreads more. A 10% variation in flour (which is easily introduced by volume measuring) is enough to change the cookie’s character entirely.
Sugar type and amount: Granulated sugar promotes spreading and crispness. Brown sugar (which contains molasses) promotes chewiness and moisture. The ratio of granulated to brown sugar is a key variable in cookie recipes, and weighing ensures you get the exact ratio the recipe intended.
Butter temperature and amount: Butter that’s too warm melts too quickly in the oven, causing excessive spreading. Butter that’s too cold doesn’t cream properly with sugar, resulting in a dense cookie. While temperature is hard to weigh, the amount of butter is critical—and weighing ensures you use exactly the right amount.
The Cookie Ratio Experiment
Try this experiment to see the impact of flour weight on cookie texture: make three batches of the same chocolate chip cookie recipe, varying only the flour weight by 10% (use 100%, 90%, and 110% of the recipe’s flour amount). Bake them side by side and taste the differences. You’ll be amazed at how much a small measurement change affects the final result—and you’ll never go back to measuring flour by volume.
International Baking Traditions: Why the World Weighs
Nearly every baking tradition outside the United States uses weight-based measurements. Understanding why reveals the practical advantages of weighing:
French patisserie: French baking is built on precise ratios measured in grams. A classic tarte Tatin, a perfect croissant, a delicate macaron—all depend on exact measurements that are specified in grams in every French bakery and pastry school. The French concept of “mise en place” (everything in its place) starts with precise weighing.
German baking: German baking traditions, from黑面包 (dark bread) to Stollen, rely on weight measurements. German recipes specify ingredients in grams with precision, reflecting a culture that values accuracy and consistency in baking.
Japanese baking: Japanese baking, known for its incredibly soft, fluffy textures (think Japanese milk bread or soufflé cheesecake), depends on precise measurements. The delicate balance of ingredients that creates these textures would be impossible to replicate consistently with volume measurements.
Italian baking: From focaccia to panettone, Italian baking uses metric measurements. Panettone, in particular, is a high-hydration, enriched dough that demands precise measurement of flour, butter, eggs, and sugar to achieve its characteristic airy texture.
When you weigh your ingredients, you’re not just following a trend—you’re joining a global community of bakers who have understood for centuries that precision is the foundation of great baking.
Weight-Based Cooking: Beyond Baking
While baking gets most of the attention in the weight-vs-volume debate, a kitchen scale is equally valuable for everyday cooking. Here’s how weighing improves your savory cooking.
Meal Prep and Batch Cooking
If you meal prep or cook in large batches, a scale is indispensable for portioning. Divide a big pot of chili into five equal portions? Weigh the total, divide by five, and scoop accordingly. Portion ground meat into uniform burger patties? Weigh each patty to ensure even cooking. Divide a batch of soup into containers for the freezer? Weigh each container to know exactly how many servings you have.
For anyone tracking calories or macros, weighing cooked food portions is far more accurate than using measuring cups or visual estimation. A “serving” of cooked rice might look like one cup, but it could be 150g or 200g depending on how tightly you pack it. Weighing eliminates this uncertainty.
Grilling and Smoking
A scale is surprisingly useful at the grill. Weigh your meat before cooking to calculate cooking times (a general rule is 15-20 minutes per pound for indirect grilling). Weigh your charcoal or wood chunks for consistent heat. Weigh your rubs and marinades for consistent flavor across batches.
For smoking, where low-and-slow cooking can take 8-14 hours, knowing the exact weight of your brisket, pork butt, or ribs helps you predict when they’ll be done. Many experienced pitmasters weigh their meat before and after cooking to calculate moisture loss—a key indicator of doneness and tenderness.
Fermentation and Preservation
Weight-based measurement is essential for fermentation and preservation:
- Sauerkraut and kimchi: The salt-to-vegetable ratio must be precise for safe fermentation. Too little salt risks harmful bacteria; too much inhibits the good lactobacillus. The standard ratio is 2-3% salt by weight of the vegetables.
- Pickles: Brine concentration (salt-to-water ratio) determines whether your pickles are safe, flavorful, and crunchy. Weighing the salt and water ensures consistency.
- Charcuterie: Curing salts (like Prague Powder #1) are used in precise amounts based on the weight of the meat. Too little curing salt is a food safety risk; too much is unpleasant and potentially harmful. A scale is mandatory for safe charcuterie.
- Kombucha and kefir: Sugar feeding ratios for kombucha and kefir are based on weight. Precise sugar amounts ensure consistent fermentation and flavor.
Portion Control for Restaurants and Food Businesses
If you run a food business—whether it’s a cottage food operation, a food truck, or a catering company—a kitchen scale is a legal requirement in many jurisdictions. Portion control ensures consistency, controls costs, and meets health department regulations. A scale that weighs accurately and repeatedly is essential for commercial food preparation.
A Brief History of Kitchen Scales
The kitchen scale has a fascinating history that spans thousands of years, from ancient balance scales to today’s precision digital instruments.
Ancient Origins
The earliest known weighing devices date back to ancient Egypt and Mesopotamia (around 2400-1800 BCE). These were simple balance scales—a beam balanced on a fulcrum with pans on each side. One pan held the object being weighed; the other held known reference weights. This basic principle remained unchanged for millennia.
Roman and Greek merchants used balance scales for trade, and the concept spread throughout the ancient world. The Romans developed standardized weights and measurement systems, and their balance scales were sophisticated enough to detect small differences in precious metals.
The Spring Scale Revolution
The spring scale, which measures weight by the compression or extension of a spring, was invented in the 18th century. Richard Salter, a British spring maker, patented the first spring scale in 1770. Spring scales were cheaper and more portable than balance scales, making them accessible for everyday kitchen use.
By the 19th century, spring scales were common in kitchens throughout Europe and America. They were simple, reliable, and didn’t require reference weights. However, they were less accurate than balance scales and could lose calibration over time as the spring fatigued.
The Digital Revolution
The first digital kitchen scales appeared in the 1980s, using load cells and electronic displays instead of springs and dials. Early digital scales were expensive and bulky, but they offered a significant improvement in accuracy and readability.
By the 1990s, digital scales had become affordable enough for mainstream adoption. The introduction of LCD displays, tare functions, and multiple unit conversions made them far more versatile than their mechanical predecessors. Today, a $15 digital scale is more accurate than a $100 mechanical scale from the 1980s.
The Smart Scale Era
The latest chapter in kitchen scale history is the connected scale—devices with Bluetooth, companion apps, and nutritional tracking features. While still a niche market, smart scales represent the ongoing convergence of kitchen tools and digital technology. Whether they’ll become mainstream remains to be seen, but the trend toward smarter, more connected kitchen tools is undeniable.
Environmental and Sustainability Considerations
In an era of increasing environmental awareness, even kitchen tools deserve scrutiny for their environmental impact. Here’s what to consider when choosing a kitchen scale.
Battery Waste
Traditional battery-powered scales contribute to battery waste—an estimated 3 billion batteries are discarded in the U.S. each year. To minimize your impact:
- Choose rechargeable: Scales with built-in rechargeable batteries eliminate the need for disposable batteries. A single rechargeable battery can replace hundreds of disposables over its lifetime.
- Use rechargeable AA/AAA batteries: If your scale uses standard batteries, invest in a set of rechargeable NiMH batteries and a charger. You’ll save money and reduce waste.
- Recycle properly: Never throw batteries in the trash. Use battery recycling programs (many hardware stores and municipalities offer them).
Material Choices
The materials used in kitchen scales vary in environmental impact:
- Stainless steel platforms: Stainless steel is highly recyclable and extremely durable. A stainless steel scale platform can last decades and be fully recycled at end of life.
- Plastic bodies: Plastic is less environmentally friendly, but a durable plastic scale that lasts 10 years is better than a “green” scale that breaks in 2 years and ends up in a landfill.
- Glass platforms: Glass is recyclable but energy-intensive to produce. Tempered glass is durable but can crack, requiring replacement.
Longevity as Sustainability
The most sustainable kitchen scale is the one you don’t have to replace. A well-made scale that lasts 10-15 years is far more environmentally friendly than a cheap scale that needs replacing every 2-3 years, even if the cheap scale uses “greener” materials. Durability is sustainability.
This is another argument for investing in a quality scale like the Escali Primo. Its exceptional durability means fewer replacements over time, less waste in landfills, and a lower total environmental impact despite its plastic construction.
Teaching Kids to Bake with a Scale
A kitchen scale is an excellent educational tool for children. Here’s how to introduce kids to weight-based measurement.
Why Kids Should Learn to Weigh
Learning to use a scale teaches kids several valuable skills simultaneously:
- Math: Weighing ingredients reinforces concepts like addition (running total), subtraction (how much more do I need?), multiplication (doubling a recipe), and fractions (half of 200g is 100g).
- Science: The scale demonstrates cause and effect (add more flour, the number goes up), measurement precision, and the concept of zero (tare function).
- Reading: Following a recipe with weight measurements practices reading comprehension and sequential thinking.
- Fine motor skills: Pouring, scooping, and adding small amounts of ingredients develops hand-eye coordination and fine motor control.
Age-Appropriate Activities
Ages 3-5: Simple weighing activities like “put 100g of flour in the bowl” or “add berries until the scale reads 50g.” Focus on number recognition and the concept of more/less.
Ages 6-8: Simple recipes that use weight measurements. Cookies, muffins, and no-bake treats are great starters. Introduce the tare concept and unit conversions.
Ages 9-12: More complex recipes with multiple ingredients. Introduce the concept of ratios (1:2:3 cookie ratio) and let them experiment with modifying recipes.
Ages 13+: Full recipe execution, including converting volume recipes to weight and understanding hydration percentages in bread baking.
Kids and the Kitchen Scale: Safety First
Always supervise children in the kitchen. Keep the scale away from the edge of the counter. Teach kids to place heavy items gently on the scale. And make sure they understand that the scale is a precision instrument—not a toy to be dropped or banged around.
Advanced Weighing Techniques
Once you’ve mastered the basics, these advanced techniques can further improve your precision and efficiency.
The Double-Bowl Method
For ingredients that are messy or hard to clean off a scale platform (like molasses, peanut butter, or sticky dough), use the double-bowl method: place a large bowl on the scale, tare, then place a smaller bowl inside it. Add your sticky ingredient to the smaller bowl. When you’re done, you can easily remove the smaller bowl for cleaning while the large bowl protects the scale platform.
Pre-Weighing Ingredients (Mise en Place)
Professional chefs and bakers practice “mise en place”—having all ingredients measured and ready before cooking begins. For weight-based mise en place:
- Set out small bowls or ramekins for each ingredient.
- Place each bowl on the scale, tare, add the ingredient, and set aside.
- Label each bowl with the ingredient name and weight (use masking tape and a marker).
- When you’re ready to cook, all your ingredients are measured, organized, and ready to go.
This method is especially valuable for complex recipes with many ingredients, like multi-layer cakes, elaborate pastries, or elaborate bread recipes with preferments.
Weight-Based Dough Hydration Adjustments
Experienced bakers often adjust hydration based on environmental conditions. On humid days, flour absorbs more moisture from the air, so you might reduce the water by 5-10g. On dry days, you might add a splash more. These micro-adjustments are only possible when you’re working with weights—you can’t meaningfully adjust “a splash” when you’re measuring by volume.
To develop this skill, keep a baking journal that records the weight of your flour, the weight of your water, the ambient humidity, and the resulting dough consistency. Over time, you’ll develop intuition for how environmental conditions affect your dough and how to compensate.
The Baker’s Percentage System
Baker’s percentage is a professional system where all ingredients are expressed as a percentage of the total flour weight. Flour is always 100%, and everything else is calculated relative to it. For example, a basic bread dough might be:
- Flour: 100% (1000g)
- Water: 65% (650g)
- Salt: 2% (20g)
- Yeast: 1% (10g)
This system makes it easy to scale recipes up or down, compare different formulas, and understand the relationship between ingredients. It’s only practical when you’re measuring by weight—you can’t express “1 cup of water” as a percentage of “3 cups of flour” in any meaningful way.
Learning baker’s percentage is one of the most valuable skills for any serious baker, and it’s only possible with a kitchen scale.
The Final Weigh-In
Switching from volume to weight is the single most important step you can take to improve your baking. A digital kitchen scale is an affordable, easy-to-use tool that removes guesswork and delivers consistent, repeatable results every time.
For its unbeatable blend of accuracy and durability, the Escali Primo remains our top recommendation. If you need a specialized solution for large bowls, the OXO Good Grips Scale is a worthy investment. And if you’re just getting started and want the best value, the Etekcity Scale delivers impressive performance at a fraction of the cost.
Whatever you choose, the simple act of weighing your ingredients will transform your baking from inconsistent to reliable. Welcome to the world of precision—your taste buds will thank you.


Pingback: Loaded Nutella Fruit Waffle with Ice Cream Recipe