How to Store Kitchen Appliances: The Complete Space-Saving Guide
A clutter-free countertop starts with a smart storage system — here’s exactly how to build one.
1. Why Appliance Storage Matters More Than You Think
Every kitchen eventually hits the same wall: countertops crowded with a blender, an air fryer, a stand mixer, and three chargers tangled behind them. It isn’t a lack of appliances that causes the chaos — it’s a lack of a system. Good appliance storage isn’t about hiding everything in a closet and forgetting it exists; it’s about designing a kitchen where every tool has a home, is easy to reach when you need it, and doesn’t turn your counters into a graveyard of dusty gadgets.
Beyond aesthetics, proper storage extends the life of your appliances. Dust buildup in a stand mixer’s motor housing, grease film on an air fryer’s exterior, and moisture trapped in a blender jar left on the counter all shorten lifespan and increase the odds you’ll need a replacement sooner than expected. A dedicated storage plan also protects your countertop workspace — the single most valuable real estate in any kitchen — and makes meal prep faster because you’re not shuffling appliances around just to find cutting board space.
There’s also a safety angle that’s easy to overlook. Appliances stored haphazardly on overcrowded shelves are more likely to be knocked down, and cords left dangling near a stovetop or sink create both a trip and an electrical hazard. A thoughtful storage system reduces these risks while making your kitchen genuinely more pleasant to cook in.
Compact designs make organization far simpler than bulky units — see our top-rated family air fryers built with stackable, storage-friendly footprints.
2. Audit Your Appliance Collection First
Before you buy a single organizer bin, take fifteen minutes to sort every appliance in your kitchen into three simple categories. This audit is the single most valuable step in the entire process, because it determines everything that follows — which appliances stay on the counter, which go into easy-access cabinets, and which get relegated to deep storage.
Category 1: Daily Use
These are appliances you touch almost every day — your coffee maker, toaster, or electric kettle. These earn permanent countertop real estate because the friction of pulling them out and putting them away repeatedly outweighs the clutter cost.
Category 2: Weekly Use
Blenders, air fryers, and toaster ovens usually fall here. They’re used often enough that they shouldn’t be buried in a hard-to-reach cabinet, but not so often that they need to live on the counter permanently. These belong in the most accessible storage zone: a low cabinet, a pull-out shelf, or an appliance garage near the outlet you use most.
Category 3: Occasional or Seasonal Use
Ice cream makers, waffle irons, turkey roasters, and pasta machines fall into this bucket. These can go into higher cabinets, a pantry top shelf, or even a labeled storage bin in a hall closet, since you’ll only need them a handful of times a year.
| Category | Frequency | Ideal Storage Zone | Example Appliances |
|---|---|---|---|
| Daily Use | Every day | Countertop | Coffee maker, kettle, toaster |
| Weekly Use | 2–5x per week | Low cabinet / appliance garage | Blender, air fryer, food processor |
| Occasional Use | Monthly or seasonal | High shelf / pantry / closet bin | Ice cream maker, waffle iron, canner |
Once you’ve sorted, be honest about appliances that haven’t been used in over a year. If something hasn’t earned a spot in any category, it may be time to sell or donate it — freeing up an entire shelf is often more valuable than any organizer product.
3. Step-by-Step: Building Your Storage System
With your audit complete, follow this five-step process to turn scattered appliances into an organized system. Each step below includes a simple visual to make the process concrete.
Step 1 — Clear and Reset Your Storage Zones
Empty every cabinet and drawer you plan to use for appliance storage. Wipe down shelves and check for uneven surfaces or non-slip liner needs before anything goes back in.
Step 2 — Group Appliances by Frequency Zone
Physically cluster appliances into the three groups from your audit before placing anything in a cabinet. This prevents you from mixing daily-use items into hard-to-reach spots.
Step 3 — Assign Zones Based on Reach Height
Daily items go at counter or eye level, weekly items at waist-to-shoulder height, and occasional items on the top shelf. This “reach triangle” reduces strain and keeps frequently used appliances effortless to grab.
Step 4 — Add Liners, Bins, and Labels
Use non-slip shelf liner to protect surfaces from scratches, clear bins for small accessories, and simple labels so every family member knows where things belong.
Step 5 — Test and Adjust After One Week
Use your kitchen normally for a week, then revisit the layout. If you find yourself reaching past three shelves for the blender, it’s in the wrong zone — move it and repeat.
4. Cabinet & Deep Drawer Storage
Deep drawers below the counter are some of the most underused storage space in modern kitchens. A drawer that pulls straight out gives you a bird’s-eye view of everything inside — unlike a cabinet where items get buried behind each other. Heavy appliances like stand mixers and food processors are ideal candidates for deep drawer storage because you avoid lifting them up and over a cabinet lip; you simply slide the drawer open and lift straight up.
To maximize a deep drawer, add a non-slip drawer mat first, then use appliance-specific inserts or simply position heavier items toward the back hinge point so the drawer doesn’t feel front-heavy when fully extended. If you have a soft-close drawer mechanism, avoid overloading it beyond the manufacturer’s weight rating — check your cabinet’s hardware specs if you’re storing something like a stand mixer that can weigh over 10kg.
Pros of Drawer Storage
- Full visibility of contents at a glance
- No lifting over cabinet lips
- Keeps countertops completely clear
- Works well for heavy appliances
Cons of Drawer Storage
- Limited to appliances that fit drawer height
- Not all kitchens have deep drawers
- Retrofitting drawers can be costly
For cabinets without drawers, a pull-out wire shelf (installed on standard drawer slides) replicates much of the same benefit. This is a relatively inexpensive upgrade and one of the highest-value changes you can make to an appliance-heavy kitchen.
When measuring a cabinet for a new drawer conversion, always account for the appliance’s tallest dimension with its lid or attachments in place, not just the base unit. A food processor, for example, is often measured by its base footprint online, but once you add the tall feed tube and pusher, the true height can be several inches more. Measure twice, and leave at least an inch of clearance on all sides so the drawer glides freely even when fully loaded.
Another often-missed detail is drawer depth versus appliance depth. A drawer that’s technically deep enough to fit a blender base might not leave room to also stand the pitcher upright beside it. In these cases, consider storing the pitcher separately in an adjacent cabinet, or lay it on its side in a padded drawer liner so it doesn’t roll and chip against the drawer walls when opened and closed repeatedly.
Labeling Deep Drawers for Shared Kitchens
In households where more than one person cooks, labeling deep drawers dramatically reduces the “where does this go” friction that causes clutter to creep back in within weeks. A simple printed label on painter’s tape, or a small chalkboard tag clipped to the drawer front, keeps everyone on the same page without requiring a permanent modification to your cabinetry.
5. Pantry & Closet Storage Solutions
If your pantry has any depth to it, dedicating one section to appliances can free up an enormous amount of kitchen cabinet space. The key is treating the pantry shelf like a mini appliance garage rather than a dumping ground — group similar appliances together, keep cords contained, and use the back wall for hooks holding lightweight accessories.
A rolling cart is one of the best pantry-adjacent solutions for kitchens tight on built-in storage. A three-tier cart with locking wheels can hold a blender, a food processor, and a stack of mixing bowls, and rolls out of a pantry corner only when needed — then tucks away completely out of sight.
Closet Conversion for Rarely-Used Appliances
A hall or linen closet with adjustable shelving can become secondary appliance storage for seasonal items — turkey roasters, canning equipment, or holiday waffle irons. Use clear storage bins labeled by season so you’re not hunting through boxes every time you need the ice cream maker in July.
When converting a closet for this purpose, install shelving that’s adjustable rather than fixed. Appliance boxes rarely come in uniform sizes, and a shelf that’s locked at a set height often wastes several inches of usable vertical space above shorter items. Adjustable brackets, even basic ones, let you tailor the spacing to match exactly what you’re storing, and you can reconfigure the whole closet in minutes if your appliance collection changes.
Consider also lining the bottom shelf with a rubber or cork mat if you’re storing anything with a water reservoir, such as a bread machine or a countertop ice maker. Even fully drained units can carry residual moisture, and a protective mat prevents that moisture from warping wood shelving over time.
Pantry Depth and Reach Considerations
Deep pantries can become a trap for appliances that get pushed to the back and forgotten. To avoid this, reserve only the front third of any pantry shelf for appliance storage, and use the back two-thirds for canned goods and dry staples that are less frequently rotated. This keeps appliances within a comfortable arm’s reach and prevents the “lost in the back” problem that leads to duplicate purchases.
6. Appliance Garages & Countertop Zones
An “appliance garage” is a cabinet built directly into the counter, usually with a roll-up or lift-up door, designed to hide small appliances while keeping them plugged in and ready to use. If you’re renovating or have cabinet space to repurpose, converting an end cabinet into an appliance garage is one of the most functional upgrades you can make — it keeps your coffee maker or toaster fully accessible without ever sitting in open view.
If a built-in appliance garage isn’t feasible, a simple “zone” approach works nearly as well: designate one end of your counter as the permanent appliance zone, using a tray or mat to visually contain it. This keeps clutter from creeping across your entire workspace while still allowing daily-use items to remain out.
The psychology behind a defined zone matters more than it might seem. When appliances have a visually bounded space — a tray, a mat, or even a strip of contrasting countertop material — it signals to everyone in the household exactly where things belong, which makes putting items back a near-automatic habit rather than a conscious decision. Kitchens without a defined zone tend to see clutter spread outward over time, since there’s no visual cue marking where “appliance territory” ends.
If you’re renovating and have the budget, a corner appliance garage is often the most space-efficient version of this idea, since corner cabinets are otherwise among the hardest kitchen spaces to use well. A lazy Susan or corner pull-out combined with a roll-up door can turn an awkward blind corner into dedicated, hidden appliance storage that would otherwise go completely wasted.
7. Vertical & Wall-Mounted Storage
Vertical space is the most overlooked storage resource in most kitchens. Walls, the insides of cabinet doors, and the undersides of upper cabinets can all hold weight if you add the right hardware.
- Pegboards: Mount a pegboard on an open wall to hold lightweight appliances with hanging hardware, like hand mixers or immersion blenders.
- Under-cabinet mounts: Brackets that screw into the underside of upper cabinets can hold a toaster oven or microwave, freeing the entire counter beneath.
- Door-mounted racks: The inside of a pantry or cabinet door is prime real estate for small appliance accessories like blender lids or measuring attachments.
Before mounting anything to a wall or cabinet underside, always check the appliance’s actual weight against the hardware’s rated load capacity, and add a safety margin of at least 25%. A toaster oven might feel light when you lift it, but repeated door-opening motion adds stress to the mounting bracket over time, and a bracket rated right at the appliance’s exact weight is more likely to loosen with daily use.
For rented kitchens where drilling isn’t an option, adhesive-backed hooks rated for kitchen use can still support lightweight items like a hand mixer or a set of measuring cups, as long as you respect the manufacturer’s stated weight limit and avoid placing them near heat sources like a stovetop, where adhesive bonds weaken over time.
8. Cord Management Systems
Tangled cords are the number one reason appliance storage looks messy even when everything is technically “put away.” A simple system fixes this permanently.
| Method | Best For | Cost |
|---|---|---|
| Velcro cable ties | Any cord, reusable | Low |
| Cord-wrap clips (stick-on) | Cabinet interiors | Low |
| Cord boxes | Hiding excess cord length near outlets | Low–Medium |
| Labeled cord bins | Drawer storage of multiple cords | Low |
Wrap each cord and secure it with a velcro tie before storing — this alone prevents 90% of the tangling that makes people avoid putting appliances away in the first place.
9. Storing Small Attachments & Accessories
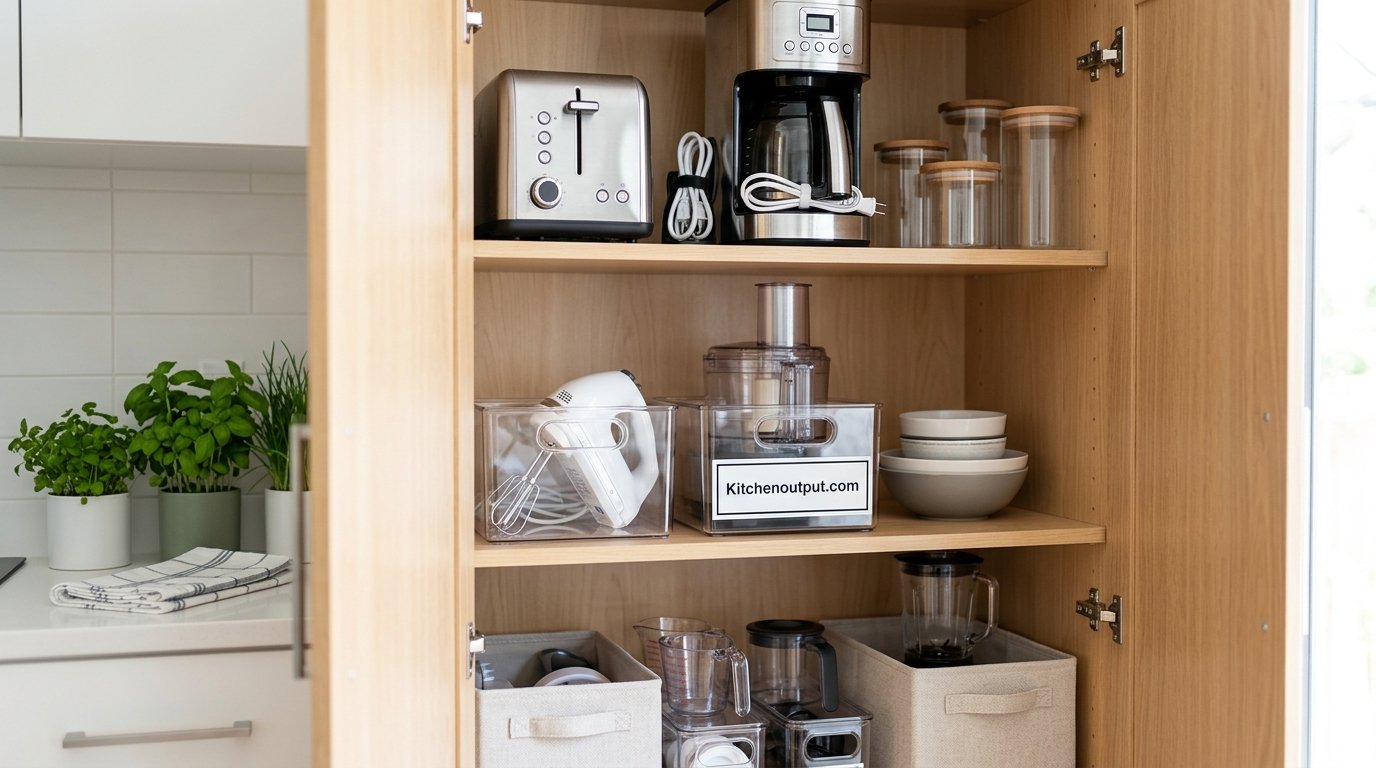
Blender blades, food processor discs, mixer attachments, and air fryer racks are the pieces most likely to get lost or damaged in storage. Clear stackable bins with dividers keep these organized and visible, and storing sharp blades point-down in a slotted holder prevents accidental cuts when reaching in.
A useful habit is storing each appliance’s attachments in the same container as the appliance itself, rather than in a shared communal drawer. It’s tempting to consolidate all blender blades, mixer beaters, and processor discs into one big “attachments” bin, but this quickly turns into a puzzle of matching pieces back to the correct base unit. Keeping attachments paired with their appliance — even if that means a slightly larger storage footprint — saves significant time during actual cooking.
For appliances with multiple interchangeable discs or blades, a slim magnetic strip mounted inside a cabinet door can hold metal attachments securely and visibly, which is both safer and faster than digging through a drawer. Just make sure the strip is rated for kitchen use and positioned where little hands can’t easily reach it if you have young children in the home.
10. Seasonal & Rarely-Used Appliance Storage
Appliances used only a few times a year — ice cream makers, turkey roasters, pressure canners — deserve dedicated deep storage that doesn’t compete with your everyday kitchen flow. Basements, garages, and top hall closet shelves are all reasonable homes for these, provided they’re kept in a climate-stable environment away from extreme heat or moisture that could damage motors or seals.
Before boxing up a seasonal appliance for long-term storage, give it a proper cleaning and make sure it’s completely dry — this single step prevents the vast majority of mold, odor, and rust issues people discover when they pull an appliance back out months later. For anything with a rubber gasket or seal, such as a pressure canner or an ice cream maker with a freezer bowl, store the lid slightly ajar rather than fully sealed, since a compressed gasket left under pressure for months can lose its shape and fail to seal properly next time you need it.
It also helps to keep the original box or a snug-fitting storage bin for oddly shaped appliances like waffle irons or panini presses, since generic bins often leave awkward gaps that let the appliance shift and knock into neighboring items during storage. A little extra care at the point of storage saves real frustration months later when the appliance comes back out for its next use.
11. Best Storage Products & Organizers
| Product Type | Use Case | Approx. Price Range |
|---|---|---|
| Non-slip shelf liner | Protects cabinet surfaces | $8–$15 |
| Pull-out wire drawer | Converts cabinet to drawer-style access | $25–$60 |
| 3-tier rolling cart | Mobile appliance storage | $30–$70 |
| Cord organizer box | Hides excess cord near outlets | $10–$20 |
| Clear stackable bins | Accessories and attachments | $12–$25 (set) |
12. Small Kitchen & Apartment Solutions
In small kitchens, every storage decision has to work twice as hard. Prioritize multi-purpose appliances (like an air fryer/toaster oven combo) to reduce total appliance count, and lean on vertical storage since floor and counter space are usually the scarcest resource. A slim rolling cart that fits in a narrow gap between the fridge and wall can add an entire extra storage column without taking floor space you don’t have.
Finally, revisit your storage system every few months. Kitchens evolve — you’ll acquire new appliances, retire old ones, and your cooking habits will shift. Treat your storage plan as a living system rather than a one-time project, and it will keep working for you long-term.
Frequently Asked Questions
Where should I store appliances I use every day?
Keep daily-use appliances like coffee makers, kettles, or toasters on the countertop or in an appliance garage near an outlet, since easy access matters more than hiding them.
How do I store a stand mixer without it taking up counter space?
A deep base cabinet drawer or a sturdy pull-out shelf works best — lift the mixer straight up and out rather than over a cabinet lip to avoid strain.
What’s the best way to organize small appliance accessories?
Use clear, labeled bins with dividers inside a nearby cabinet or drawer, and store sharp blades point-down in a slotted holder.
Should appliances be unplugged when stored?
Yes, unplug any appliance that isn’t used daily before storing it, both for safety and to prevent standby power draw.
How do I stop appliance cords from tangling in storage?
Wrap each cord and secure it with a reusable velcro tie before placing the appliance in its cabinet or bin.
Is it okay to store an air fryer in a cabinet right after use?
Let it cool completely and wipe down any grease residue first, since storing it warm can trap moisture and affect the nonstick coating.
What’s the best storage solution for a small kitchen?
Prioritize multi-purpose appliances, use vertical wall space, and consider a slim rolling cart to add storage without using floor space.
How often should I reorganize my appliance storage?
Every few months, or any time you notice yourself reaching past several items to grab something you use often — that’s a sign it’s in the wrong zone.
Can I store appliances in the garage or a closet?
Yes, for seasonal or rarely-used items, as long as the space is climate-stable and free from excess moisture or extreme temperature swings.
What’s an appliance garage?
It’s a cabinet built into the counter with a roll-up or lift-up door that hides small appliances while keeping them plugged in and ready to use.
Do I need special liners for appliance shelves?
Non-slip shelf liner isn’t required but is highly recommended — it protects cabinet surfaces from scratches and keeps appliances from sliding when the drawer or door opens.
How do I decide what to keep versus get rid of?
If an appliance hasn’t been used in over a year and doesn’t fit into your daily, weekly, or seasonal categories, it’s a strong candidate to sell or donate.
Bringing It All Together
A well-organized kitchen isn’t about owning fewer appliances — it’s about giving every appliance a logical home based on how often you actually use it. Start with the audit, build zones by frequency, tame your cords, and revisit the system every few months as your kitchen evolves. The payoff is a countertop that stays clear, appliances that last longer, and a kitchen that finally feels calm to cook in.
Shop Kitchen Storage Organizers →


