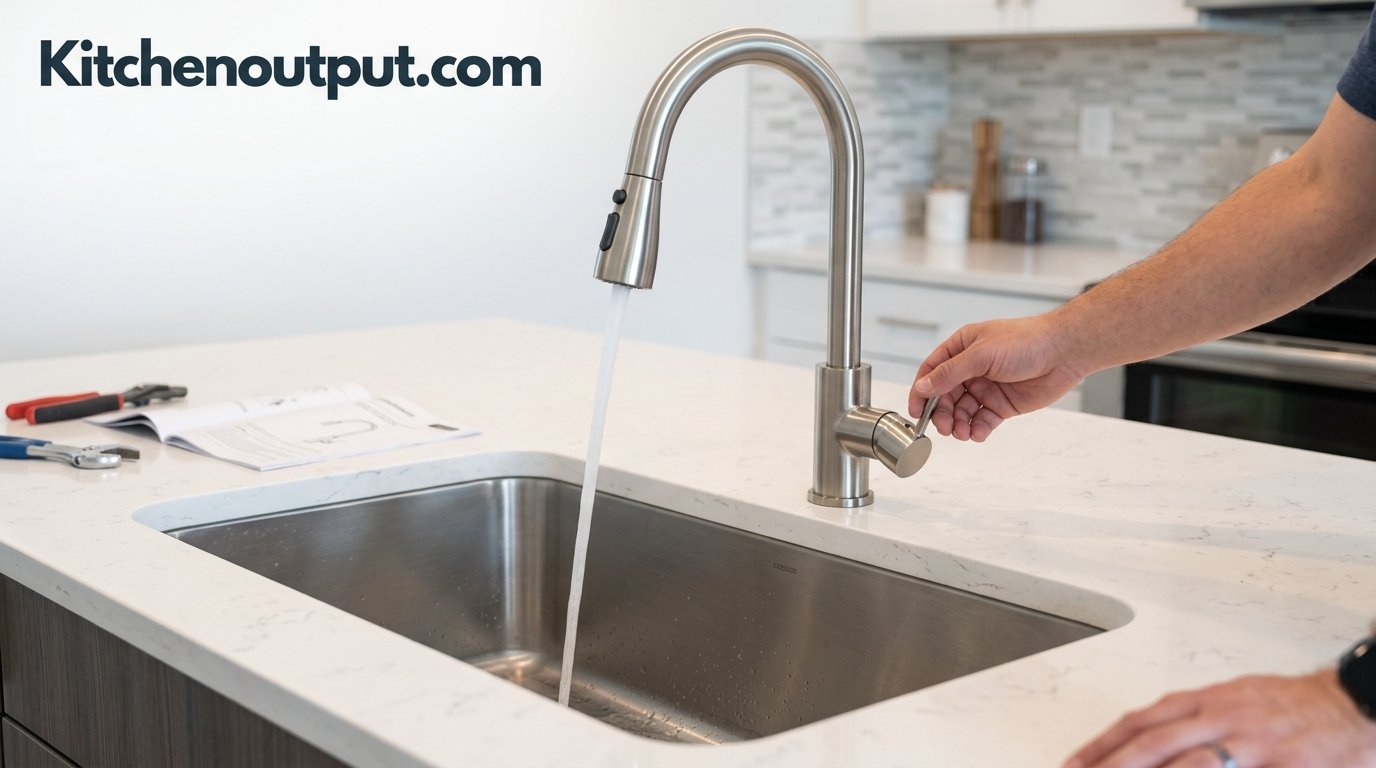
A properly installed faucet should sit flush, swivel freely, and show zero drips at every connection.
How to Replace a Kitchen Faucet: A Complete Step-by-Step Guide
Swap out a leaky, outdated, or broken kitchen faucet yourself in an afternoon — no plumber required for most standard installations.
1. Signs It’s Time to Replace Your Kitchen Faucet
Most homeowners don’t wake up one morning and decide to replace a kitchen faucet on a whim. It’s usually a slow build-up of small annoyances that eventually tips into “I’m done dealing with this.” Recognizing the warning signs early can save you from water damage, higher utility bills, and the kind of 2 a.m. drip-drip-drip that makes you question your life choices.
The most obvious sign is a persistent leak, either at the spout, the base, or underneath at the connections. A slow drip might seem harmless, but a faucet that leaks even one drop per second can waste thousands of gallons of water a year. If you’ve already tried replacing the O-rings, cartridge, or washers and the leak keeps coming back, the fixture itself may simply be worn out.
Low or inconsistent water pressure is another red flag, especially if it’s isolated to one faucet rather than the whole house. Mineral buildup inside an aging faucet’s internal channels can restrict flow in ways that no amount of aerator cleaning will fully fix. Similarly, a spout or handle that wobbles, sticks, or requires a Herculean grip to turn on is telling you that internal components have degraded beyond a simple repair.
Cosmetic issues matter too, particularly if you’re planning a broader kitchen refresh. Corrosion, pitting, discoloration, or a finish that’s worn down to bare metal doesn’t just look dated — it can also mean the protective coating has failed, leaving the base metal exposed to corrosion. If you’re already updating other elements of your kitchen and consulting a kitchen appliance buying guide for new appliances, a faucet swap is a natural companion project since both jobs benefit from turning off water and power at the same time.
Age alone isn’t always a reliable indicator, but it’s a useful data point. Most residential kitchen faucets are built to last somewhere between 15 and 20 years under normal household use, with cheaper builder-grade models sometimes falling short of that range and premium fixtures occasionally exceeding it. If your faucet came with the house and you have no idea how old it is, a combination of visible wear, internal corrosion, and outdated styling is usually enough to make the call without needing an exact installation date.
Finally, consider function. Older faucets often lack modern conveniences like pull-down sprayers, magnetic docking, or single-lever temperature control. If you’re finding yourself constantly wrestling with a two-handle setup while your hands are full of raw chicken, that friction alone is a legitimate reason to upgrade.
It’s also worth thinking about the cumulative cost of doing nothing. A faucet that drips at roughly one drop per second can waste well over 3,000 gallons of water in a single year — money that quietly disappears into your utility bill month after month without you ever noticing a single dramatic event to point to. Multiply that by several years of procrastination, and the “just live with it” approach often ends up costing more than the replacement faucet itself would have.
There’s also a less obvious risk: a failing faucet base or worn supply line connection can fail suddenly rather than gradually, sending water spraying under the sink while you’re at work or asleep. Cabinets, subflooring, and even ceiling drywall in the room below can suffer real damage in a matter of hours. Treating a wobbly, leaking, or corroded faucet as a “someday” project rather than a “this weekend” project is one of the more common regrets homeowners mention after dealing with a water damage claim.

2. Tools and Materials Checklist
Having everything laid out before you start is the single biggest factor in whether this project takes 45 minutes or turns into a three-hour ordeal spent crawling in and out from under the sink looking for a missing wrench. Most of these items are inexpensive, and several double as useful additions to your permanent home toolkit — a nice overlap if you’re also working through a broader list of essential kitchen tools and equipment.
A basin wrench is the single most important specialty tool on this list. Its long shaft and pivoting jaw are purpose-built to reach the cramped, awkward mounting nuts hidden deep behind a sink basin — a space where a standard wrench simply can’t get the right angle. If you don’t already own one, it’s worth the small investment rather than trying to improvise with pliers, which tend to round off nuts and turn a 10-minute step into a 45-minute fight.
Plumber’s putty is used to create a watertight seal under the base of many faucets, though some modern models use a rubber gasket instead and specify silicone sealant. Always check your new faucet’s installation instructions, since using the wrong sealing method can void a warranty or, worse, fail to actually seal.
Channel-lock pliers earn a spot on this list as a backup for the basin wrench, useful for gripping supply line nuts or holding a fitting steady while you turn a connector with your other hand. A headlamp or clip-on flashlight is more valuable than it sounds — under-sink cabinets are notoriously dark, and trying to balance a phone flashlight while also holding a wrench is a recipe for dropped tools and skinned knuckles.
Keep a small bowl or container nearby for loose hardware. Faucet mounting kits often include multiple washers, spacers, and small brackets that look interchangeable but aren’t, and losing track of even one piece can send you searching the kitchen floor on your hands and knees at the worst possible moment. Laying pieces out on a towel in the order you remove them, left to right, makes reassembly with the new faucet far more intuitive.

3. Choosing the Right Replacement Faucet
Before you buy anything, count the holes in your sink deck (or countertop) and measure the distance between them if there’s more than one. This single detail eliminates more return trips to the store than any other factor. A single-hole sink needs a faucet designed for single-hole mounting, though many single-hole faucets include a deck plate that can also cover a 3-hole configuration if needed.
Beyond hole count, think about handle style, spray function, and finish. If you’re coordinating the new faucet with recently updated stainless steel cookware or appliances, matching or complementary metal tones can make the whole kitchen feel intentional rather than mismatched.
Spout height and reach matter more than most first-time buyers expect. A tall, gooseneck-style spout gives you more clearance for filling stockpots and pitchers, but can also splash more in a shallow sink. Measure the height from your countertop to the underside of your upper cabinets before committing, since an overly tall spout can bump into cabinetry when raised or swiveled. Reach, meanwhile, should center the spout comfortably over your sink’s main basin rather than favoring one side, particularly on double-basin sinks.
Spray pattern options are another differentiator worth a moment’s thought. Many pull-down and pull-out sprayers now offer a toggle between a standard aerated stream and a wider spray or “power rinse” setting for scrubbing baked-on food off dishes. If you frequently deal with cast iron or heavily soiled cookware, a dedicated power-spray mode is a genuinely useful upgrade rather than a marketing gimmick.
Lastly, register your new faucet’s warranty promptly after installation. Most reputable brands offer lifetime warranties on the finish and mechanical parts, but only if you keep proof of purchase and, in some cases, complete an online registration within a set window. It takes five minutes and can save you a full replacement cost years down the line if a cartridge or finish issue develops.
| Feature | Single-Handle | Double-Handle | Touchless / Smart |
|---|---|---|---|
| Ease of use | Very easy — one motion for flow & temp | Requires two adjustments | Hands-free sensor activation |
| Installation holes | 1 (sometimes +2 for soap/sprayer) | 3 | 1–3 depending on model |
| Typical price range | $ | $–$$ | $$$ |
| Best for | Busy cooks, small sinks | Traditional or vintage-style kitchens | Hygiene-focused households |
| Maintenance complexity | Low | Moderate (2 valve sets) | Higher (battery/electronics) |
Pull-Down Sprayer Pros
- Extra reach for washing large pots
- Magnetic docking keeps the hose secure
- Great for filling tall vessels
Pull-Down Sprayer Cons
- More moving internal parts
- Hose can wear out over years of use
- Slightly pricier than fixed spouts
Material and construction quality behind the scenes matter just as much as the visible finish. Solid brass faucet bodies tend to outlast zinc-alloy construction, resisting corrosion better and holding up longer to daily use, though they typically come at a higher price point. Ceramic disc cartridges, now standard on most mid-range and higher faucets, are far more durable and drip-resistant than the rubber washer designs common in older fixtures, and are worth confirming even on budget-friendly models since the difference in longevity is substantial.

4. Step 1 – Shut Off the Water Supply and Prep the Space
STEP 1 OF 6Open the cabinet doors below your sink and locate the two shutoff valves — one for hot, one for cold — typically mounted on the supply lines running up from the wall or floor. Turn each valve clockwise until it stops. If your home doesn’t have local shutoff valves under the sink (common in older houses), you’ll need to shut off the main water supply to the house instead.
Once the valves are closed, turn the faucet handle on at the sink to release any residual pressure and drain the lines. Place a bucket or towel underneath the connections, since a small amount of water will still trickle out when you disconnect the supply lines later. Clear out anything stored under the sink so you have full range of motion — this is not a job you want to do while doubled over a bottle of dish soap.
Close both the hot and cold shutoff valves fully before disconnecting anything.

5. Step 2 – Remove the Old Faucet
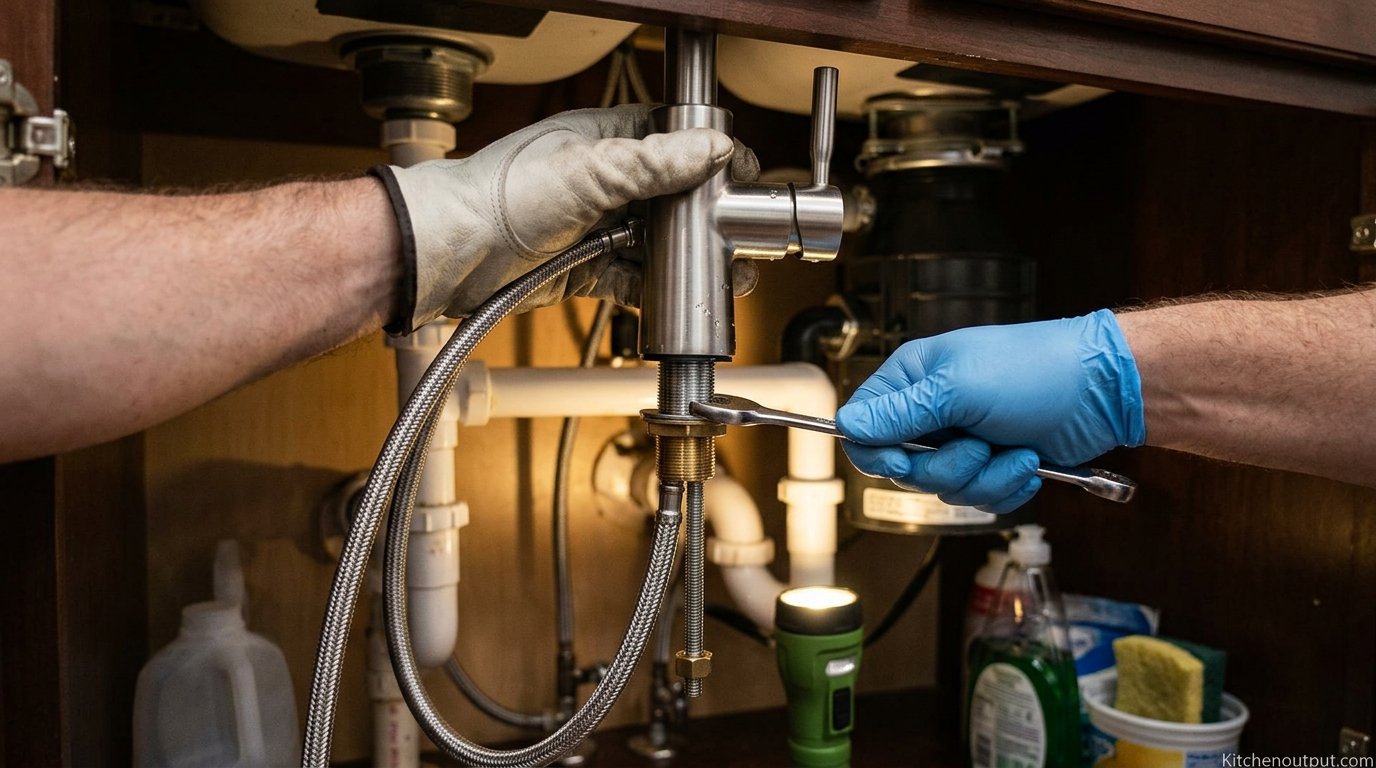
STEP 2 OF 6Using an adjustable wrench, disconnect the flexible supply lines from the shutoff valves first, then from the faucet’s tailpieces. Have your bucket ready — this is where most of the residual water will drip out. Next, locate the mounting nuts securing the faucet body to the underside of the sink deck. This is where your basin wrench earns its keep: slide the jaw up and over the nut, hook it in place, and turn counterclockwise.
If a mounting nut refuses to budge, a few minutes of penetrating oil applied to the threads can work wonders, especially on faucets that have been in place for a decade or more. Avoid excessive force with pliers, which can strip the nut or crack aging plastic mounting hardware. Once all nuts are removed, the faucet should lift free from above. If it’s a fully integrated unit with a sprayer, disconnect the sprayer hose from its docking mount and any quick-connect fittings before lifting the whole assembly out.
Take a moment before you toss the old faucet to note how the existing plumbing was configured — a quick photo with your phone of the supply line routing and any brackets can be a lifesaver later if something about the new installation doesn’t look quite right. This is especially useful if your old faucet used a mounting style you haven’t seen before, since it gives you a reference point rather than relying purely on memory.
The basin wrench’s pivoting jaw reaches nuts that standard tools can’t access.
6. Step 3 – Clean and Prep the Sink Deck
STEP 3 OF 6With the old faucet out, you’ll likely find a ring of old plumber’s putty, mineral deposits, or grime around the mounting hole. Scrape this away with a plastic putty knife (metal can scratch stainless steel or porcelain), then wipe the area down with a mild cleaner and dry it completely. A clean, dry, flat surface is essential for the new faucet’s gasket or putty to form a proper seal — skipping this step is one of the most common reasons a “brand-new” faucet leaks within the first week.
While you’re in there, it’s worth inspecting the sink itself and surrounding cabinet for any water damage, soft wood, or mold from a prior slow leak. Catching that now, before the new faucet goes in, is far easier than addressing it later.
A clean, dry deck surface is critical for a leak-free seal.
7. Step 4 – Install the New Faucet Body
STEP 4 OF 6Follow the manufacturer’s instructions for whether your new faucet requires plumber’s putty or a rubber gasket at the base — many modern faucets use a gasket exclusively and explicitly warn against putty, which can degrade certain finishes. If putty is called for, roll a thin rope of it into a ring and press it around the base before inserting the faucet’s shank down through the mounting hole from above.
From underneath, thread on any washers and the mounting nut, then hand-tighten before finishing with your basin wrench. Snug is the goal — overtightening can crack the sink material or strip plastic threads, while under-tightening leaves the faucet wobbly and prone to leaks at the base. If your faucet includes a separate deck plate (common on single-hole faucets installed in 3-hole sinks), seat that first following the same sealing method.
Seat the gasket, insert the shank, then tighten the mounting nut evenly from below.

8. Step 5 – Connect the Water Supply Lines
STEP 5 OF 6If your old flexible supply lines are more than a few years old, this is the right time to replace them rather than reuse them — they’re inexpensive and a failure here can cause serious water damage down the road. Wrap the threads on the shutoff valves and faucet tailpieces with two or three wraps of PTFE tape, then hand-tighten the supply line connectors before giving them a final quarter-turn with an adjustable wrench. Be careful not to cross-thread the fittings, and never over-tighten compression fittings, which can crack under excess torque.
Double-check that you’ve connected hot to hot and cold to cold — an easy mistake to make when you’re working upside down in a cramped cabinet, and one that will leave you with reversed water temperatures at the tap.
If your kitchen also has a dishwasher air gap or a connected garbage disposal, this is a convenient moment to visually inspect those connections as well, since you already have the cabinet cleared out and a flashlight in hand. Catching a slow disposal leak or a loose air-gap fitting while everything is accessible saves you from having to crawl back under the sink again next month for an unrelated issue.
Match cold-to-cold and hot-to-hot, and tape every threaded connection.

9. Step 6 – Test for Leaks and Final Adjustments
STEP 6 OF 6Turn both shutoff valves back on slowly and watch every connection closely for the first minute — the mounting nut, the supply line fittings at both ends, and the base of the faucet itself. Run the water on both hot and cold for a full minute, cycling the sprayer if your model has one, since a leak sometimes only appears under active flow rather than at rest.
If you spot a drip, don’t panic — it’s almost always a connection that needs another quarter-turn, not a sign you’ve done something fundamentally wrong. Shut the water back off, tighten the specific fitting slightly, and retest. Once everything runs dry, remove the aerator from the spout tip and flush the line for 15–20 seconds to clear out any debris or metal shavings from the installation, then reattach the aerator.
It’s worth doing a second check a day or two later, after the fixture has had time to settle and any putty or sealant has had a chance to fully cure. Slow seepage that wasn’t visible during the initial test sometimes shows up as a small water stain or faint dampness on the cabinet floor after 24 to 48 hours, and catching it at that stage is far easier than discovering it weeks later as a warped cabinet base.
Inspect the mounting nut, both supply connections, and the base for drips under active flow.
10. Special Installation Scenarios
Not every kitchen sink is a straightforward single-hole or 3-hole setup, and a few common variations are worth planning for before you buy your new faucet.
Converting between hole counts
If you’re moving from a 3-hole double-handle faucet to a single-hole modern design, you’ll be left with two empty holes. Most single-hole faucets come with a matching deck plate that covers all three holes at once, so this is usually a non-issue — just confirm the plate is included before checkout. Going the other direction (single-hole sink, multi-hole faucet) isn’t possible without drilling, which is not a DIY-friendly step on most sink materials.
Farmhouse and apron-front sinks
These sinks often sit slightly forward of the counter edge, which can affect faucet reach and spout height. Look specifically for faucets marketed as “farmhouse compatible” with taller, more forward-curving spouts designed to clear a deeper basin.
Faucets with separate soap dispensers or air gaps
If your sink has an extra hole for a soap dispenser or a dishwasher air gap, make sure your new faucet’s deck plate or hole configuration accounts for it, or plan to keep the existing dispenser in its own hole separately.
Wall-mounted faucets
Faucets that mount to the wall behind the sink rather than to the sink deck follow an entirely different installation process, since the water lines run through the wall rather than up from the cabinet floor. If you’re switching from a deck-mounted to a wall-mounted design (or vice versa), this typically requires opening up drywall and relocating plumbing — a job better suited to a licensed plumber unless you already have experience with in-wall rough-in work.
Filtered and instant-hot-water faucets
Faucets paired with an under-sink filtration system or an instant hot water dispenser usually need an extra hole for the secondary spout, along with a dedicated low-voltage or standard outlet nearby for instant-hot units. If you’re adding this functionality during your faucet swap, confirm your sink has (or can accommodate) the additional hole and that there’s an accessible outlet under the cabinet before you finalize your faucet choice.
RVs, mobile homes, and utility sinks
Faucets in RVs and mobile homes often use different thread sizes and lower-pressure-rated components than standard residential fixtures, so double-check compatibility specs rather than assuming a standard kitchen faucet will thread onto RV plumbing. Utility and laundry-room sinks, by contrast, are usually more forgiving and can often accept a standard kitchen faucet as long as the hole spacing matches.

11. Troubleshooting Common Installation Problems
Even a careful installation can run into a snag. Here are the issues that come up most often, and how to resolve them without starting over.
| Problem | Likely Cause | Fix |
|---|---|---|
| Leak at the base | Missing/misaligned gasket or dried-out putty | Remove faucet, reseat gasket or reapply putty, retighten evenly |
| Leak at supply connection | Insufficient PTFE tape or cross-threading | Redo tape wraps, ensure straight threading before tightening |
| Low water pressure after install | Debris in aerator or supply lines | Remove and flush aerator, check for kinked supply lines |
| Faucet wobbles at base | Mounting nut under-tightened | Snug the mounting nut further with a basin wrench |
| Hot and cold reversed | Supply lines connected to wrong tailpieces | Shut off water, swap the two connections |
| Sprayer hose won’t retract | Weight or dock magnet misaligned | Check the counterweight clip and realign the docking magnet |
| Handle feels stiff or grinds | Debris in the cartridge or over-tightened set screw | Remove handle, inspect cartridge, back off set screw slightly |
If you’re still finding a persistent drip after multiple attempts to reseat the gasket and tighten connections, the issue may not be the installation at all — it could be a defective cartridge inside the new faucet itself. This isn’t common, but it does happen occasionally even with reputable brands. Most manufacturers will send a replacement cartridge free of charge under warranty if you contact their customer support with your model number and a description of the issue, so there’s rarely a need to return the entire faucet.
DIY Installation Pros
- Saves $150–$350 in typical labor costs
- Usually completes in under 90 minutes
- No scheduling wait for a contractor
DIY Installation Cons
- Harder with corroded or seized old plumbing
- Requires comfort working in cramped spaces
- Mistakes can cause water damage if unchecked
12. Maintenance Tips to Extend Your Faucet’s Lifespan (and When to Call a Pro)
Once your new faucet is in and leak-free, a little routine care goes a long way. Wipe down the finish with a soft cloth rather than abrasive sponges, which can dull chrome and matte finishes over time. Clean the aerator every few months by unscrewing it and rinsing away mineral deposits, especially if you live in a hard-water area. If your faucet has a pull-down sprayer, periodically extend the hose fully to check that it retracts smoothly without catching.
Avoid hanging heavy items like wet dish towels or scrub brushes directly on the spout or handle, since the repeated extra weight and leverage over months can gradually loosen internal fittings that were designed for water flow, not load-bearing use. It’s a small habit, but it’s one of the more common quiet contributors to a faucet developing a wobble years before it otherwise would.
Keeping your under-sink area organized also helps you spot small leaks before they become big problems — a quick weekly glance while grabbing cleaning supplies is often enough. If you’re rethinking storage down there as part of the project, a guide on how to store kitchen appliances and small tools nearby can help you make the most of that awkward cabinet space, and broader tips on organizing a small kitchen apply just as well to the space under the sink as they do to your cabinets and countertops.
Most standard faucet replacements are well within reach of a confident DIYer with basic tools and an hour or two of patience. That said, call a licensed plumber if: your shutoff valves themselves are corroded and won’t turn or seal properly, you discover soft or damaged subflooring under the sink, your home has older galvanized or unusual piping that doesn’t match modern fittings, or you’re not fully comfortable working with water lines. Paying for an hour of professional help is far cheaper than repairing water damage from a mistake.
If you live in an area with hard water, consider whether a whole-house or under-sink water softening or filtration system makes sense alongside your new faucet. Mineral buildup is one of the biggest contributors to a shortened faucet lifespan, gradually clogging the aerator, restricting internal channels, and dulling finishes faster than they would wear in soft-water conditions. Even a simple inline filter on the cold supply line can meaningfully slow that process.
Seasonal habits matter too. In colder climates, make sure the cabinet under your kitchen sink isn’t sealed so tightly that it traps cold air against the supply lines during a hard freeze, since a burst line is a far more expensive fix than a faucet replacement. Leaving cabinet doors slightly open during extreme cold snaps is a simple, free precaution that plumbers routinely recommend.
Finally, keep the original box, model number, and any leftover parts (extra washers, a spare aerator, the installation manual) somewhere accessible for at least the first year. If you ever need to order a replacement cartridge or file a warranty claim, having the model number on hand turns a potentially frustrating phone call into a five-minute transaction.
Ready to finish the job?
Grab a reliable faucet, a basin wrench, and a roll of PTFE tape — and you can have this project wrapped up before dinner.
Shop Everything You NeedFrequently Asked Questions
How much does it cost to replace a kitchen faucet yourself?
DIY replacement typically costs only the price of the new faucet plus a few dollars in supplies like tape and sealant, since you’re skipping labor charges entirely. Faucets themselves range widely from budget models to premium smart faucets, and supplies like PTFE tape, putty, and a basin wrench are all one-time purchases you’ll reuse on future plumbing projects.
Do I need a plumber to replace a kitchen faucet?
Not usually. Most standard sinks with accessible shutoff valves and standard mounting hardware can be handled by a confident DIYer in under two hours. A plumber becomes worthwhile if valves are seized, piping is unusual, you’re converting to a wall-mounted design, or you’re simply not comfortable working with water lines under pressure.
How long does it take to replace a kitchen faucet?
Most straightforward replacements take 30 to 90 minutes, with older or corroded installations sometimes taking longer due to stuck nuts or valves.
What size are kitchen faucet holes, and does it matter?
Standard kitchen sink holes are typically about 1.375 inches in diameter, though this can vary slightly. What matters most is the number of holes and the spacing between them, since this determines faucet compatibility more than the exact hole diameter.
Can I install a 3-hole faucet on a 1-hole sink?
No, not without drilling additional holes, which isn’t practical or safe on most sink materials without specialized equipment. It’s much easier to choose a faucet that matches your existing hole configuration.
Do I really need to turn off the main water valve?
Only if your sink lacks dedicated hot and cold shutoff valves underneath. If those local valves are present and functioning, closing them is sufficient and far more convenient than shutting off water to the entire house.
What tools do I really need for a basic DIY faucet swap?
At minimum: a basin wrench, an adjustable wrench, PTFE tape, and either plumber’s putty or the gasket included with your new faucet. Everything else on the checklist makes the job easier but isn’t strictly required.
Why is my new faucet leaking at the base?
This is almost always caused by a missing or misaligned gasket, dried-out putty, or a mounting nut that isn’t tight enough. Remove the faucet, reapply the sealing method correctly, and retighten evenly.
Can I reuse my old flexible water supply lines?
You can, but it’s not recommended if they’re more than a few years old, since the rubber or braided lining degrades over time and a failure can cause significant water damage. New supply lines are inexpensive relative to the risk.
What’s the best faucet finish for hard water areas?
Finishes like brushed nickel and matte black tend to show mineral spots less visibly than polished chrome, though regular cleaning matters more than finish choice for long-term appearance in any hard water area.
How do I remove a stuck or corroded mounting nut?
Apply penetrating oil to the threads and let it sit for 10–15 minutes before attempting again with a basin wrench. Avoid excessive force, which can crack plastic mounting hardware or strip the nut entirely.
How often should a kitchen faucet be replaced?
Quality faucets typically last 15 to 20 years with normal use, though this varies based on water quality, usage frequency, and build quality. Persistent leaks or corrosion are better indicators than age alone.
Is it normal for a brand-new faucet to have some wobble before the nut is fully tightened?
Yes — the faucet will typically feel loose while it’s only hand-tightened, and that’s expected until you finish snugging the mounting nut from below with a basin wrench. Any wobble that remains after full tightening usually points to a nut that still needs another quarter-turn or an improperly seated shank.
Do all kitchen faucets fit all sinks?
No. Compatibility depends on matching the faucet’s hole configuration and mounting method to your sink’s existing holes, along with confirming the faucet’s deck plate (if needed) covers any extra holes. Always measure your sink’s hole count and spacing before purchasing a replacement.


