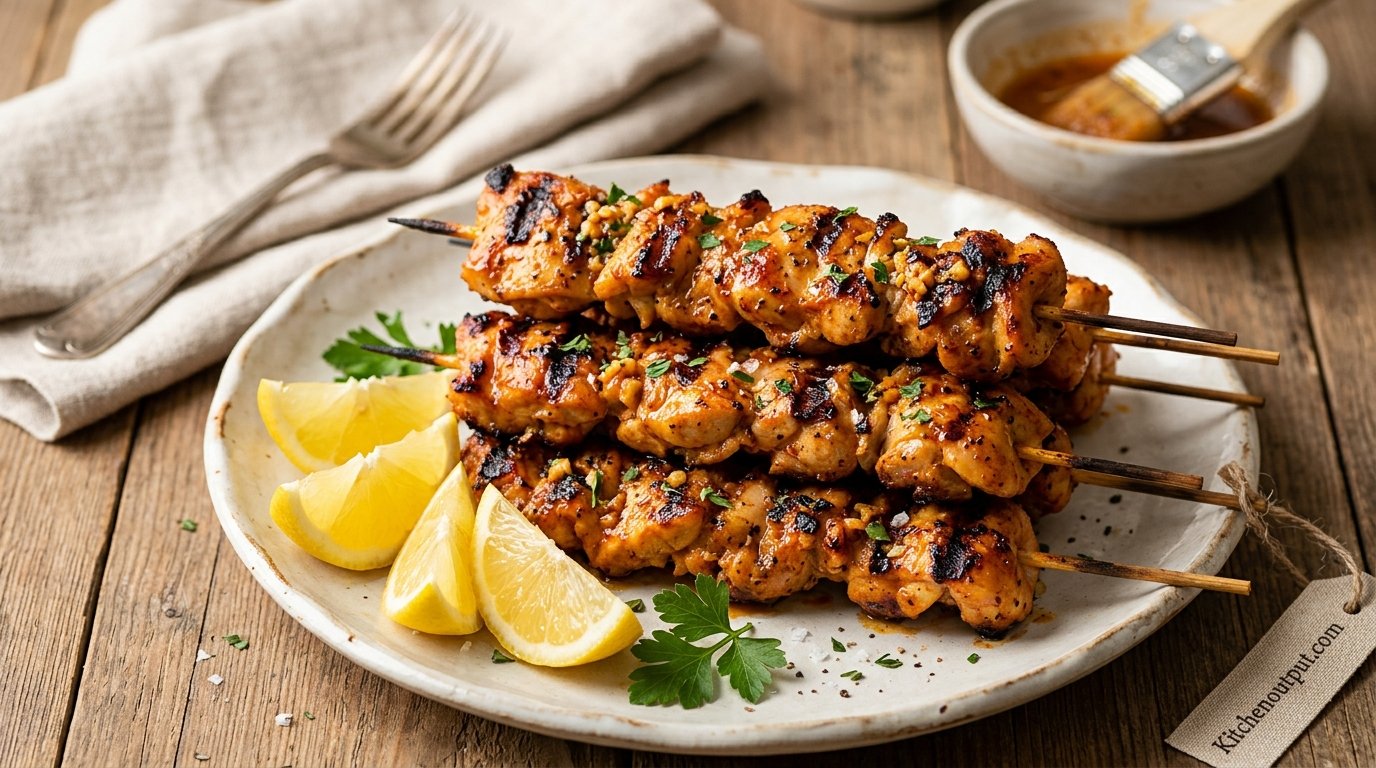
Garlic-Paprika Butter Chicken Skewers: The Weeknight Recipe That Tastes Like a Backyard Cookout
Juicy, lemon-bright chicken chunks rubbed in garlic and paprika, threaded onto skewers, and finished with a rich melted-butter baste until the edges catch a proper char — built for the air fryer, the grill, or a stovetop grill pan.
Why This Recipe Works
There’s a specific kind of chicken skewer that shows up at every backyard cookout worth remembering: slightly charred at the edges, juicy all the way through, and coated in something rich enough that you don’t need a dipping sauce. Garlic-paprika butter chicken skewers hit that mark with a short ingredient list and almost no technique that requires practice. The chicken is cut small enough to cook fast, the dry rub leans on pantry staples, and the finishing butter baste does the job that a marinade usually gets credit for — carrying fat-soluble flavor into every bite while keeping the surface from drying out under high heat.
What separates this version from a generic paprika chicken skewer is the order of operations. Most recipes either marinate the chicken in oil and spices for hours, or they brush on a sauce at the very end and call it a glaze. This recipe does both, but lighter: a quick dry-leaning rub goes on before skewering so the surface seasoning has time to bond with the meat, and a separate warm butter baste goes on twice during cooking — once midway through, once near the end — so the fat has time to render into the chicken instead of just sitting on top of it.
It also happens to be one of the more forgiving proteins to cook this way. Boneless, skinless chicken breast has a reputation for drying out, but cut into small, even chunks and cooked hot and fast, it behaves more like a piece of meat on a kebab than a single thick fillet. The higher surface-area-to-volume ratio means the outside sears and chars before the inside has a chance to overcook, provided you’re not walking away from the pan or the grill grate.
Below, we’ll walk through every part of the process — ingredient substitutions, how to pick a cut of chicken, the actual step-by-step prep, three different cooking methods with their own timing, and the troubleshooting that comes up most often when people try this at home. If you’re the type who reads a recipe start to finish before touching a knife, this is written for you.
There’s also a practical reason this recipe travels well between kitchens with very different setups. Not everyone has a charcoal grill in a backyard, and not everyone wants to fire one up on a Tuesday night. But almost every modern kitchen has either an air fryer, an oven with a broiler function, or at minimum a stovetop and a heavy skillet. Rather than write a recipe that assumes one specific piece of equipment, this one is built around a marinade-and-baste system that adapts to whatever heat source you’re working with, which is part of why it shows up so often as a go-to weeknight dinner rather than a special-occasion cookout dish.
It’s also worth saying plainly what this recipe is not. It’s not a low-and-slow braise, it’s not a sauce-heavy stir-fry, and it’s not something that benefits from being left alone for hours. Everything about it — the small cut of chicken, the light rub, the quick two-stage baste — is built around speed and direct heat. Understanding that up front changes how you approach the whole process: you’re not trying to tenderize tough meat over time, you’re trying to season and char a naturally tender cut as efficiently as possible without drying it out. That distinction matters more than it might seem, because it explains why almost every troubleshooting tip later in this article comes back to either “cut size” or “heat and timing,” rather than marinade duration.
Ingredient Breakdown & Substitutions
Nothing here is exotic, which is part of the appeal. Below is what goes into the chicken rub and the butter baste, plus what you can swap if your pantry looks a little different.
What You’ll Need
For the Chicken
- 1.5 lb (700g) boneless, skinless chicken breast, cut into bite-sized chunks
- ½ tsp salt
- ½ tsp black pepper
- 1 tsp paprika
- ½ tsp garlic powder (or 2 cloves fresh grated garlic)
- Zest of 1 lemon
For the Butter Baste
- 3 tbsp butter, melted
- ½ tsp black pepper
- ½ tsp dried parsley (or oregano)
- ¼ tsp paprika
These quantities are sized for the amount of chicken most people buy in a single grocery-store pack — around a pound and a half. Treat them as a solid starting point and adjust to taste once you’ve made the recipe once; some cooks like double the garlic, and there’s no version of this dish that suffers from an extra pinch of paprika.
Substitutions Worth Knowing
- Chicken breast → chicken thighs: Boneless, skinless thighs work beautifully here and are more forgiving if you overcook them slightly, since they hold more fat. Cut them into similarly sized chunks and expect a slightly shorter cook time.
- Garlic powder → fresh garlic: Two cloves of finely grated fresh garlic will give a sharper, more pungent flavor than the powder. If you go fresh, mince it very finely or use a microplane so it doesn’t burn on the skewer’s surface.
- Sweet paprika → smoked paprika: Smoked paprika adds a barbecue-like depth without a grill, which is useful if you’re cooking indoors in an air fryer or oven. Start with half the amount called for, since smoked paprika is more assertive.
- Butter → ghee or olive oil: If you want a slightly higher smoke point or you’re avoiding dairy, ghee is a near-seamless swap. Olive oil works too, though you’ll lose some of the richness that makes the baste feel indulgent.
- Dried parsley → fresh herbs: Fresh parsley, chives, or even a little fresh thyme can replace the dried herb in the baste — just chop finely and add at the very end so the color and flavor stay bright.
| Ingredient | Role in the Recipe | Easy Swap |
|---|---|---|
| Paprika | Color, mild sweetness, base flavor | Smoked paprika (use less) or chili powder |
| Garlic powder | Even seasoning without burning | Fresh grated garlic, garlic paste |
| Lemon zest | Brightness that cuts through the butter | Lime zest, orange zest (milder) |
| Butter | Carries fat-soluble flavor, promotes browning | Ghee, olive oil, avocado oil |
| Dried parsley | Herbal note in the baste | Fresh parsley, oregano, thyme |
A quick note on why the ingredient list stays this short on purpose. It’s tempting, especially with a dish this simple, to start adding cumin, coriander, smoked chipotle powder, or a splash of soy sauce for umami depth. All of those can work, but they change the character of the dish into something closer to a spice-forward global kebab rather than the specific garlic-paprika-lemon-butter combination this recipe is built around. If you want to experiment, do it on a second batch after you’ve made the base version once — that way you have a reference point for how much any single addition is actually changing the result, rather than guessing at several variables simultaneously.
One more detail worth flagging: salt timing. Salting the chicken and letting it sit, even briefly, does more than season the surface — it starts a light brining effect where the salt draws out a small amount of moisture, which then dissolves the salt and gets partially reabsorbed into the meat along with some of the surrounding seasoning. Ten to fifteen minutes isn’t long enough for this to meaningfully affect texture, but it is long enough for the surface seasoning to stop looking like loose granules and start looking like it’s actually adhered to the chicken. If you’re pressed for time and skip this rest, the recipe still works — the seasoning will just sit a little more superficially on the surface rather than clinging through the cooking process.

For more on getting measurements right before you cook, see our guide to the best digital kitchen scales.
Choosing the Right Chicken Cut
Boneless, skinless chicken breast is the default here, and for good reason: it’s widely available, cooks quickly, and takes on seasoning well once it’s cut small. But it’s worth understanding why cut size and cut choice matter more for skewers than for almost any other chicken preparation.
Chicken breast is lean, which means it has a narrower margin between “cooked through” and “dried out” compared to thigh meat. When you’re roasting a whole breast, that margin might be a matter of a few minutes. When you’re cooking bite-sized chunks over high heat, the margin shrinks to under a minute in some cases. The fix isn’t to cook the chicken at a lower temperature — that just extends the time it spends in the temperature danger zone without actually protecting the moisture. The fix is uniform sizing.
Breast vs. Thigh for Skewers
Chicken thighs contain more intramuscular fat and connective tissue, both of which render during cooking and help keep the meat moist even if it goes a minute or two past ideal doneness. If you’ve had skewers that turned out chalky or stringy in the past, thighs are the easier fix. Breast, on the other hand, has a cleaner bite and takes on the paprika-garlic flavor slightly more directly, since there’s less fat competing for space on your palate.
Chicken Breast
- Leaner, lighter final texture
- Cooks fast, ideal for quick weeknight meals
- Widely available and budget-friendly
Watch Out For
- Dries out quickly if overcooked or unevenly cut
- Needs consistent chunk size to cook evenly
- Less forgiving with high heat than thigh meat
How to Cut Chicken for Even Cooking
Aim for chunks roughly 1 to 1.25 inches on each side. Anything smaller tends to overcook before it develops any char; anything larger takes longer to cook through and increases the odds of a raw center by the time the outside looks done. Trim away the thin tapered end of the breast (sometimes called the tender) and either save it for a separate quick sear or cut it into a couple of smaller chunks to mix in — its thinness means it cooks faster than the rest of the piece.
Pat the chicken dry with paper towels before cutting. A dry surface takes the rub better and browns more readily once it hits heat, whether that’s an air fryer basket or a grill grate.
What About Chicken Tenderloins?
Pre-cut chicken tenderloins are sometimes marketed as a shortcut for skewer recipes, since they’re already a manageable size. In practice, they’re a mixed bag here. Tenderloins are thinner and more uniform in one dimension but not in the other, which means cutting them into cubes still leaves you with pieces that are thicker on one end than the other. If tenderloins are what you have on hand, cut them into slightly larger chunks than you would from a full breast, and expect a bit more variation in doneness across a single skewer — it’s a workable substitute, just not a perfect one.
Bone-in, skin-on chicken is not a good fit for this particular recipe. The skewer format depends on quick, even cooking through small, boneless chunks; bones change cooking time unpredictably from piece to piece, and skin needs either much longer cooking or much higher heat to render properly, both of which work against the fast, high-heat approach this dish relies on. If you’re craving a bone-in, skin-on version of a similar flavor profile, it’s worth treating that as its own separate recipe with its own timing, rather than trying to force it onto a skewer built for lean, boneless meat.

New to slicing chicken evenly? Our best knife sets for beginners roundup covers options that make clean, uniform cuts easier.
Marinade & Prep, Step by Step
This isn’t a long-marinate recipe, and that’s intentional. The rub is designed to season the surface of the chicken quickly rather than tenderize it over hours, which means you can go from fridge to skewer in about ten minutes of active prep.
- Cut the chicken. Slice the breast into even, bite-sized chunks (about 1 to 1.25 inches), trimming off any excess fat or connective tissue as you go.
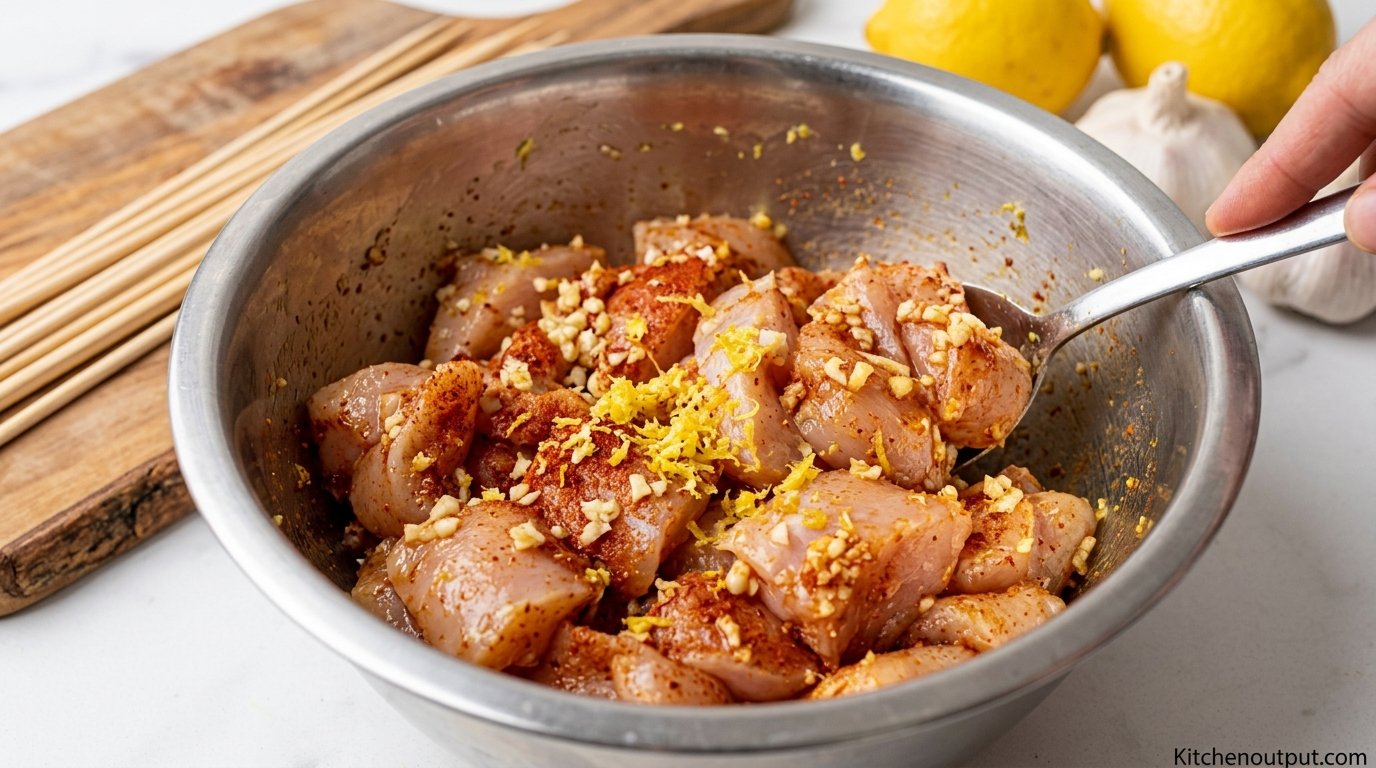
- Season in a bowl, not on a plate. Add the salt, pepper, paprika, garlic powder (or fresh garlic), and lemon zest to a mixing bowl with the chicken. A bowl lets you toss without pieces sliding off the edge, and it distributes seasoning more evenly than sprinkling over a flat surface.
- Toss until every piece is coated. Use your hands or a pair of tongs to turn the chicken over several times. You’re looking for an even reddish-orange tint across every chunk, not just a few visibly seasoned pieces on top.
- Let it sit while you prep skewers. Ten to fifteen minutes at room temperature is enough for the lemon zest and garlic to start perfuming the surface. If you’re prepping further ahead, cover and refrigerate for up to 8 hours — anything longer and the salt starts pulling excess moisture out of the lean breast meat.
- Make the butter baste. Melt the butter and stir in the pepper, dried herbs, and a pinch more paprika. Keep it warm and loose (not solidifying) so it’s easy to brush on later.
A common question at this stage is whether to add oil to the rub. This recipe intentionally leaves it out, relying on the butter baste for fat instead of building it into the dry rub itself. Adding a tablespoon of neutral oil to the chicken before seasoning isn’t wrong — it can help the spices adhere slightly better and adds a small buffer against sticking on a grill grate — but it does mean you’re introducing fat earlier in the process, which changes how the exterior browns. If you find your chicken is sticking to your cooking surface regardless of oiling the chicken itself, the better fix is usually oiling the grate, basket, or pan rather than the meat.

Skewering Technique
Threading chicken onto a skewer looks simple, and mostly it is, but a few habits separate skewers that cook evenly from ones with raw centers and burnt tips.
Metal vs. Bamboo Skewers
Flat metal skewers are worth the small investment if you make kebabs more than once or twice a year. Round wooden or bamboo skewers let the chicken spin freely when you try to flip them, which means one side chars while the opposite side stays pale. Flat metal skewers grip the meat, so a single flip turns every piece at once. If you’re using bamboo, soak it well and try to keep chunks snug against each other so they can’t rotate independently.
Spacing the Chicken
Leave a small gap — about the width of a pencil — between each piece of chicken rather than packing them tightly edge to edge. Packed-tight skewers cook more like a solid block of meat, with heat struggling to reach the touching surfaces. A little breathing room lets hot air or direct flame reach more of each chunk’s surface area, which is where the char and flavor actually develop.
How Many Pieces Per Skewer
For a standard 10-12 inch skewer, five to seven chunks of chicken is a comfortable amount. Overloading a skewer makes it heavy and awkward to turn, and it also means the chicken closest to the ends of the skewer (which get less direct heat in some setups) takes longer to catch up to the pieces in the middle.

Air Fryer vs. Grill vs. Oven: Which Should You Use?
This recipe was built to work across three common setups: an air fryer, an outdoor grill, or a grill pan / broiler if you don’t have either of the first two. Each method changes the timing slightly and produces a slightly different result, mostly around how much char you get and how much cleanup is involved.
| Method | Approx. Cook Time | Char Level | Moisture Retention | Cleanup |
|---|---|---|---|---|
| Air Fryer | 10–12 min | Moderate | High | Easy |
| Charcoal / Gas Grill | 8–10 min | High | Moderate–High | Moderate |
| Stovetop Grill Pan / Broiler | 10–14 min | Moderate–High | Moderate | Moderate |
The air fryer is the most consistent option for a weeknight dinner — enclosed heat circulates around the chicken, so you get even browning without babysitting a grill. An outdoor grill delivers the most authentic char and smoky depth, but it also introduces more variables: flare-ups, uneven coal distribution, and the general unpredictability of cooking over live fire. A grill pan or broiler splits the difference, giving you some char without needing to step outside.
If you’re deciding between an air fryer and a conventional oven more broadly (not just for this recipe), our breakdown of air fryer vs. oven cooking covers the differences in more detail.
There’s a fourth option worth a brief mention: a standard oven with the broiler set to high, using a wire rack over a sheet pan. This behaves similarly to a stovetop grill pan in terms of char and moisture retention, but with the advantage of not requiring you to stand over the stove — you just need to check on it every couple of minutes, since broiler intensity varies enormously between ovens and a couple of extra minutes can be the difference between a nice char and a burnt exterior. If your kitchen doesn’t have an air fryer, a grill, or a stovetop grill pan, this is a perfectly reasonable fourth path, and the basting technique carries over unchanged.
Whichever method you land on, the underlying goal is the same: get direct or near-direct heat onto the chicken’s surface quickly enough that browning happens before the interior overshoots 165°F. Everything else — the specific appliance, the exact minute count, whether you’re using charcoal or gas — is a variable you can adjust once you understand that core relationship between heat, time, and doneness.

Cooking for a bigger group? See our picks for the best air fryer for families and our roundup of the five best digital air fryers.
Air Fryer Method (Step by Step)
- Preheat the air fryer to 400°F (200°C) for 3-5 minutes, if your model has a preheat function.
- Arrange the skewers in a single layer in the basket, angling them diagonally if they’re longer than the basket is wide. Avoid overlapping — air needs to circulate on all sides.
- Cook for 5-6 minutes, then open the basket and brush generously with the warm butter baste on all visible sides.
- Flip the skewers and cook for another 5-6 minutes, for a total of 10-12 minutes, depending on chunk size and your air fryer’s actual output (models vary more than the dial suggests).
- Baste again near the end — in the last minute or two of cooking — so the final layer of butter doesn’t have time to fully absorb and instead sits glossy on the surface.
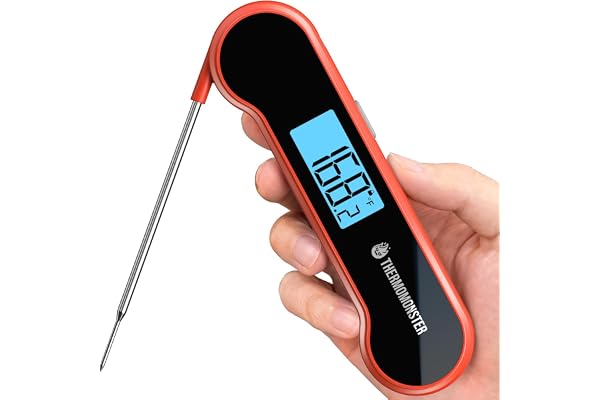
- Check for doneness with an instant-read thermometer inserted into the thickest chunk; it should read at least 165°F (74°C).
- Rest for 2-3 minutes off the heat, then baste one final time for shine before serving.
If you’re new to air frying generally, our air fryer cooking tips and beginner timing and temperature guide are useful companion reads. For the science behind why high heat produces better browning, see our piece on air fryer temperature control and the Maillard reaction.

Read our full Ninja air fryer review before buying.
Grill & Stovetop Method (Step by Step)
No air fryer? These skewers translate directly to a grill, grill pan, or broiler with a few adjustments to timing and technique.
Outdoor Grill
- Preheat the grill to medium-high heat (around 400-450°F) and oil the grates to prevent sticking.
- Place skewers directly over the heat, close the lid, and cook for 3-4 minutes per side.
- Brush with the butter baste after the first flip, then again in the final minute of cooking.
- Total cook time is usually 8-10 minutes; check the thickest piece with a thermometer to confirm 165°F (74°C).
Stovetop Grill Pan or Broiler
- Heat a grill pan over medium-high heat with a thin layer of oil, or set the broiler to high with a rack positioned 5-6 inches from the element.
- Cook skewers for 4-5 minutes per side on a grill pan, or 5-7 minutes per side under the broiler, watching closely since broilers vary widely in output.
- Baste after the first turn and again near the end, exactly as with the other two methods.
Grill Pros
- Best flavor from live-fire char and smoke
- Cooks multiple skewers at once with plenty of space
- Naturally sears without added oil
Grill Cons
- More variables — flare-ups, uneven heat zones
- Requires more attention and turning
- Weather-dependent for outdoor grills

See our picks for heat-resistant gloves that make flipping hot skewers safer.
The Butter Baste & Getting a Proper Char
The butter baste is doing more work in this recipe than its short ingredient list suggests. Butter is roughly 80% fat and about 15-17% water; when it hits a hot chicken surface, the water flashes off and the milk solids in the butter start to brown, adding a faint nuttiness on top of the paprika and herbs. That’s part of why basting partway through cooking (rather than only at the very start) produces a deeper flavor than marinating in melted butter beforehand — the butter is browning against an already-hot surface instead of just sitting there.
Getting Char Without Drying Out the Chicken
Char comes from direct, high heat contact with a food’s surface — the sugars and proteins on the exterior undergo the Maillard reaction and caramelize before the interior has time to overcook. The trick with lean chicken breast is giving the surface enough heat to char while pulling the skewers before the internal temperature climbs much past 165°F (74°C). A few habits help:
- Don’t overcrowd the air fryer basket or grill grate. Crowding traps steam, which softens the surface instead of letting it dry out enough to char.
- Pat chicken dry before seasoning — excess surface moisture has to evaporate before browning can start, which eats into your cooking window.
- Resist flipping too often. Every time you turn a skewer, you interrupt the browning process on whichever side was down. Two flips (three total sides of contact time) is usually enough.
- Pull at the right temperature, not the right time. Times are estimates; a thermometer reading is the actual finish line.
For more on why high, controlled heat matters for browning specifically in air fryers, our piece on Maillard crisping science goes deeper into the mechanics.
Why Two Bastes Instead of One
It’s worth spelling out exactly what each baste is doing, since it’s easy to assume more butter earlier would simply mean more flavor throughout. The first baste, applied partway through cooking, hits chicken that’s already partially set on the surface. At that point, the butter has time to actually render into the meat’s exterior rather than just sliding off a still-raw, moist surface. This is also the baste that contributes most to browning, since it’s applied with enough remaining cook time for the milk solids in the butter to caramelize alongside the chicken itself.
The second baste, applied in the final minute or two, behaves differently. There isn’t enough remaining heat exposure for this layer to fully cook off, so it stays glossy and visible on the surface — this is the layer responsible for that shine you see in well-made butter-basted skewers, and it’s also where a lot of the immediate aroma comes from when the dish is plated. Skip this step and the chicken will still taste good, but it reads as noticeably flatter, both visually and in terms of how much butter flavor comes through in the first bite.
If you’re doubling the recipe for a larger group, it’s worth doubling the baste as well, even though it might seem like more than you need. A thin baste spreads unevenly across a larger volume of chicken, and having extra on hand means you’re not scraping the bottom of a small bowl trying to stretch three tablespoons of butter across sixteen skewers.

Serving Suggestions & Pairings
These skewers are flexible enough to sit next to almost anything — grain bowls, flatbreads, salads, or a simple side of rice. A few combinations that work particularly well:
- Garlicky yogurt sauce: plain yogurt, a small grated garlic clove, lemon juice, and a pinch of salt makes a cooling counterpoint to the paprika and char.
- Warm flatbread or pita: pull the chicken straight off the skewer into warm bread with shredded lettuce, tomato, and the yogurt sauce above for a quick wrap.
- Rice pilaf or lemon rice: the citrus in the chicken pairs naturally with rice cooked with a little lemon zest and fresh herbs.
- Simple chopped salad: cucumber, tomato, red onion, and a light vinaigrette balances the richness of the butter baste.
- Grilled vegetables: bell peppers, zucchini, and red onion threaded onto their own skewers cook in a similar timeframe and share the grill or air fryer basket well.
If you’re building out a full appliance-based dinner and want to round out sides using the same air fryer, our guide to the benefits of using an air fryer covers what else it handles well, from vegetables to reheated leftovers.
For a more composed plate, consider building a bowl: a base of rice or a grain like couscous or farro, the chicken pulled off the skewer and roughly chopped, a scoop of the yogurt sauce, a scattering of chopped cucumber and tomato, and a final squeeze of lemon. This turns a fairly casual skewer dinner into something that photographs and portions well for meal prep containers, without adding much additional cooking time — most of the components can be made while the chicken is marinating or cooking.
If you’re hosting, these skewers also work well served straight off a platter with the sauces on the side rather than pre-assembled, letting guests build their own plate or wrap. This is particularly useful if you’re serving a mixed group where some people want a low-carb option (skip the bread, add extra salad) and others want something more filling.

Whipping up sauces or chopping vegetables for sides? Compare options in our best food processor reviews.
Storage, Meal Prep & Reheating
These skewers hold up well as leftovers, which makes them a reasonable option for meal prep if you’re willing to do a slightly larger batch.
Storing
- Let the chicken cool to room temperature before storing — sealing it hot traps steam and speeds up moisture loss in the fridge.
- Store in an airtight container for up to 3-4 days in the refrigerator.
- For longer storage, remove the chicken from the skewers and freeze in a freezer-safe bag for up to 2 months; thaw overnight in the fridge before reheating.
Reheating Without Drying It Out
Reheating lean chicken is where a lot of leftovers go wrong. A few approaches that keep the chicken from turning rubbery:
- Air fryer: 3-4 minutes at 350°F (175°C), which recrisps the exterior without overcooking the center.
- Stovetop: a covered skillet over medium-low heat with a splash of water or broth, which creates gentle steam instead of direct dry heat.
- Microwave (last resort): cover with a damp paper towel and use 50% power in short bursts to reduce moisture loss.
Avoid reheating at full power in the microwave uncovered — it’s the fastest route to chalky, overcooked chicken.

Common Mistakes & How to Fix Them
| Problem | Likely Cause | Fix |
|---|---|---|
| Chicken is dry or rubbery | Overcooked past 165°F, or cut too small | Use a thermometer; pull skewers right at 165°F and let rest briefly |
| No char at all | Basket or grill overcrowded, or heat too low | Cook in batches, preheat fully, raise temperature slightly |
| Skewers spin when flipping | Round bamboo/wood skewers with loosely packed chicken | Switch to flat metal skewers or pack chunks snugly |
| Uneven cooking on one skewer | Chunks cut in inconsistent sizes | Cut chicken into uniform 1–1.25 inch pieces before threading |
| Burnt exterior, raw center | Heat too high with pieces cut too large | Reduce heat slightly, cut chicken smaller and more evenly |
| Bland flavor despite seasoning | Rub applied right before cooking with no rest time | Let seasoned chicken sit 10–15 minutes before skewering |
For general safety guidance around high-heat appliance cooking, our air fryer safety tips are worth a quick read, especially if you’re new to the appliance. And if you’re wondering what else an air fryer handles well beyond skewers, see what you can cook in an air fryer.

Browse options in our best air fryer liners guide, and see our air fryer cleaning guide for keeping your basket free of burnt-on butter after basting-heavy recipes like this one.
Frequently Asked Questions
Can I use chicken thighs instead of chicken breast?
Yes. Boneless, skinless thighs work well and are more forgiving if slightly overcooked, since they carry more fat. Cut them to the same 1–1.25 inch size and check for doneness a minute or two earlier than you would with breast.
How long should I marinate the chicken?
Ten to fifteen minutes at room temperature is enough for this quick rub. If prepping ahead, refrigerate for up to 8 hours; beyond that, the salt can start pulling excess moisture from lean breast meat.
Can I make these skewers without an air fryer?
Yes — an outdoor grill, a stovetop grill pan, or a broiler all work. Timing shifts slightly for each method, which is covered in the grill and stovetop section above.
What internal temperature should the chicken reach?
165°F (74°C) at the thickest part of the largest chunk, checked with an instant-read thermometer, is the standard safe target for poultry.
Can I use wooden skewers in an air fryer?
Yes, as long as they fit inside the basket and are soaked in water for at least 20 minutes beforehand to reduce scorching. Flat metal skewers still give more even results since the chicken can’t spin freely on them.
How do I keep the chicken from drying out?
Cut chunks to a consistent size, avoid overcrowding the cooking surface, pull the skewers right at 165°F rather than cooking “until it looks done,” and don’t skip the butter baste — it helps protect the surface from drying out under high heat.
Can I prep these skewers ahead of time?
Yes. You can season and thread the chicken up to 8 hours ahead and keep it covered in the fridge, or freeze the seasoned raw chicken (unskewered) for up to 2 months and thread it fresh after thawing.
What sides pair well with garlic-paprika butter chicken skewers?
Lemon rice, warm flatbread, a garlicky yogurt sauce, a simple chopped salad, or grilled vegetables all complement the paprika and butter flavors well.
Can I freeze leftover cooked skewers?
Yes — remove the chicken from the skewers and freeze in an airtight, freezer-safe bag for up to 2 months. Thaw overnight in the refrigerator before reheating.
Is smoked paprika better than sweet paprika for this recipe?
Neither is objectively better — they produce different results. Sweet paprika gives a milder, slightly sweet base flavor and vivid color. Smoked paprika adds a barbecue-like depth that’s especially useful when cooking indoors without a grill. Start with less if substituting smoked for sweet, since it’s more assertive.
How do I reheat chicken skewers without drying them out?
An air fryer at 350°F for 3-4 minutes or a covered skillet with a splash of water or broth over medium-low heat both work better than a microwave, which tends to overcook lean chicken quickly.
Can I grill these skewers on a stovetop grill pan?
Yes. Heat the pan over medium-high with a thin layer of oil and cook for 4-5 minutes per side, basting after the first flip and again near the end, following the same technique as the outdoor grill method.
Final Thoughts
Garlic-paprika butter chicken skewers earn their place in a regular dinner rotation because they don’t ask for much: a short list of pantry ingredients, one bowl, a set of skewers, and whatever cooking method you already have set up in your kitchen. The double butter baste is the one step worth not skipping — it’s a small amount of extra effort for a noticeably richer, glossier result than a single application at the start.
Once you’ve made the base recipe, it’s an easy one to build on. Swap in smoked paprika for a barbecue-leaning version, add chili flakes for heat, or thread vegetables onto their own skewers to cook alongside the chicken. Whichever way you take it, the technique underneath — even cuts, a light rub, high heat, and a butter baste applied twice — is the part worth remembering.


Pingback: What to Put on Kitchen Counters: Complete Styling Guide