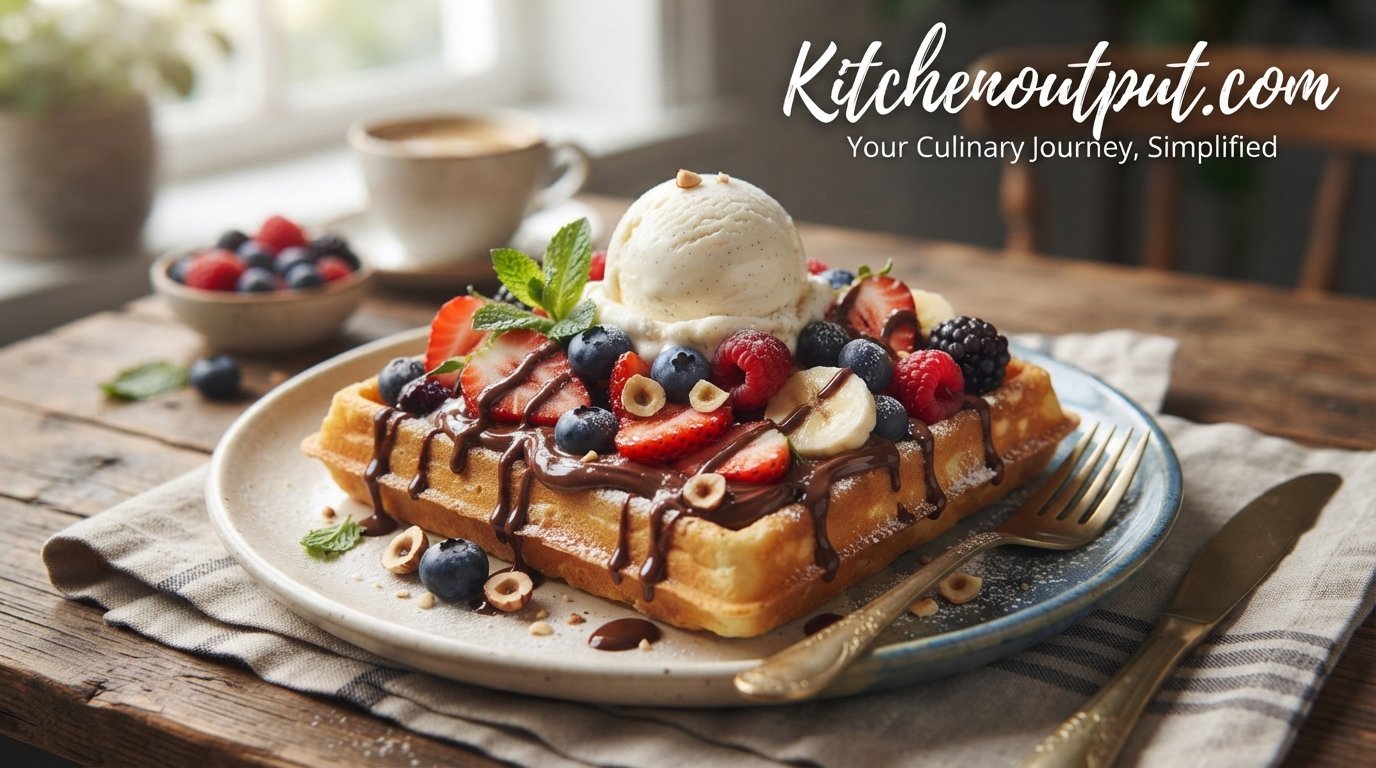
Loaded Nutella Fruit Waffle with Ice Cream
A giant, pull-apart Belgian waffle drenched in melted Nutella, piled with fresh fruit, whipped cream, and two scoops of ice cream — the dessert that stops every scroll and every conversation at the table.
Why Loaded Waffles Are Everywhere Right Now
Scroll through any food video app for more than thirty seconds and you’ll run into some version of this dessert: a single, oversized waffle scored into a grid, drowned in melted chocolate spread, buried under fruit, and finished with a scoop or two of ice cream that’s already starting to slump into the cracks. It’s not subtle, and that’s exactly the point. The loaded waffle format took the humble breakfast staple and turned it into a shareable centerpiece dessert, the kind of thing that looks like restaurant plating but is genuinely achievable in a home kitchen with a waffle iron you probably already own.
Part of the appeal is structural. A regular waffle is flat and a little one-note — you eat a bite, it’s fine, you move on. A loaded waffle is scored deeply enough that it becomes a serving vessel of its own, a pull-apart tray where every square carries a slightly different ratio of crisp edge, soft interior, melted chocolate, cold fruit, and creamy ice cream. That variation is what makes it fun to eat rather than just fun to look at. No two bites are quite the same, and the waffle itself does double duty as both the base and the plate.
There’s also a practical reason this style of dessert has taken off: it scales beautifully for groups without requiring individual plating. One large square waffle, topped generously, easily serves two to four people who can pull pieces straight off the board. That makes it a natural fit for weekend brunches, birthday spreads, or the kind of casual gathering where nobody wants to be stuck plating six identical desserts in the kitchen while everyone else is at the table.
This guide walks through the entire process in depth — the equipment that actually matters, how to choose and prep every topping so nothing turns soggy or bland, the order of operations that keeps the ice cream from melting before you’ve even taken a photo, and enough variations that you can rebuild this dessert around whatever fruit is actually good at your grocery store this week. Whether you’ve never scored a waffle in your life or you’re trying to fix a version that turned out soupy last time, everything here is aimed at getting you to a plate that holds together as well as it photographs.
It also helps to think of this dessert less as a single fixed recipe and more as a template. Once you understand why each layer is there — structure, richness, acidity, cold contrast, texture, and a final flavor accent — you can swap almost any component in or out based on what’s in season, what your household actually likes, or what you already have open in the fridge. A version built around roasted stone fruit in late summer or citrus segments in the middle of winter follows exactly the same logic as the classic banana-kiwi-strawberry-mango combination described here. The waffle base and the order of assembly are the parts worth getting right; the specific fruit and drizzle choices are where you have the most room to make it your own.

Anatomy of a Perfect Pull-Apart Waffle
The single biggest technical difference between a loaded waffle that holds together and one that collapses into a puddle is the base itself. This isn’t a delicate Japanese souffle waffle or a thin American diner waffle — it needs to be a thick, sturdy, Belgian or Liège-style waffle with deep pockets that can physically hold melted chocolate and fruit juice without turning to mush within five minutes.
Batter Structure Matters More Than Flavor Here
A batter that’s too thin will cook into a waffle that’s crisp on the outside but flimsy in the middle, and it will sag the moment you pile on wet toppings. You want a batter with enough structure — a good ratio of flour to liquid, an egg or two for protein structure, and a reasonable amount of fat (butter or oil) for crispness — that the finished waffle can be picked up in one hand without drooping. Liège-style waffles, made with a yeasted, brioche-like dough studded with pearl sugar, are especially good for this because the dough is denser and chewier than standard batter, and the pearl sugar caramelizes into crunchy pockets that hold their structure even after ice cream starts to melt into them.
The Score Is Not Optional
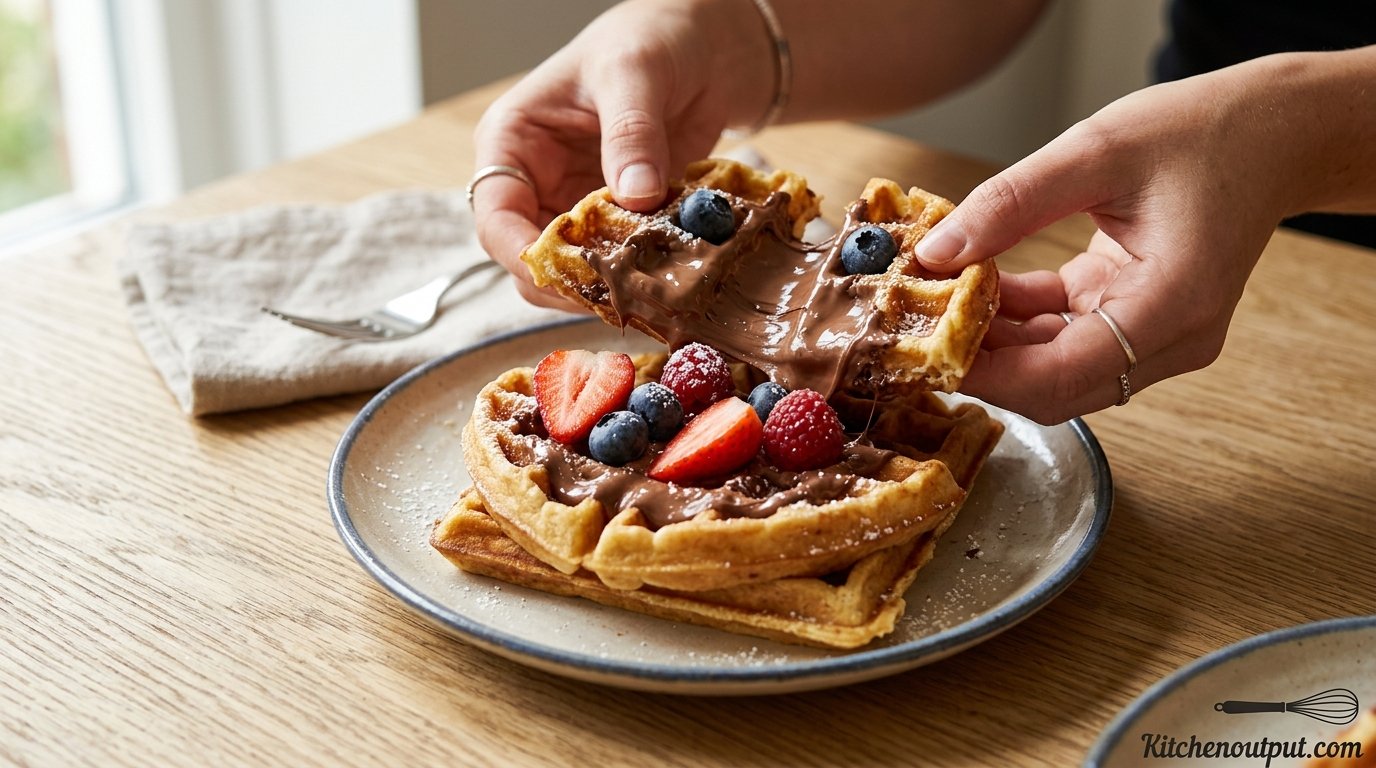
Cutting the waffle into a grid after cooking — deep enough to go most of the way through, but not so deep that the pieces fall apart before serving — is what turns a single waffle into a shareable, pull-apart tray. This score does two things: it creates channels for the melted chocolate to pool into instead of just running off the edges, and it pre-portions the dessert so guests can pull off a square without needing a knife. Score in a simple grid, roughly four rows by four columns for a large square waffle, using a sharp knife and cutting straight down about three-quarters of the way through the thickness.
Freshness Window
Waffle crispness has a short shelf life once toppings go on. Ideally, the waffle should come off the iron, get scored, and immediately move into the topping stage — you’re aiming for a total window of under ten minutes between “hot off the iron” and “on the table,” because every minute of sitting time lets steam soften the crust from the inside out. If you’re making waffles for a group, consider using two irons at once, or keep the cooked-but-untopped waffle warm in a low oven (around 200°F) on a wire rack — never a flat plate, which traps steam underneath — while you finish the rest.
Getting an Even Cook Through a Thick Batter
Because this style of waffle is thicker than a typical breakfast waffle, it’s easy to end up with a base that’s browned on the outside while still slightly gummy in the very center. If that happens, the fix is almost always temperature and time rather than batter adjustment — dial the iron down one setting and extend the cook time rather than trying to rush a hotter iron, which browns the surface before the middle has a chance to set. A finished base should sound distinctly hollow and feel light for its size when you tap it; a dense, heavy feel usually means it needs another minute or two.
| Base Type | Texture | Best For |
|---|---|---|
| Classic Belgian batter | Light, airy, crisp exterior | Fast weeknight version |
| Liège-style yeasted dough | Dense, chewy, caramelized sugar pockets | Best structural hold under heavy toppings |
| Buttermilk batter | Tender, slightly tangy | Balances very sweet toppings |

Choosing the Right Waffle Maker
Not every waffle iron is built for this job. A thin, non-adjustable travel waffle maker will give you a waffle that’s too shallow to hold toppings and too fragile to score properly. For a loaded waffle, you want a machine with deep, wide pockets — sometimes marketed as “Belgian” style — and ideally a flip mechanism, which uses gravity to distribute batter evenly and produces a more uniform pocket depth across the whole surface.
What Actually Matters in a Waffle Iron for This Recipe
- Pocket depth: Look for at least 1-inch deep pockets; shallower irons won’t hold melted chocolate or fruit without immediate overflow.
- Plate size: A single large square plate (rather than four small round waffles) gives you one continuous surface to score and load, which is closer to the viral presentation style.
- Non-stick coating quality: Because you’re working with a sugar-heavy batter (especially for Liège-style dough), a high-quality non-stick surface prevents the caramelized sugar from tearing the waffle apart on release.
- Even heat distribution: Cheaper irons often run hot in the center and cooler at the edges, leaving you with a waffle that’s overcooked in the middle and pale around the rim.
Flip-Style Belgian Irons
- More even pocket depth
- Better for thick, yeasted dough
- Usually larger cooking surface
Standard Non-Flip Irons
- Faster and simpler to use
- Shallower pockets on average
- Can undercook the center of thick batter
If you already own a basic round waffle maker, you can still make this dessert — you’ll just be working with a smaller base, so scale the toppings down proportionally and expect a single-serving presentation rather than a shareable tray. It’s a perfectly good option; it’s just a different scale of the same idea.
Seasoning and Maintaining Your Iron
A well-seasoned non-stick surface makes an enormous difference with a sugary, chocolate-heavy dessert like this one. Before the first use, and periodically afterward, lightly brush the plates with a neutral oil while the iron is warm (not hot) and wipe away the excess with a paper towel — this keeps the surface release working properly over years of use rather than months. Avoid metal utensils on the cooking plates entirely, since even small scratches give sugary batter somewhere to grip and burn onto the surface, which then becomes much harder to release cleanly on future waffles.

The Chocolate Layer: Nutella vs. Alternatives
Nutella is the default for a reason — it melts smoothly, it’s sweet without being cloying on its own, and its hazelnut note pairs naturally with almost every fruit you’d put on top. But it’s worth knowing what you’re trading off if you swap it for something else, especially if you’re adjusting sweetness levels or working around a nut allergy.
Melting Nutella Properly
Nutella straight from the jar is thick and doesn’t pour well. Warm it gently — 20-second bursts in the microwave, stirring between each, or a small saucepan over low heat — until it loosens into a pourable, glossy consistency. Avoid overheating it, which can cause the cocoa solids to separate slightly and turn the texture grainy rather than silky. You’re aiming for the consistency of warm caramel sauce: thin enough to drizzle and sink into the waffle’s scored channels, thick enough to still cling rather than run straight off the edges.
| Spread | Flavor Profile | Melts Well? | Allergy Notes |
|---|---|---|---|
| Nutella / hazelnut spread | Sweet, nutty, chocolatey | Yes, very smooth | Contains tree nuts and dairy |
| Dark chocolate ganache | Rich, less sweet, more intense | Yes, with cream added | Dairy only (unless made vegan) |
| Cookie butter spread | Spiced, caramelized, sweet | Yes, similar texture | Contains wheat/gluten |
| Sunflower seed spread | Milder, earthy | Yes | Nut-free alternative |
Sticking with Nutella
- Universally recognizable flavor
- Reliable melt and pour consistency
- Pairs with virtually any fruit
Trade-offs to Consider
- Very sweet — can compete with sugary fruit
- Not nut-free
- Less “premium” chocolate flavor than ganache
If you find the finished dessert tastes flat despite all that chocolate, the fix usually isn’t more Nutella — it’s a pinch of flaky salt over the top before serving, which cuts through the sweetness and makes the chocolate flavor read as richer rather than one-dimensional.
Layering Chocolate for More Depth
For an even more layered flavor, some versions use two chocolate applications rather than one: a thin layer of warmed Nutella brushed directly onto the waffle right off the iron, which soaks slightly into the surface, followed by a second, thicker drizzle applied after the fruit and cream are in place. This two-step approach means every bite has chocolate flavor built into the base itself, rather than relying entirely on a single top layer that can end up concentrated in some squares and nearly absent in others.

Selecting and Prepping the Fruit
Fruit does more than decorate a loaded waffle — it’s the acidic counterweight to all that chocolate, cream, and sugar, and picking the wrong fruit (or prepping it wrong) is one of the fastest ways to end up with a soggy, watery mess instead of a clean, structured dessert.
Banana
Sliced banana is a classic here, but it browns fast once cut and releases a fair amount of moisture. Slice it last, right before assembly, and consider a very light squeeze of lemon or lime juice over the slices if you’re prepping more than a few minutes ahead — this slows oxidation without adding noticeable tartness.
Kiwi
Kiwi brings both color contrast and a tartness that balances the sweetness of the chocolate and ice cream. Peel it with a spoon (run a spoon between the flesh and skin rather than using a knife) for cleaner, less wasteful slices, and slice into thin rounds so it distributes across more of the waffle’s surface.
Strawberries
Halved strawberries hold their shape well and don’t weep as much liquid as fully diced fruit. Hull them first, and if they’re particularly large, quarter them instead of halving so each piece is a manageable bite size that won’t slide off when someone pulls a waffle square apart.
Mango
Diced mango adds a tropical sweetness and a softer texture that contrasts with the crisp waffle edges. Because mango is naturally very juicy, pat diced pieces dry with a paper towel before adding them — this single step prevents a surprising amount of sogginess in the final plate.
| Fruit | Prep Tip | Moisture Risk |
|---|---|---|
| Banana | Slice last, add citrus juice if prepping ahead | Medium |
| Kiwi | Peel with a spoon, slice thin | Low |
| Strawberries | Hull and halve or quarter | Low-medium |
| Mango | Dice and pat dry before adding | High |
As a general rule, add fruit in order from least to most watery, and always after the chocolate layer has had a moment to set slightly — this keeps fruit from sliding straight down into the chocolate and disappearing rather than sitting visibly on top where it belongs, both for texture and for how the finished plate photographs.
Buying Fruit for Peak Ripeness Timing
Because this dessert depends on fruit that’s ripe but not overripe, timing your grocery trip matters more than it does for most recipes. Strawberries and kiwi hold their peak ripeness window for a few days in the fridge, but bananas continue ripening quickly at room temperature and can go from perfect to overly soft within a day or two. If you’re planning to make this on a specific day, buy bananas slightly underripe two to three days ahead so they finish ripening right on schedule, and buy the more perishable berries and mango as close to serving day as reasonably possible.

Building the Ice Cream Component
Ice cream is both the star of the presentation and the most time-sensitive part of the whole dessert. The waffle needs to be warm enough to be appealing, but that same warmth is what causes the ice cream to start melting the instant it touches down — which is why timing and technique matter more here than almost anywhere else in the recipe.
Two Scoops, Two Flavors
Using one scoop each of vanilla and chocolate ice cream (rather than two of the same) does more than look nice — it gives you two different flavor notes that play off the fruit and chocolate spread differently. Vanilla acts as a neutral, creamy contrast to the tart fruit, while chocolate ice cream doubles down on the Nutella layer for anyone who wants an even richer bite.
Scooping Technique
Firm, well-formed scoops hold their shape far longer than ice cream that’s been softened and re-scooped. Let a fresh scoop of ice cream sit at the very edge of soft enough to scoop cleanly — not fully softened — and use a proper ice cream scoop rather than a spoon, which tends to compress and warm the ice cream more through repeated pressure.
Look for in a Scoop
- Sturdy, comfortable handle
- A trigger release mechanism for clean scoops
- Stainless steel head that resists warping
Avoid
- Thin, flexible plastic scoops
- Scoops with no release mechanism (tend to compact ice cream)
- Very small scoop heads for a large dessert
Timing the Scoop
Add the ice cream scoops last, immediately before serving — not while you’re still slicing fruit or drizzling sauce. If you’re making this for a group and need a few extra minutes to plate everything, pre-scoop the ice cream onto a parchment-lined tray and freeze the scoops solid, then simply place them on top at the very last second. This “pre-scooping” trick is a standard technique in ice cream shops for exactly this reason — it buys you working time without sacrificing the scoop’s shape.
Choosing Ice Cream Flavors Beyond the Classics
While vanilla and chocolate are the standard pairing, this dessert adapts well to other flavor combinations depending on what you’re building around. A salted caramel scoop plays nicely with tart fruit like kiwi and strawberry, while a strawberry or mixed berry ice cream doubles down on the fruit theme rather than contrasting against it. If you’re leaning into the hazelnut flavor of the Nutella layer, a coffee or espresso ice cream makes an unexpectedly good third option, echoing the toasted, nutty notes without competing directly with the chocolate.

Whipped Cream and Drizzle Technique
The whipped cream layer and the final drizzles are what tie the whole plate together visually and texturally, but they’re also where a lot of home versions go wrong — either too thin to hold shape or applied in a way that just makes everything look muddy rather than intentional.
Whipped Cream That Holds
For whipped cream that stays piped and doesn’t collapse into a puddle by the time the ice cream starts melting, whip cold heavy cream to stiff (not soft) peaks, and consider stabilizing it with a small amount of powdered sugar rather than granulated, since the added cornstarch in powdered sugar helps the structure hold longer at room temperature. A stand mixer or hand mixer gets you there faster and more consistently than whisking by hand, especially if you’re making a large batch for a group dessert.
The Drizzle Order
Drizzles should go on last, after the fruit, whipped cream, and ice cream are already in place — not mixed in earlier. Working with two contrasting drizzles (a white chocolate or condensed milk drizzle alongside a dark chocolate sauce) creates a marbled look that reads as intentional and professional rather than accidental. Use a spoon or a squeeze bottle held a few inches above the plate and move it back and forth in thin, controlled lines rather than pouring in one spot, which tends to create a heavy blob instead of an even web of drizzle.
| Drizzle | Consistency Target | Application Tool |
|---|---|---|
| White chocolate / condensed milk | Thin, pourable, warm | Squeeze bottle or spoon |
| Dark chocolate sauce | Slightly thicker, glossy | Squeeze bottle |
If your whipped cream keeps deflating faster than expected, it’s almost always one of two things: the cream wasn’t cold enough when you started whipping, or the bowl and beaters were warm from a previous use. Chilling the bowl and beaters in the freezer for ten minutes before whipping makes a noticeable difference in how long the final texture holds.
Making the Drizzles from Scratch
A simple dark chocolate drizzle comes together by gently warming chopped chocolate with a small amount of heavy cream or a splash of neutral oil until glossy and pourable, whisking until fully smooth. For the lighter drizzle, warmed sweetened condensed milk is often the simplest route — it’s already the right consistency straight from the can and needs nothing more than a gentle warm-through to loosen it slightly for easier pouring. Both can be made a day or two ahead and stored in a squeeze bottle in the fridge, then briefly warmed in a bowl of hot water before use.

Garnishing the Final Plate
Garnish is the last two percent of effort that makes the difference between “homemade dessert” and “dessert that looks like it came from a cafe menu.” For this recipe, that mostly comes down to a fine dusting of something contrasting in color and texture over the very top.
Pistachio Dust
Crushed pistachios add a green color pop against the brown chocolate and white cream, plus a crunchy texture contrast to all the soft, creamy elements underneath. Pulse shelled, unsalted pistachios in a food processor in short bursts — you want a coarse, sand-like texture, not a paste, which happens fast if you over-process nuts with any natural oil content.
Matcha Powder as an Alternative
If you don’t have pistachios on hand, a light dusting of matcha powder through a fine sieve achieves a similar green visual contrast with a more bitter, herbal note instead of a nutty one. Because matcha is much finer than crushed nuts, use a very light hand — a little goes a long way, and too much reads as bitter rather than as an accent flavor.
Other Garnish Options
- Toasted coconut flakes for texture and a nutty aroma
- Mint leaves for color and a fresh, cooling note
- A light dusting of powdered sugar for contrast against the chocolate
- Mini chocolate chips or shavings for extra richness
Apply any powder-based garnish through a small fine-mesh sieve rather than sprinkling by hand — it distributes far more evenly and avoids the clumping that happens when you try to pinch and scatter a fine powder directly from your fingers.
Balancing Color on the Final Plate
Beyond flavor, garnish is doing visual work too. A plate that’s entirely brown and white — waffle, chocolate, whipped cream, vanilla ice cream — reads as flat in photos no matter how good it tastes. The pink of strawberries, yellow-orange of mango, and green of kiwi already do a lot of that work, but a final garnish in a fourth color, whether that’s the green of pistachio dust or matcha, or the white speckle of toasted coconut, is what keeps the eye moving across the plate instead of settling on one dominant tone.

Step-by-Step Assembly
With every component prepped, the actual build takes only a few focused minutes. Here’s the order that keeps textures intact and prevents the common failure points covered above.
- Cook the waffle until deeply golden and fully set, using a large square Belgian or Liège-style iron with deep pockets.
- Score the waffle into a grid immediately after removing it from the iron, cutting most of the way through but not all the way, so it holds together as a pull-apart tray.
- Warm and pour the chocolate spread generously over the surface, letting it settle into the scored channels rather than just sitting on top.
- Layer the fruit in order from least to most watery — banana, then kiwi, then strawberries, then mango — spreading it across the surface rather than piling it all in the center.
- Add whipped cream in generous dollops or piped rosettes, positioned to leave room for the ice cream scoops.
- Place the ice cream scoops — one vanilla, one chocolate — as the very last step before drizzling, ideally pre-scooped and frozen solid if there’s been any delay.
- Finish with both drizzles, moving the bottle or spoon in thin lines across the whole plate rather than pooling in one area.
- Dust with pistachio or matcha through a fine sieve just before serving.
- Serve immediately while the ice cream is still fully formed, pulling the scored squares apart at the table for the full presentation effect.
The entire assembly, once everything is prepped, should take well under five minutes — the goal is speed at this stage, since every additional minute is time the ice cream spends softening against a warm waffle.
Working with a Helper
If you have a second person available, splitting assembly duties speeds things up considerably and reduces the total time between “hot waffle” and “served dessert.” One person can handle the chocolate and fruit layering while the other pre-scoops ice cream and prepares the drizzle bottles, so both halves are ready to combine at the same moment rather than one person working through every step in sequence while the waffle continues to cool and the earlier toppings continue to sit.

Serving and Presentation
Because this dessert is meant to be shared straight off a board or large plate rather than portioned onto individual plates, presentation choices matter more here than in a typical single-serving dessert.
Choosing a Serving Surface
A wide, flat wooden board or a large ceramic platter works better than a bowl or a small plate — you need enough surface area for the toppings to spread out visually rather than pile up in a mound that collapses the moment someone reaches for a piece. Light-colored surfaces also make the chocolate and fruit colors pop more in photos than a dark board does.
Photographing It Before It Melts
If you’re taking photos, do it immediately after the final garnish and before anyone touches the plate — natural, indirect light near a window works far better than direct overhead kitchen lighting, which tends to flatten the glossy texture of the melted chocolate and drizzle. Shoot from a 45-degree angle to capture both the height of the ice cream scoops and the texture of the pulled-apart waffle squares.
Serving at the Table
Encourage guests to pull their own squares apart rather than pre-cutting and plating individual portions — part of the appeal of this dessert format is the interactive, shareable nature of it, and pre-plating removes that entirely. Keep a stack of small plates and forks nearby so people can transfer their piece without juggling drippy toppings by hand.
Adjusting for a Formal vs. Casual Setting
For a more casual gathering, serving the whole loaded waffle family-style on one board is part of the fun. For a slightly more formal dinner party dessert course, you can build individual smaller versions instead — using a round waffle maker or cutting a large waffle into quarters before topping each quarter separately — so each guest gets their own composed plate without losing the visual impact of the layered toppings.

Storage, Make-Ahead, and Reheating
This is not a dessert that reheats well once fully assembled — the ice cream and whipped cream simply don’t survive being put back in a fridge and pulled out later. What you can do is prep individual components ahead of time so assembly on the day itself takes only a few minutes.
What Can Be Made Ahead
- The waffle base: Cook and cool waffles fully, then freeze in a single layer before transferring to a freezer bag. Reheat in a toaster or oven (never a microwave, which makes them soggy) directly from frozen until crisp and hot through.
- Fruit prep: Wash and slice sturdier fruits like kiwi a few hours ahead and refrigerate in an airtight container; save banana and mango for right before assembly.
- Whipped cream: Can be made up to a few hours ahead and kept refrigerated, though it will need a quick re-whip with a whisk if it starts to loosen.
- Drizzle sauces: Both the chocolate and white chocolate drizzles can be made in advance and gently rewarmed before use.
What Should Never Be Made Ahead
The ice cream scoops and the full assembly itself should always happen immediately before serving. There’s no version of pre-assembling this dessert and holding it in the fridge that doesn’t result in a soggy, melted mess by the time it’s served.
Reheating a Waffle Base Properly
A frozen, pre-cooked waffle reheats best in a toaster oven or conventional oven at around 350°F for eight to ten minutes, which re-crisps the exterior without drying out the interior. A standard toaster works in a pinch for a thinner waffle, but a very deep-pocketed Belgian waffle may not fit or heat evenly in a slot toaster.
How Long Waffle Bases Actually Keep
Cooked and fully cooled waffle bases keep well in the freezer for up to about two months without a significant drop in quality, as long as they’re wrapped tightly enough to prevent freezer burn — a layer of plastic wrap followed by a freezer-safe bag works better than a bag alone. In the refrigerator, rather than the freezer, a cooked waffle base is best used within two to three days, since refrigeration actually accelerates the staling process compared to either room temperature short-term storage or freezing.

Variations and Dietary Swaps
The core structure of this dessert — crisp base, chocolate layer, fruit, cream, ice cream — is flexible enough to accommodate most dietary needs with a few straightforward substitutions.
Vegan Version
Swap dairy milk and eggs in the waffle batter for a plant-based milk and a flax or chia egg substitute, use a dairy-free chocolate hazelnut spread in place of standard Nutella, coconut whipped cream in place of dairy whipped cream, and any of the widely available plant-based ice creams (coconut, oat, or cashew-based) for the scoops.
Gluten-Free Version
A good 1:1 gluten-free flour blend works well in a standard Belgian waffle batter, though the yeasted Liège-style dough is trickier to adapt because of how gluten contributes to that dough’s chew — a gluten-free all-purpose blend with added xanthan gum tends to give the closest texture if you’re set on that style.
Lower-Sugar Version
Use a reduced-sugar or dark chocolate spread instead of standard Nutella, lean more heavily on fresh fruit relative to chocolate and drizzle, and choose a lower-sugar or no-sugar-added ice cream. Unsweetened whipped cream, sweetened only lightly if at all, also helps rebalance the overall sweetness without losing the creamy contrast the dish relies on.
Nut-Free Version
Skip the pistachio garnish in favor of toasted coconut or a light dusting of cocoa powder, and double-check that any chocolate hazelnut spread substitute is genuinely nut-free rather than just lower in a specific allergen, since cross-contamination labeling varies by brand.
Adjusting Portion Size for Smaller Households
Not every household needs a full large-format loaded waffle. Scaling down to a standard round waffle iron and proportionally reducing every topping — roughly a quarter of the chocolate, fruit, cream, and a single scoop of ice cream instead of two — produces a single-serving version that keeps all the same layering logic without leftovers you don’t want. This is often the easiest starting point if you’re testing the recipe for the first time before committing to a full group-sized version.
Combining Multiple Adaptations
These swaps aren’t mutually exclusive — a vegan, lower-sugar, nut-free version is entirely achievable by stacking the relevant substitutions from each category rather than treating them as separate recipes. The one thing worth testing ahead of a group gathering, especially if you’re combining several swaps at once, is the waffle batter itself, since flour and egg substitutes can behave differently together than they do individually. A quick single test waffle a day or two ahead of time is a small investment that avoids any surprises when you’re cooking for guests.
| Need | Swap |
|---|---|
| Vegan | Plant milk + flax egg, dairy-free spread, coconut cream, plant-based ice cream |
| Gluten-free | 1:1 GF flour blend + xanthan gum |
| Lower sugar | Reduced-sugar spread, more fruit, unsweetened cream |
| Nut-free | Coconut flakes or cocoa dust instead of pistachio |

Frequently Asked Questions
Can I make this loaded waffle ahead of time?
The waffle base and several toppings can be prepped ahead, but full assembly — especially the ice cream — should always happen right before serving to avoid a melted, soggy result.
What’s the best type of waffle for this recipe?
A thick, deep-pocketed Belgian or Liège-style waffle holds toppings and structure far better than a thin standard waffle.
Can I substitute Nutella with something else?
Yes — dark chocolate ganache, cookie butter, or a sunflower seed spread all work as substitutes with slightly different flavor and allergy profiles.
How do I keep the ice cream from melting too fast?
Add ice cream last, use firm rather than softened scoops, and consider pre-scooping onto a frozen tray if you need extra assembly time.
Is this recipe kid-friendly?
Generally yes, though the amount of sugar and chocolate is significant — smaller individual portions work well for younger kids.
Can I make it vegan?
Yes, with plant-based milk and egg substitutes in the batter, a dairy-free chocolate spread, coconut whipped cream, and plant-based ice cream.
What fruits work best on a loaded waffle?
Banana, kiwi, strawberries, and mango are classic choices, but any fruit with a good balance of sweetness and acidity works — berries, stone fruit, or citrus segments are all good alternatives.
Do I need a special waffle maker to make this?
A deep-pocketed Belgian-style iron gives the best results, but a standard round waffle maker works fine for a smaller, single-serving version.
How many servings does one large waffle make?
A single large square waffle loaded this way typically serves two to four people, depending on portion size and how many other desserts are on the table.
Can I freeze the waffle base for later?
Yes — cook and cool the waffle fully, then freeze in a single layer before bagging. Reheat in a toaster or oven directly from frozen.
What’s the best way to reheat leftover waffle base?
A toaster oven or conventional oven at around 350°F for eight to ten minutes re-crisps the exterior without drying out the interior; avoid the microwave, which makes it soggy.
Can I make a healthier version of this dessert?
Yes — lean more heavily on fresh fruit, use a reduced-sugar chocolate spread, and choose a lower-sugar or lighter ice cream to rebalance the overall sweetness.
The Bottom Line
A loaded Nutella fruit waffle isn’t a complicated recipe so much as a sequencing exercise — get the waffle base sturdy, layer toppings in the right order, and save the ice cream for the very last moment. Nail those three things and you’ve got a dessert that looks like it took far more effort than it did, and one that disappears fast whenever it hits the table.


