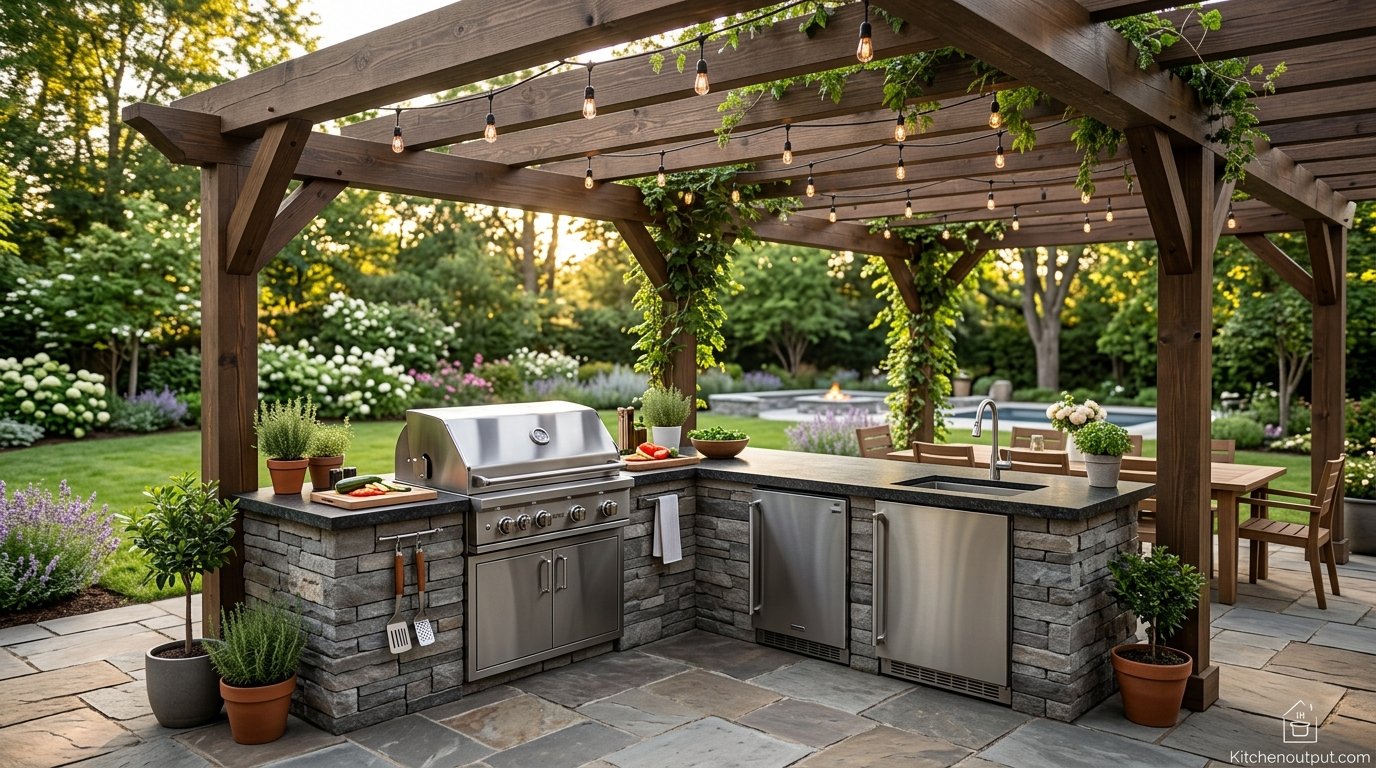
How to Build an Outdoor Kitchen: A Complete Step-by-Step Guide
From choosing a location to running gas lines and setting the final countertop, here’s everything you need to plan, frame, and finish an outdoor kitchen that holds up to years of grilling season.
Jump to a section
- 1. Planning Your Outdoor Kitchen Layout
- 2. Choosing the Right Location
- 3. Setting a Realistic Budget
- 4. Foundation and Site Preparation
- 5. Framing the Structure
- 6. Running Gas, Electrical, and Plumbing Lines
- 7. Selecting and Installing Your Grill or Cooktop
- 8. Countertops and Work Surfaces
- 9. Cabinetry, Doors, and Weatherproof Storage
- 10. Adding a Roof, Pergola, or Shade Structure
- 11. Ventilation and Safety Considerations
- 12. Final Touches: Lighting, Seating, and Decor
- FAQs
An outdoor kitchen is one of those projects that quietly changes how a household uses its backyard. What starts as “maybe we’ll add a grill island” tends to grow into a full cooking, prepping, and entertaining space once you start planning it properly. The good news is that building one doesn’t require a construction background — it requires a clear sequence, the right materials for outdoor exposure, and a willingness to get the utility rough-in right before anything else happens. This guide walks through that sequence from the first sketch to the final light fixture, with enough detail that you can either do the work yourself or talk knowledgeably with a contractor.
Before diving into steps, it helps to know what you’re actually building toward. A functional outdoor kitchen usually includes four zones: a cooking zone (grill, side burner, or pizza oven), a prep zone (counter space and a cutting surface), a storage zone (weatherproof cabinets, a trash pull-out, maybe a mini fridge), and a serving or seating zone. Not every backyard needs all four on day one, but designing around them from the start prevents an expensive redo later.
1. Planning Your Outdoor Kitchen Layout
Layout comes before everything else because it determines your utility runs, your structure’s footprint, and how the space actually feels to cook in. Most outdoor kitchens fall into one of three shapes: a straight run against a wall or fence, an L-shape that wraps a corner, or a U-shape that creates a semi-enclosed cooking pocket. A straight run is the easiest to build and the cheapest to plumb, but it puts the cook’s back to the guests. An L-shape solves that by opening the cooking zone toward the yard while still giving you a defined counter run for prep. A U-shape is the most functional for serious entertaining, but it needs the most space and the longest utility runs, which raises cost.
Walk your yard with a tape measure and a can of marking paint before you commit to anything. Mark the grill’s centerline, then measure at least 30 inches of clearance behind it for the cook to move freely, and at least 42 inches of aisle space if two people will be working at once. Sketch the counter run to scale, including any appliances you already own or plan to buy, since cutouts are hard to change once the cabinetry frame is built.
| Layout | Best For | Typical Footprint | Relative Cost |
|---|---|---|---|
| Straight run | Small yards, single-cook households | 6–10 ft | $ |
| L-shape | Moderate entertaining, corner lots | 8×8 ft to 10×10 ft | $$ |
| U-shape | Large yards, frequent entertaining | 10×10 ft+ | $$$ |
If you’re still deciding what appliances belong in the space, our kitchen appliance buying guide and our roundup of must-have kitchen appliances are useful starting points for thinking through what actually gets used versus what looks good in a showroom.
2. Choosing the Right Location
Once you have a rough layout in mind, the actual placement in your yard matters more than most people expect. Three things drive this decision: proximity to utilities, wind direction, and how far you’re willing to carry food back to the indoor kitchen. The closer your outdoor kitchen sits to an existing gas line, electrical panel, or water supply, the cheaper your utility trenching will be. Every extra 10 feet of trench for a gas line or buried conduit adds material and labor cost, so a spot near the house’s utility wall is almost always the economical choice.
Wind direction affects both comfort and safety. Position the grill so prevailing summer winds carry smoke away from the seating area and any windows or doors that stay open in warm weather. If your region gets strong seasonal winds, an L-shape or U-shape layout with a solid side wall can act as a windbreak for the cooking zone.
Attached to the House
- Shorter utility runs, lower cost
- Easy to run power for lighting
- Convenient for indoor-outdoor serving
Freestanding in the Yard
- More design freedom on shape and size
- Longer, costlier utility trenching
- May need its own permit review for setbacks
Check your local setback requirements before finalizing a spot — most municipalities require a minimum distance from property lines and from combustible structures like wood fences, and an inspector will flag this during the permit process if it’s overlooked.
3. Setting a Realistic Budget
Outdoor kitchen budgets vary enormously depending on materials and how much you do yourself. A basic DIY straight-run kitchen with a mid-range built-in grill can land in the low thousands, while a full U-shaped kitchen with stone veneer, a pizza oven, a refrigerator, and a roof structure can run well into five figures. The biggest cost swings come from four places: the grill or cooktop itself, the countertop material, the structural framing (steel stud vs. masonry block), and whether you’re paying a licensed plumber or electrician for the utility hookups.
A practical way to budget is to separate “structure” costs from “appliance” costs. Structure includes the frame, countertop, and any roofing or hardscape work. Appliances include the grill, side burner, refrigerator, and any built-in accessories. Most first-time builders underestimate the appliance line item because a quality built-in grill alone can cost as much as the entire frame and countertop combined.
| Budget Tier | What’s Typically Included | Rough Range (USD) |
|---|---|---|
| Basic DIY | Steel frame, laminate or tile counter, mid-range grill | $2,000–$5,000 |
| Mid-range | Block frame, stone veneer, built-in grill + side burner | $8,000–$15,000 |
| High-end | Full utilities, stone counters, fridge, roof structure | $20,000+ |
Whatever tier you land in, leave a 10–15% contingency for utility surprises — buried lines, unexpected soil conditions, or a permit inspector requiring an additional shutoff valve are common enough that skipping the buffer usually means a mid-project budget crunch.
4. Foundation and Site Preparation
A stable, level foundation is what keeps an outdoor kitchen from cracking, shifting, or trapping water against the frame over time. For most residential builds, that means a poured concrete pad or a compacted paver base sized to the full footprint of the kitchen, extending a few inches beyond the frame on all sides.
Step 1: Excavate and Grade
Remove sod and topsoil across the full footprint to a depth of 4–6 inches, then grade the subsoil with a slight slope — about a quarter inch per foot — away from the house. This keeps rainwater from pooling under the structure.
Excavation and grading before the gravel base and footing forms go in.
Step 2: Pour a Reinforced Footing or Slab
For a masonry block frame, pour a reinforced concrete footing at least 8 inches thick with rebar spaced 12–16 inches apart. For a lighter steel-stud frame, a 4-inch compacted paver base or a thinner slab is usually sufficient, but check your local frost line — in colder climates the footing needs to sit below it to prevent heaving.
Footing depth and rebar spacing are the two details inspectors check first.
Let concrete cure fully — typically 3–5 days before light framing loads and a full 28 days before heavy stone veneer is applied — before moving to the next phase.
5. Framing the Structure
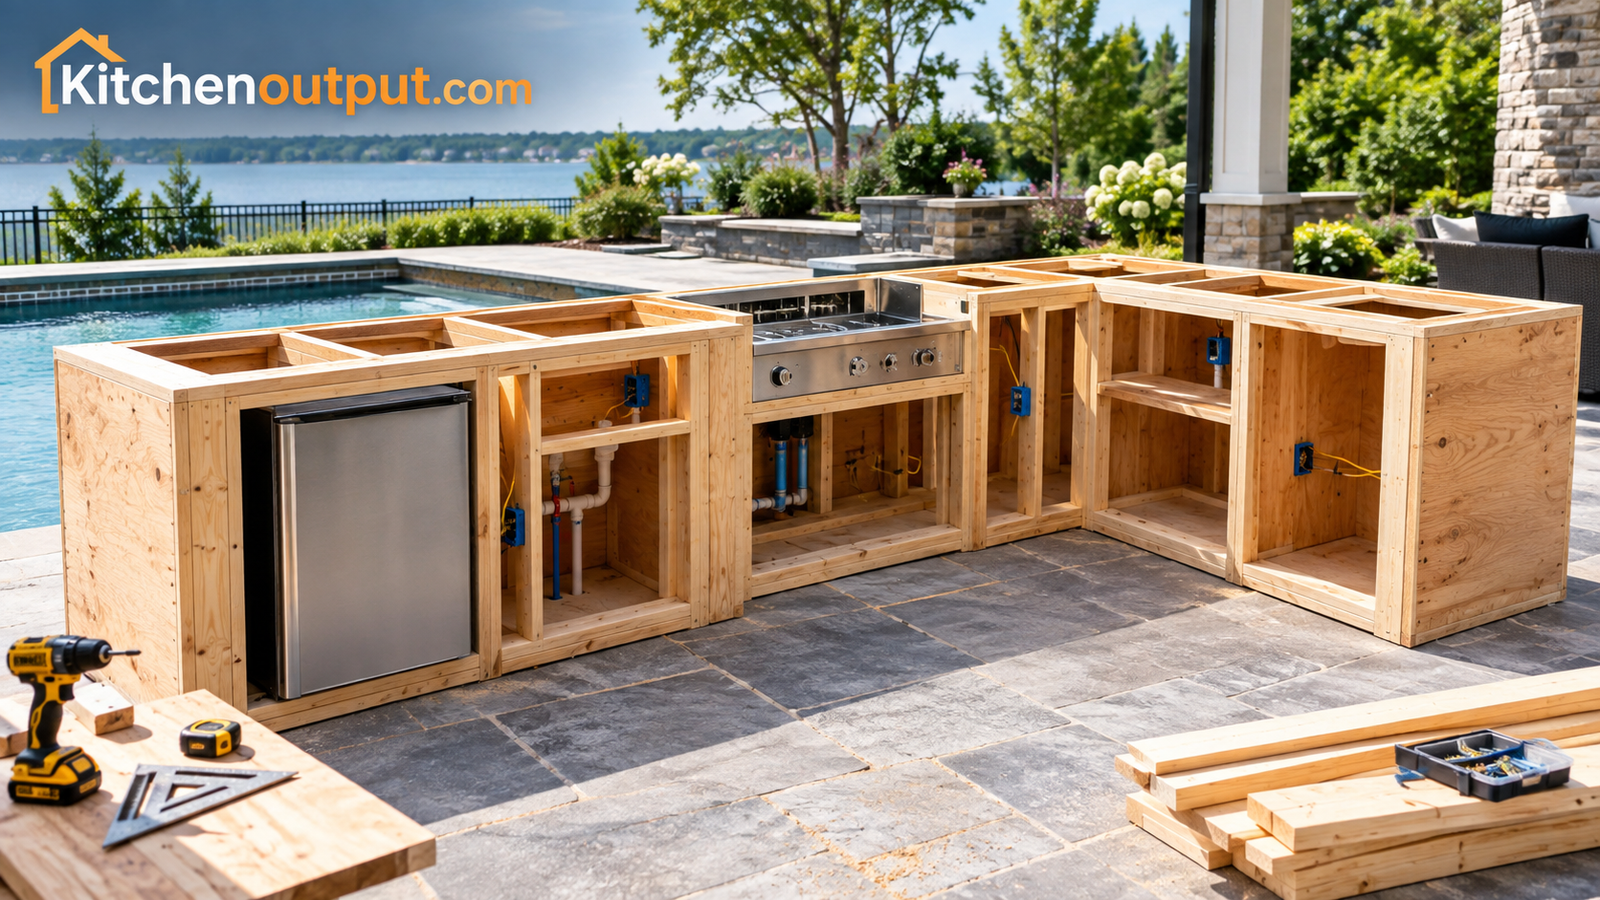
Once the foundation has cured, framing gives the kitchen its shape and provides the backbone for utilities, countertop support, and cabinet doors. Two framing methods dominate outdoor kitchen builds: galvanized steel stud framing wrapped in cement board, and concrete masonry unit (CMU) block construction.
Steel Stud Frame
- Lighter, faster to assemble
- Easier to run utilities through pre-cut knockouts
- Lower material cost
CMU Block Frame
- More labor-intensive and slower to build
- Extremely durable and fire-resistant
- Heavier footing requirements
Step 3: Build and Anchor the Frame
Set corner studs first, anchor the bottom track to the footing with concrete anchors every 24 inches, then fill in field studs at 16-inch centers. Leave a rough opening for the grill insert sized to the manufacturer’s cutout specification, typically 3 inches larger than the appliance body on each side for heat clearance.
Frame layout showing stud spacing and a properly cleared grill cutout.
Wrap the exterior of the frame in cement backer board, taping and mudding the seams the same way you would for a tiled shower — this creates the substrate that veneer, tile, or stucco will bond to later.
6. Running Gas, Electrical, and Plumbing Lines
This is the step where hiring a licensed professional is almost always worth it, even on an otherwise DIY build. Gas and electrical work typically require permits and inspections in most jurisdictions, and getting them wrong creates real safety risk. That said, understanding the sequence helps you plan trenching and coordinate timing even if a pro handles the actual connections.
Step 4: Trench and Run Gas Line
Gas lines for outdoor kitchens are typically run in black iron pipe or flexible corrugated stainless tubing, buried at the depth your local code requires — commonly 12–18 inches. A dedicated shutoff valve should sit at an accessible point near the appliance, not buried under concrete.
A shutoff valve should always remain accessible above grade near the appliance.
Step 5: Run Electrical Conduit
Outdoor electrical runs need weatherproof conduit and GFCI-protected circuits — required by code for anything within reach of water or exposed to weather. Plan for at least one dedicated circuit for lighting and a separate one for any refrigerator or powered appliance, since combining high-draw devices on one circuit is a common cause of tripped breakers mid-cookout.
GFCI protection is required by most codes for any outdoor receptacle.
If plumbing is part of your design — a sink or a cold-water line for a beverage station — this is also the stage to set supply and drain lines, sloped to a dry well or tied into an existing drain per local plumbing code.
7. Selecting and Installing Your Grill or Cooktop
Built-in grills come in two broad categories: drop-in inserts designed to sit inside a pre-built cutout, and freestanding grills housed in their own cart. For a true outdoor kitchen island, a drop-in insert is almost always the better choice — it integrates into the countertop line and leaves no gap for grease or debris to collect around the unit.
| Fuel Type | Pros | Cons |
|---|---|---|
| Natural gas | Never runs out, cheaper per use | Requires a permanent gas line |
| Propane | No trenching needed, portable tank swap | Tank runs out mid-cook, needs storage space |
| Charcoal/wood | Best smoke flavor, no utility needed | Longer prep time, more cleanup |
Step 6: Set the Insert and Connect Utilities
Slide the grill insert into the rough opening left in framing, level it front-to-back and side-to-side, then secure it per the manufacturer’s mounting bracket instructions. Connect the gas line using a certified flexible connector, and test every joint with a soap-and-water solution before firing it up — bubbling indicates a leak that needs to be resealed.
Always test gas connections with a soap-water leak check before first use.
If a side burner or pizza oven is part of the build, install and level each one the same way, keeping manufacturer-specified clearances to combustible materials on every side. Our comparisons of Ninja vs. Philips air fryers and air fryer vs. convection oven are more relevant to an indoor countertop, but the same clearance logic applies outdoors with any heat-producing appliance.
8. Countertops and Work Surfaces
Countertop material is one of the most visible decisions in the whole build, and it needs to survive sun, rain, and temperature swings without cracking or fading. Granite, concrete, and porcelain slab are the three most common choices for outdoor use because all three resist UV fading and moisture penetration far better than indoor-only materials like laminate or most engineered stone.
| Material | Durability | Maintenance | Relative Cost |
|---|---|---|---|
| Granite | Excellent | Seal yearly | $$ |
| Concrete | Very good | Reseal every 1–2 years | $ |
| Porcelain slab | Excellent | Minimal | $$$ |
| Tile | Good, grout wears faster | Regrout periodically | $ |
Whatever material you choose, the countertop should overhang the front face of cabinetry by at least 1.5 inches to shed water cleanly, and any seams should be positioned away from the sink or grill cutout where moisture exposure is highest. Support long overhangs — especially bar seating extensions — with steel corbels rated for the counter’s weight, spaced no more than 24 inches apart.
9. Cabinetry, Doors, and Weatherproof Storage
Storage is where a lot of outdoor kitchens quietly fail — regular indoor cabinet doors and hinges corrode or warp within a season or two outside. Stainless steel doors with marine-grade or powder-coated hinges are the standard for a reason: they shrug off humidity and UV exposure that would ruin wood or standard-finish hardware.
Stainless Steel Cabinetry
- Rust-resistant, long lifespan outdoors
- Easy to wipe clean after cooking
- Widely available in modular sizes
Weatherproof Wood or Composite
- Warmer look that matches some patio styles
- Needs periodic resealing or refinishing
- More vulnerable to prolonged moisture
Plan cutouts for a trash pull-out and, if your budget allows, an outdoor-rated mini fridge — both dramatically cut down on trips back to the indoor kitchen mid-cook. If you’re outfitting the prep zone with tools, our guides on the best knife set for beginners, best mixing bowls, and best digital kitchen scales can help you decide what’s worth duplicating outside versus carrying out as needed.
10. Adding a Roof, Pergola, or Shade Structure
A shade structure isn’t strictly required, but it extends the usable hours of the kitchen dramatically — both by keeping the cook out of direct sun and by protecting cabinetry, electronics, and the countertop from constant UV and rain exposure. Three common options are a solid roof tied into the house, a freestanding pergola, and a retractable canopy.
| Structure | Weather Protection | Cost | Permit Likely? |
|---|---|---|---|
| Solid attached roof | Full | $$$ | Usually yes |
| Freestanding pergola | Partial (sun only, unless covered) | $$ | Sometimes |
| Retractable canopy | Adjustable | $ | Rarely |
If you go with a solid roof, make sure it’s designed with a grill-rated ventilation gap or a dedicated vent hood — trapping smoke and heat under a low roof is both a comfort problem and, in enclosed cases, a carbon monoxide risk that the next section covers in more detail.
11. Ventilation and Safety Considerations
Ventilation is one of the most overlooked parts of outdoor kitchen design, largely because people assume “it’s outside, so airflow isn’t an issue.” That assumption breaks down fast under a solid roof, in a U-shaped layout with tall side walls, or on a covered patio — all setups that can trap smoke, heat, and combustion byproducts if there’s no dedicated vent path.
- Install a vent hood rated for outdoor use above any grill positioned under a roof, sized to the grill’s BTU output per the manufacturer’s chart.
- Keep a minimum clearance — typically 24–30 inches — between the grill surface and any combustible ceiling material.
- Never fully enclose a gas grill on more than two sides without a certified ventilation path; enclosed setups need a professional review.
- Keep a fire extinguisher rated for grease fires mounted within reach of the cooking zone, not stored in a cabinet across the yard.
- If propane is used, store tanks upright, outdoors, and away from any ignition source — never inside an enclosed cabinet without ventilation.
Our guide on general appliance safety tips covers some overlapping principles around heat clearance and electrical safety that apply just as much outdoors as in a kitchen.
12. Final Touches: Lighting, Seating, and Decor
With the structure, utilities, and appliances in place, the last stretch is about making the space usable after dark and comfortable enough that people actually want to gather there. Task lighting over the cooking zone and counter is the priority — under-cabinet LED strips or a mounted fixture directly above the grill make evening cooking dramatically easier and safer than relying on ambient patio light alone.
Seating should match how you actually entertain: a bar-height counter with stools works well for casual gatherings where guests chat with the cook, while a separate dining table suits sit-down meals better. Add wind-resistant task lighting fixtures rated for outdoor/wet locations, and finish with weatherproof decor — planters, an outdoor rug rated for exterior use, and cushions in fade-resistant fabric — to make the space feel finished rather than purely functional.
Frequently Asked Questions
Do I need a permit to build an outdoor kitchen?
In most areas, yes — especially for any gas line, electrical circuit, or structure that ties into your home’s utilities. Check with your local building department before starting site work.
How long does it take to build an outdoor kitchen?
A basic DIY build can take a few weekends once utilities are roughed in. A full custom build with masonry, stone veneer, and a roof structure often runs 4–8 weeks including inspection wait times.
Can I build an outdoor kitchen without running gas?
Yes — a propane-fueled grill removes the need for a permanent gas line entirely, at the cost of manually swapping tanks and storing extras safely.
What’s the cheapest way to frame an outdoor kitchen?
A galvanized steel stud frame wrapped in cement board is typically the most budget-friendly structural option compared to full masonry block construction.
Do outdoor kitchen cabinets need to be stainless steel?
Not strictly, but stainless steel or marine-grade hardware significantly outlasts standard wood cabinetry in outdoor humidity and UV exposure.
How deep should a gas line be buried?
This depends on local code, but 12–18 inches is common. Always confirm the exact requirement with your local permitting office before trenching.
Can I put a refrigerator in an outdoor kitchen?
Yes, but use a fridge specifically rated for outdoor temperature swings — a standard indoor fridge isn’t built to handle the humidity and heat cycling of an exterior installation.
Do I need a vent hood for an outdoor grill?
If the grill sits under a solid roof or in a partially enclosed structure, yes. Fully open-air grills generally don’t require one, but check your roof height and layout.
What countertop material handles rain and sun best?
Granite, concrete, and porcelain slab all perform well outdoors. Avoid laminate and most engineered quartz, which can discolor or delaminate under prolonged UV and moisture exposure.
How much clearance does a built-in grill need from combustible materials?
Follow the manufacturer’s specification exactly — it varies by model, but 24–30 inches from any combustible material is a common baseline for both sides and any overhead structure.
Should I hire a professional for any part of this project?
Gas and electrical connections are the two areas where hiring a licensed professional is strongly recommended, even if you handle the framing, countertop, and finishing work yourself.
Bringing It All Together
Building an outdoor kitchen is really a sequence of smaller, manageable decisions — layout, location, foundation, framing, utilities, appliances, and finishing — rather than one overwhelming project. Get the foundation level, the utility rough-in correct and inspected, and the ventilation clearances right, and the rest of the build is mostly about picking materials and appliances that match how you actually plan to use the space.
Ready to start shopping for the appliances that’ll anchor your build?
Browse Outdoor Kitchen Essentials


