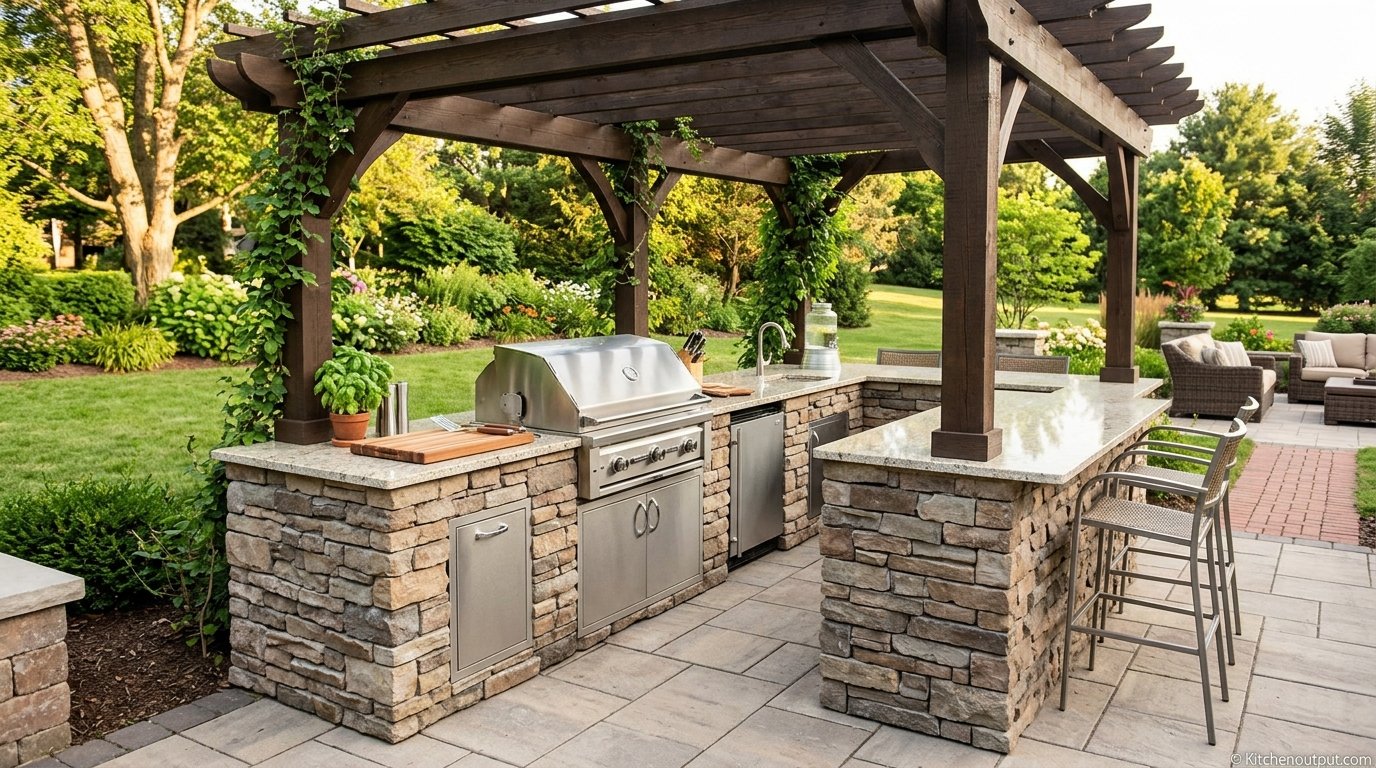
What Is a Summer Kitchen? The Complete Guide to Outdoor Cooking Spaces
Everything you need to know about summer kitchens — what they are, how they differ from a standard outdoor kitchen, the appliances and materials that make them work, and how to plan one that survives every season.
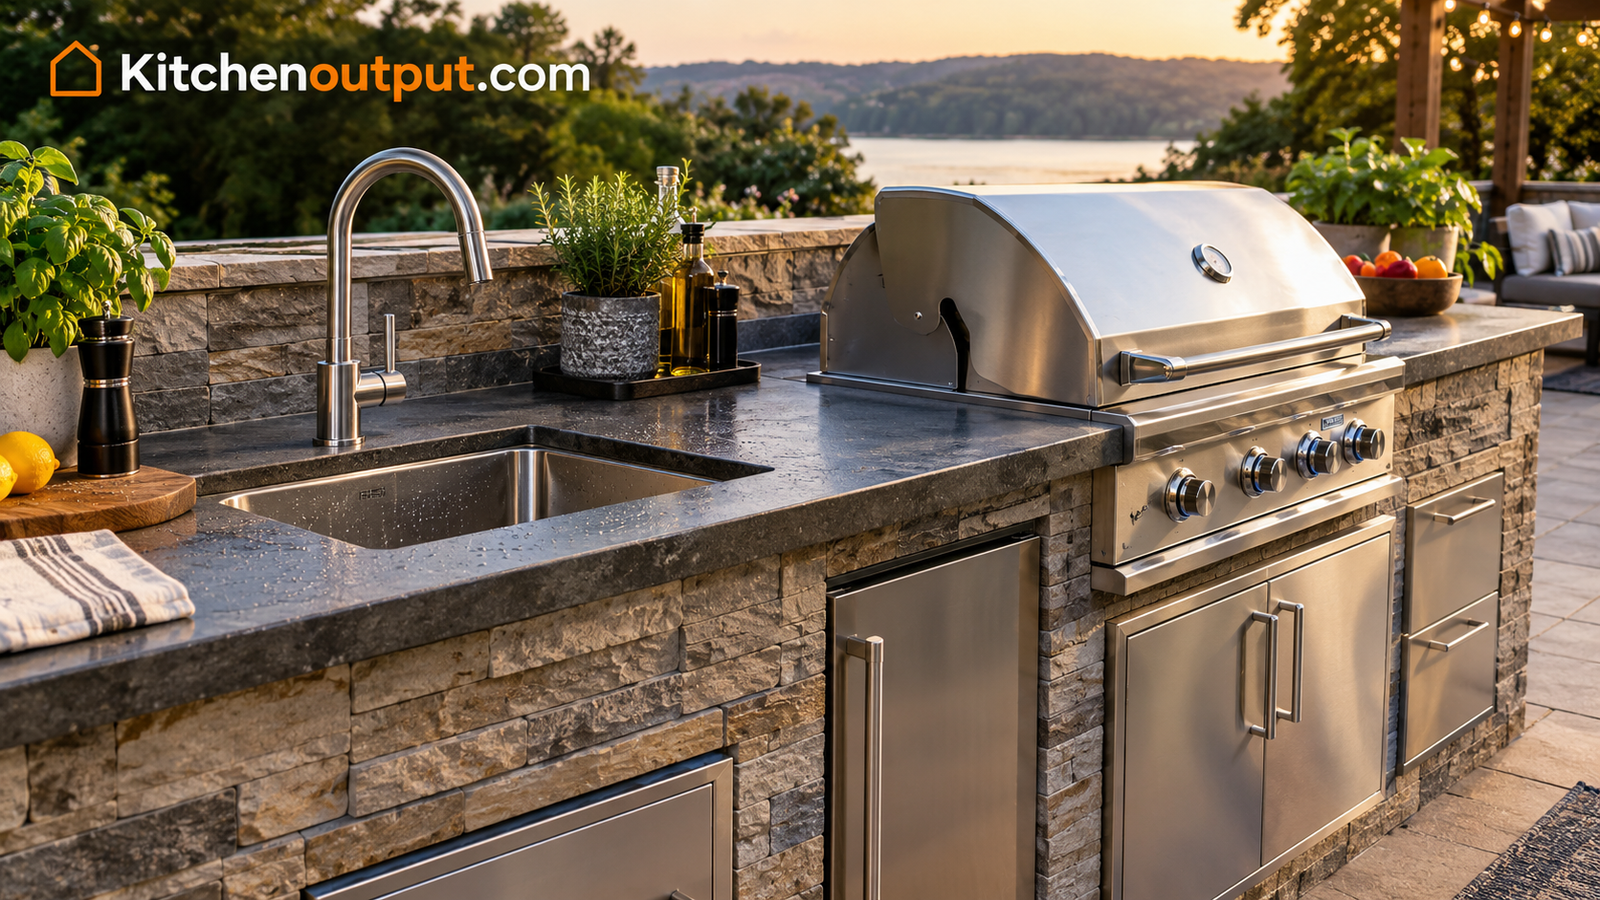
1. What Is a Summer Kitchen?
A summer kitchen is a secondary cooking space, usually built outdoors or in a semi-enclosed structure attached to the home, designed specifically for warm-weather cooking. The idea is simple: instead of running your oven, stovetop, and dishwasher inside during the hottest months of the year — and heating up your entire house in the process — you move the bulk of your cooking to a dedicated outdoor or semi-outdoor space built to handle heat, smoke, mess, and humidity.
The term originally described a small detached building on farms and older homes, but today “summer kitchen” is used much more broadly. It can mean anything from a simple grill station with a countertop to a fully equipped outdoor culinary suite with a range, sink, refrigerator, and dining area. What ties every version together is the underlying purpose: keep heat, grease, and food odors out of the main house while extending your living and entertaining space into the yard.
If you’re weighing a small grill island against a full build-out, it helps to start with a kitchen appliance buying guide mindset — figure out how you actually cook before you decide what to build.
It’s also worth separating the marketing use of the phrase from the practical one. Plenty of outdoor living companies use “summer kitchen” as a catch-all label for any patio cooking area, regardless of how much real cooking it can actually handle. For the purposes of this guide, a true summer kitchen is judged by what it can do, not how it’s branded: can it run a full meal from prep to plate without a trip inside, and can it survive a full season of sun, rain, and humidity without falling apart? If the answer to both is yes, it earns the name.
That functional bar matters because it shapes almost every decision that follows — from which appliances are worth the extra cost, to how much shelter the space needs, to whether plumbing and electrical work make sense for your household. A summer kitchen that can’t hold up to daily use for months at a stretch is really just an outdoor bar with a grill attached, which is a perfectly fine project, just a different one.
2. A Short History of Summer Kitchens
Summer kitchens aren’t a new trend — they’re a revival of a very old idea. In the 18th and 19th centuries, especially in warmer regions of the United States and parts of Europe, homes were often built with a separate structure just for cooking. Without air conditioning, running a wood-fired stove inside the main house during summer made the whole home unbearable, and it also created a real fire risk. So families cooked, canned, and preserved food in a detached building a few steps from the back door.
These original summer kitchens were purely functional: a hearth or stove, storage for cookware, and enough ventilation to keep smoke from lingering. Many doubled as laundry rooms or root cellars in the off-season. As electricity, air conditioning, and modern kitchen appliances became standard, the detached summer kitchen mostly disappeared from new construction — but the underlying problem it solved never went away. Cooking indoors in July still heats up the house, and grilling, frying, and smoking still produce smoke, grease, and odor that most people would rather keep outside.
The modern summer kitchen is the direct descendant of that old farmhouse structure, rebuilt with stainless steel appliances, weatherproof cabinetry, and the kind of layout you’d expect from a well-planned indoor kitchen, just built to survive rain, UV exposure, and temperature swings.
The resurgence really picked up alongside the broader outdoor living movement of the past few decades. As patios evolved into full extensions of the home — complete with seating areas, fire features, and lighting — it made sense for cooking to follow. Homeowners who already had a grill on the patio started adding counters, then storage, then refrigeration, until the setup started to resemble a genuine second kitchen rather than a single appliance parked outside. That gradual, additive process is still how most summer kitchens get built today, and it’s part of why the category covers such a wide range of setups.
3. Summer Kitchen vs. Outdoor Kitchen vs. Kitchenette — Key Differences
These three terms get used interchangeably online, but they aren’t quite the same thing. Understanding the distinction will help you plan the right project and avoid overspending on features you don’t need.
| Feature | Summer Kitchen | Outdoor Kitchen | Kitchenette |
|---|---|---|---|
| Primary use | Seasonal, warm-weather cooking | Year-round or seasonal cooking | Light snack/beverage prep |
| Typical location | Attached porch, screened room, or detached structure | Open patio or covered lanai | Poolside bar, basement, guest suite |
| Cooking equipment | Range, grill, or full cooktop | Grill, smoker, pizza oven | Mini-fridge, sink, microwave |
| Enclosure | Often screened or partially walled | Usually fully open-air | Fully enclosed, indoors |
| Runs plumbing/electric? | Usually yes | Sometimes | Almost always |
| Investment level | Moderate to high | Moderate to high | Low |
In short: a kitchenette is about convenience, an outdoor kitchen is about entertaining, and a summer kitchen is about function — taking real cooking off the household’s main utility grid for a few months a year.
The overlap between “summer kitchen” and “outdoor kitchen” is real, though, and in practice a lot of homeowners build something that borrows from both categories. A common pattern is an open-air layout for most of the year that gets closed in with removable screens or clear vinyl panels during shoulder seasons — giving the flexibility of an outdoor kitchen with some of the weather protection of a true summer kitchen. When you’re planning your own project, it’s more useful to think in terms of the specific features you want (shelter, storage, refrigeration, plumbing) than to worry too much about which label technically applies.
4. Core Components of a Modern Summer Kitchen
Most well-planned summer kitchens include a consistent set of building blocks, regardless of size or budget. Understanding these components makes it much easier to plan a layout that won’t need to be redone in a year.
- Cooking zone: a grill, range, griddle, or a combination, typically the anchor of the whole layout.
- Prep counter: heat- and moisture-resistant surface for chopping, plating, and staging food.
- Storage: weatherproof cabinets for cookware, utensils, and dry goods — the outdoor equivalent of how you’d store kitchen appliances indoors, just built for humidity.
- Cold storage: an outdoor-rated refrigerator or beverage cooler, so trips inside are minimized.
- Sink and water access: for washing produce, rinsing tools, and basic cleanup without tracking mess through the house.
- Ventilation: either open-air design or a vent hood if the space is partially enclosed.
- Shelter: a roof, pergola, or awning to protect the cooking zone from rain and direct sun.
- Lighting and power: task lighting over the cooking area and outlets rated for outdoor use.
Not every summer kitchen needs all eight elements from day one — plenty of people start with a grill, a counter, and a small fridge, then build outward.
The order you add these components in matters more than most first-time builders expect. Cooking and prep should come first, since everything else exists to support them. Storage and cold storage come next, because they’re what actually let you stop making trips back into the house — which is the entire point of the project. Shelter should be prioritized before purely decorative upgrades, since sun and rain damage compound quickly on unprotected surfaces. Lighting, extra seating, and finishing touches like backsplash tile or decorative hardware can reasonably wait until the functional core is in place and tested through at least one full season.
5. Popular Summer Kitchen Layouts
Layout matters just as much outdoors as it does inside. The right shape depends on your available space, how many people typically cook or gather at once, and whether the kitchen backs directly onto the house.
Linear (Single-Wall) Layout
The simplest and most budget-friendly option — one continuous counter run along a wall or the back of the house. Works well for smaller patios and for cooks who mainly grill and plate rather than run a full multi-course setup.
L-Shape Layout
Adds a second counter run at a right angle, which is useful for separating the “hot” cooking zone from a prep or serving zone. This is one of the most common layouts because it fits naturally into a corner of a patio.
U-Shape Layout
Wraps counters around three sides, similar to a full indoor kitchen. It maximizes counter space and storage but needs significantly more square footage — best suited to larger patios or dedicated outdoor rooms.
Island Layout
A freestanding island in the middle of the patio, often paired with bar seating on one side. Islands work particularly well when the summer kitchen is meant to double as an entertaining hub rather than a purely functional cooking space.
Good fits for small yards
- Linear layout against an existing wall
- Compact L-shape in a patio corner
- A single multi-function cart instead of built-ins
Needs more space and budget
- U-shape with full counter wraparound
- Island layouts with seating
- Layouts that separate cooking and dining zones
Traffic flow deserves as much attention as the shape of the counters. A good rule of thumb borrowed from indoor kitchen design is to keep at least three feet of clearance between the cooking zone and any seating or walkway, so smoke, heat, and splatter stay away from guests. If the summer kitchen sits close to a pool, adding a slightly raised lip or curb along the counter edge helps keep splashed water away from any electrical outlets or appliance vents nearby.
6. Essential Appliances for a Summer Kitchen
A summer kitchen earns its name by taking real cooking load off the indoor kitchen, which means the appliance list matters more here than in a purely decorative outdoor space. Most well-used setups include some combination of the following.
- Grill or built-in cooktop — the workhorse of the space.
- Outdoor-rated refrigerator — keeps proteins and drinks cold without trips inside.
- Side burner — for sauces, boiling corn, or anything that doesn’t belong on the grill grate.
- Compact air fryer or countertop oven — several outdoor cooks bring in a small family-sized air fryer for weeknight sides without firing up the full grill.
- Blender — for smoothies, frozen drinks, and sauces; a budget-friendly blender is plenty for most patios.
- Small food processor — speeds up prep work for salsas, slaws, and marinades; see our food processor reviews for outdoor-friendly picks.
- Instant Pot or multi-cooker — useful for sides that need to simmer while the grill runs; our Instant Pot guide breaks down the best sizes for outdoor use.
- Stand mixer — less common, but bakers who host regularly sometimes keep a dedicated stand mixer in the summer kitchen for dough and batters.
- Coffee maker — a simple outdoor-friendly coffee maker means mornings on the patio don’t require a trip back inside.
- Toaster oven — a compact toaster oven covers reheating and small bakes without heating the whole house.
One thing worth planning for early: outdoor appliances draw power differently than most homeowners expect. A refrigerator, an ice maker, and a couple of small countertop appliances running at once can add up quickly, so it’s worth sizing the electrical circuit for the appliance lineup you actually intend to run rather than the bare minimum. It’s also smart to keep at least one dedicated outlet free for whatever small appliance you bring out seasonally — a slow cooker for a fall gathering, an ice cream maker for a summer party, or a griddle for weekend breakfasts — instead of designing the space around only the fixed built-ins.
7. Materials That Actually Hold Up
Nothing sinks a summer kitchen project faster than choosing materials that look great on day one and fail after a single season of sun, rain, and temperature swings. The right material choice depends on your climate, but a few options consistently perform well.
| Material | Best For | Watch Out For |
|---|---|---|
| 304/316 stainless steel | Cabinets, appliance housings, coastal climates | Cheaper 430-grade steel can rust near salt air |
| Natural stone (granite, soapstone) | Countertops, heat resistance | Needs periodic sealing to resist staining |
| Concrete (poured or pavers) | Countertops, flooring, structural bases | Can crack in freeze-thaw climates without proper reinforcement |
| Pressure-treated or composite wood | Framing, pergolas, accent trim | Untreated wood warps and rots quickly outdoors |
| Porcelain tile | Backsplashes, flooring | Grout lines need weatherproof sealant |
As a rule of thumb: anything that touches food or water should be non-porous and UV-stable, and anything structural should be rated for your specific climate zone — freeze-thaw cycles are a very different challenge than year-round humidity.
Climate should really drive the material list before style does. In coastal areas, salt air accelerates corrosion on lower-grade metal hardware, hinges, and fasteners, so it’s worth spending a little more on marine-grade stainless steel even for small details like cabinet handles. In regions with hard winters, any poured concrete or masonry work needs proper reinforcement and drainage to handle repeated freeze-thaw cycles, or cracking becomes almost inevitable within a few seasons. In consistently hot, dry climates, UV resistance matters more than moisture resistance — countertop sealants and cushion fabrics fade and degrade faster under intense, sustained sun exposure than they do from occasional rain.
8. Roofing, Shade, and Structural Considerations
Shelter is what separates a true summer kitchen from a bare grill on a slab. Without some form of roof or shade structure, appliances degrade faster, cooking in direct sun becomes unpleasant, and rain can shut the whole space down for the day.
Common Shelter Options
- Attached patio roof — extends the home’s existing roofline, usually the most weather-resistant option.
- Pergola with a solid or louvered top — offers partial shade with better airflow than a full roof.
- Freestanding gazebo — works when the summer kitchen sits away from the house.
- Retractable awning — flexible, lower cost, but less durable long-term than a fixed structure.
If the space is going to house electronics, a refrigerator, or cabinetry, a solid roof is worth the extra cost — appliances left under open sky age noticeably faster than ones under real shelter.
9. Plumbing, Electrical, and Gas Requirements
This is the part of a summer kitchen project most people underestimate, and it’s usually where a permit becomes necessary.
- Gas lines: a hard-piped natural gas line or a properly rated propane setup for grills, side burners, or pizza ovens.
- Electrical: outdoor-rated (GFCI-protected) outlets for refrigerators, lighting, and small appliances; a dedicated circuit is often required for higher-draw equipment.
- Water supply and drainage: a cold (and sometimes hot) line for the sink, plus proper drainage that doesn’t just dump greywater onto the patio.
- Permits: most municipalities require permits for gas, electrical, and plumbing work, even in a detached structure — checking local code before pouring a foundation saves a lot of headaches later.
Because these systems interact with the home’s main utilities, this is one area where hiring a licensed contractor is almost always worth it, even on an otherwise DIY project.
It’s also worth thinking a step ahead of your current plans. Running a slightly larger gas line, an extra conduit for future wiring, or a second water shutoff valve during initial construction costs relatively little compared to trenching the yard again in two years to add a pizza oven or an extra burner. Many contractors will size utilities for a “phase two” build if you tell them upfront that you’re planning to expand the space later, which can save a meaningful amount of money and disruption down the road.
10. Budgeting a Summer Kitchen
Costs vary enormously depending on scope, materials, and how much of the project touches gas, water, and electrical lines. The table below gives a general sense of where budgets tend to land, though local labor costs and material choices can shift these ranges significantly.
| Scope | What’s Included | Typical Range |
|---|---|---|
| Basic grill station | Grill, small counter, no plumbing/electrical | Low |
| Mid-size kitchen | Grill, counter, storage, side burner, basic lighting | Moderate |
| Full outdoor kitchen | Full appliance suite, sink, refrigerator, roofed structure | High |
| Custom summer house/kitchen | Enclosed or screened structure, full utilities, seating area | Highest |
A few budgeting tips that consistently save money without sacrificing function:
- Start with the utilities (gas, water, electric) sized for future expansion, even if you build in phases.
- Buy appliances rated for outdoor use rather than repurposing indoor units — the upfront cost difference is far cheaper than early replacement.
- Prioritize shelter before decorative finishes; a roof protects every dollar spent underneath it.
- Reuse an existing patio slab or deck where possible instead of pouring new hardscape.
- Get at least two or three contractor quotes before committing, since pricing for outdoor-specific work can vary significantly between builders in the same area.
- Phase the project deliberately — a grill and counter this year, storage and a fridge next year — rather than trying to finance everything at once.
It also helps to separate “must-have now” from “nice to have eventually” before getting quotes. A sink, for example, is genuinely useful but not strictly necessary if the summer kitchen sits close enough to an existing outdoor faucet or the back door. A pizza oven is a wonderful centerpiece but rarely earns its keep the way a solid grill and a reliable refrigerator do. Being honest about which features you’ll actually use every week versus a few times a season is one of the simplest ways to keep a budget under control without feeling like you’re cutting corners.
11. Design Styles and Aesthetic Inspiration
Summer kitchens don’t have to look purely utilitarian — most homeowners treat the space as an extension of their home’s overall style.
- Rustic farmhouse: reclaimed wood beams, stone veneer, and a wraparound counter that echoes the historic detached summer kitchen.
- Modern minimalist: clean stainless steel lines, concrete countertops, and a flat pergola roof with slim steel supports.
- Mediterranean: stucco walls, terracotta tile, and a wood-fired pizza oven as the visual centerpiece.
- Coastal: light-toned woods, marine-grade stainless steel, and open-air layouts that maximize breeze and views.
Whatever the style, keeping a consistent material palette between the summer kitchen and the main house — even something as simple as matching countertop tone — makes the addition feel intentional rather than bolted on.
Lighting deserves special attention in any of these styles, since it does double duty as both function and mood. Task lighting directly over the cooking surface — usually a weatherproof fixture mounted under the roofline or pergola beam — is non-negotiable for safe grilling after dark. Beyond that, layering in softer ambient lighting along counter edges, string lights across a pergola, or low-voltage path lighting leading to the space turns a purely functional cooking area into somewhere people actually want to linger after the food is done.
12. Maintenance and Seasonal Care
A summer kitchen is exposed to far more wear than an indoor one, so a light maintenance routine goes a long way toward protecting the investment.
- End of season: deep-clean the grill, disconnect and drain water lines in freeze-prone climates, and cover or store portable appliances.
- Countertops: reseal natural stone annually and check grout lines on tile for cracking.
- Cabinetry: wipe down stainless steel with a non-abrasive cleaner to prevent water spotting and light surface rust.
- Appliances: check gaskets and seals on outdoor refrigerators, and inspect gas connections for leaks before the first use each season.
- Structure: inspect roofing, pergola joints, and any wood elements for rot or loosened fasteners each spring.
Treating the space with the same seasonal rhythm as the rest of a well-equipped kitchen keeps it running smoothly for years rather than needing a major overhaul every few seasons.
A simple habit that saves a lot of trouble later is keeping a short seasonal checklist somewhere visible — a laminated card in a drawer, or a recurring note on your phone — so opening and closing the space each year doesn’t rely on memory alone. Small issues like a slightly loose gas fitting, a cracked grout line, or a fading sealant are cheap and easy to fix when caught early, but can turn into much larger repairs if they’re left unchecked for a full off-season.
Frequently Asked Questions
What exactly counts as a summer kitchen?
Any dedicated cooking space — outdoors, screened-in, or in a detached structure — built specifically to handle warm-weather cooking away from the main indoor kitchen. It can range from a simple grill and counter to a full appliance suite.
Is a summer kitchen the same as an outdoor kitchen?
They overlap heavily, but a summer kitchen usually implies more structure — often partial walls, a roof, or a screened enclosure — and a stronger focus on taking real cooking load off the house, rather than just entertaining.
Do I need a permit to build a summer kitchen?
In most areas, yes, if the project involves gas lines, electrical circuits, plumbing, or a permanent structure. Check with your local building department before starting construction.
Can a summer kitchen be used year-round?
It depends on climate and how enclosed the space is. In mild climates, many summer kitchens see light use through most of the year. In colder regions, water lines typically need to be drained and appliances protected once temperatures drop.
What’s the cheapest way to start a summer kitchen?
A basic grill station with a weatherproof counter and no plumbing or electrical work is the lowest-cost entry point. Many homeowners expand it in phases as budget allows.
What materials are best for outdoor countertops?
Sealed natural stone, concrete, and porcelain slab are all popular because they resist heat, moisture, and UV exposure far better than laminate or untreated wood.
Do I need a vent hood for an outdoor kitchen?
Fully open-air setups usually don’t need one, since smoke disperses naturally. Partially enclosed or screened summer kitchens often do, especially if the cooking zone sits close to a ceiling or wall.
Can I use my regular indoor refrigerator outside?
It’s not recommended. Standard refrigerators aren’t built to handle outdoor humidity and temperature swings and tend to fail much faster. An outdoor-rated compressor unit is worth the extra cost.
How much does a basic summer kitchen cost?
Costs vary widely by region and scope, but a simple grill-and-counter setup sits at the low end, while a full appliance suite with plumbing, electrical, and a roofed structure sits at the high end.
What’s the difference between a pergola and a full roof for shade?
A pergola offers partial, filtered shade and better airflow, while a solid roof provides full rain protection and is generally better for protecting appliances and cabinetry long-term.
Should I build the summer kitchen attached to the house or detached?
Attached setups are usually cheaper to run utilities to and easier to access, while detached structures better contain smoke, heat, and noise — the right choice depends on lot layout and how the space will be used.
What appliances get the most use in a typical summer kitchen?
Grills see the heaviest use by far, followed by outdoor refrigerators, side burners, and small countertop appliances like blenders and air fryers brought out for specific meals.
Is a summer kitchen worth it if I only use it a few months a year?
For most households, yes — even seasonal use tends to pay off quickly in reduced indoor heat, easier cleanup, and more time spent entertaining outside during the exact months people already want to be outdoors.
How big should a summer kitchen be?
There’s no fixed rule, but a comfortable single-cook layout usually needs at least six to eight linear feet of counter space, while a setup meant for hosting groups benefits from a wider footprint with separate prep and serving zones.
Bringing It All Together
A summer kitchen is really just a practical answer to a seasonal problem: keeping the heat, smoke, and mess of serious warm-weather cooking out of the house while making the most of the months when everyone wants to be outside anyway. Whether that means a simple grill and counter or a full appliance suite under a roofed structure, the same core principles apply — build for your climate, choose materials that won’t fail after one season, and plan the utilities before the finishes.
Start with the appliances that will see the most use, protect them with real shelter, and expand the space in phases as your budget and needs grow. Done right, a summer kitchen pays for itself in comfort within the first season alone.


