What Is the Best Paint for Kitchen Cabinets? A Complete Buyer’s Guide
Every finish claims to be “kitchen-proof.” Here’s what actually holds up to grease, steam, and daily use — and which paint you should reach for depending on your cabinet material, your timeline, and how much prep work you’re willing to do.
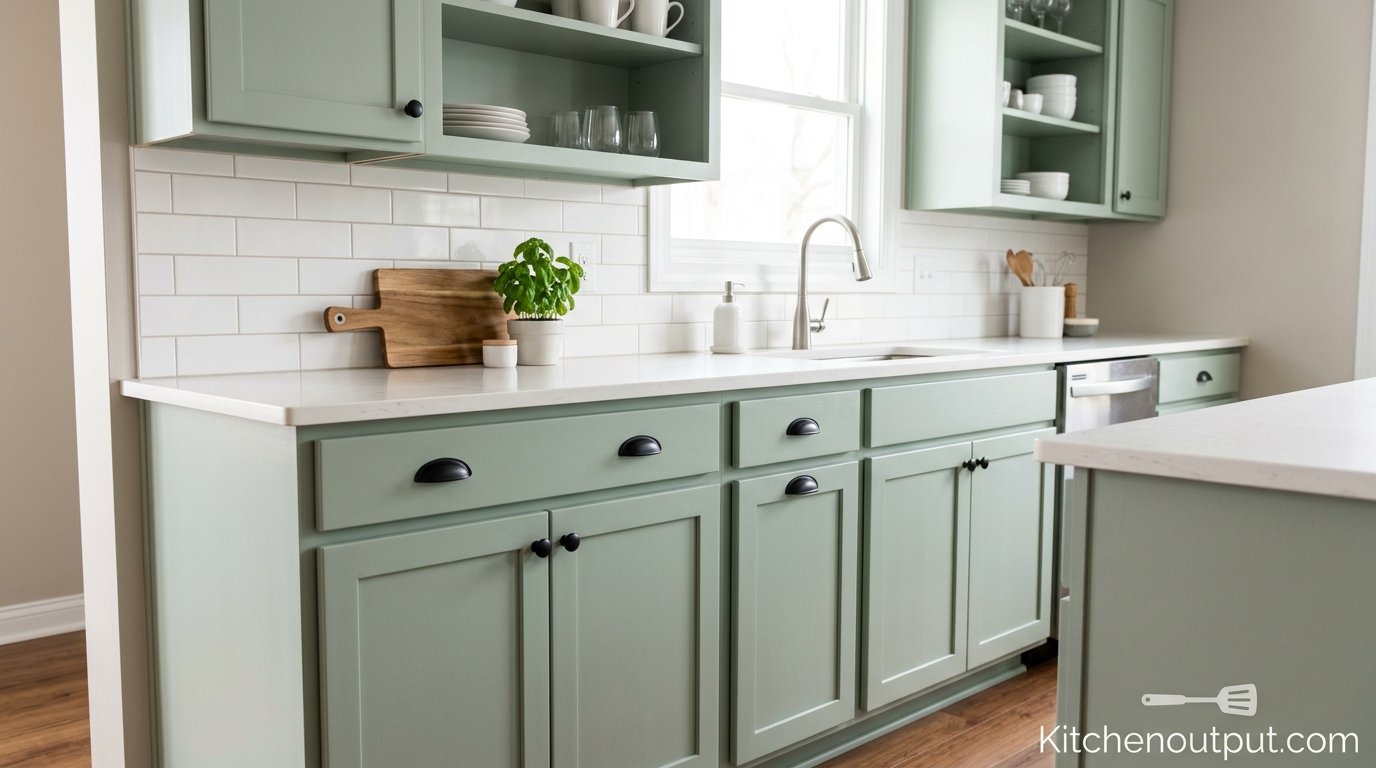
A well-chosen cabinet paint can transform a kitchen for a fraction of the cost of a full replacement.
Cabinets take more daily abuse than almost any other surface in your home. They’re gripped with wet hands, splashed with sauce, bumped by chair backs, and wiped down with whatever cleaner happens to be under the sink. So when people ask what the best paint for kitchen cabinets actually is, they’re really asking a more specific question: which finish will still look good in three years, not just three weeks after the drop cloths come up.
The honest answer depends on a few things — the material your cabinets are made from, whether you’re comfortable using an oil-based product, and how much time you want to spend on prep. But there is a clear hierarchy of what performs well versus what looks fine in the store and fails in real kitchens. This guide walks through that hierarchy in plain language, with specific products, comparison tables, and the prep steps that matter more than the paint brand itself.
It’s also worth setting expectations up front: no paint, however good, will outperform bad prep work, and no amount of careful prep will fully compensate for a paint that’s not actually formulated for cabinetry. The two decisions work together, and this guide treats them that way — walking through paint selection, prep, application, and long-term care as one connected process rather than a single product recommendation.
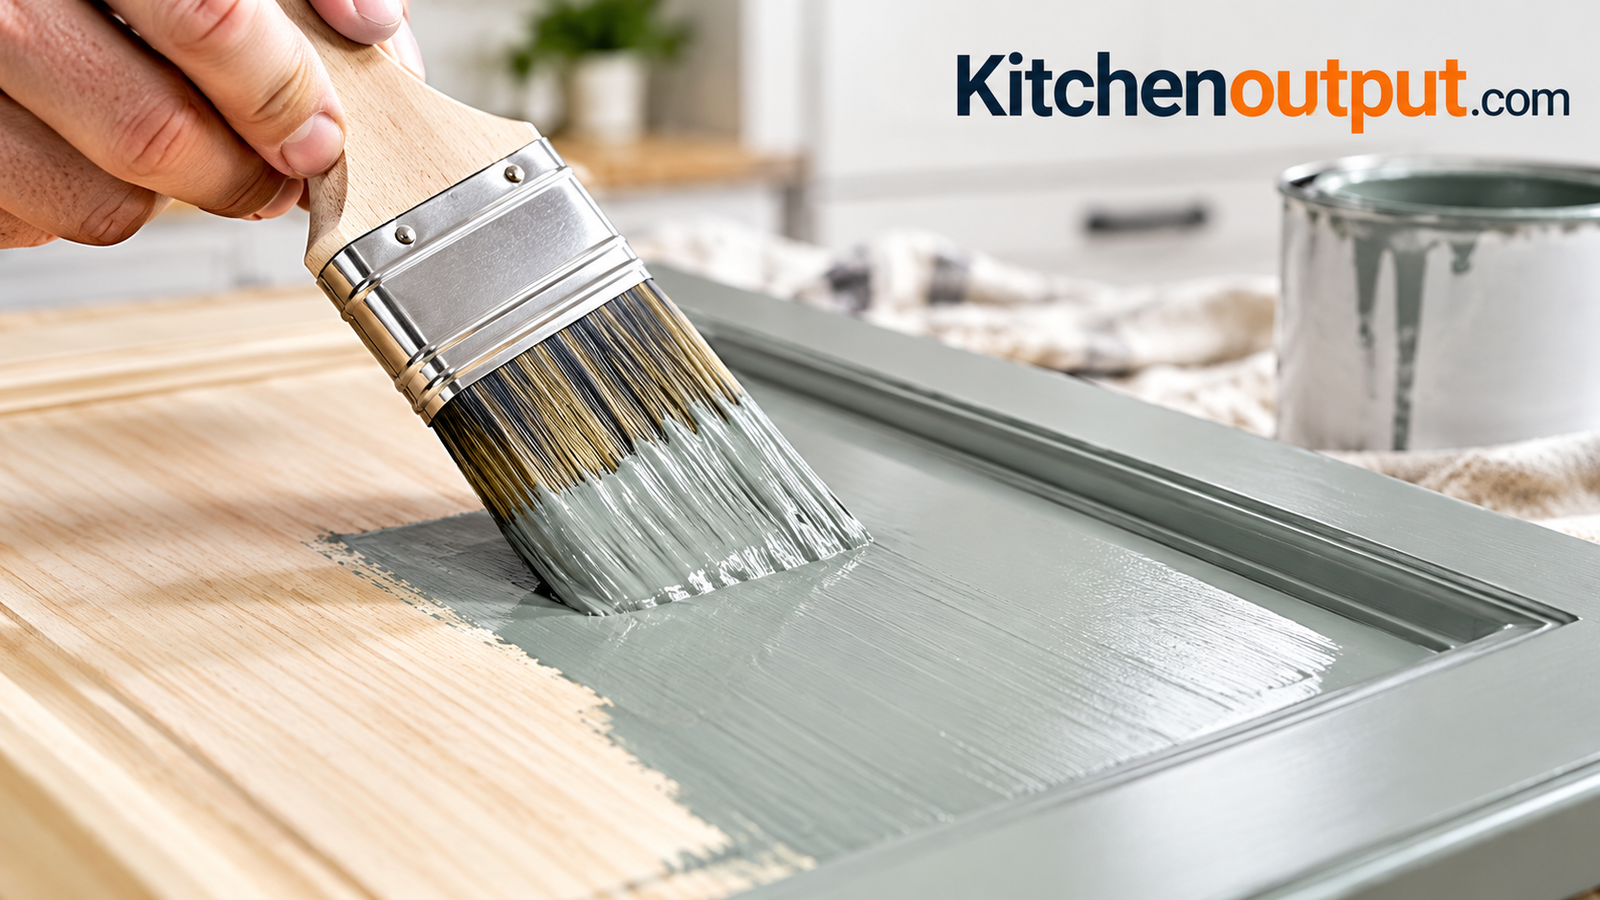
Quick Answer: The Best Overall Pick
If you only read one section, read this one. For most home kitchens, a hybrid alkyd enamel applied over a bonding primer gives the best combination of hardness, self-leveling finish, and easy cleanup. It behaves like an oil-based paint in terms of durability but cleans up with soap and water and doesn’t yellow the way traditional oil enamels can.
Best for beginners: Cabinet-specific acrylic enamel — more forgiving brush strokes, faster dry time.
Best budget option: High-quality acrylic latex trim paint, upgraded with a hardening additive.
1. Understanding Paint Types for Kitchen Cabinets
Walk into any paint store and you’ll find a dozen products marketed for cabinets, but they generally fall into five categories. Knowing the difference matters more than any brand name, because the category determines how the paint cures, how hard it gets, and how it reacts to grease and moisture over time.
Oil-Based Alkyd Enamel
The traditional choice for cabinetry. Oil-based alkyds cure into an extremely hard, glass-like shell that resists scuffs and chemical cleaners better than almost anything else. The trade-offs are real, though: strong fumes during application, a slower cure time measured in weeks rather than days, cleanup that requires mineral spirits, and a tendency to yellow slightly over time, especially on whites.
Hybrid Alkyd (Waterborne Enamel)
This is the modern middle ground and, for most people, the sweet spot. Hybrid alkyds are formulated to flow and level like oil paint while cleaning up with water and curing faster. They resist yellowing far better than true oil paints and have become the go-to recommendation among cabinet painters and kitchen refinishing professionals.
Acrylic Enamel (100% Acrylic)
A step down in hardness from hybrid alkyds, but still a legitimate cabinet-grade option, especially for cabinets that see moderate use. Acrylic enamels dry faster, have virtually no odor, and are the easiest for a first-time painter to control without leaving brush marks.
Chalk-Style and Mineral Paint
Popular for a matte, farmhouse aesthetic, but chalk-style paints are inherently soft and almost always need a topcoat of wax or polyurethane to survive kitchen conditions. Without that topcoat, they mark and stain easily around handles and sink cabinets.
Cabinet-Specific Lacquer
Sprayed lacquer is what most factory-finished cabinets use, and it produces the smoothest possible finish. It’s a viable DIY option only if you have spray equipment and a well-ventilated space, since lacquer is fast-drying and unforgiving of brush application.
How to Read a Paint Label Before You Buy
Cabinet paint marketing can be misleading, since almost every can on the shelf claims to be durable. A few label details tell you more than the front-of-can claims. Look for the words “enamel” rather than “flat wall paint” — enamel formulations are built around a harder resin base designed to cure to a washable film. Check the recommended cure time in the fine print; anything under 48 hours to full hardness is a signal the formula is closer to a wall paint than a true cabinet product. Finally, look for language around “block resistance,” which refers specifically to a paint’s ability to resist sticking to itself when two painted surfaces touch — exactly what happens when a cabinet door closes against its frame.
Matching Paint to Your Cabinet Material
The paint category you choose should also account for what’s underneath it. Solid wood cabinets tolerate almost any paint type well, since the surface is porous enough for good adhesion once sanded. MDF (medium-density fiberboard) panel doors, common on many stock and semi-custom cabinets, need a sealing primer on any cut or routed edges to prevent the material from absorbing moisture and swelling during humid seasons. Laminate and thermofoil cabinets are the trickiest substrate: they’re essentially a thin plastic-like film over a particleboard core, and standard paints will not form a lasting bond without a dedicated bonding primer formulated for slick, low-porosity surfaces.
| Paint Type | Durability | Ease of Use | Dry/Cure Time | Best For |
|---|---|---|---|---|
| Oil-Based Alkyd | Excellent | Difficult | 2–3 weeks full cure | Heavy-use kitchens, experienced painters |
| Hybrid Alkyd | Excellent | Moderate | 7–14 days full cure | Most homeowners, best overall balance |
| Acrylic Enamel | Good | Easy | 5–7 days full cure | First-time painters, lighter-use kitchens |
| Chalk/Mineral | Fair (needs topcoat) | Very Easy | 1–3 days + topcoat | Decorative, low-traffic cabinets |
| Lacquer (sprayed) | Excellent | Difficult (needs equipment) | 1–2 days | Spray booth setups, smoothest finish |
2. Oil-Based vs. Water-Based Paint: Which Should You Choose?
This is the debate that trips up most people at the paint counter. Both formulations can produce a durable cabinet finish; the difference comes down to working conditions and tolerance for the drawbacks of each.
Oil-Based Pros
- Hardest possible cured finish
- Excellent stain and grease resistance
- Self-levels beautifully, hiding brush marks
Oil-Based Cons
- Strong solvent odor for days
- Requires mineral spirits for cleanup
- Yellows over time, especially whites
- Long cure window before normal use
Water-Based Pros
- Low odor, faster dry time
- Soap-and-water cleanup
- Doesn’t yellow
- Lower VOCs, safer indoors
Water-Based Cons
- Can raise wood grain if applied heavily
- Standard acrylics are softer than oil
- Needs a compatible bonding primer on slick surfaces
For a kitchen that’s used daily, most painters now recommend a water-based hybrid alkyd instead of a true oil paint — it closes most of the durability gap while avoiding the smell, the yellowing, and the long cure time that make traditional oil paints frustrating to live with during a renovation.
VOCs and Indoor Air Quality
Volatile organic compound (VOC) content is another practical difference worth weighing, especially if you’re painting cabinets while still living in the home. Traditional oil-based alkyds tend to sit at the higher end of the VOC scale and off-gas noticeably for days after application, which is part of why they’re typically recommended only with windows open and, ideally, while the kitchen is unoccupied. Water-based acrylics and hybrid alkyds are formulated with substantially lower VOC content, which not only reduces the smell but also shortens the window where the fumes are a concern for households with young children, pets, or anyone sensitive to strong chemical odors. If ventilation is limited in your kitchen — an interior kitchen with few windows, for instance — that alone can be a strong enough reason to choose a water-based hybrid over a traditional oil enamel, regardless of which one technically cures harder.
3. Top-Rated Cabinet Paints Worth Buying
With the categories established, here’s how the actual products stack up. These are grouped by paint type so you can match the option to your project rather than chasing a single “best” bottle.
Best Hybrid Alkyd Enamel
Hybrid alkyd enamels from established trim-and-cabinet lines consistently score highest in independent durability testing, largely because they’re formulated specifically to resist print-through (the fingerprint marks left when cabinet doors are closed too soon) and to cure to a hard, washable film within about two weeks.
Best Acrylic Enamel for Beginners
If this is your first time painting cabinets, a dedicated acrylic enamel is more forgiving. It dries fast enough to recoat the same day, doesn’t require a respirator, and is far more tolerant of an imperfect brush technique than oil or hybrid formulas.
Best Budget Pick
A high-quality acrylic trim-and-door paint, paired with a separate bonding primer, can get you 80% of the durability of a dedicated cabinet system at a lower price point. The key is not skimping on the primer — that step matters more to longevity than the topcoat brand.
For the rest of your kitchen upgrade checklist — not just the cabinets — this kitchen appliance buying guide is worth reading before you finalize a renovation budget, since paint is usually one of the cheaper line items compared to appliances.
What Actually Separates a “Cabinet Paint” From a Wall Paint
It’s worth pausing on why the distinction matters so much, since the price difference between a cabinet-grade product and a standard wall paint can be significant. Wall paints are formulated primarily for coverage and appearance on a large, low-contact vertical surface. Cabinet-grade paints are engineered around a completely different set of priorities: resistance to repeated contact and abrasion (from hands, dish towels, and closing motion), resistance to grease and common kitchen chemicals, and a harder cured film that won’t stay tacky under warm, humid conditions near a stove or dishwasher. The resin binders used in true enamel formulations are simply a different chemistry than what’s used in a flat or eggshell wall paint, which is why a “paint and primer in one” wall product, however good it looks on a bedroom wall, is a poor substitute for a dedicated cabinet system.
4. Choosing the Right Sheen
Sheen level affects both appearance and performance, and it’s an easy detail to get wrong. Kitchens need more washability than a bedroom wall, which rules out flat and eggshell finishes for cabinet doors.
| Sheen | Look | Washability | Recommended For |
|---|---|---|---|
| Matte / Flat | Soft, no glare | Poor | Not recommended for cabinets |
| Eggshell | Slight sheen | Fair | Low-traffic cabinet interiors only |
| Satin | Warm, low glare | Good | Most popular cabinet choice |
| Semi-Gloss | Noticeable shine | Excellent | Heavy-use kitchens, families |
| High-Gloss | Mirror-like | Excellent | Modern kitchens; shows imperfections |
Satin is the compromise most homeowners land on: it hides minor surface imperfections better than gloss while still standing up to a damp cloth. Semi-gloss is worth the extra shine if you have kids, pets, or a kitchen that sees heavy daily cooking.
5. Popular Cabinet Color Trends
Color choice is personal, but a few directions consistently perform well in resale value and long-term satisfaction surveys.
- Warm white / cream: Still the top-selling cabinet color; pairs with almost any countertop and hardware finish.
- Sage and muted green: The breakout trend of recent years, especially on lower cabinets paired with white uppers.
- Deep navy or charcoal: A popular choice for kitchen islands as a contrast color against lighter perimeter cabinets.
- Greige (gray-beige): A safe, timeless middle ground for buyers who don’t want a strong color statement.
- Two-tone kitchens: Dark lower cabinets with light uppers remain one of the most requested combinations from cabinet painters.
Color trends move faster in photos and showrooms than they do in most people’s actual kitchens, and that’s worth keeping in mind before committing to something very of-the-moment. A useful test is to look past the color itself and ask how it will read in five years alongside your countertop material, backsplash, and flooring — neutral and muted tones tend to age more gracefully than saturated, high-contrast choices, even when the saturated option looks more exciting on a paint chip. Two-tone layouts offer a middle path: a bolder color on an island or lower cabinets can be repainted relatively cheaply down the line if trends shift, while the larger area of perimeter cabinetry stays in a safer, more neutral tone.
Whatever color you choose, hardware finish matters just as much. If you’re deciding between brushed brass, matte black, or classic chrome pulls, plan that decision alongside your paint color rather than after — it’s much easier to test swatches together than to repaint once hardware is installed. And if you’re rethinking your cookware finishes to match a new kitchen look, this comparison of cast iron vs. stainless steel cookware is a useful companion read.
If your kitchen is on the smaller side, lighter cabinet colors combined with the space-planning ideas in this guide to organizing a small kitchen can make a real visual difference beyond just the paint itself.
6. Prepping Cabinets Before You Paint
Prep work is where most DIY cabinet paint jobs succeed or fail — far more than the specific paint brand chosen. Skipping steps here is the single biggest reason a “bad paint” gets blamed when the real issue was inadequate surface preparation.
Step-by-Step Prep Checklist
- Remove doors and hardware. Label everything with painter’s tape and a numbering system so reassembly is fast.
- Degrease thoroughly. A dedicated degreasing cleaner (not just soap and water) is essential around stove and sink cabinets, where cooking oil residue prevents paint from bonding.
- Sand to scuff, not strip. A 180–220 grit sanding is usually enough to dull the existing sheen and give primer something to grip; you’re not trying to remove the old finish entirely.
- Fill and sand imperfections. Wood filler on dings and screw holes, sanded flush once dry.
- Wipe down with a tack cloth. Removes sanding dust that would otherwise trap under the primer coat.
Choosing the Right Degreaser
Not all cleaners are strong enough for cabinet prep. A general all-purpose spray cleaner will lift surface dust but often leaves behind a thin oily film that’s invisible until primer is applied and starts to fish-eye or bead up. Dedicated degreasers formulated for cabinetry — or a diluted solution of trisodium phosphate (TSP) substitute — cut through cooking grease more thoroughly and leave a surface that primer can actually bond to. Cabinets flanking the stove and any surface within a few feet of the cooktop deserve extra attention here, since grease travels further than most people expect during regular cooking.
Filling and Sanding for a Seamless Look
Wood filler works best applied slightly proud of the surface, then sanded flush once fully cured rather than while still soft — sanding too early tends to drag the filler rather than smoothing it. On cabinet doors with a raised profile or routed detail, a slightly firmer sanding sponge (rather than a flat block) helps you follow the contour without flattening decorative edges. Between the initial scuff sand and the final pre-primer pass, vacuuming the work area in addition to wiping with a tack cloth meaningfully cuts down on dust nibs that would otherwise show up as small bumps in the cured finish.
Having the right supplies on hand before you start prevents mid-project trips to the hardware store. This rundown of must-have kitchen appliances and this broader list of essential kitchen tools and equipment are useful if you’re restocking your kitchen alongside the renovation.
7. Do You Need to Prime First?
Almost always, yes — and the primer choice matters as much as the topcoat. Skipping primer, or using a generic wall primer instead of a bonding formula, is one of the most common reasons cabinet paint peels at the edges within months.
When You Need a Stain-Blocking Primer
Older wood cabinets, especially oak or cherry with visible tannins, need a stain-blocking, shellac- or oil-based primer. Without it, tannins can bleed through even multiple coats of topcoat, leaving yellow-brown discoloration weeks later.
When You Need a Bonding Primer
Laminate, melamine, thermofoil, and previously varnished or glossy cabinets all need a dedicated bonding primer formulated to grip slick, non-porous surfaces. Regular primer will not adhere properly and will peel in sheets.
| Cabinet Surface | Primer Needed | Why |
|---|---|---|
| Raw or painted wood | Stain-blocking primer | Blocks tannin bleed-through |
| Laminate / Melamine | Bonding primer | Grips non-porous, slick surfaces |
| Thermofoil | Bonding primer (light touch) | Adheres without lifting the foil layer |
| Previously varnished | Bonding + light sanding | Breaks the glossy seal for adhesion |
| MDF panel doors | Stain-blocking, sealing primer | Seals porous edges from swelling |
8. Application Methods: Brush, Roller, or Sprayer
The application method affects the final look almost as much as the paint itself. Each has a place depending on your equipment, space, and patience for setup.
Brush Application
A high-quality angled sash brush gives the most control for cutting in edges and profiles on shaker-style doors. The trade-off is visible brush strokes unless you’re using a self-leveling formula like a hybrid alkyd.
Foam Roller (Mini Roller)
A dense foam mini-roller lays down a smoother finish than a brush on flat panel sections, and is the most common combination professionals use: roll the flats, brush the edges and profiles, then lightly tip off with the brush to blend.
Airless or HVLP Sprayer
Produces the smoothest, most factory-like finish with zero brush marks, but requires a well-ventilated space (ideally a garage or outdoor setup), masking off the entire work area, and a learning curve to avoid drips and orange peel texture.
If you’re spraying for the first time, practice on scrap wood or the backs of doors before moving to visible surfaces. Keep the gun moving at a steady speed and a consistent distance from the surface — pausing or arcing the spray path is the most common cause of uneven thickness and runs. Between coats, a light scuff sand with fine-grit paper (320 or higher) knocks down any dust nibs or minor texture without cutting through the still-curing layer underneath.
Spraying Pros
- Smoothest possible finish
- Fastest coverage for many doors
- No brush marks
Spraying Cons
- Requires equipment investment
- Significant overspray and masking prep
- Steeper learning curve
9. Tools and Supplies Checklist
Beyond paint and primer, a short list of supporting supplies makes the difference between a smooth project and a frustrating one.
- Angled sash brush (2–2.5 inch) for edges and profiles
- Dense foam mini-roller for flat panels
- 120–220 grit sandpaper (multiple grits)
- Tack cloth for dust removal
- Degreasing cleaner
- Wood filler for dings and holes
- Painter’s tape and rosin paper for surface protection
- Drying rack or pegboard stands to hold doors off the ground while curing
- Labeling system (tape + marker or numbered stickers) for doors and hardware
If you’re stocking up on general kitchen tools while you’re at it, this list of 20 essential kitchen tools and equipment covers the everyday items worth having beyond the painting project itself.
10. Common Mistakes That Ruin a Paint Job
Most cabinet paint failures trace back to one of a handful of repeated mistakes, almost all of which are easy to avoid once you know to look for them.
- Skipping degreasing. Invisible cooking oil residue prevents primer from bonding, leading to peeling within months near the stove.
- Closing doors too soon. Even “dry to the touch” paint can still be soft enough to print-through and stick shut for days after application.
- Using wall paint instead of a cabinet or trim formula. Wall paints are not formulated for the abrasion and moisture cabinets face.
- Over-thinning paint. Adding too much water or conditioner to make spraying easier weakens the cured film.
- Ignoring humidity and temperature during cure. Painting in a cold or overly humid kitchen slows curing and can trap moisture under the film.
- Reinstalling hardware too early. Screwing hinges back into a still-curing finish can crack or dent the coating around the screw holes.
- Painting over old hardware holes without filling them. If you’re changing pull or hinge placement, unfilled holes will telegraph through even multiple coats of paint.
- Applying paint too thickly to “save a coat.” Thick single coats are more prone to sagging, drips, and a longer, less even cure than two properly thinned coats.
- Not testing the color first. Cabinet paint colors can look noticeably different under kitchen lighting than they do on a small swatch card; painting a spare drawer front or the inside of a door first avoids an expensive surprise.
Each of these mistakes is avoidable with a little patience, and none of them require expensive tools to prevent — mostly just resisting the urge to rush the parts of the project that aren’t the fun, visible topcoat.
Common renovation projects tend to overlap — if a faucet is next on your list after cabinets, this guide on how to replace a kitchen faucet follows the same “prep matters more than the product” principle.
11. Cost Breakdown: DIY vs. Hiring a Pro
| Approach | Typical Cost Range | Time Investment | Best For |
|---|---|---|---|
| Full DIY | Lowest — paint, primer, and supplies only | 3–7 days including cure time | Comfortable with hands-on projects, flexible timeline |
| DIY with rented sprayer | Low-to-moderate | 2–5 days | Smoother finish without full pro cost |
| Professional cabinet painting | Significantly higher, varies by region and kitchen size | 2–5 days (their time, not yours) | Factory-smooth finish, no time to DIY |
| Full cabinet replacement | Highest by a wide margin | Weeks | Structural issues beyond a cosmetic refresh |
Painting is almost always the most cost-effective way to meaningfully change a kitchen’s look short of a full remodel — often at a fraction of the cost of new cabinetry. If you’re weighing a bigger renovation, some homeowners tackle indoor cabinets first as a trial run before larger projects like this guide to building an outdoor kitchen.
Hidden Costs People Forget to Budget For
Beyond the paint and primer themselves, a few line items tend to get left off a first-pass budget. New hardware — hinges, pulls, and knobs — is often worth replacing alongside a repaint, and can add up quickly if a kitchen has twenty or more doors and drawers. A sprayer rental, if you go that route instead of buying equipment outright, is typically billed by the day, so timing your prep to be finished before the rental period starts saves money. Finally, factor in the cost of temporary kitchen disruption: takeout meals or a portable setup while cabinet doors are off and drying can be a real, if easy to overlook, part of the total project cost.
12. Maintenance and Longevity Tips
Even the best cabinet paint benefits from a bit of ongoing care to hit its full lifespan, which can range from 5 years for a budget acrylic to well over a decade for a properly applied hybrid alkyd system.
- Wipe, don’t scrub. A soft cloth with mild soap and water handles most messes; abrasive sponges dull the sheen over time.
- Address grease near the stove promptly. Built-up grease is harder on a finish the longer it sits.
- Avoid magnetic clips and adhesive hooks directly on painted surfaces where possible, since removal can chip the film.
- Touch up small chips early with leftover paint before they become impact points for larger peeling.
- Keep a labeled leftover-paint can in a cool, dry spot — cabinet touch-ups are far easier when the exact formula is on hand.
Keeping counters styled thoughtfully also helps protect a fresh cabinet finish from daily wear near the edges — this guide on what to put on kitchen counters is a useful companion piece for finishing the space around your newly painted cabinets.
How Long Should a Cabinet Paint Job Actually Last?
Expectations matter here as much as the product itself. A properly prepped and applied hybrid alkyd or oil-based enamel system, maintained with reasonably gentle cleaning habits, commonly holds up for eight to fifteen years before it needs more than minor touch-ups. A budget acrylic applied without a bonding primer, especially over laminate or a previously glossy surface, may start showing chipping at high-contact points — door edges, pull surrounds, the bottom corners of lower cabinets — within two to four years. The gap between those two outcomes is almost entirely explained by prep quality and primer choice rather than which specific brand of topcoat was used, which is worth remembering if you’re tempted to spend more on the paint itself while rushing through the steps that come before it.
Seasonal Care Considerations
Kitchens go through real seasonal swings in humidity and temperature, and painted cabinets respond to that more than people expect. In winter, a drier indoor environment can make painted wood slightly more prone to hairline cracking at joints if the wood itself is shrinking and expanding; keeping indoor humidity in a moderate range with a humidifier during heating season helps protect both the wood and the paint film. In summer, especially in kitchens without strong ventilation, higher ambient humidity slows the evaporation of any residual moisture in a water-based paint film, which is one more reason to avoid rushing full cure timelines during particularly humid stretches.
Frequently Asked Questions
What is the most durable paint for kitchen cabinets?
Hybrid alkyd enamel and traditional oil-based alkyd enamel are the two most durable options. Hybrid alkyd is generally recommended over true oil paint because it offers nearly the same hardness without the strong odor, slow cure, and yellowing that oil-based paints are prone to.
Do I really need to sand cabinets before painting?
Yes, at least a light scuff sand. Sanding isn’t about removing the old finish — it’s about dulling the existing sheen so primer has a surface to grip. Skipping this step is one of the leading causes of peeling.
Can I paint laminate or thermofoil cabinets?
Yes, but only with a dedicated bonding primer formulated for slick, non-porous surfaces. Standard primer will not adhere properly to laminate or thermofoil and tends to peel off in sheets within weeks.
How long does cabinet paint need to cure before use?
Most cabinet paints are dry to the touch within hours but need 1–3 weeks to fully cure to their maximum hardness. Doors should be handled gently and kept propped open (not closed tight) during this window to avoid sticking or print-through marks.
What sheen is best for kitchen cabinets?
Satin is the most popular choice, balancing washability with a softer look. Semi-gloss is a better fit for heavy-use kitchens, families with kids, or anyone who wants maximum wipeability, though it shows more surface imperfections.
Is spraying better than brushing for cabinet paint?
Spraying produces a smoother, more factory-like finish with no brush marks, but requires equipment, ventilation, and more extensive masking. Brushing and rolling with a self-leveling paint like a hybrid alkyd can get very close to a sprayed look with far less setup.
Do dark cabinet colors show more wear than light colors?
Dark, matte colors tend to show dust, water spots, and fingerprints more visibly than mid-tone or satin-finished lighter colors. A satin or semi-gloss sheen helps offset this on darker color choices.
How much paint do I need for an average kitchen?
Most average-sized kitchens need one to two gallons of primer and one to two gallons of topcoat for two coats on all doors, drawers, and frames, though larger kitchens or darker color changes over light bases may require more. As a rough guide, a kitchen with 20–25 doors and drawers typically uses close to a gallon of topcoat for two full coats, so buying slightly more than the calculator suggests is cheaper than running short mid-project and having to color-match a partial can later.
Can I skip primer if I’m using paint-and-primer-in-one?
Not recommended for cabinets. Paint-and-primer-in-one products are formulated for walls, not for blocking tannins or bonding to glossy or laminate surfaces the way a dedicated cabinet primer does.
How do I keep brush strokes from showing?
Use a self-leveling formula such as a hybrid alkyd enamel, apply thin coats rather than one thick coat, and lightly sand with fine-grit sandpaper between coats to knock down any texture before the final layer.
Should I paint cabinet boxes or only the doors?
Painting both gives the most cohesive result, but many homeowners choose to paint only doors and drawer fronts (which get the most visible wear and handling) to save time, leaving interior cabinet boxes in their original finish.
How do I remove yellowing from old oil-based cabinet paint?
Yellowing from oil-based paint typically can’t be reversed by cleaning — it requires a fresh topcoat. Switching to a non-yellowing hybrid alkyd or acrylic enamel for the repaint prevents the same issue from recurring.
The Bottom Line
For the overwhelming majority of kitchens, a hybrid alkyd enamel over a proper bonding or stain-blocking primer delivers the best mix of durability, workability, and finish quality — without the fumes and yellowing of traditional oil paint. Whatever product you land on, the prep work matters more than the label on the can: degrease thoroughly, sand to scuff rather than strip, prime for your specific cabinet material, and give the paint the full cure time before shutting doors or reinstalling hardware.
You May Also Like
More kitchen guides and appliance reviews from our library.


