
Best Knife Sharpener: Our Tested Picks for Razor-Sharp Edges at Home
A dull knife is the most frustrating tool in any kitchen, and it is also the most dangerous. We compared electric, pull-through, guided, and whetstone options so you can pick the sharpener that fits your knives, your budget, and your patience.

1. Why Your Knives Need a Real Sharpener
Ask a room full of home cooks which kitchen tool they neglect the most, and the answer is almost always the same: their knives. We buy a good chef’s knife, use it daily, rinse it, and put it back in the block. Months go by. The tomatoes start to squash instead of slice, onions need three passes, and somewhere along the way we decide that cooking has become a little more annoying than it used to be. The knife did not change. The edge simply wore away.
Here is the part many people get backwards: a dull knife is more dangerous than a sharp one. A sharp edge bites into food with very little pressure and goes exactly where you point it. A dull edge needs force, and force is what makes a blade skid off a round carrot or a slippery pepper skin and into your fingers. Keeping an edge keen is a safety habit as much as a performance upgrade.
There is a money argument too. A decent chef’s knife costs real money, and a properly maintained one lasts for decades. If you are building out a collection, our guide to the best knife set for beginners shows what is worth buying, and our OXO knife review covers a budget-friendly option. Whichever blades you own, they will only perform as well as the edge you maintain on them.
The good news is that sharpening is not a dark art reserved for chefs and bladesmiths. Modern sharpeners have made the process approachable. Some do the entire job in under a minute with almost no learning curve. Others reward a little practice with an edge that rivals what a professional service produces. This guide walks through ten of the most popular choices we found, explains who each one is really for, and gives you a framework for choosing without second-guessing yourself.
If you are curious about the broader process, we also keep a detailed walkthrough on how to sharpen kitchen knives. This article focuses on the gear itself, so you can match the right tool to your skill level and the knives you actually own.
What a sharp knife changes in practice
The difference shows up in small ways first. Herbs stay green instead of bruising black along the cut. Onions release fewer fumes because the blade slices cells cleanly rather than crushing them. Raw chicken and fish portion neatly, and a ripe tomato gives up uniform slices instead of collapsing under the blade. Over a week of normal cooking, those little improvements add up to meals that look better, cook more evenly, and take less time to prep. Many people tell us the biggest surprise is how much more relaxed chopping feels once the knife is doing the work.
It also changes how you shop. Once you know a sharpener can restore an old blade, you stop thinking of knives as disposable and start thinking of them as long-term tools. That mindset makes it easier to invest in a single great chef’s knife instead of replacing cheap ones every couple of years.
Ready to browse knife sharpeners right now?
See Top Knife Sharpeners on Amazon2. Our Top Picks at a Glance
If you are short on time, this table gives you the essentials. Each sharpener is covered in depth later in the article, but here is the quick version of what each one does best.
| Sharpener | Type | Best For | Skill Level |
|---|---|---|---|
| Work Sharp Knife & Tool Sharpener | Electric belt | Many knives and tools, adjustable angle | Beginner to intermediate |
| Chef’sChoice 15XV Trizor XV | Electric, 3-stage | Fast, consistent edge on Western and Asian knives | Beginner |
| Chef’sChoice 4643 ProntoPro | Manual pull-through | Simple, compact everyday touch-ups | Beginner |
| Wüsthof 4-Stage Hand-Held | Manual pull-through | Wüsthof owners wanting a matched maintenance tool | Beginner |
| Smith’s 50264 Adjustable Angle | Manual pull-through | Choosing your own angle on a budget | Beginner |
| Kitchellence 4-in-1 | Manual multi-slot | Low-cost, all-in-one kitchen drawer tool | Beginner |
| Lansky Deluxe 5-Stone System | Guided clamp | Repeatable angles with multiple grits | Intermediate |
| KME Precision Sharpener | Guided clamp | Precise angle control for serious hobbyists | Intermediate to advanced |
| Shapton Glass Stone 1000 Grit | Whetstone | Premium everyday sharpening stone | Intermediate to advanced |
| Sharp Pebble 1000/6000 Whetstone | Whetstone kit | Learning on stones with a complete starter kit | Beginner to intermediate |
Notice how the list spans a wide range of approaches. That is intentional. The best knife sharpener for a busy parent who wants decent edges in thirty seconds is not the same as the best one for a hobbyist who enjoys the ritual of stones. Keep your own habits in mind as you read.
Compare current options side by side.
Shop Kitchen Knife Sharpeners3. How We Chose the Best Sharpeners
A sharpener review is only useful if it tells you how the verdict was reached. We looked at each product through the same set of lenses, weighting the ones that matter most to everyday home cooks. Here is what we considered.
Edge quality and consistency
The whole point is a sharper knife, so edge quality came first. We considered how fine the final edge is, how evenly it is ground from heel to tip, and how repeatable the result is from one session to the next. A sharpener that produces a great edge only when you get everything perfect is less valuable than one that gives a very good edge every time.
Ease of use
Plenty of people buy a sharpener, struggle with it once, and never touch it again. That is a wasted purchase. We favored designs with sensible guides, clear stages, and a short learning curve, and we noted honestly where a tool demands practice.
Blade compatibility
Kitchens contain a mix of knives: thick German chef’s knives, thin Japanese gyuto, serrated bread knives, paring knives, and the occasional pair of kitchen shears. Some sharpeners handle a wide range, while others are built for specific angles or blade styles. Compatibility affects who a product suits more than almost anything else.
Metal removal and blade longevity
Aggressive sharpening shortens a knife’s life. We paid attention to how much steel each system takes off and whether it offers finer stages for gentle maintenance. A good sharpener removes only as much metal as it must.
Build quality, size, and storage
A sharpener that lives in a cupboard and weighs as much as a stand mixer rarely gets used. Footprint, stability, materials, and how easy the thing is to clean all factored in. If you like thinking about what deserves counter space, our roundup of must-have kitchen appliances covers similar trade-offs.
Value
Finally, we asked whether each product delivers worthwhile results for what it costs, not in isolation but compared with alternatives in the same style. A modest tool that does its job well can beat an expensive one that is overkill for your needs.
Good to know: No sharpener is the best at everything. The right choice depends on the knives you own, how often you cook, and whether you want a fast routine or an enjoyable hobby.
Find a sharpener that matches your knives.
Browse Sharpening Systems4. Types of Knife Sharpeners Explained
Before choosing a product, it helps to understand the four main families of sharpeners. Each takes a different route to the same destination: a thin, even, burr-free edge.
Electric sharpeners
Electric models use motorized abrasive wheels or belts to grind the edge. They are fast, forgiving, and appealing if you want minimal effort. Many include angle guides that lock the blade at the right position, so you do not need steady hands. The trade-offs are size, cost, and the fact that some models remove more metal than purists like.
Manual pull-through sharpeners
These are small handheld units with slots containing carbide, ceramic, or diamond abrasives. You draw the blade through the slot a few times and you are done. They are inexpensive, compact, and easy to learn. Their limitation is fixed geometry: you get the angle the slot gives you, and the edge is often a little coarser than what a stone produces.
Guided clamp systems
Guided systems clamp the knife in place and use a rod to hold the stone at a constant angle as you work. They take longer to set up, but they remove the biggest source of error in sharpening: wobbling hands. If you want a precise, repeatable angle without learning freehand technique, this style delivers.
Whetstones
Whetstones are the traditional method and the one most professionals respect. You hold the angle yourself and move the blade across the stone, working from coarse to fine grits. Skill is required, but so is the reward: a polished, razor-sharp edge you can tailor to the knife and the task. Stones also last for years and are among the most economical tools once you account for how long they serve.
| Type | Speed | Learning Curve | Edge Quality Potential | Footprint |
|---|---|---|---|---|
| Electric | Very fast | Low | Good to very good | Largest |
| Pull-through | Very fast | Very low | Acceptable to good | Smallest |
| Guided clamp | Moderate | Medium | Very good to excellent | Medium |
| Whetstone | Slower | Higher | Excellent | Small to medium |
The table makes the trade-off clear: the faster and easier a method is, the less room you usually have to fine-tune the result. Most cooks end up choosing based on how much time they will realistically spend, and that is a perfectly sound way to decide.
Not sure which style fits you? Compare them all.
Compare Sharpener Types5. Best Electric Sharpeners
If you want sharp knives with minimal effort, electric sharpeners are the logical place to start. These two take different approaches, so read both before choosing.
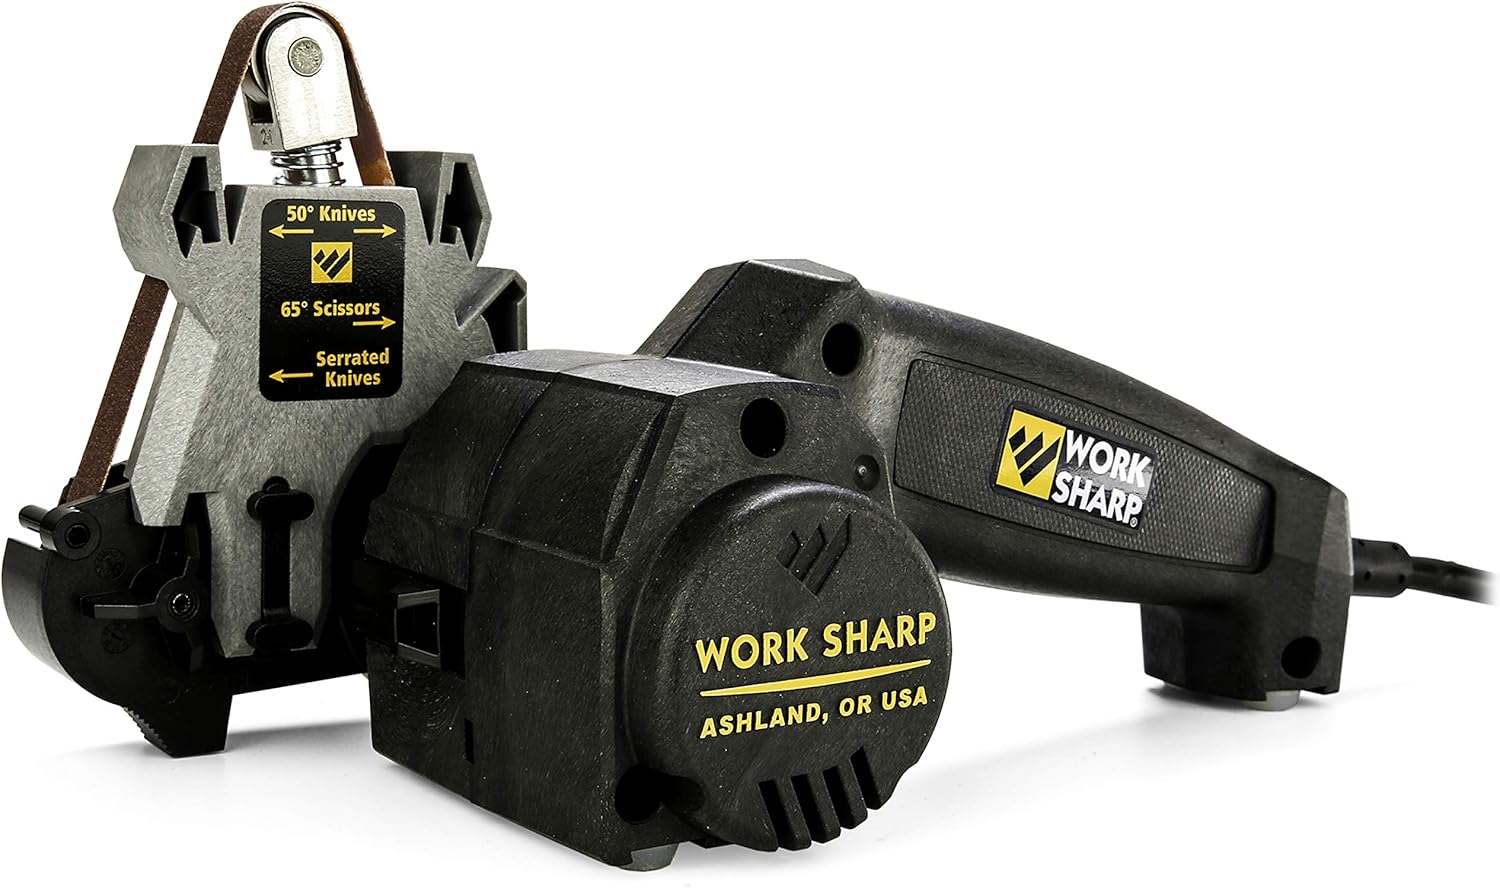
Work Sharp Knife & Tool Sharpener
- Electric belt system
- Adjustable angle guide
- Variable speed
- Knives, shears, and more
The Work Sharp stands apart from most countertop sharpeners because it uses abrasive belts rather than fixed wheels. That design gives you flexibility. You can adjust the sharpening angle to suit a thin Japanese blade or a sturdy German chef’s knife, and you can switch between coarser belts for repairing damage and finer ones for finishing. The variable speed control lets you slow things down for delicate work, which is a thoughtful touch many competitors lack.
Its real strength is breadth. Beyond kitchen knives, this style of sharpener is built to handle outdoor knives, scissors, and various garden or workshop tools. If you are the kind of person whose neighbors regularly ask to borrow your sharpener, this one earns its footprint. Belts wear and need replacing over time, so factor that into long-term cost.
The learning curve is gentle but not zero. Because it grinds quickly, you should take light passes and check the edge often rather than holding the blade against the belt too long. Used with care, it produces a clean, sharp edge in minutes and can rescue a neglected knife that other sharpeners struggle with.
Pros
- Adjustable angle for different knife styles
- Variable speed gives you control
- Handles tools and scissors, not only knives
- Good for repairing badly dulled edges
Cons
- Belts are a recurring expense
- Can remove metal quickly if you are careless
- Takes more counter space than a hand sharpener
Check the Work Sharp today.
View Work Sharp on Amazon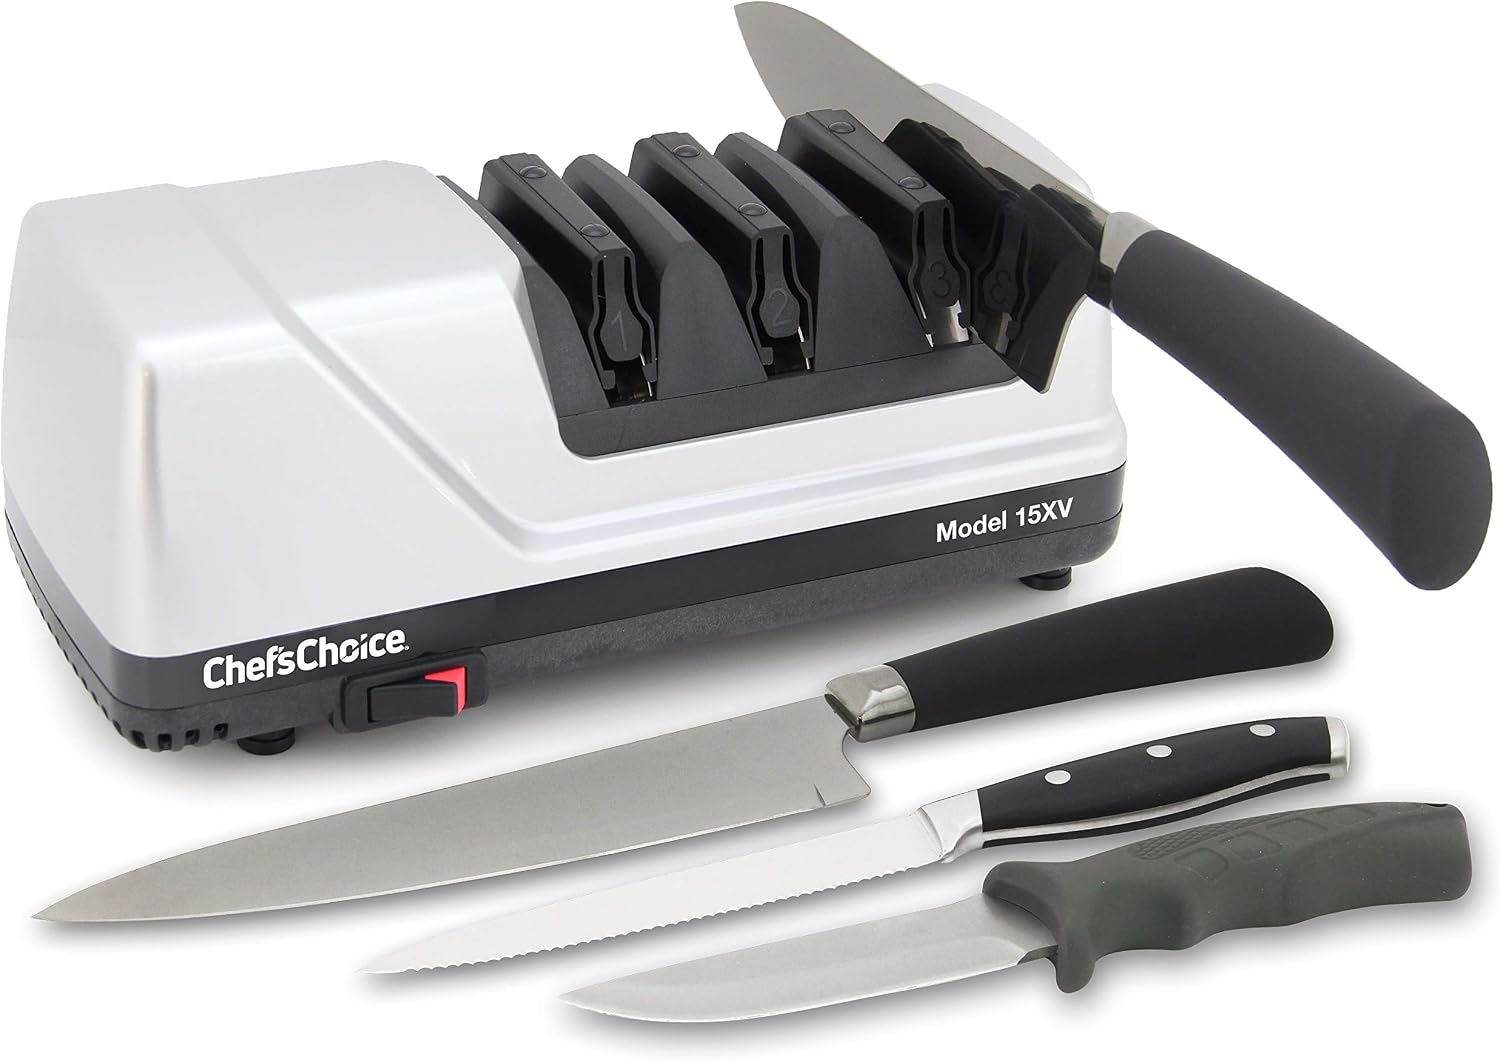
Chef’sChoice 15XV Trizor XV EdgeSelect
- Electric, 3-stage
- Diamond abrasives
- Angle-guided slots
- Western and Asian knives
The Chef’sChoice 15XV is the kind of sharpener that makes sense to a new owner within about thirty seconds. You place the blade in a guided slot, draw it through, and move on to the next stage. The system uses diamond abrasives and is designed to convert a standard Western edge into a sharper, more acute profile that suits both Western and Asian-style knives. The angle is controlled by built-in guides, which takes the guesswork out of the equation.
What we like most is how repeatable it feels. Every pass is guided, so you do not need steady hands or a trained eye, and the result looks uniform along the blade. That consistency is why this model shows up on so many recommended lists. It is also an easy way to bring an entire block of knives back to life in one afternoon.
The trade-offs are worth knowing. The sharper, more acute edge it creates can be a little more delicate than a traditional thick edge, so it suits careful home cooks better than anyone who hacks through bones. And because it is an electric appliance, it takes up space. Check the manufacturer’s instructions for what it can and cannot handle, particularly for serrated knives.
Pros
- Guided slots remove user error
- Fast, consistent, uniform edges
- Works on a wide range of everyday knives
- Diamond abrasives for durability
Cons
- Larger footprint than manual models
- Acute edge can be more delicate
- Removes more metal than a stone would
See the Chef’sChoice 15XV on Amazon.
Check the 15XVIf you are weighing the two, the decision usually comes down to scope. Choose the Work Sharp if you want to sharpen more than kitchen knives and enjoy having control. Choose the 15XV if your priority is a quick, foolproof edge on the knives already sitting in your block.
6. Best Pull-Through Sharpeners
Pull-through sharpeners are the budget-friendly entry point to sharper knives. They are small, simple, and perfect for a drawer. Three of them made our list, and each has a slightly different personality.

Chef’sChoice 4643 ProntoPro Manual Sharpener
- Manual pull-through
- Angle guides
- Compact body
- Easy storage
The ProntoPro is a no-fuss manual sharpener from a brand best known for its electric machines. It brings that same focus on guided angles to a small handheld design. You set it on the counter, hold the handle, and pull the blade through the slots with light pressure. The guides keep the blade at a consistent angle so you can focus on a smooth motion.
It is ideal for the person who has never sharpened a knife and does not want to learn a new skill. A few pulls restore a noticeable bite to a tired blade, and the compact size means it can live in a drawer without anyone noticing. It is not meant to replace a stone for edge refinement, but as a quick, repeatable way to keep daily knives working, it does its job.
Pros
- Very easy to learn
- Small and easy to store
- Guided angle keeps results consistent
Cons
- Fixed geometry limits flexibility
- Not for fine polishing
- Slots may not suit every thin blade
Add a simple sharpener to your drawer.
Check the ProntoPro
Wüsthof 4-Stage Hand-Held Sharpener
- Four stages
- Hand-held design
- Brand-matched for Wüsthof knives
- Everyday maintenance
Wüsthof is one of the best-known names in kitchen knives, and its own hand-held sharpener is designed to keep those blades performing between professional services. The multi-stage layout takes a blade from coarse sharpening through to finer finishing and honing in a single compact tool, which gives you more control over the process than a basic one-slot unit.
Owners of Wüsthof knives will appreciate the confidence of using a sharpener designed by the same maker, though it works on other quality kitchen knives too. It is a sensible choice if you want a respected name and a simple routine. The main limitation is the same one that applies to every pull-through design: it follows a fixed angle, so it suits knives with a compatible edge geometry better than very thin or very hard blades.
Pros
- Multiple stages in one small tool
- Trusted brand pairing for Wüsthof owners
- Quick to use
Cons
- Fixed angle only
- Not ideal for very hard Japanese steel
- Costs more than basic pull-through models
See the Wüsthof sharpener.
View Wüsthof 4-Stage
Smith’s 50264 Adjustable Angle Pull-Thru Sharpener
- Adjustable angle
- Pull-through design
- Compact and affordable
- Kitchen and outdoor knives
Most pull-through sharpeners lock you into one angle. The Smith’s 50264 lets you choose, which is a meaningful advantage when your knives are not all the same. You can set a shallower angle for thin slicing knives and a steeper one for sturdier blades. That flexibility is rare at this price and makes the unit a strong value pick for mixed collections.
It is simple to use, and the adjustable design makes it useful beyond the kitchen. Campers and anglers who carry a pocket knife will find it handy. As with all pull-through tools, the edge it creates is practical rather than polished, so think of it as a maintenance workhorse rather than a finishing tool. Take your time with light passes and test the edge on a sheet of paper or a tomato to see how it is progressing.
Pros
- Adjustable angle is rare for this style
- Affordable
- Handy for kitchen and outdoor knives
Cons
- Edge is practical, not polished
- Takes a few tries to find a good setting
- Not for serrated blades
Pick up an adjustable pull-through.
Check Smith’s 50264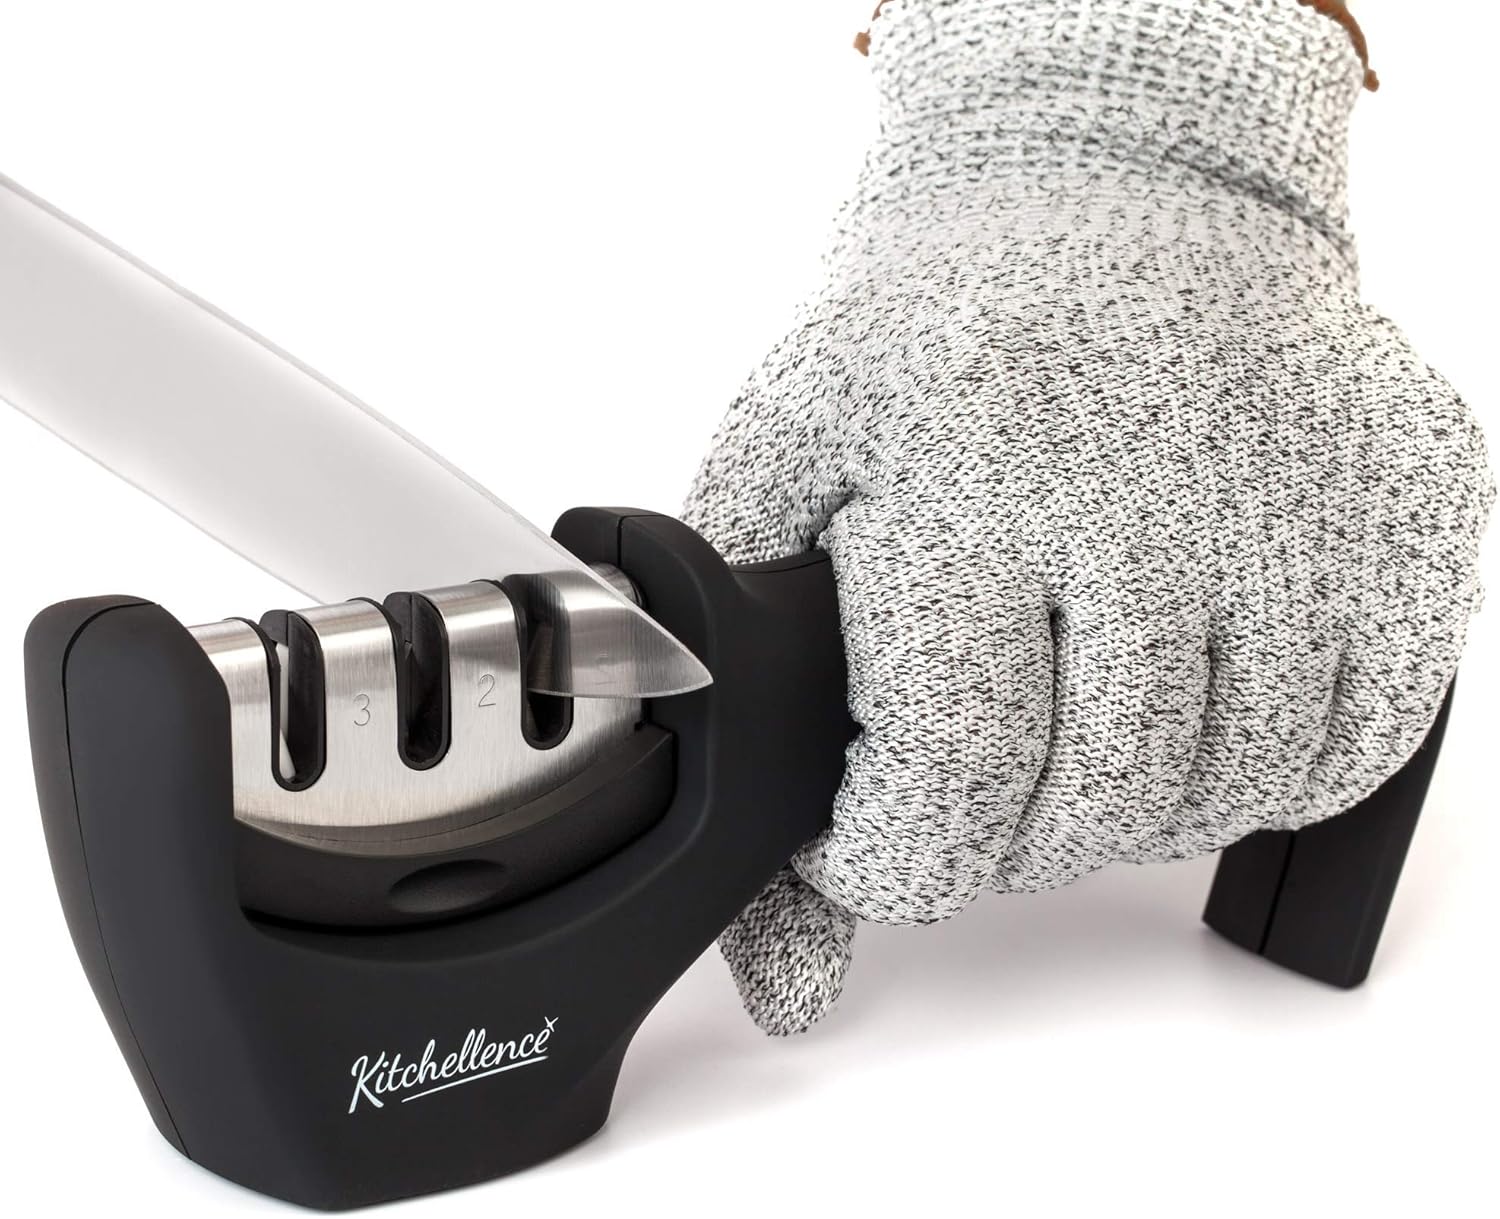
Kitchellence 4-in-1 Knife Sharpener
- Four-slot design
- Manual use
- Low cost
- Drawer-friendly
The Kitchellence 4-in-1 is a very approachable entry point. Its multi-slot layout gives you different stages for different jobs, such as repairing, sharpening, and finishing, in a body small enough to tuck away. For anyone who wants sharper knives without spending much, it is a sensible first sharpener.
Keep expectations realistic. Budget pull-through sharpeners work by scraping the edge, which is fast but not especially gentle, so use light pressure and do not over-sharpen. For fine, high-end knives you may prefer a stone or guided system. For an inexpensive set of everyday blades, though, it brings back a usable edge in a minute or two.
Pros
- Very affordable
- Multiple slots in one tool
- Simple for first-time users
Cons
- Not ideal for expensive knives
- Edge is less refined
- Can feel less stable than premium models
Grab an affordable all-in-one sharpener.
See Kitchellence on Amazon7. Best Guided Sharpening Systems
Guided systems sit between pull-through gadgets and freehand stones. They do not require a trained hand, but they do reward a patient one. Two options earned a place here.

Lansky Deluxe 5-Stone Sharpening System
- Clamp-guided
- Five hones
- Multiple angle settings
- Honing oil included
The Lansky system is a classic for good reason. A clamp grips the blade, and a guide rod holds each stone at a fixed angle as you stroke along the edge. Moving through the included stones from coarse to fine allows you to repair a damaged edge and then refine it, all while keeping the geometry consistent. The multiple angle settings let you match different knives, from a thin fillet blade to a sturdy utility knife.
It takes longer than an electric sharpener, and setting up the clamp requires some care, particularly on large chef’s knives where the clamp placement can be tricky. Once you get the hang of it, though, the results are dependable. It is also great for people who enjoy learning a craft but want training wheels while they build skill.
Pros
- Repeatable angles without freehand skill
- Wide grit range for repair and finishing
- Great value for a complete system
Cons
- Slower than electric options
- Clamp can be awkward on wide blades
- Needs setup and cleanup each time
See the Lansky system.
View Lansky Deluxe
KME Precision Knife Sharpener
- Guided clamp
- Fine angle control
- Precision stones
- For serious hobbyists
KME’s guided system is built for people who care about getting the angle exactly right. It is a step up in precision from many entry-level systems, with controls that let you dial in and repeat a specific angle on each knife. If you own a mix of premium blades that deserve careful treatment, this approach protects them while producing a clean, sharp edge.
This is not the quickest way to sharpen a knife, and it asks for a bit of patience. In return, you gain a level of consistency that is hard to achieve freehand. It is a satisfying tool for someone who wants a methodical process and professional-grade results without years of practice on stones.
Pros
- Excellent angle control and repeatability
- Good for premium knives
- Rewards careful technique
Cons
- Slower and more involved
- Higher price than basic systems
- More components to store
Check the KME system.
View KME PrecisionBoth guided options shine when you want to learn what a perfect edge feels like without gambling on freehand technique. Many people eventually graduate to stones, and the habits you build with a guide transfer nicely.
8. Best Whetstones
Stones are the traditional way to sharpen and, in skilled hands, produce the best edges available. They also teach you more about your knives than any gadget can. Here are the two we recommend.

Shapton Glass Stone 1000 Grit Whetstone
- 1000 grit
- Glass-backed ceramic stone
- Hard, fast-cutting
- Splash-and-go style
Shapton’s Glass Stones are admired by serious sharpeners. The hard abrasive layer is bonded to a glass plate, which keeps the surface flat and stable. A 1000 grit stone is the sweet spot for everyday sharpening: coarse enough to restore an edge efficiently, fine enough to leave a surface ready for use or for further polishing. These stones are known for cutting quickly and wearing slowly, and they stay flat longer than many softer stones.
Because it is a single stone, you will need a stable base and, ideally, a finer stone if you want a polished finish. A 1000 grit edge is already excellent for most kitchen tasks. This is not a beginner’s gadget; it rewards patience and a steady hand. If you are ready to learn freehand sharpening, it is an outstanding long-term investment.
Pros
- Cuts quickly and stays flat
- Durable and long-lasting
- Excellent for refining a precise edge
Cons
- Requires freehand technique
- Premium price
- Single grit means you may want a second stone
See the Shapton Glass Stone.
Check Shapton 1000 GritSharp Pebble Premium Whetstone 1000/6000 Grit
- Dual-sided stone
- 1000 and 6000 grit
- Non-slip base
- Starter-friendly kit
If the idea of stones appeals to you but you do not want to assemble a kit piece by piece, the Sharp Pebble is a friendly place to begin. The dual-sided stone pairs a 1000 grit side for sharpening with a 6000 grit side for polishing, so you can complete the whole routine with one product. A non-slip base and accessories commonly packaged with kits like this make setup easier for newcomers.
Expect a learning curve. Holding a consistent angle takes practice, and your first few sessions may be wobbly. That is normal. Start with an inexpensive knife, keep the angle low and steady, and check your progress often. Within a few sessions, most people feel the difference, and the finished edge from a 6000 grit polish is a noticeable upgrade from any pull-through slot.
Pros
- Two grits in one stone
- Great introduction to whetstones
- Excellent edge potential with practice
Cons
- Needs soaking and regular flattening
- Requires patience to master
- Slower than electric or pull-through options
See the Sharp Pebble kit.
View Sharp Pebble KitStones need a little care. Many types should be flattened periodically because they develop a dip with use, and a dished stone makes it hard to maintain a clean angle. Rinse after each session, let the stone dry thoroughly, and store it somewhere it will not get knocked around.
9. Matching a Sharpener to Your Knives
Choosing the best sharpener is easier when you start with your knives. Different blades are made differently, and a sharpener that flatters one style can be wrong for another.
Western knives
German and European-style knives tend to have softer steel and a more robust edge angle. They respond well to pull-through sharpeners, electric models, and almost any stone. If your block is full of this style, you have the widest range of choices, and a simple electric or manual unit will serve you well.
Japanese knives
Japanese blades are usually thinner and made from harder steel that holds an acute edge. Fixed-angle pull-through sharpeners can be too aggressive for them, and the harder steel can be brittle if mishandled. Stones, guided systems, or a sharpener with angle control are better choices. If you own a gyuto or santoku you care about, favor the Lansky, KME, Shapton, or Sharp Pebble over the simplest pull-through options.
Serrated knives
Bread knives and steak knives with serrations need a different approach because each scallop must be sharpened individually. Most standard sharpeners are not built for this and can ruin the pattern. Check the manufacturer’s guidance before using any sharpener on serrated edges, and consider a tapered rod or a dedicated tool.
Paring and utility knives
Small knives sharpen quickly, and they usually receive the most abuse. Almost any sharpener on this list can handle them, but guided systems make it especially easy to keep a small blade at the correct angle.
| Your Situation | Recommended Sharpener |
|---|---|
| Busy household, standard Western knives | Chef’sChoice 15XV |
| Knives, shears, and tools | Work Sharp Knife & Tool Sharpener |
| Tight budget, everyday blades | Kitchellence 4-in-1 or Smith’s 50264 |
| Small kitchen, simple routine | Chef’sChoice 4643 ProntoPro |
| Own Wüsthof knives | Wüsthof 4-Stage |
| Thin Japanese knives | Shapton Glass Stone or Sharp Pebble |
| Want precision without freehand skill | Lansky or KME |
| Want to learn a craft | Sharp Pebble Whetstone |
A well-organized kitchen also makes it easier to keep up the habit. If space is tight, our guide on how to organize a small kitchen offers ideas for keeping sharpeners and tools where you can actually reach them.
Match a sharpener to your knife style.
Shop Sharpening Stones10. Sharpening Technique Tips
Even the best sharpener will disappoint if the technique is wrong. These habits apply to nearly every method on this list, and they will help you get more from whatever you buy.
Start with a clean, safe setup
Place a damp towel or non-slip mat under stones and guided systems so they cannot move. Keep your fingers behind the edge at all times. Take your time, since rushing is how fingers meet blades.
Find and keep a consistent angle
Angle consistency is the secret to a sharp edge. For most Western kitchen knives, that means roughly the angle of a matchbook’s thickness held under the spine; for many Japanese knives it is lower. The sharpener you choose should either set the angle for you or give you a way to maintain it by hand. If you are unsure of your knife’s angle, ask the maker or start with a conservative setting.
Use light, even pressure
More pressure does not mean a sharper edge. Excess force pushes the blade too deep into the abrasive, removes extra metal, and can create an uneven edge. Let the abrasive do the work.
Work through grits in order
Whether you are using multiple stones or the stages on an electric machine, begin with the coarser grit to establish the edge and move to finer grits to refine it. Skipping stages leaves scratches that make the edge less sharp and less durable.
Watch for the burr
When you sharpen one side of an edge, a tiny curl of metal called a burr forms on the opposite side. Feeling for it with a light touch tells you that you have reached the edge. Once you have raised a burr along the full length, switch sides and repeat. Finish with a few light passes to remove it.
Test the edge
Slice a tomato, a sheet of printer paper, or a piece of newspaper. A properly sharp knife glides through with little effort. If it catches or tears, return to the stone or slot for another light pass.
Pro tip: Practice on a cheap knife before sharpening an expensive one. Your first few attempts are for learning, not for perfecting a prized blade.
Stock up on the tools you need to practice.
Shop Whetstone Kits11. Honing, Maintenance, and Common Mistakes
Honing is not sharpening
This is one of the most misunderstood points in knife care. Honing realigns a bent edge using a steel or ceramic rod, without removing much metal. Sharpening actually grinds away steel to create a new edge. A knife that feels dull may only need honing. A knife that stays dull after honing needs to be sharpened. Most people benefit from honing frequently and sharpening occasionally, a few times a year depending on how much they cook.
Protect the edge between sessions
How you store and use your knives matters as much as how you sharpen them. Keep blades in a block, on a magnetic strip, or in blade guards so they do not rattle against other metal. Cut on wood or soft plastic boards rather than glass, stone, or ceramic, which can chip and dull an edge quickly. Our roundup of the best cutting boards explains which materials are gentle on knives.
Wash knives by hand and dry them right away. Dishwashers expose blades to harsh detergents, high heat, and banging against other items, all of which shorten an edge’s life. Storage and care guidance for other tools lives in how to store kitchen appliances.
Common mistakes to avoid
- Sharpening too often. Every session removes metal. Hone regularly and sharpen only when honing no longer helps.
- Using the wrong angle. A mismatch between the sharpener and the knife leaves a weak or uneven edge.
- Pressing too hard. Heavy pressure damages edges and shortens knife life.
- Ignoring the heel and tip. Check that the whole length of the edge contacts the abrasive.
- Skipping the test. Always confirm the edge with a quick slice before you start cooking.
- Using a pull-through on fine knives. Premium thin blades deserve a gentler method.
Sharpening and the rest of your tools
Blades show up in surprising places. If you use a mandoline, a dull slicer blade can be dangerous and frustrating, so explore our picks for the best mandoline slicer and keep those blades in mind during maintenance. If you work with hot pans while handling sharp tools, our heat-resistant gloves guide covers protection worth having in your kit.
Keep your edges in shape between sharpenings.
Shop Honing Rods12. Final Buying Guide: Which Sharpener Should You Choose?
By now you probably have a favorite in mind, but here is a simple framework for making the final call.
If you want speed and simplicity
Go electric. The Chef’sChoice 15XV is the easiest path to consistently sharp knives, and the Work Sharp gives you more control and the ability to sharpen other tools. Both are built for people who would rather cook than practice sharpening.
If you want to spend as little as possible
Choose a pull-through. The Kitchellence 4-in-1 is the most affordable, the Smith’s 50264 adds an adjustable angle, the Chef’sChoice 4643 brings guided simplicity, and the Wüsthof offers brand-matched convenience. Any of them will beat living with a dull knife.
If you want precision without freehand skill
Pick a guided system. The Lansky is the better value, while the KME rewards you with finer control. Both are excellent for learning what a correctly sharpened edge feels like.
If you want the best possible edge
Learn on stones. The Sharp Pebble gives beginners a complete 1000/6000 setup, and the Shapton Glass Stone is a superb investment for those who are ready to commit. Your patience will be repaid with an edge that no pull-through slot can match.
Our overall recommendation
For most home cooks who want the simplest route to a noticeably sharper kitchen, the Chef’sChoice 15XV is the one we would hand to a friend. For people who enjoy the process and want long-term control, the Sharp Pebble whetstone kit is a better teacher and a better value over time. Whichever you pick, pair it with a good cutting board and a habit of regular honing, and you will feel the difference every time you cook.
Finally, if you are equipping a kitchen from scratch, check our kitchen appliance buying guide and our list of 20 kitchen tools and equipment for ideas on what else deserves a place on your counter.
A realistic maintenance routine
A simple rhythm keeps most households happy. Hone your everyday knife briefly before cooking, wipe and dry it right after use, and store it where the edge cannot knock against other metal. Every few months, run it through your chosen sharpener for a short session, checking the edge often. Once or twice a year, give the whole collection a more thorough pass, including paring and utility knives that tend to be forgotten. That cadence costs only a few minutes each month and means you rarely face the chore of restoring a badly dull blade.
If you share a kitchen with other cooks, set the sharpener where everyone can find it and teach them the basics. Knives dull fastest when they are misused, so a quick conversation about cutting boards, dishwashers, and cutting through bones or frozen food can protect your edges as much as the sharpener itself. A little shared know-how turns sharpening from a rescue mission into a normal part of owning good tools.
Ready to choose? See today’s best-selling sharpeners.
Shop Best Knife SharpenersFrequently Asked Questions
What is the best knife sharpener for beginners?
For most beginners, a guided electric sharpener such as the Chef’sChoice 15XV is the easiest option because the slots set the angle for you. If you prefer something small and inexpensive, a manual pull-through like the Chef’sChoice 4643 ProntoPro is also very approachable.
Are electric knife sharpeners better than manual ones?
Neither is universally better. Electric models are faster and more consistent, but they remove more metal and take up more space. Manual options are compact and economical, and whetstones in particular can produce the finest edges when used with skill.
How often should I sharpen my kitchen knives?
It depends on how often you cook and what you cut. Many home cooks sharpen two to four times a year and hone before most cooking sessions. If a knife struggles with a ripe tomato even after honing, it is time to sharpen.
What is the difference between honing and sharpening?
Honing straightens a slightly bent edge without removing much metal, while sharpening grinds the blade to form a new edge. Honing maintains sharpness between sharpenings, but it cannot restore a truly dull knife.
Can I use a pull-through sharpener on Japanese knives?
It is generally not recommended for premium Japanese knives. Their thinner, harder blades often have more acute angles that fixed-slot sharpeners cannot match, and aggressive abrasives may damage the steel. Stones or guided systems are safer choices.
Do whetstones really sharpen better than gadgets?
In skilled hands, yes. Stones allow you to control the angle, work through multiple grits, and finish with a polished edge. They do require practice, so many people start with a guided system or a simple kit like the Sharp Pebble before moving to higher-end stones.
What grit whetstone should I buy first?
A combination stone with 1000 grit on one side and 6000 grit on the other is a popular starting point. The 1000 side handles most sharpening, and the 6000 side polishes the edge for a smoother, sharper finish.
Can I sharpen serrated knives with these sharpeners?
Most standard sharpeners are not designed for serrated edges. Some models list serrated compatibility, but you should always check the manufacturer’s instructions first. A tapered rod or dedicated serrated sharpener is usually the safest approach.
Will sharpening damage my knives?
Every sharpening removes a small amount of steel, so over-sharpening can shorten a knife’s life. Using the correct angle, light pressure, and fine abrasives where possible minimizes wear. Regular honing keeps you from sharpening more than you need to.
Is a sharper knife really safer?
Yes. A sharp knife cuts with less pressure and tracks where you aim it, so it is less likely to slip. Dull knives require extra force and are more likely to skid off food and cause injuries.
How do I know when my knife is sharp enough?
Try slicing a sheet of printer paper or a ripe tomato. A sharp knife cuts cleanly with almost no pressure. If it tears, snags, or crushes, keep working through your finer stages or stones.
Should I use a professional sharpening service instead?
Professional services are a good option if you own expensive knives or simply do not want to do it yourself. For regular home use, owning a decent sharpener is more convenient and cost-effective, and it lets you keep your edges in shape between professional visits.
Conclusion
Great cooking starts with a good edge, and the best knife sharpener is simply the one that you will actually use. If you crave convenience, an electric model like the Chef’sChoice 15XV or the versatile Work Sharp will deliver sharper knives in minutes. If budget is the priority, the Smith’s 50264, Chef’sChoice 4643, Wüsthof 4-Stage, and Kitchellence 4-in-1 all make a clear improvement over a dull blade. Those who want more control will love the Lansky and KME guided systems, and anyone ready to embrace the craft will be rewarded by the Sharp Pebble and Shapton whetstones.
Whichever route you choose, remember the basics: hone regularly, sharpen when you need to, use a gentle cutting surface, and keep your blades dry and protected. A sharp knife makes prep faster, safer, and more enjoyable, and that is worth far more than the price of the right sharpener.
Ready to sharpen up your kitchen?
Find Your Knife Sharpener on Amazon


